
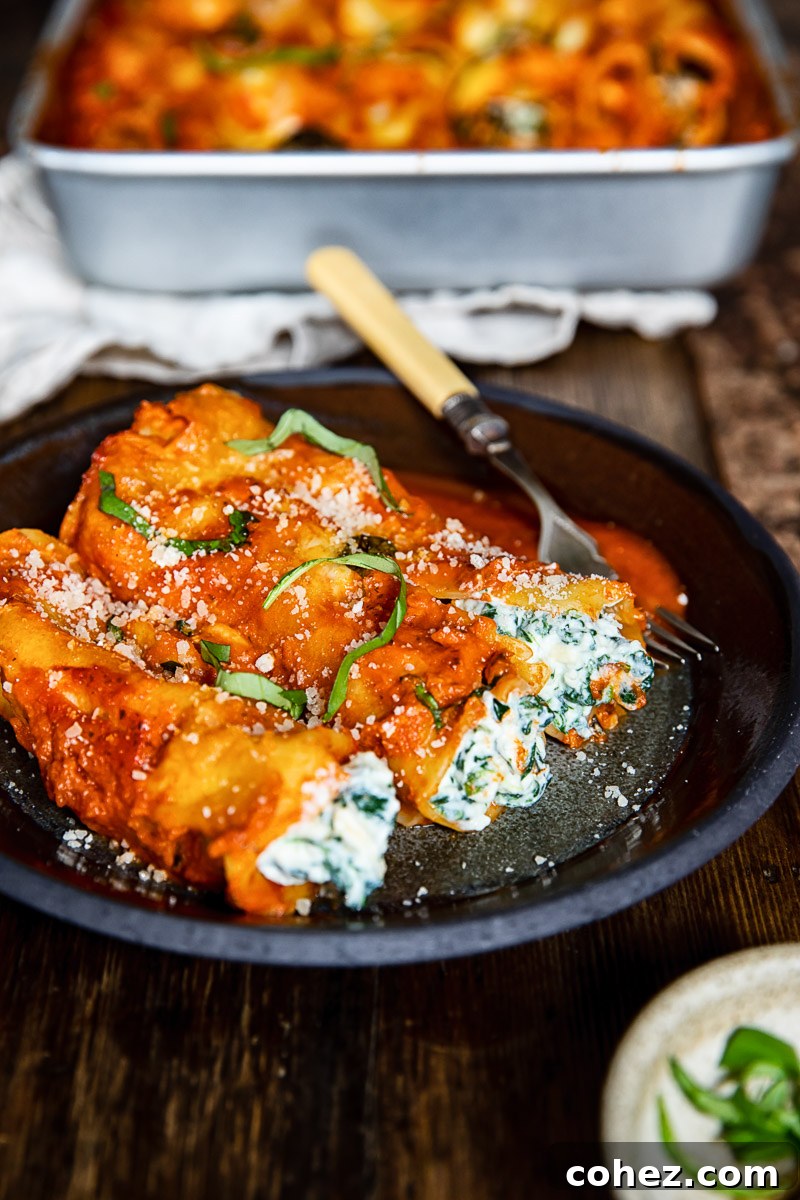
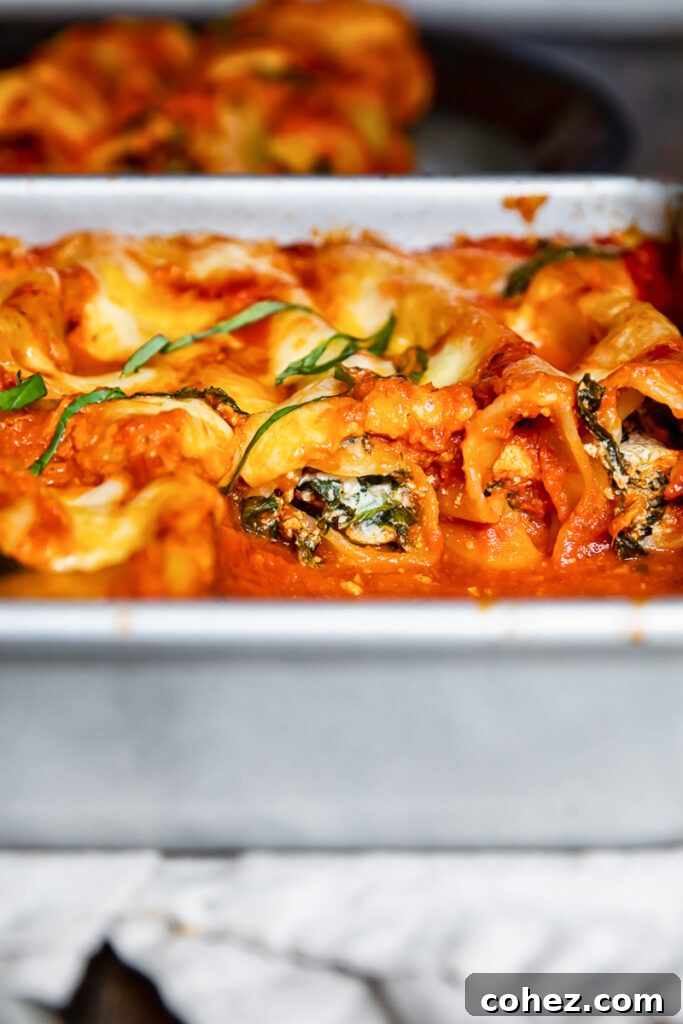
Spinach and ricotta, beautifully combined and encased in tender cannelloni tubes, then drenched in a rich, flavorful tomato sauce – this dish is the epitome of an elegant, yet deeply comforting Italian dinner!
Ricotta cheese is incredibly versatile, extending its creamy goodness beyond savory dishes. For a delightful sweet treat, you might also enjoy exploring recipes like these Lemon Ricotta Cookies!
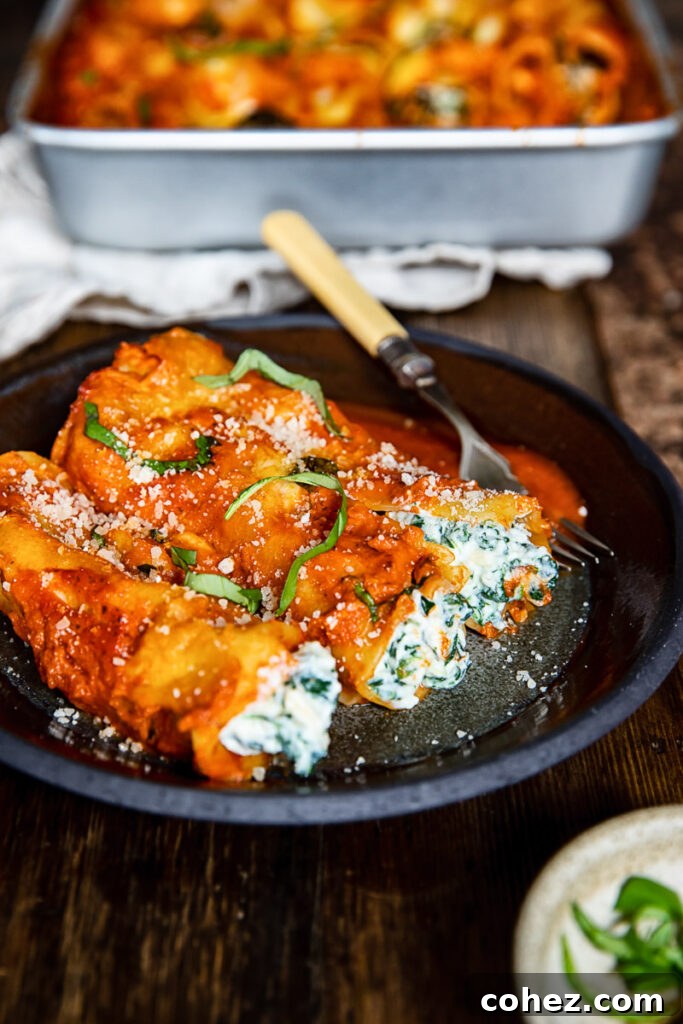
The Ultimate Spinach and Ricotta Cannelloni: A Timeless Italian Comfort Dish
There’s something truly magical about a baked pasta dish. The oven works wonders, melding all the individual flavors into a harmonious symphony, coaxing out the very best from every ingredient. The result is a bubbling, cheesy, and deeply satisfying meal that feels both special and incredibly homely.
Baked pasta makes frequent appearances on our dinner table, and to keep things exciting, I’m always experimenting with new recipes. After all, a constant rotation of the same few dishes wouldn’t make anyone happy in my household!
This culinary exploration led me to a box of cannelloni on a supermarket shelf, sparking the inspiration for this particular recipe. From the very first bite, this Spinach and Ricotta Cannelloni was an absolute triumph – a huge hit with everyone. Its immense success is precisely why I knew I had to share this exquisite recipe with you! It’s such a profoundly satisfying dish, embodying the very essence of comfort food, that you’ll undoubtedly want to make it a regular feature in your dinner plans too.
The Perfect Harmony: Spinach and Ricotta
The culinary marriage of spinach and ricotta is a classic for a reason. Their flavors and textures complement each other so brilliantly, making them an incredibly common and cherished combination in Italian cuisine. This dynamic duo is frequently found enhancing various pasta dishes, from rich pasta sauces and delicate tortellini to luscious ravioli, or even layered within a hearty lasagna.
However, when I envision this sublime pairing, my mind immediately conjures images of Spinach and Ricotta Cannelloni. It’s not just a classic dish; it’s arguably one of the most perfect ways to showcase these ingredients within the embrace of pasta. The creamy, slightly sweet ricotta and earthy spinach mixture provides a beautiful counterpoint to the bright, acidic notes of the rich tomato sauce.
When these elements are brought together, baked within the sturdy pasta tubes until golden and bubbly, the result is nothing short of pure magic. Each bite offers a delightful balance of textures and flavors – the yielding pasta, the tender, flavorful filling, and the robust, vibrant sauce – creating an unforgettable eating experience that truly satisfies the soul.
Cannelloni vs. Manicotti: Understanding the Differences
When preparing this dish, you might encounter a common question: what’s the difference between cannelloni and manicotti? And can they be used interchangeably? The good news is that while there are subtle distinctions, they serve largely the same purpose in a delicious baked pasta dish. If you find one difficult to source, the other is typically a perfectly acceptable substitute.
Cannelloni is the traditional Italian pasta shape, a long-standing staple in Italian kitchens. Manicotti, on the other hand, is generally considered the American counterpart, designed to fulfill the same culinary role. Both are characterized by their large, tubular form, specifically crafted to be stuffed with a savory filling, covered in a delectable sauce, and baked to perfection.
The subtle differences lie primarily in their texture and size. Traditional Italian cannelloni often features a smoother surface and tends to be slightly narrower, usually made from fresh pasta sheets rolled into tubes. Manicotti, typically of American origin, might have ridges on its surface and can be a bit wider, more commonly found in dry pasta form. However, for most home cooks, these differences are negligible, and the two shapes can indeed be used interchangeably without significantly altering the outcome of your dish. So, feel free to grab whichever is most readily available at your local grocery store.
A Brief History of Stuffed Pasta
The tradition of stuffing pasta tubes with rich fillings and baking them in sauce dates back centuries in Italian culinary history. This method was a clever way to create hearty, satisfying meals that could feed many, often making use of fresh, seasonal ingredients. These dishes became symbols of comfort and celebration, deeply embedded in regional Italian traditions. Whether it was a simple ricotta and herb filling or a more elaborate meat ragu, the concept of a baked, stuffed pasta quickly became a beloved part of the Italian gastronomic landscape, cherished for its depth of flavor and ability to bring families together around the dinner table.
Crafting the Irresistible Tomato Sauce
The tomato sauce is more than just a coating for your cannelloni; it’s the foundational layer of flavor that elevates the entire dish. A well-made sauce provides the necessary moisture for the pasta to cook beautifully in the oven, infuses every bite with a rich tang, and brings a vibrant freshness that balances the creamy filling. For an authentic Italian experience, don’t rush this step. Allowing the sauce to simmer for at least 10 minutes helps the garlic, basil, and oregano to truly meld, creating a depth of flavor that canned tomatoes alone cannot achieve. Consider using high-quality canned San Marzano tomatoes for their sweet, less acidic profile, which forms a perfect base for your homemade sauce. A tiny pinch of sugar can also help to cut through the acidity of the tomatoes and enhance their natural sweetness, resulting in a perfectly balanced sauce that will make your cannelloni truly shine.
Preparing the Creamy Spinach and Ricotta Filling
The heart of our cannelloni lies in its exquisite spinach and ricotta filling. This creamy, herbaceous mixture is what gives the dish its signature comforting texture and rich flavor. The key to a perfect filling is ensuring your spinach is properly prepared. If using frozen spinach, thaw it completely and squeeze out as much excess water as possible. This step is crucial; any lingering moisture will result in a watery filling that could make your cannelloni soggy. Combine the ricotta (full-fat is recommended for maximum creaminess and flavor), finely chopped spinach, generous amounts of freshly grated Parmesan, and a touch of sharp Cheddar for an extra layer of savory depth. A single egg acts as a binder, ensuring the filling holds together beautifully during baking. Season with salt and freshly ground black pepper to taste, creating a filling that’s both light and incredibly satisfying.
Assembling Your Cannelloni Masterpiece
Assembling cannelloni might seem daunting at first, but with a simple piping bag or even a sturdy freezer bag, it becomes a straightforward and enjoyable process. First, ensure your casserole dish is lightly coated with a layer of your delicious tomato sauce – this prevents the pasta from sticking and begins the flavor journey. Once your creamy spinach and ricotta filling is ready, spoon it into your piping bag, snip off a corner (about ½ inch wide), and gently pipe the mixture into each dry cannelloni tube. Don’t overfill, but ensure each tube is evenly packed. Arrange the filled tubes snugly in a single layer in your prepared baking dish. This step-by-step approach ensures each cannelloni is perfectly stuffed, leading to a uniformly delicious dish where every bite is as satisfying as the last.
Expert Recipe Tips for Success
- **Spinach Selection and Preparation:** I often opt for fresh spinach for its vibrant flavor, but frozen spinach is an excellent, convenient alternative, especially since it keeps longer and takes up less freezer space. If you choose frozen spinach, remember to thaw it thoroughly and, most importantly, squeeze out every last drop of excess liquid. Using a clean kitchen towel or paper towels works wonders to prevent a watery filling.
- **No Need to Pre-Boil Cannelloni:** One of the most common questions about cannelloni is whether to boil the pasta tubes before filling. The answer is a resounding no! Just like with lasagna noodles, the cannelloni pasta will cook perfectly in the oven, absorbing moisture from the sauce as it bakes. This method ensures the pasta remains al dente and prevents it from becoming overdone and mushy.
- **The Parmesan Factor:** While freeze-dried Parmesan cheese might seem like a time-saving shortcut, I strongly advise against it. It’s far too dry, often fails to melt properly, and lacks the complex, nutty flavor of fresh Parmesan. Investing in a block of good quality Parmesan and grating it yourself makes a significant difference in taste and texture. You’ll find you can use less while achieving a far superior flavor profile.
- **Allow for Resting Time:** Straight out of the oven, your cannelloni will be incredibly hot, with a molten, bubbly filling and sauce. To prevent burned mouths – particularly if serving to children – allow the dish to rest for a full 15 minutes before serving. This crucial resting period also allows the flavors to deepen and the sauce to set slightly, making it easier to serve and ensuring a more cohesive dish.
- **Choosing the Right Ricotta:** For the creamiest, most flavorful filling, always opt for full-fat ricotta cheese. The higher fat content contributes to a richer texture and helps the filling stay moist and tender during baking. Avoid low-fat or part-skim varieties, as they can result in a drier, less satisfying filling.
- **Enhance Your Sauce:** For an even richer and deeper flavored tomato sauce, consider adding a splash of red wine or a pinch of red pepper flakes for a subtle kick. Simmering the sauce a little longer than the recommended 10 minutes can also help to concentrate the flavors further.
Serving Suggestions to Complete Your Meal
A rich, cheesy baked pasta dish like Spinach and Ricotta Cannelloni pairs beautifully with sides that offer a fresh counterpoint and textural contrast. A simple green salad, tossed with a light vinaigrette, is always an ideal companion. Its crispness and freshness cut through the richness of the cheesy cannelloni, balancing the meal perfectly. A classic Caprese salad could also work wonders, offering juicy tomatoes, fresh mozzarella, and aromatic basil, though for some, this might add a bit too much cheese to an already decadent dish.
However, I’ve learned from experience that attempting to serve this magnificent pasta without a side of golden, aromatic garlic bread would almost certainly incite a rebellion at my dinner table! It’s the perfect vehicle for soaking up any leftover sauce and adds a delightful crunchy texture. For ultimate speed and simplicity, I often prepare mine in an air fryer, achieving perfectly toasted results with minimal fuss.
Perfect Pairings
Beyond salads and garlic bread, consider complementing your cannelloni with a crisp, dry white wine like a Pinot Grigio or Sauvignon Blanc. For a non-alcoholic option, sparkling water with a slice of lemon or a light iced tea would be equally refreshing. A side of steamed green beans or roasted asparagus can also add a touch of vibrant green and healthy crunch, rounding out your Italian feast beautifully.
Storage and Leftovers: Enjoying Your Cannelloni Later
Pasta dishes, especially baked ones, can sometimes present a challenge when it comes to leftovers. They tend to lose their fresh, al dente texture and can become a bit soggy or dry if not stored and reheated properly. However, with a few simple tips, you can enjoy your Spinach and Ricotta Cannelloni for days to come.
To reheat, cover the cannelloni loosely with aluminum foil and place it in an oven preheated to 180°C (350°F). The foil helps to trap moisture, preventing the pasta from drying out. It typically takes 10-15 minutes, but reheating times can vary depending on the amount you have left. Always ensure the dish is heated thoroughly and bubbling before serving. A splash of water or extra sauce can be added before reheating if it appears too dry.
Baked cannelloni also freezes exceptionally well, making it an excellent meal prep option for busy weeks. You can freeze it directly in the baking dish for up to a month. To serve, simply remove it from the freezer and allow it to defrost completely in the refrigerator overnight. Once thawed, reheat it in the oven as described above, adding extra sauce if needed. This makes for a convenient, ready-to-bake meal that tastes almost as good as fresh!
Freezing and Reheating Best Practices
For best results when freezing, ensure your cannelloni is completely cooled before placing it in the freezer. Wrap the baking dish tightly with several layers of plastic wrap and then aluminum foil to prevent freezer burn. When reheating from frozen, it’s best to allow it to thaw first; however, if you’re in a pinch, you can bake it directly from frozen (covered), increasing the baking time significantly (perhaps 45-60 minutes or more), checking periodically for doneness and ensuring it’s piping hot throughout. Adding a little extra sauce or a splash of broth can help keep it moist during the longer reheating process.
More Delicious Stuffed Pasta Recipes
- Tuscan Tortellini Sauce
- Chicken Meatball Soup with Tortellini
- 5 Minute Ravioli Sauce
- Stuffed Shells with Pesto and Tomato Beef Sauce
Spinach and Ricotta Cannelloni
Julia Frey of Vikalinka
15 mins
30 mins
1 hr
6
Ingredients
- 2 tbsp extra virgin olive oil
- 3 cloves garlic, minced
- 1/8 cup (12½g) fresh basil leaves, chopped
- 1/2 tsp dried oregano
- 1½ x 14oz (400g) canned tomatoes (passata or crushed)
- 1/4 tsp salt
- 8oz (250g) ricotta, full fat
- 4oz (125g) spinach, frozen and thawed, then well drained
- 1/2 cup (50g) Parmesan cheese, freshly grated
- 1/2 cup (50g) Cheddar cheese, sharp/extra mature
- 9oz (260g) fresh mozzarella, torn into pieces
- 1 egg
- Salt and pepper to taste
Instructions
- Preheat the oven to 180°C (350°F).
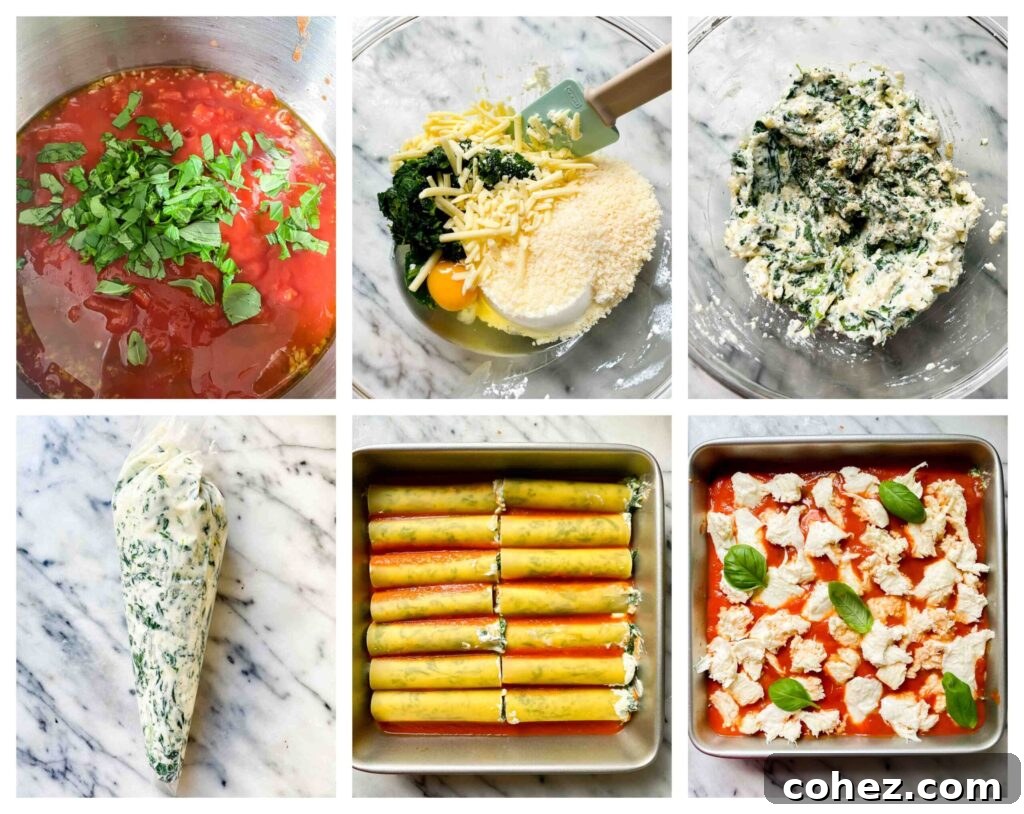
- Heat one tablespoon of olive oil in a pan. Add minced garlic, canned tomatoes, chopped basil leaves, and dried oregano with a pinch of salt and a touch of sugar. Bring the mixture to a boil, then reduce the heat and simmer gently for 10 minutes to allow the flavors to meld.
- In a medium bowl, combine the full-fat ricotta cheese, well-drained chopped spinach, freshly grated Parmesan cheese, sharp Cheddar cheese, a generous pinch of salt, and freshly ground black pepper. Mix in one egg until everything is well combined and creamy.
- Spread about ¼ inch (½ cm) deep layer of the prepared tomato basil sauce across the bottom of a 9×9 inch (23cm x 23cm) square casserole dish.
- Transfer the creamy ricotta filling into a large piping bag (or a sturdy sandwich bag with the corner snipped off). Carefully fill each dry cannelloni tube with the cheese mixture and arrange the filled cannelloni tubes in a single layer over the sauce in the casserole dish.
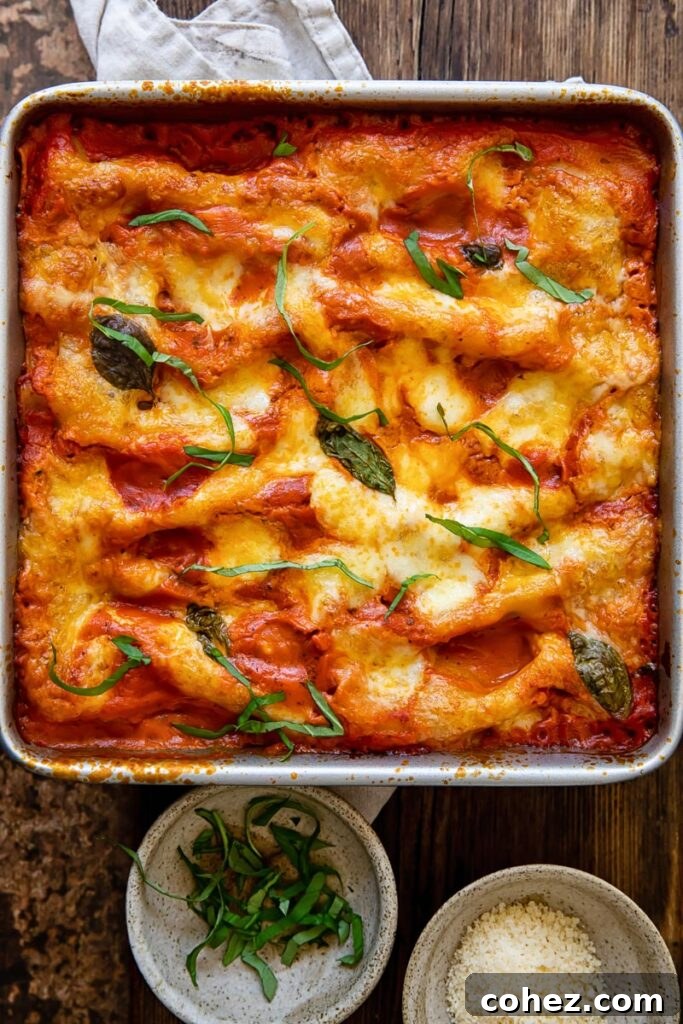
- Cover the filled cannelloni with the remaining sauce. Scatter torn pieces of fresh mozzarella cheese over the top, and add a few extra basil leaves if desired. Cover the dish with aluminum foil and bake for 25 minutes. After 25 minutes, remove the foil and continue to bake for another 10 minutes, or until the cheese is bubbly and lightly golden.
- Allow the cannelloni to rest for 15 minutes before serving. This crucial step helps the pasta set and prevents burns from the hot filling and sauce.
Notes
- Both fresh and frozen spinach work wonderfully in this recipe. If using frozen spinach, ensure it’s thoroughly thawed and squeezed dry to remove any excess water that could make the filling watery.
- Avoid using freeze-dried Parmesan cheese. Its dry texture doesn’t melt correctly, and it lacks the rich flavor of fresh Parmesan. Opt for freshly grated Parmesan for the best taste and texture.
- This dish comes out of the oven extremely hot. Resting for 15 minutes before serving is essential to prevent burns and allow the flavors to deepen and the pasta to absorb more sauce.
Nutrition Facts (per serving)
Calories: 365 kcal |
Carbohydrates: 11g |
Protein: 23g |
Fat: 26g |
Saturated Fat: 13g |
Polyunsaturated Fat: 1g |
Monounsaturated Fat: 9g |
Trans Fat: 0.003g |
Cholesterol: 98mg |
Sodium: 758mg |
Potassium: 525mg |
Fiber: 2g |
Sugar: 5g |
Vitamin A: 2959 IU |
Vitamin C: 16mg |
Calcium: 538mg |
Iron: 3mg
Nutrition information is automatically calculated, so should only be used as an approximation.
Tried this recipe?
Let us know how it was!