
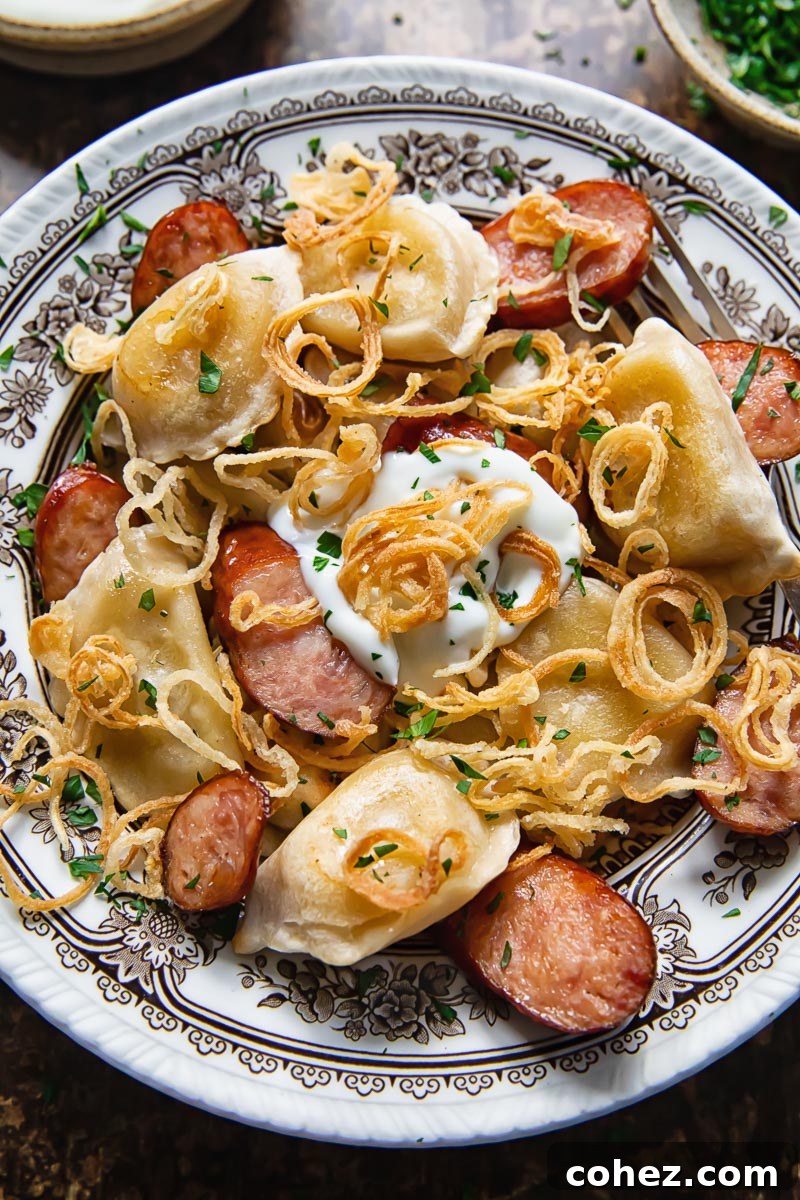
Immerse yourself in the heartwarming flavors of Eastern Europe with a classic dish featuring tender, doughy pierogies generously filled with fluffy mashed potatoes, accompanied by thick, savory slices of smoked kielbasa sausage. This enticing combination promises a delightful dinner-time treat that’s both satisfying and easy to prepare. Crown your plate with a scattering of sweet, crispy fried shallots and a dollop of velvety sour cream, and you’ve crafted an authentically Polish mid-week meal that tastes like it took hours, but with store-bought pierogies, it can be ready in around 20 minutes.
As the days grow shorter and a cozy blanket becomes a bedroom essential, I often find myself drawn to the comforting embrace of Eastern European cuisine. These colder months evoke a longing for the hearty, soul-satisfying dishes of my childhood, like a rich sweet and sour beef stew (Solyanka), which also features the robust flavor of kielbasa sausage. There’s something inherently nostalgic about these dishes, a culinary hug that transports you back to simpler times and family gatherings.

Unveiling the Delight of Pierogi: A Culinary Journey
These beloved little dumplings, known universally as pierogi, are more than just a dish; they are a vessel of culinary heritage and cherished memories. While often associated with Poland, similar dough parcels are found across Eastern Europe, each region boasting its unique name and variations. Growing up closer to Ukraine and the Eastern parts of Europe, I knew them as vareniki. However, their Polish moniker, pierogi (plural) or pieróg (singular), is arguably the most recognized internationally.
Pierogi are delightful pockets of dough, typically boiled and then often pan-fried, filled with a myriad of sweet or savory ingredients. While meat-filled dumplings like pelmeni are distinct, pierogi traditionally lean towards vegetarian fillings. My personal favorites include the tangy zest of sauerkraut and mushroom, or the rich combination of potato and caramelized onion with crispy bacon. These fillings showcase the versatility and comforting essence of pierogi, making them a staple in many households.
For this particular recipe, we’re embracing convenience without sacrificing flavor by utilizing high-quality, store-bought frozen potato pierogies. This smart shortcut drastically reduces the preparation time from an hour and forty minutes down to a mere 20-minute endeavor, making it perfect for busy weeknights. However, for those who relish the art of dumpling making, I highly recommend dedicating an afternoon to crafting them from scratch. My comprehensive step-by-step pierogi recipe offers a rewarding experience for homemade enthusiasts. Whether homemade or store-bought, the key is to achieve that perfect tender-chewy dough and flavorful filling.
The Hearty Charm of Kielbasa: More Than Just Sausage
No Pierogies and Kielbasa dish would be complete without the distinctive presence of its namesake sausage. Kielbasa, which simply translates to “sausage” in Polish, is a culinary institution in itself. While there are countless varieties of Polish sausage, the most common for this dish is a smoked, often garlic-infused pork sausage. Its robust, smoky flavor provides a wonderful counterpoint to the subtle sweetness of the potato pierogies and the delicate crispness of the fried shallots.
When selecting kielbasa, aim for an authentic Polish brand, often found in specialty Eastern European delis or well-stocked grocery stores. Look for varieties labeled “Polska Kielbasa” or “Smoked Kielbasa” that have a firm texture and a deep, inviting aroma. The quality of your kielbasa will significantly impact the overall flavor profile of the dish, so investing in a good one is well worth it. Slicing it thickly ensures each piece retains its juicy texture and rich flavor as it broils alongside the pierogies, adding not just taste but also a delightful textural contrast.
The Golden Touch: Crafting Crispy Fried Shallots
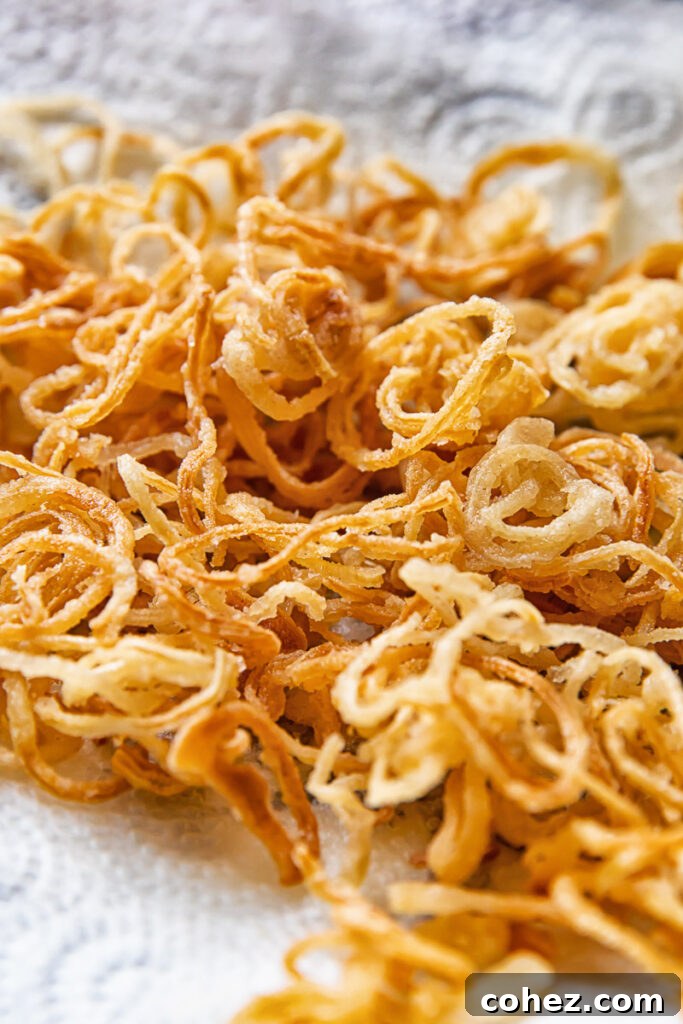
These delicate, spiraled strands of golden shallots are far more than just a pretty garnish; they are an indispensable component of this dish, adding layers of flavor and texture that truly elevate the experience. Their irresistible crunch provides a delightful contrast to the soft-centered pierogi, while their inherent sweetness beautifully balances the smoky, savory notes of the kielbasa. Skipping them would mean missing out on a crucial textural and flavor element.
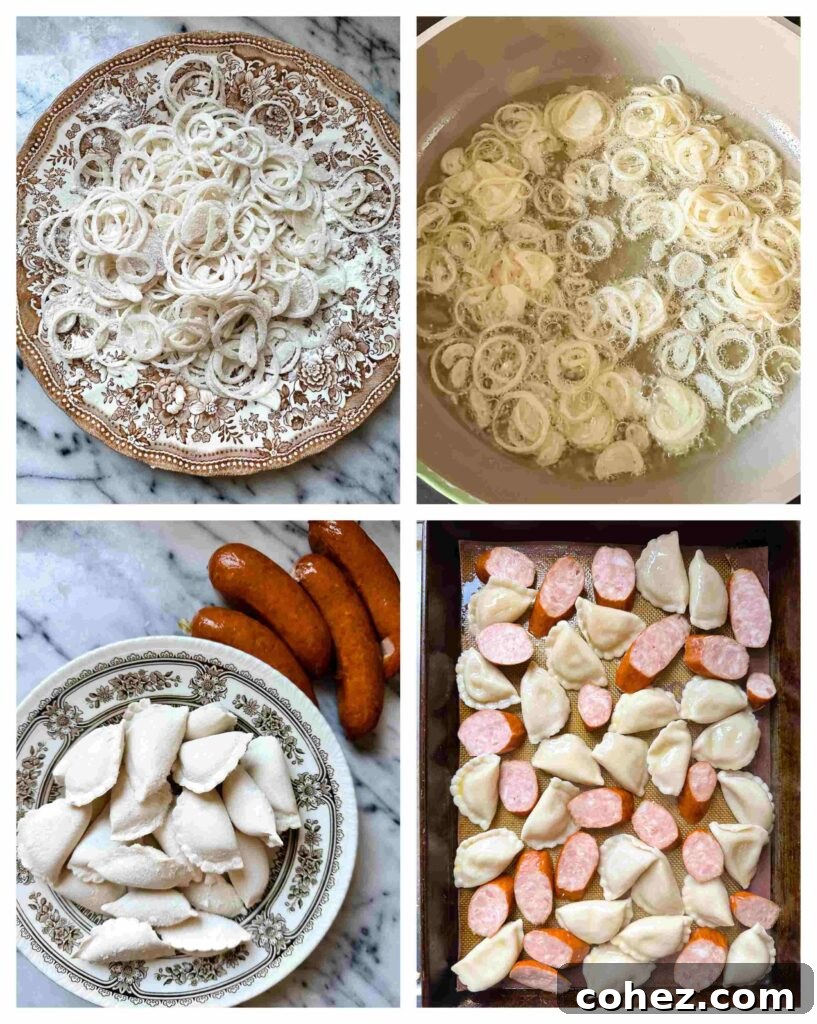
Achieving their fragile wispiness and perfect crispness requires a few simple yet essential steps. First, precision in slicing is key; I aim for them to be as thin as humanly possible, which allows them to fry quickly and achieve that pale, golden-yellow hue. A mandoline slicer can be incredibly helpful here for uniform, razor-thin cuts. Next, they need a thorough coating of flour. This thin layer of flour is what helps them crisp up beautifully and prevents them from clumping together in the oil. Each individual curl should be well-covered before being gently lowered into the sizzling hot oil. Keep a close eye on them, as they cook rapidly, transforming into a light, fresh straw color in just a few minutes.
Once fried to perfection, immediately transfer them to a plate lined with paper towels. This crucial step allows the excess oil to be absorbed, ensuring your shallots remain wonderfully crisp, rather than becoming greasy and soft. Give them ample time to rest and dry; patience here will be rewarded with the ultimate crunch. While shallots are preferred for their dainty circles and natural sweetness, regular yellow onions can be substituted if shallots are unavailable. Just slice them equally thin for the best results.
Expert Recipe Tips and Notes for Perfection
- For the Crispiest Shallots: Don’t skimp on the flour! Generously coat your thinly sliced shallots in about 2 tablespoons of all-purpose flour. This creates a thin batter that fries up beautifully golden and extra crispy.
- Watch Them Closely While Frying: Shallots cook incredibly fast. They can go from perfectly golden to burnt and bitter in a matter of seconds. Stay by the stove and remove them from the oil as soon as they achieve a lovely sunlight-golden color.
- Drain Properly for Maximum Crunch: Once fried, immediately transfer the shallots to a plate lined with paper towels. This allows any excess oil to drain off, preventing them from becoming soggy. Give them a few minutes to cool and crisp up further.
- Don’t Discard the Frying Oil: The vegetable oil used for frying the shallots will now be infused with a wonderful sweet shallot flavor. Strain it and save it in a clean jar. It can be reused for other savory dishes like stir-fries, roasted vegetables, or even for cooking eggs, adding a subtle depth of flavor.
- Effortless Pierogi Browning: Many traditional recipes call for frying pierogi in butter to achieve a beautiful golden color and a slightly crispy, shell-like exterior. While undeniably delicious, this can be time-consuming. My go-to easy method involves a baking tray, a light drizzle of olive or sunflower oil, and a few minutes under the broiler (or grill in the UK). This method yields fantastic results with minimal fuss.
- Broiling Caution: When broiling your pierogies, resist the temptation to leave them under the broiler for “just one more minute” to deepen their color. The delicate dough can quickly go from shiny and slick with oil to dry, chewy, and utterly disappointing. Keep a watchful eye, as broiler temperatures can vary, and timings are crucial. Aim for a light golden hue and a tender bite.
- Seek Out Authentic Kielbasa: For the best flavor, it’s truly worth the effort to visit an Eastern European grocery store or a specialty deli to find a high-quality, authentic Polish kielbasa. These often have a more complex flavor profile and superior texture compared to generic supermarket versions. Look for brands that pride themselves on traditional recipes.
Elevating Your Meal: Perfect Serving Suggestions
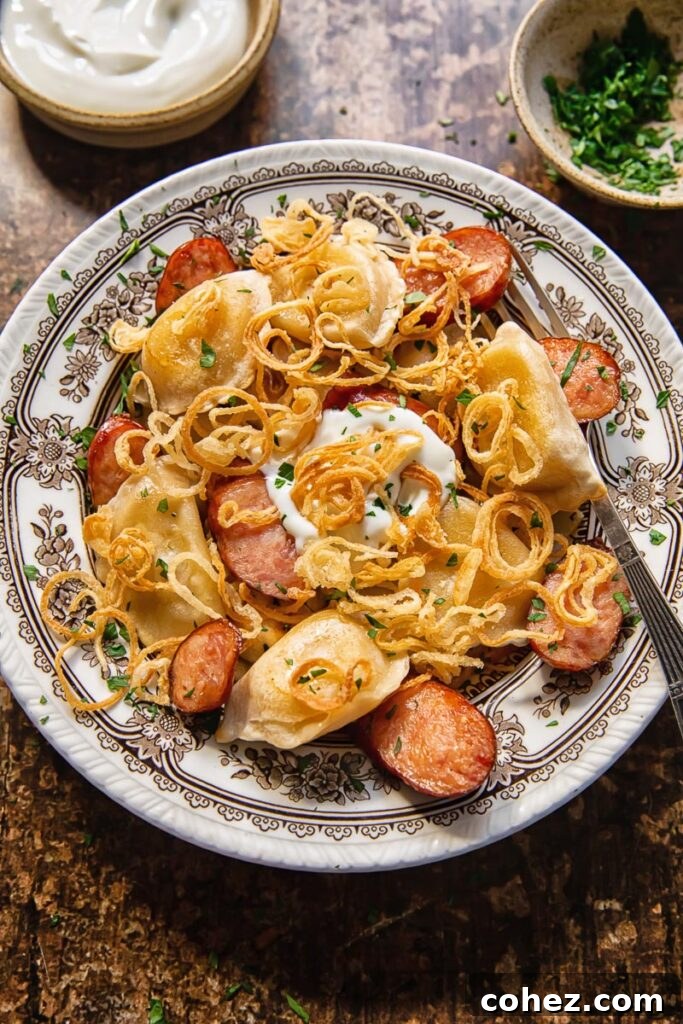
A plate piled high with steaming, golden-broiled pierogi and succulent kielbasa is a simple yet profoundly beautiful sight. While they are often served with minimal embellishment to let their inherent flavors shine, a few traditional accompaniments can elevate the experience even further. In their simplest form, they might arrive “naked,” perhaps with just a knob of melted butter drizzling over them as a light dressing.
The most classic pairing, and one I highly recommend, is a generous dollop of traditional sour cream (or smetana). Its tangy creaminess perfectly cuts through the richness of the sausage and complements the potato filling. Other popular additions include a side of zesty homemade Russian sauerkraut, offering a fermented crunch and bright flavor, or a sprinkling of fresh, feathery dill, which adds an aromatic freshness. In my household, we often enjoy a little bit of everything, creating a symphony of flavors and textures on the plate.
If you’re planning a more elaborate Eastern European-inspired meal, consider starting with a vibrant, earthy bowl of borscht, the iconic beet soup, as an appetizer. Its deep flavors and nourishing qualities perfectly set the stage. To conclude your culinary journey, a slice of rustic plum cheesecake offers a sweet, fruity, and delightfully rich ending to a memorable feast.
Storage and Leftovers: Enjoy Them Fresh!
Like many delicate dough-based dishes such as pasta or gnocchi, pierogi tend not to fare well when stored as leftovers. Their tender, doughy nature means that time spent in the refrigerator can transform them from delightfully yielding to unpleasantly tough and chewy. The texture is simply not the same the next day. So, if you’re looking for an excellent excuse to enjoy every last pierogi on your plate, consider this your culinary permission slip! They are truly best enjoyed fresh off the stove or from under the broiler. If you absolutely must store them, a quick re-fry in a pan with a little butter can help revive some of their texture, but they will never quite match their fresh glory.
Explore More Russian and Eastern European Delights
If this dish has sparked your interest in the diverse and comforting world of Eastern European cuisine, here are a few more Russian-inspired recipes from my kitchen that you might enjoy:
- Russian Eggplant Caviar (Ikra)
- Russian Potato Salad Recipe (Olivier)
- Russian Frikadellar Soup (Meatball Soup)
- Homemade Russian Sauerkraut
Pierogies and Kielbasa: A Quick & Comforting Meal
By Julia Frey of Vikalinka
Prep Time: 5 mins
Cook Time: 35 mins
Servings: 4 people

Pierogies and kielbasa combine doughy dumplings with a fluffy potato center and thick slices of smoky sausage for an unbeatable comfort meal.
Ingredients
- 400g / 14 oz frozen potato pierogi
- 1-2 tbsp olive oil (or sunflower oil)
- 4 kielbasa sausages, thickly sliced
- 1 shallot, thinly sliced
- 2 tbsp flour
- 1/2 tsp salt
- 100 ml vegetable oil for frying (can be saved for later use)
- Sour cream for serving
Instructions
- Bring a pot of water to a rolling boil for the pierogi. Once boiling, add the frozen pierogi and cook until they float to the surface. Drain them in a colander and set aside. Preheat your oven to broiler/grill mode.
- In a large shallow plate, combine the flour with the salt. Thinly slice the shallot; a mandoline can help achieve uniform, delicate slices. Toss the shallot slices with the seasoned flour until each piece is well coated.
- Heat the 100 ml vegetable oil in a frying pan over medium heat. The oil should be at least an inch deep. Test the oil’s readiness by sprinkling in a pinch of flour; it should sizzle immediately. Shake off any excess flour from the shallots and carefully add them to the hot oil, spreading them evenly across the pan. Fry until they turn a light golden color, typically 3-5 minutes, depending on the oil’s temperature. Using a slotted spoon or spatula, remove the shallots as soon as they begin to color and place them on a paper towel-lined plate to drain. Set aside for garnishing.
- Line a rimmed baking sheet with parchment paper. Add the drained pierogi to the sheet, drizzle with olive or sunflower oil, and gently toss to ensure they are evenly coated. Arrange the pierogi in a single layer. Next, add the thickly sliced kielbasa sausage to the same baking sheet, distributing it amongst the pierogi.
- Place the baking sheet on the top rack of the oven and broil for 5 minutes. Carefully flip the pierogi and kielbasa, then broil for another 2 minutes on the other side, or until both are golden brown and heated through. Watch closely to prevent burning.
- Serve the hot pierogi and kielbasa immediately, generously topped with the crispy fried shallots and a dollop of sour cream or crème fraîche (smetana).
Nutrition
Nutrition information is automatically calculated, so should only be used as an approximation.
- Calories: 598 kcal
- Carbohydrates: 45g
- Protein: 19g
- Fat: 39g
- Saturated Fat: 11g
- Polyunsaturated Fat: 5g
- Monounsaturated Fat: 15g
- Trans Fat: 0.02g
- Cholesterol: 64mg
- Sodium: 1500mg
- Potassium: 226mg
- Fiber: 3g
- Sugar: 5g
- Vitamin A: 0.3 IU
- Vitamin C: 12mg
- Calcium: 49mg
- Iron: 3mg
Tried this recipe? We’d love to hear from you! Share your thoughts and let us know how it was in the comments section below.