
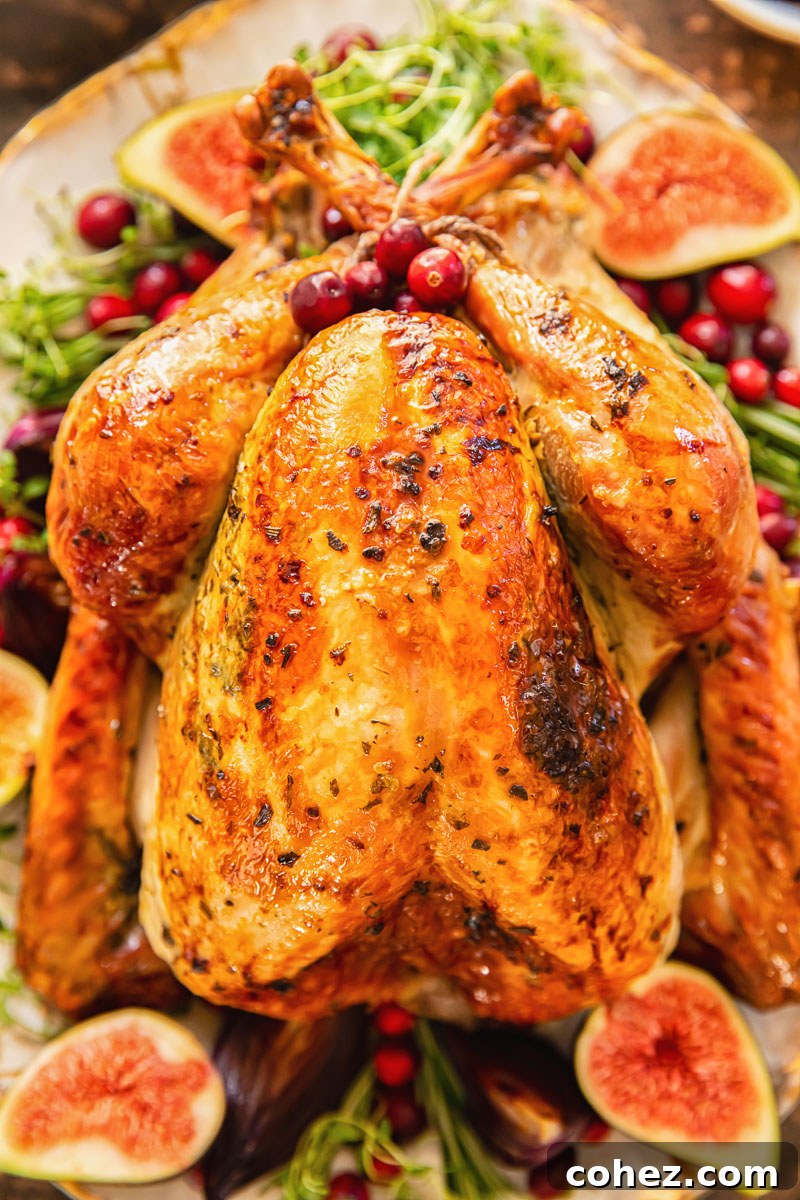
The holiday season brings with it the cherished tradition of gathering around a magnificent feast, and at the heart of many of these celebrations lies a beautifully roasted turkey. This comprehensive guide is your essential companion to mastering the art of turkey roasting, ensuring you serve the juiciest, most flavorful bird your friends and family have ever tasted. From precise timings to expert seasoning techniques, we’ll cover everything you need to know to create a show-stopping centerpiece. Don’t forget to pair your perfect turkey with our rich homemade gravy!
While a grand turkey often takes center stage, if you’re planning a smaller, more intimate gathering, consider roasting a delicious and succulent roast chicken as a delightful alternative. For even more inspiration and practical advice on holiday cooking and organization, be sure to explore our extensive Thanksgiving Recipe Collection. It’s packed with all the recipes and tips you could possibly need to make your festive season truly special.
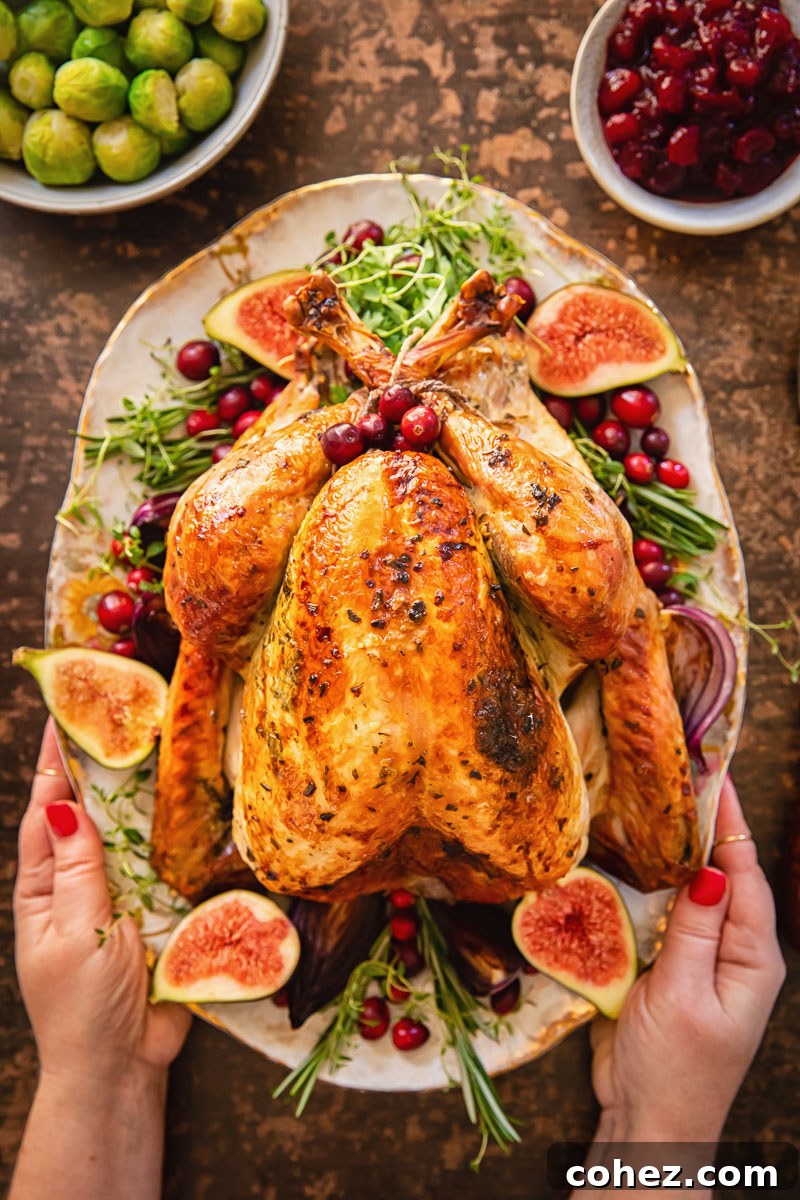
As the vibrant hues of autumn fade and the festive spirit begins to sparkle, the anticipation of holiday feasts fills the air. For many, the ultimate culinary challenge and joy revolves around presenting a perfectly roasted turkey. It’s officially that wonderful time of the year when kitchens hum with activity, and we need to talk TURKEY – seriously! I am delighted to share with you today a comprehensive guide and a tried-and-true recipe for roasting a turkey that is guaranteed to be both moist and bursting with flavor, transforming your holiday meal into an unforgettable celebration.
The quest for a truly juicy turkey is often fraught with apprehension. I frequently hear the concerns and tales of woe from home cooks who lament the seemingly impossible task of preventing their turkey from turning out disappointingly dry. Indeed, several formidable factors contribute to this common predicament:
- The Sheer Scale: A turkey is a magnificent, large bird, and its considerable size presents a significant hurdle for even cooking. The challenge lies in ensuring that heat penetrates uniformly across all its different parts.
- The Dual Nature of the Meat: A turkey uniquely combines two distinct types of meat: delicate white meat (the breast) and richer dark meat (thighs and legs). Each type cooks best at a slightly different internal temperature. The white meat, being leaner, cooks faster and is notoriously prone to drying out long before the dark meat reaches its optimal tenderness.
- The ‘Fear of Raw’ Factor: Overcooking is perhaps the most prevalent culprit behind dry turkey. The understandable anxiety of serving undercooked poultry, which poses health risks, often leads cooks to err on the side of caution. This results in prolonged roasting times that strip the turkey of its precious moisture, leaving it bland and fibrous.
These challenges are undeniable, and they can certainly make the prospect of roasting a whole turkey seem daunting, even for seasoned chefs. Yet, for over two decades, I’ve had the immense pleasure of preparing succulent turkeys for both Thanksgiving and Christmas gatherings, and I can confidently say that every single one has been met with rave reviews. There’s no secret magic involved, no elaborate culinary degree required – just a commitment to a few fundamental principles and clever techniques that reliably deliver a turkey that is moist, tender, and incredibly flavorful.
While I certainly don’t claim to be a culinary wizard, and I prefer to let the delicious results speak for themselves, I do possess a compact yet powerful arsenal of indispensable tricks that consistently yield a turkey that is NOT dry. And by “arsenal,” I mean precisely three golden rules that are guaranteed to revolutionize your approach to holiday turkey. These aren’t complicated techniques; they are foundational pillars of success that will ensure your bird is the star of your festive table. Are you ready to discover the secrets to unlocking consistently juicy and flavorful turkey?
How to Cook a Juicy Turkey Every Time: The Golden Rules
Trick Number 1: The Indispensable Role of an Accurate Meat Thermometer
This cannot be overstated: a reliable, accurate meat thermometer is your absolute best friend in the kitchen when roasting a turkey. It is, without a doubt, the single most critical tool for ensuring your bird is cooked to perfection – neither undercooked and unsafe, nor overcooked and dry. The widespread fear of serving raw poultry often leads cooks to significantly prolong cooking times, resulting in that disappointingly dry, tough texture. A quality thermometer eliminates all guesswork and guarantees food safety without ever sacrificing the precious moisture and tenderness of your turkey.
To achieve culinary confidence, consider these types of thermometers:
- Instant-Read Thermometers: These handheld devices provide rapid temperature readings (within seconds). They are ideal for spot-checking various areas of the turkey, allowing you to quickly verify doneness in the thickest parts of both white and dark meat.
- Probe Thermometers: Designed to remain in the turkey throughout the roasting process, these thermometers feature a heat-resistant probe connected by a wire to an external display unit. This allows you to continuously monitor the turkey’s internal temperature without repeatedly opening the oven door, which helps maintain a consistent oven temperature and speeds up cooking.
For food safety and optimal texture, you must cook your bird until the internal temperature reaches 165°F (75°C). This temperature should be registered in the deepest part of the turkey thigh (being careful not to touch the bone, as bone conducts heat and can give a false reading). It’s also wise to check the thickest part of the breast. An important tip to remember is ‘carry-over cooking’: the turkey will continue to cook for a few degrees after it’s removed from the oven. Therefore, many experts recommend pulling your turkey out when it reaches around 160-162°F (71-72°C), allowing it to reach the perfect 165°F (75°C) during the resting period. This strategy maximizes juiciness and ensures a tender result.
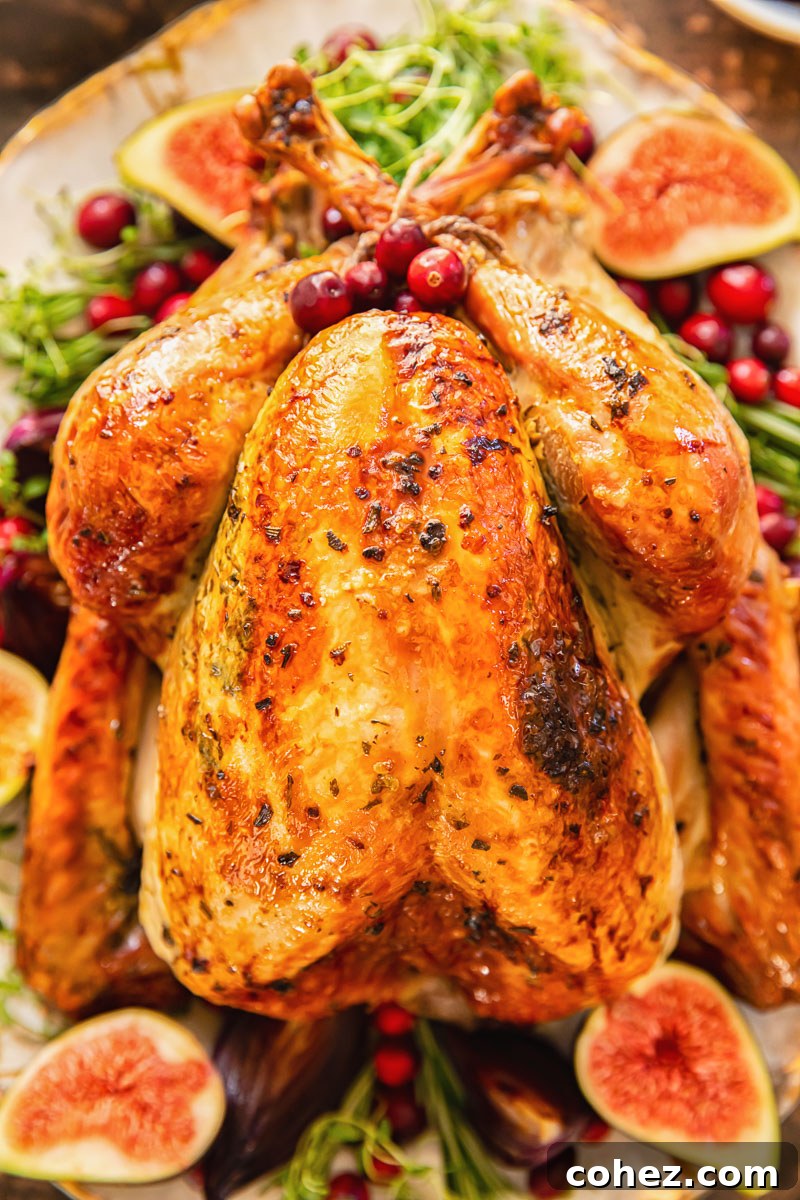
Trick Number 2: Embrace the Power of a Smaller Turkey
This advice might initially raise eyebrows, especially if you’s accustomed to the traditional notion of acquiring the largest turkey possible for holiday feasts. However, one of the most impactful secrets to consistently achieving a succulent, evenly cooked turkey lies in its size. I wholeheartedly recommend selecting a turkey that weighs no more than 10-12 lbs (approximately 4.5-5.5 kg). Here’s why opting for a smaller bird is a game-changer for juiciness:
- Superior Evenness in Cooking: Smaller turkeys heat through much more uniformly. This drastically minimizes the risk of the delicate breast meat drying out and becoming stringy while you wait for the denser dark meat of the thighs and legs to reach its safe cooking temperature.
- Reduced Roasting Time: A smaller bird naturally requires less time in the oven. Shorter cooking periods mean less moisture loss, directly contributing to a juicier final product.
When your holiday table is adorned with a dazzling array of delectable side dishes – from creamy mashed potatoes to savory stuffings and vibrant vegetable casseroles – the actual demand for an enormous quantity of turkey meat is often overestimated. Reflect on past holiday dinners: how many truly desirable turkey leftovers did you end up with, and how much of that was unfortunately dry, neglected breast meat? If you’re hosting a more modest gathering, a boneless turkey crown or breast can be an even more practical and equally delicious option, offering all the beloved white meat without the complexities of a whole bird. For those adventurous cooks seeking a delightful deviation, a rich and flavorful roast duck with a luscious port cranberry sauce presents an incredibly elegant and memorable alternative.
I anticipate your immediate thought: “But I have an enormous family, and I absolutely NEED a colossal turkey to satisfy everyone!” While feeding a crowd is certainly a priority, purchasing a single 20-25 lb (9-11 kg) “beast” is a pervasive mistake that almost guarantees a dry, disappointing turkey. Instead, for larger gatherings, adopt the strategy of roasting two smaller 8-10 lb turkeys simultaneously. This intelligent approach ensures both birds cook beautifully and remain wonderfully juicy, providing an abundance of succulent meat for all your guests without compromising on quality. It’s a simple adjustment that yields truly transformative results.
Trick Number 3: The Abundant Infusion of Aromatic Herbs and the Art of Tender Loving Care (TLC)
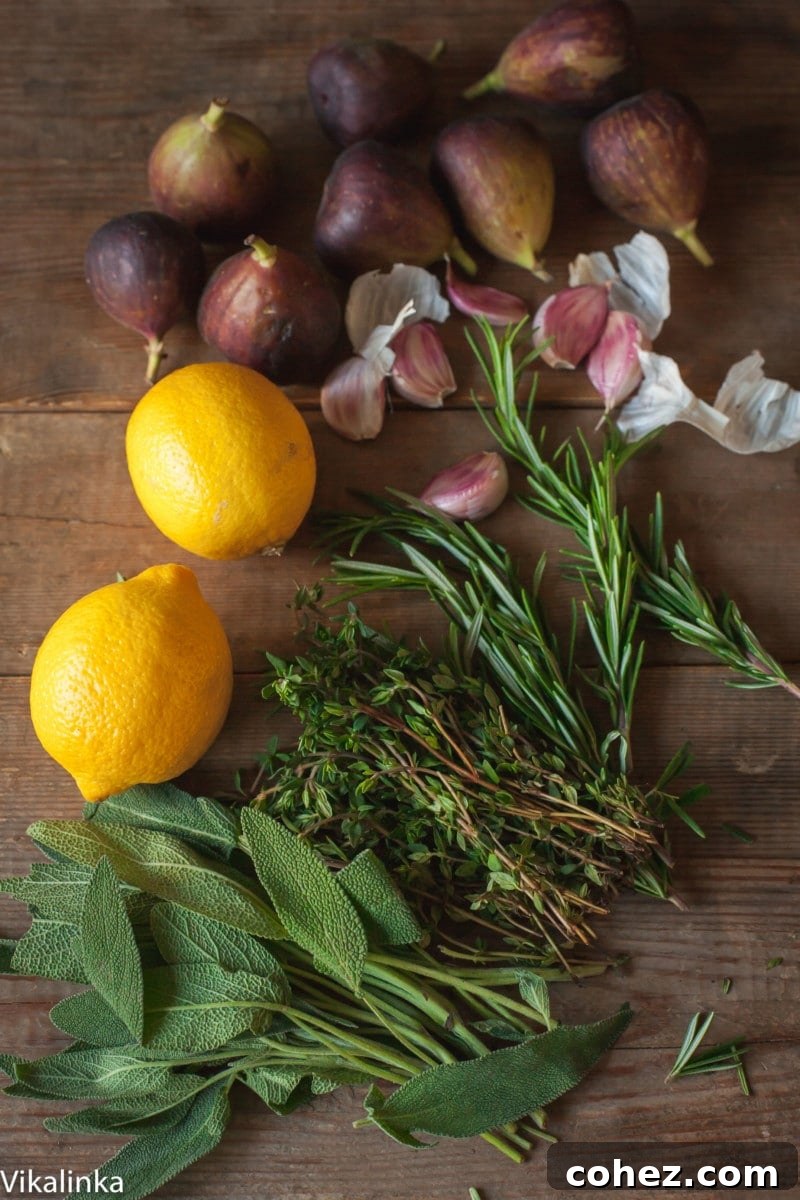
Turkey, with its relatively mild flavor, serves as an exceptional canvas for a symphony of fresh, aromatic herbs. You absolutely cannot go wrong by generously infusing your bird with a vibrant, fragrant medley. Picture this: a harmonious blend of fresh thyme, earthy sage, pungent rosemary, and bright parsley, all enhanced by the sharp, foundational notes of minced garlic and the zesty, bright aroma of lemon. These ingredients are not merely flavor enhancers; they are crucial contributors to the turkey’s overall succulence and appeal.
The “Tender Loving Care” component of this trick refers to the meticulous and thoughtful way you apply these aromatics. The most effective method involves crafting a rich, flavorful herb butter or olive oil mixture. By carefully loosening the turkey’s skin, particularly over the breast, and spreading this aromatic blend directly underneath, you create a protective, flavor-infusing layer that works its magic from the inside out. This technique effectively bastes the lean breast meat as it cooks, trapping moisture and directly imparting deep herbal notes. Furthermore, generously rubbing the exterior with olive oil and coarse salt ensures that coveted, irresistible, crispy, golden skin we all anticipate. It’s an initial investment of time and attention that culminates in a turkey bursting with flavor and unmatched tenderness.
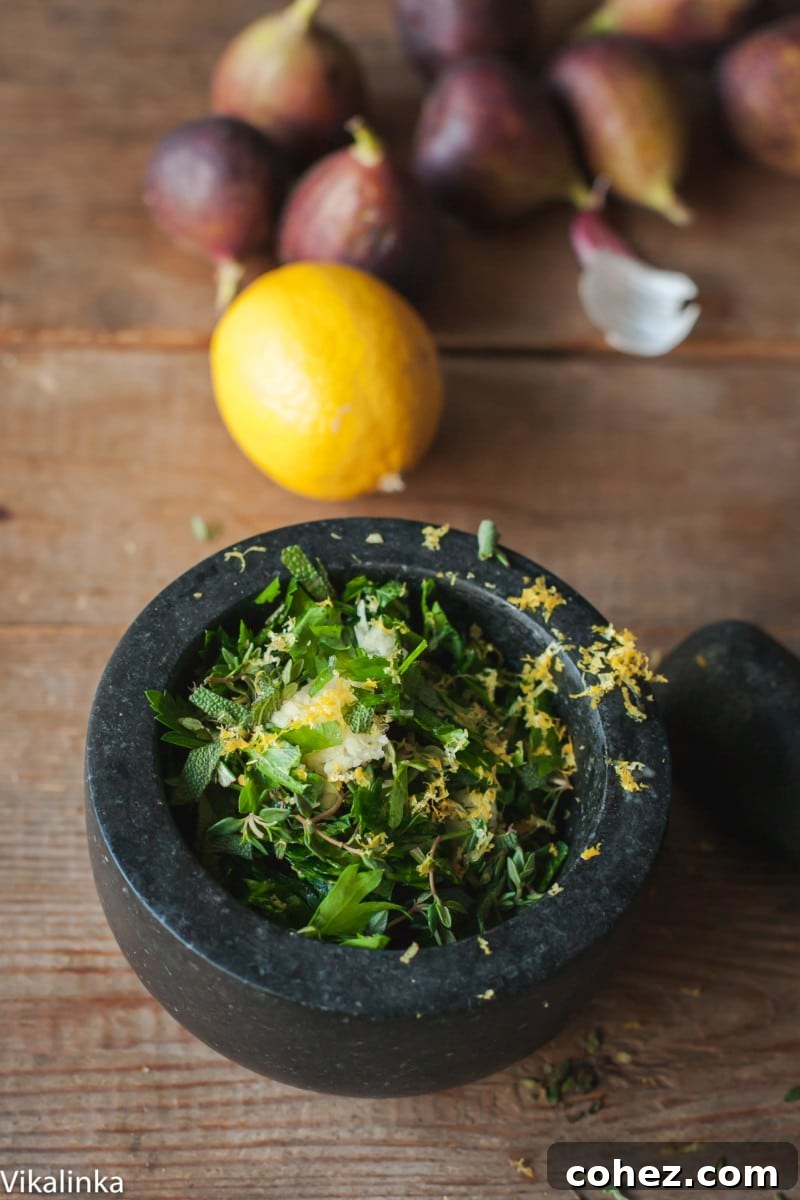
How To Prepare Your Turkey For Roasting: Step-by-Step Perfection
Proper and thorough preparation is the indispensable foundation upon which a perfectly roasted turkey is built. Following these detailed steps diligently will ensure your bird is optimally set up for success, leading to that coveted moist interior and crispy, golden-brown exterior:
- Thaw Completely and Safely: If your turkey is frozen, it is absolutely imperative that it is fully thawed well in advance of roasting day. The safest method for thawing is in the refrigerator, allowing approximately 24 hours of thawing time for every 4-5 lbs (1.8-2.3 kg) of turkey. A partially frozen turkey will cook unevenly, leading to dry spots and potentially undercooked areas. Ensure it’s fully pliable before proceeding.
- Thoroughly Pat Dry: This step, often overlooked, is crucial for achieving crispy skin. Before applying any rubs or seasoning, use multiple layers of paper towels to meticulously pat the entire turkey dry, both inside the cavity and all over the exterior skin. A dry surface allows the skin to crisp up beautifully rather than steam.
- Craft Your Aromatic Herb Rub: The simplest yet most profoundly effective method to infuse your turkey with incredible, deep flavor is to create a robust, fresh herb mixture. Finely chop a generous quantity of your chosen fresh herbs – sage, rosemary, thyme, and parsley are classic and complementary. Mince 4-6 cloves of fresh garlic (adjust to your preference), and finely grate the zest of one or two lemons. Combine these vibrant aromatics in a small bowl with 2-3 tablespoons of high-quality extra virgin olive oil until a fragrant, spreadable paste forms.
- The Secret to Moist Breast: Apply Rub Under the Skin: This technique is a true game-changer for guaranteeing moist breast meat. Carefully slide your clean fingers under the turkey skin, beginning at the cavity opening and gently working your way over the breast, separating the skin from the meat. Be delicate to avoid tearing the skin. Once loosened, grab a handful of your prepared aromatic herb-garlic mixture and spread it evenly over the entire surface of the breast meat, directly under the skin. This ensures the flavorful, moisture-rich rub directly bastes the lean breast meat as it cooks. If you have any leftover rub, feel free to place it inside the cavity or rub it lightly on the exterior dark meat.
- Infuse the Cavity with Citrus: For an added layer of subtle moisture and fragrant aroma, pierce two whole lemons in several places with a sharp knife and place them inside the turkey cavity. You can also add some roughly chopped onion wedges, celery stalks, or additional fresh herb sprigs (like extra rosemary or thyme) into the cavity.
- Truss Your Turkey for Evenness and Presentation: Trussing involves using kitchen twine to tie the turkey’s legs together and tuck its wings close to its body. This compacts the bird, preventing the thinner parts (like wing tips and leg ends) from overcooking and drying out before the rest of the turkey is done. It also promotes more even heat distribution and results in a beautifully shaped, appealing presentation.
- Final Exterior Seasoning for Crispy Skin: To achieve that irresistible, golden-brown, crispy skin, rub the entire exterior of the trussed turkey with another thin layer of olive oil. This not only aids in browning but also helps the seasoning adhere. Generously sprinkle with flaky sea salt, such as Maldon – its larger crystals create a fantastic textural crunch. Freshly ground black pepper is also a welcome, subtle addition.
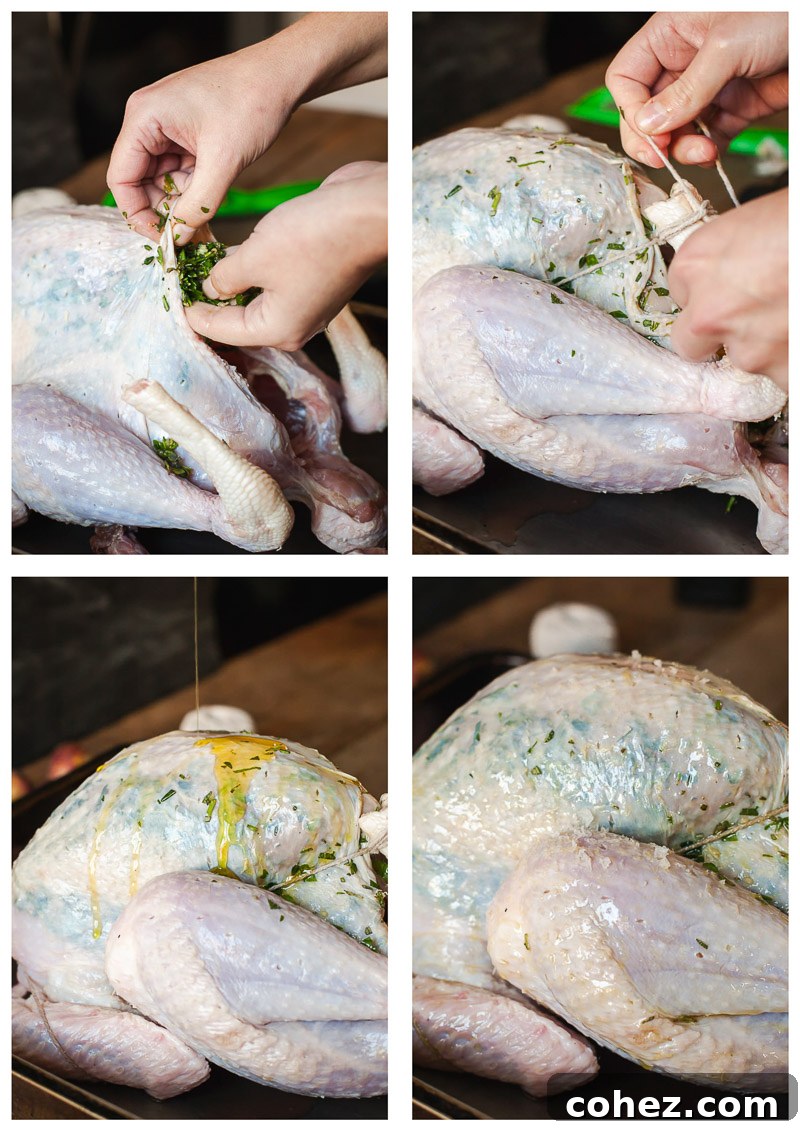
Mastering Roast Turkey Cooking Times and Techniques
Achieving a perfectly cooked turkey goes beyond merely knowing the total time; it encompasses understanding the nuances of the cooking process itself. Here’s how to ensure your turkey is roasted to succulent perfection, with juicy meat and golden, crispy skin:
- The Initial High Heat Blast (The Searing Secret): Begin by preheating your oven to its highest temperature, typically around 450-475°F (230-245°C). Once hot, carefully place your meticulously prepared turkey, breast-side up, into a sturdy roasting pan (preferably one with a V-rack to allow air circulation). This initial blast of intense heat serves a dual purpose: it helps to quickly crisp up the skin, initiating that beautiful golden-brown color, and it jump-starts the cooking process, locking in moisture.
- Reducing the Temperature for Gentle Roasting: Immediately after placing the turkey into the super-hot oven, swiftly reduce the oven temperature to a more moderate 350°F (175°C). Maintaining this lower, consistent temperature allows the turkey to cook through gently and evenly, preventing the exterior from burning while ensuring the interior reaches its safe doneness without drying out.
- General Roasting Timelines (Use as a Guide, Trust Your Thermometer): A reliable general guideline for an unstuffed turkey roasted at 350°F (175°C) is approximately 13-15 minutes per pound. However, it is crucial to remember that this is merely an approximation. Oven calibrations vary, and actual cooking times can differ. For instance, my 8 lb (3.6 kg) turkey consistently cooks to perfection in about 2 hours to reach the target internal temperature of 165°F (75°C), yielding a consistently juicy and fully cooked bird. The golden rule: ALWAYS rely on your accurate meat thermometer for definitive accuracy, not just the clock.
- Basting for Enhanced Moisture and Color: To further enhance the turkey’s succulence and develop that rich, golden-brown crust, baste your turkey every 30-45 minutes with the accumulated pan juices. If your roasting pan seems a bit dry and lacking sufficient drippings for basting, you can add a cup or two of chicken or vegetable broth to the bottom of the pan. This not only creates more basting liquid but also helps prevent the precious drippings from scorching. If you notice the turkey skin browning too rapidly at any point, simply loosely tent the bird with a piece of aluminum foil to shield it.
- The All-Important Resting Period: This step is arguably as critical as the cooking itself. Once your meat thermometer registers 165°F (75°C) in the thickest part of the thigh (and ideally the breast as well), carefully remove the turkey from the oven. Resist the urge to carve immediately! Instead, tent it loosely with aluminum foil and allow it to rest undisturbed for at least 20-30 minutes for smaller birds, and up to 45 minutes for larger ones. This crucial resting period permits the muscle fibers to relax and, most importantly, allows the internal juices to redistribute evenly throughout the entire bird. Carving too soon will cause all those precious, flavorful juices to run out onto your cutting board, leaving you with a noticeably drier turkey. Patience here is truly rewarded with an incredibly tender and moist final result.
Savoring the Leftovers: Creative Ideas and Smart Storage Tips
One of the greatest, albeit often understated, joys of roasting a magnificent holiday turkey is the abundant bounty of delicious leftovers it provides. These remnants offer convenient, versatile, and often even more flavorful meals for the days following your festive gathering. To make the most of your turkey and ensure its safety and quality, proper storage is paramount:
- Prompt Refrigeration for Safety: After carving and serving, ensure any leftover cooked turkey is cooled down and stored in an airtight container in the refrigerator as quickly as possible, ideally within two hours of cooking. Properly stored, it will remain safe and delicious for 3-4 days.
- Freezing for Extended Enjoyment: For longer-term storage, cooked turkey freezes remarkably well. It can be safely kept in a freezer-safe bag or container for up to 3-6 months. While still safe to consume after three months, you might observe a slight decline in textural quality. For optimal results, consider carving the turkey into manageable portions or shredding it before freezing, and ensure you squeeze out as much air as possible from freezer bags to prevent freezer burn.
- Smart Reheating for Moisture Retention: To avoid the common pitfall of dry, reheated turkey, always add a splash of chicken or vegetable broth, gravy, or even a little water when warming it up. Reheat gently in the oven at a low temperature (around 275°F/135°C) until just warmed through, covering it to retain moisture. Smaller portions can be reheated in the microwave, but do so cautiously and in short bursts, stirring occasionally.
The last thing anyone wants is to experience “turkey fatigue” in the days following a joyous holiday! Instead of resigning yourself to repetitive turkey sandwiches, challenge yourself to explore creative and exciting ways to transform your leftovers into entirely new culinary delights. Our dedicated holiday leftovers section is brimming with a plethora of innovative recipe ideas designed to inspire and delight.
I have a few standout recipes from my collection that you’ll definitely want to bookmark. My comforting Heartwarming Leftover Turkey Soup is always a huge winner, perfect for a cozy, nourishing meal after the festivities. You’ll also absolutely adore my rich and satisfying Hearty Turkey Stew, a fantastic way to utilize both white and dark meat. For a delightful trip down memory lane, try our classic and creamy Turkey á la King. And please, never let that precious turkey carcass go to waste – it is an invaluable base for crafting a rich, flavorful homemade turkey stock, ready to elevate soups, gravies, and sauces throughout the entire year!
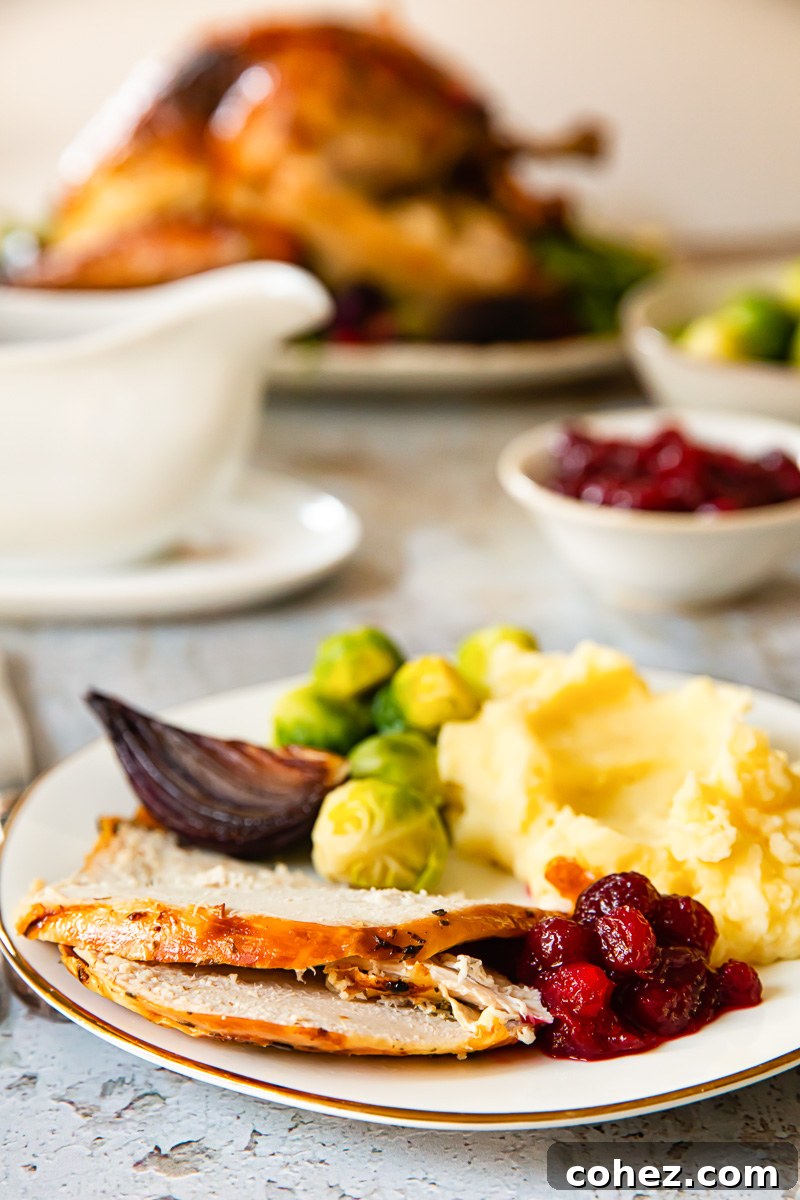
Essential Holiday Side Dishes to Complement Your Perfect Turkey
A magnificent, perfectly roasted turkey truly shines when accompanied by an equally impressive and complementary ensemble of side dishes. These culinary companions are essential for creating a balanced and unforgettable holiday feast. Here are some of our absolute favorite ideas that pair beautifully with a succulent holiday bird:
- Creamy Herb and Garlic Mashed Potatoes: A quintessential, comforting classic that is universally adored. Their rich, smooth texture and aromatic flavor make them an ideal pairing.
- Fresh Green Bean Casserole: A lighter, more vibrant, and irresistibly delicious update to a beloved traditional holiday side dish.
- Savory Sausage, Pear and Sage Stuffing: This deeply flavorful and aromatic stuffing offers a delightful blend of sweet and savory notes, adding incredible depth and texture to your meal.
- Rich Port Cranberry Sauce: The perfect balance of sweet and tart, this vibrant sauce beautifully cuts through the richness of the turkey, offering a refreshing contrast.
- Crispy Roasted Brussels Sprouts with Bacon: A delightful and often surprising way to enjoy your greens, offering a smoky, savory crunch that even sprout skeptics will love.
- Decadent Sweet Potato Casserole with Pecan Topping: A truly delightful blend of sweet, creamy, and crunchy textures, making it a beloved addition to any holiday table.
- Creamed Spinach: A luxurious and creamy side dish that adds a touch of elegance and verdant color to your spread.
4.84 from 6 votes
Your Complete Roasting Turkey Guide
By Julia Frey of Vikalinka
Print Recipe
This ultimate guide provides all the necessary information for roasting a magnificent turkey this holiday season! From precise cooking timings to expert seasoning techniques, this recipe will help you serve the juiciest, most flavorful turkey to your friends and family, making your festive meal truly special.
Ingredients
- 1 Whole Turkey (approx. 3.6 kg / 8 lbs, thawed if frozen)
- 50 g (approx. 1 large bunch) Fresh Herbs (such as sage, rosemary, thyme, and parsley, finely chopped)
- 4-6 cloves Garlic (minced)
- 2 large Lemons (zest of 1 lemon for the rub, both pierced for cavity stuffing)
- 2-3 tbsp Extra Virgin Olive Oil (for the herb rub and exterior coating)
- Kitchen Twine
- Flaky Sea Salt (such as Maldon, for crispy skin)
- Freshly Ground Black Pepper (optional, to taste)
- Chicken or Vegetable Broth (optional, for basting if pan juices run low)
Instructions
- Preheat Oven & Prepare Pan: Preheat your oven to its highest temperature, typically 450-475°F (230-245°C). Place your completely thawed and thoroughly patted-dry turkey into a sturdy roasting pan, ideally on a V-rack.
- Make the Herb Rub: In a small bowl, combine the finely chopped fresh herbs, minced garlic, and the zest of one lemon. Stir in 2-3 tablespoons of extra virgin olive oil until a fragrant, spreadable paste forms.
- Apply Rub Under Skin: Gently separate the turkey skin from the breast meat by carefully sliding your fingers underneath. Take a generous amount of the herb-garlic mixture and spread it evenly over the entire breast meat, directly under the skin. This infuses flavor and helps keep the breast moist. Place any remaining rub inside the cavity.
- Stuff Cavity: Pierce the two whole lemons in several places with a sharp knife and place them inside the turkey cavity. You may also add onion or extra herb sprigs if desired.
- Truss the Turkey: Use kitchen twine to securely tie the turkey’s legs together. If preferred, you can also run twine along the sides to tuck in the thighs and wings, ensuring a compact shape for even cooking and presentation.
- Season Exterior: Rub the entire exterior of the trussed turkey with a thin layer of olive oil. Generously sprinkle with flaky sea salt and freshly ground black pepper (if using).
- Initial High-Heat Roast: Place the turkey in the preheated oven.
- Reduce Temperature & Continue Roasting: Immediately reduce the oven temperature to 350°F (175°C). Continue roasting, allowing approximately 13-15 minutes per pound for an unstuffed turkey. An 8 lb turkey will typically take around 2 hours.
- Baste Regularly: Baste the turkey every 30-45 minutes with the pan juices. If the pan seems dry, add a cup of chicken or vegetable broth to the bottom. If the skin is browning too quickly, loosely tent the turkey with aluminum foil.
- Check Doneness & Rest: Roast until an accurate meat thermometer inserted into the thickest part of the turkey breast and thigh (without touching bone) registers 165°F (75°C). Once done, remove the turkey from the oven, tent it loosely with foil, and let it rest for at least 20-30 minutes before carving. This critical step allows the juices to redistribute, ensuring a tender and moist final result.
Notes
This recipe has been developed and tested for an 8 lbs (3.6 kg) turkey. If your turkey is larger, you will need to increase your cooking time accordingly. As a general guideline, add approximately 13-15 minutes of cooking time for each additional pound of turkey. It is paramount to always rely on an accurate meat thermometer to confirm the turkey’s internal temperature and ensure it reaches 165°F (75°C) for safe consumption and optimal juiciness.
Nutrition Facts
Carbohydrates: 2g |
Protein: 46g |
Fat: 15g |
Saturated Fat: 3g |
Cholesterol: 154mg |
Sodium: 628mg |
Potassium: 509mg |
Vitamin A: 120IU |
Vitamin C: 9.8mg |
Calcium: 30mg |
Iron: 2mg
Nutrition information is automatically calculated and provided as an approximation only. Individual dietary needs and ingredient variations may alter the actual nutritional content. Please use this information as a general guide.
Tried this recipe? We’d love to hear about your experience! Let us know how it turned out in the comments below!