
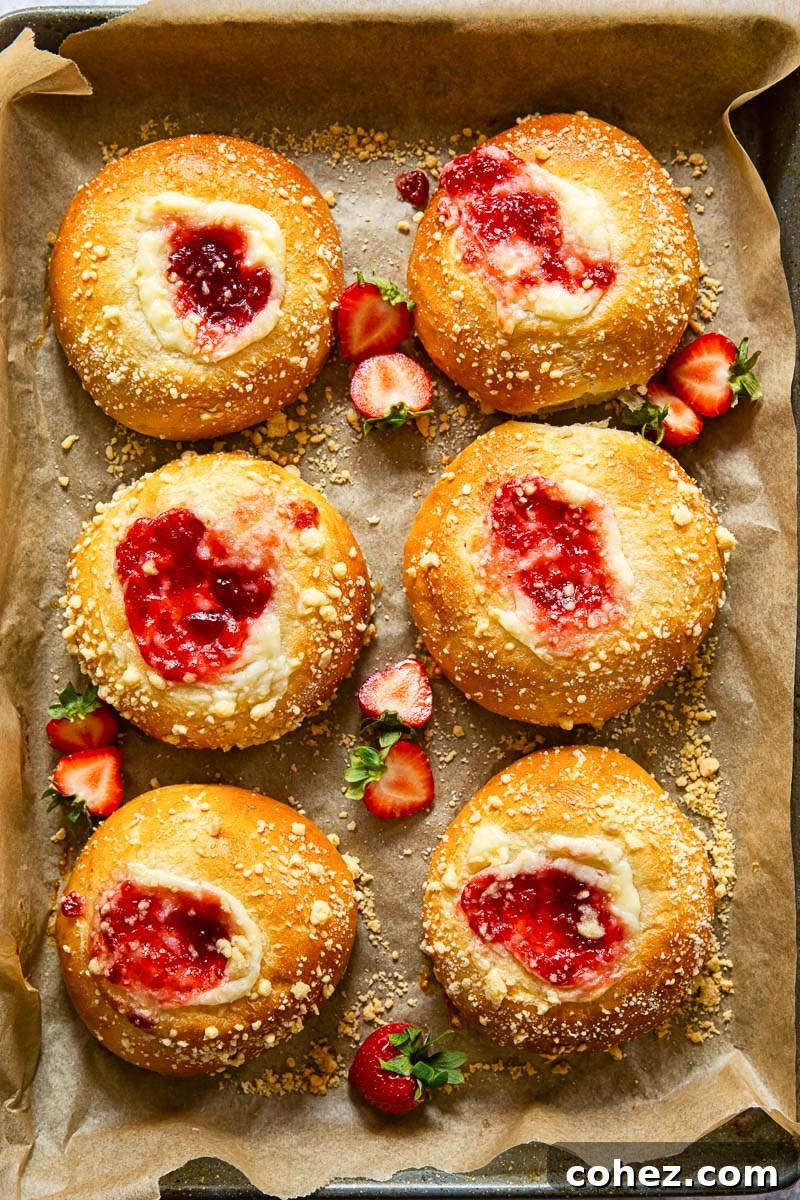
Strawberry Cheesecake Vatrushka Buns: A Delightful Russian Pastry Recipe
Indulge in the sweet embrace of tradition with these exquisite Vatrushka buns, featuring a contemporary strawberry cheesecake twist. Imagine biting into a pillowy soft, buttery yeast bun, generously filled with a creamy, subtly sweet cheesecake mixture, crowned with a dollop of vibrant strawberry jam. These rustic yet refined pastries are an absolute dream for coffee breaks, breakfast, or any moment you crave something truly special. They effortlessly blend the comforting essence of homemade baking with an irresistible, creamy-sweet surprise in every bite.
The timeless pairing of summer berries and creamy cheesecake is a match made in culinary heaven. If this tantalizing combination excites your palate, you might also enjoy exploring my Almond Raspberry Cheesecake Bars for another delightful treat.
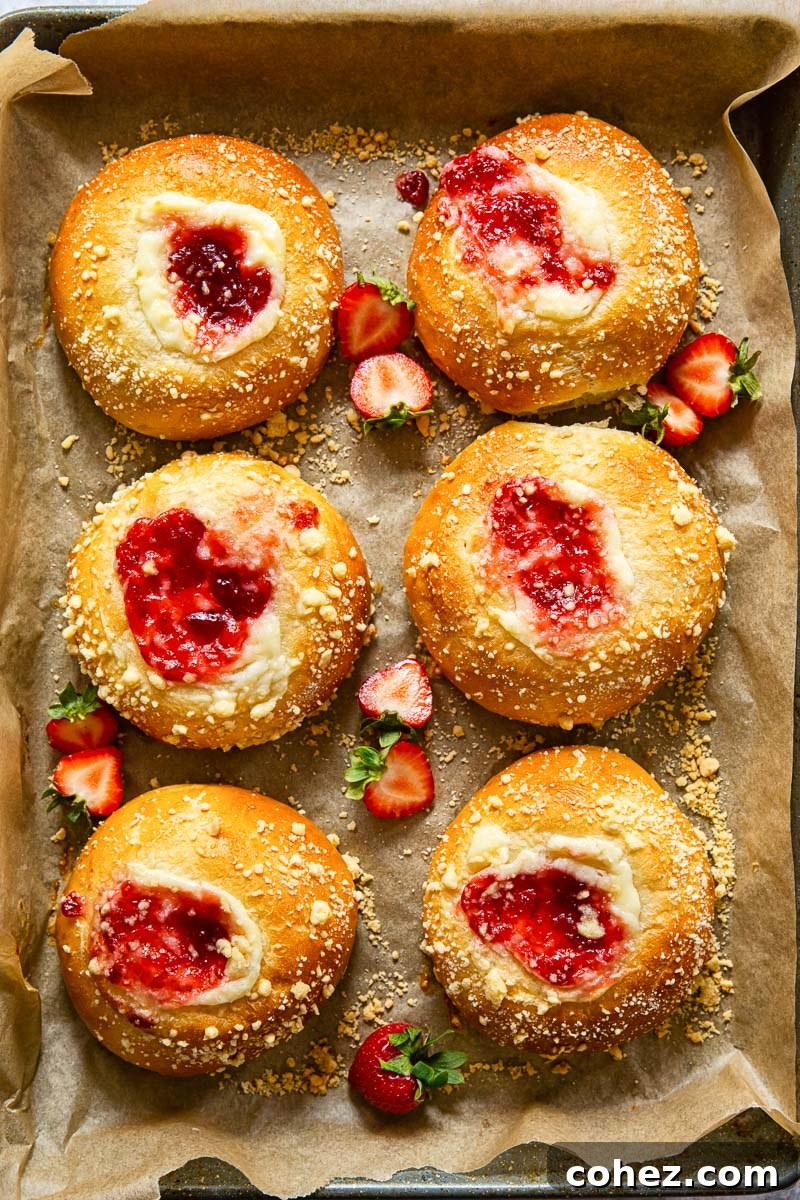
Today, I’m thrilled to share a cherished recipe that transports me straight back to my childhood – these delightful sweet buns, filled with a rich cream cheese blend, have been a perennial favorite for as long as I can remember. The joy of finally sharing this treasured recipe with fellow baking enthusiasts is immense, and I’m confident it will become a beloved staple in your kitchen too.
What Are Vatrushka Buns? A Taste of Eastern European Tradition
Vatrushka (pronounced “vat-roosh-ka”) is a classic Eastern European pastry, deeply rooted in Russian culinary traditions. These round, open-faced buns are typically crafted from an enriched yeast dough, similar to brioche, and traditionally filled with ‘tvorog’ – a type of sweet curd cheese akin to Italian ricotta or what’s often referred to as farmer’s cheese. The characteristic depression in the center, holding the luscious filling, gives Vatrushka its unique and inviting appearance.
While the traditional filling often features tvorog, variations with fruit or fruit jam are also popular. For this particular recipe, we embrace a modern interpretation by using a smooth cream cheese filling, beautifully complemented by a bright, sweet strawberry jam. It’s a fusion that marries traditional comfort with contemporary flavor.
Interestingly, Vatrushka buns are not solely exclusive to Russia. Similar pastries can be found across Eastern and Central Europe, with notable examples like Czech kolaches, which share a common heritage of sweet yeast doughs and fruit or cheese fillings. This rich history underscores the universal appeal of these delightful baked goods, transcending borders with their simple yet profound deliciousness.
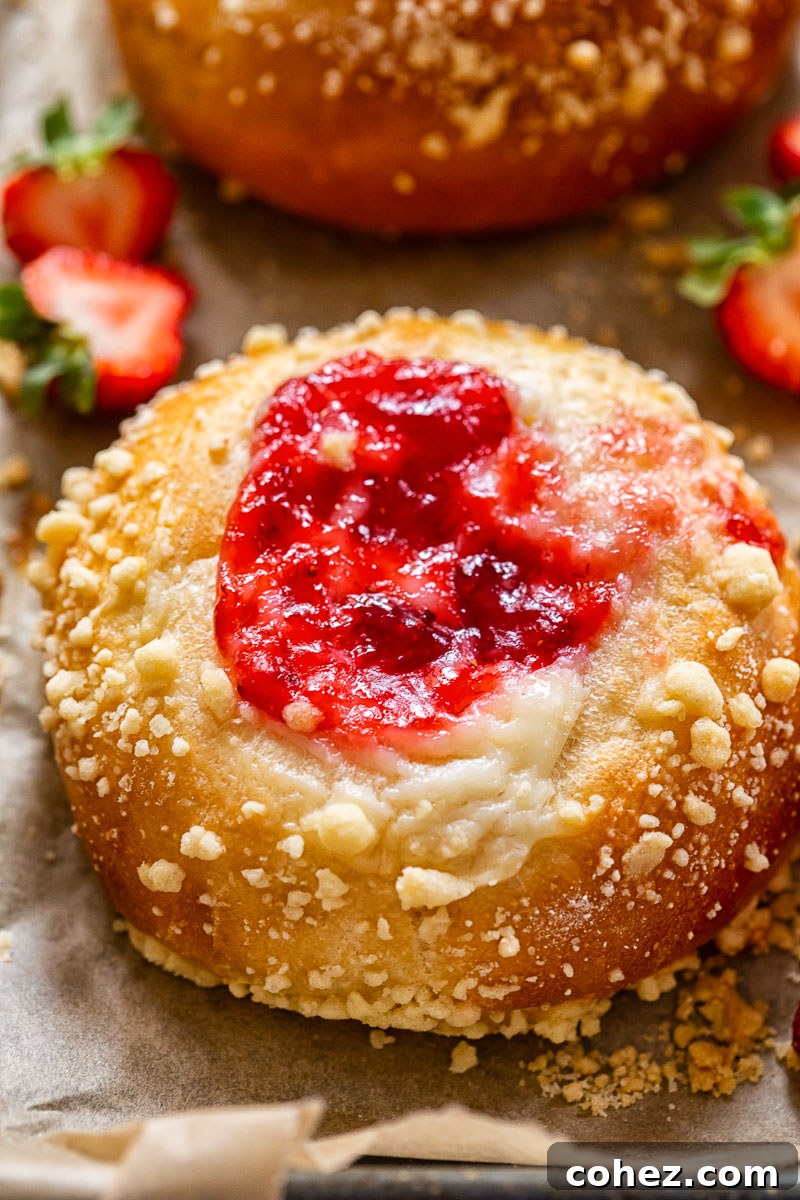
Crafting the Irresistible Strawberry Cheesecake Filling
The heart of these Vatrushka buns lies in their exquisite filling, a harmonious blend of creamy cheese and sweet, fruity jam. Our strawberry cheesecake filling offers a smooth, rich texture that perfectly contrasts with the pillowy soft yeast dough. The dollop of sweet strawberry jam nestled within the cream cheese layer provides a burst of fruity brightness, cutting through the richness and adding a delightful tang that makes each bite incredibly satisfying. It’s a dynamic duo of flavors that elevates the entire bun experience.
While strawberry jam is my personal favorite for its classic appeal and vibrant taste, the beauty of this recipe lies in its versatility. Feel free to experiment with an array of other jam varieties to suit your preference or seasonal availability. Imagine the possibilities: a luscious blueberry jam offering deep, sweet notes; tangy blackberry jam providing a delightful tartness; or a sweet raspberry jam for a burst of summer flavor. Even a rhubarb jam could introduce a wonderfully unique, sweet-tart profile. Each choice will bring its own character to the Vatrushka, making it a truly adaptable recipe for every palate and occasion.
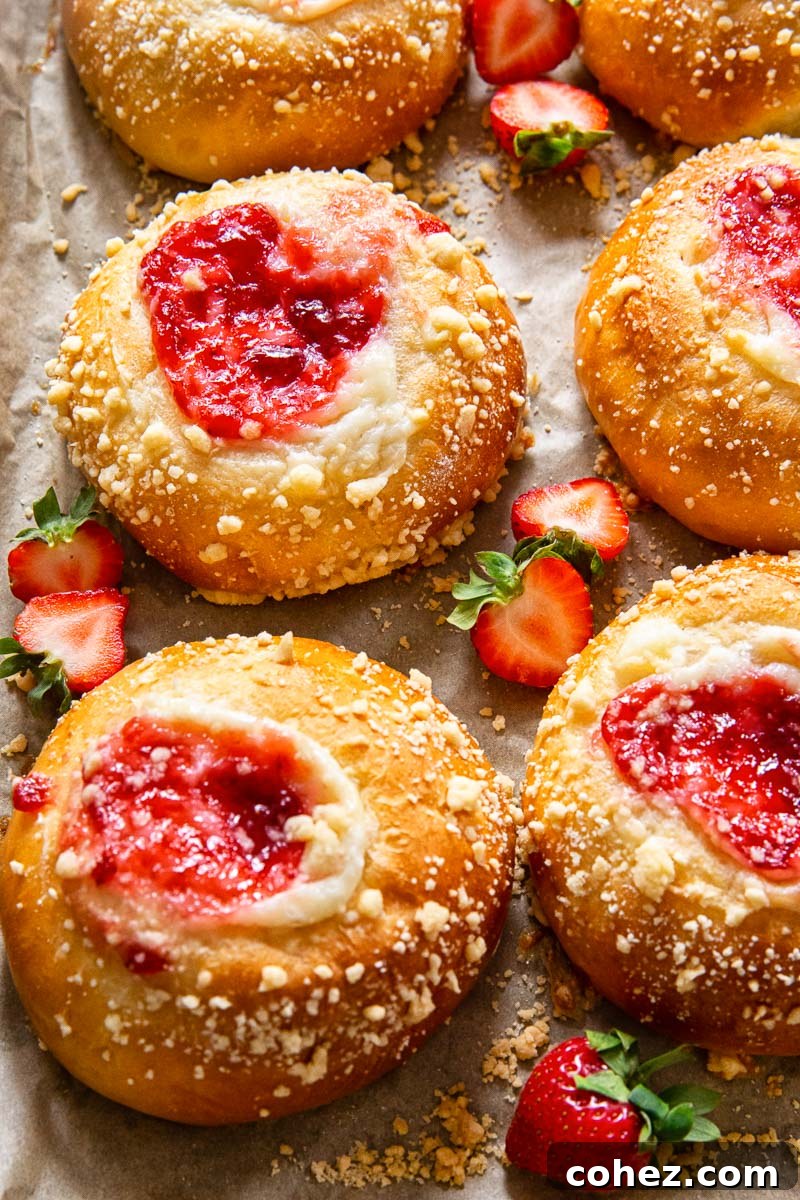
The Art of Making Vatrushka Buns: A Step-by-Step Guide
Despite their incredibly appealing appearance, these Vatrushka buns are surprisingly straightforward to prepare. Even if you’re not an expert in yeasted dough baking, my detailed recipe is designed to guide you to success, making the process enjoyable and the results consistently delicious. The creation of these buns is divided into three key components: the dough, the filling, and the streusel topping, each contributing to the bun’s delightful complexity.
The Golden Brioche Dough: Foundation of Fluffiness
The foundation of these Vatrushka buns is a magnificent enriched yeast dough – my go-to master dough, which you might recognize from my Cinnamon Bun recipe. This dough is exceptionally soft, subtly sweet, and wonderfully pliable, making it a joy to work with. Its ability to rise effectively within approximately an hour makes this a relatively quick project for a yeasted bake, perfect for when you crave fresh, homemade pastries without an excessively long waiting time.
To begin, you’ll gently bloom the active dried yeast with warm milk and a touch of sugar. This crucial step ensures the yeast is active and ready to work its magic, giving your buns their characteristic rise and airy texture. Once the yeast mixture is frothy, it’s combined with an egg and vegetable oil before being incorporated into bread flour and salt. Bread flour is highly recommended due to its higher protein content, which promotes better gluten development. This results in a dough that is not only easier to handle but also yields a beautifully soft, fluffy interior with a satisfying chew in the final baked product.
Kneading the dough, whether by stand mixer or by hand, is essential to develop the gluten. A stand mixer will typically achieve a smooth, elastic dough in about 10 minutes, while kneading by hand might take around 15 minutes of dedicated effort. After kneading, the dough undergoes its first proofing in a warm, draft-free spot, where it should more than double in size. This initial rise is vital for developing flavor and achieving that desirable light and airy texture.
Shaping and Second Rise: Preparing for the Filling
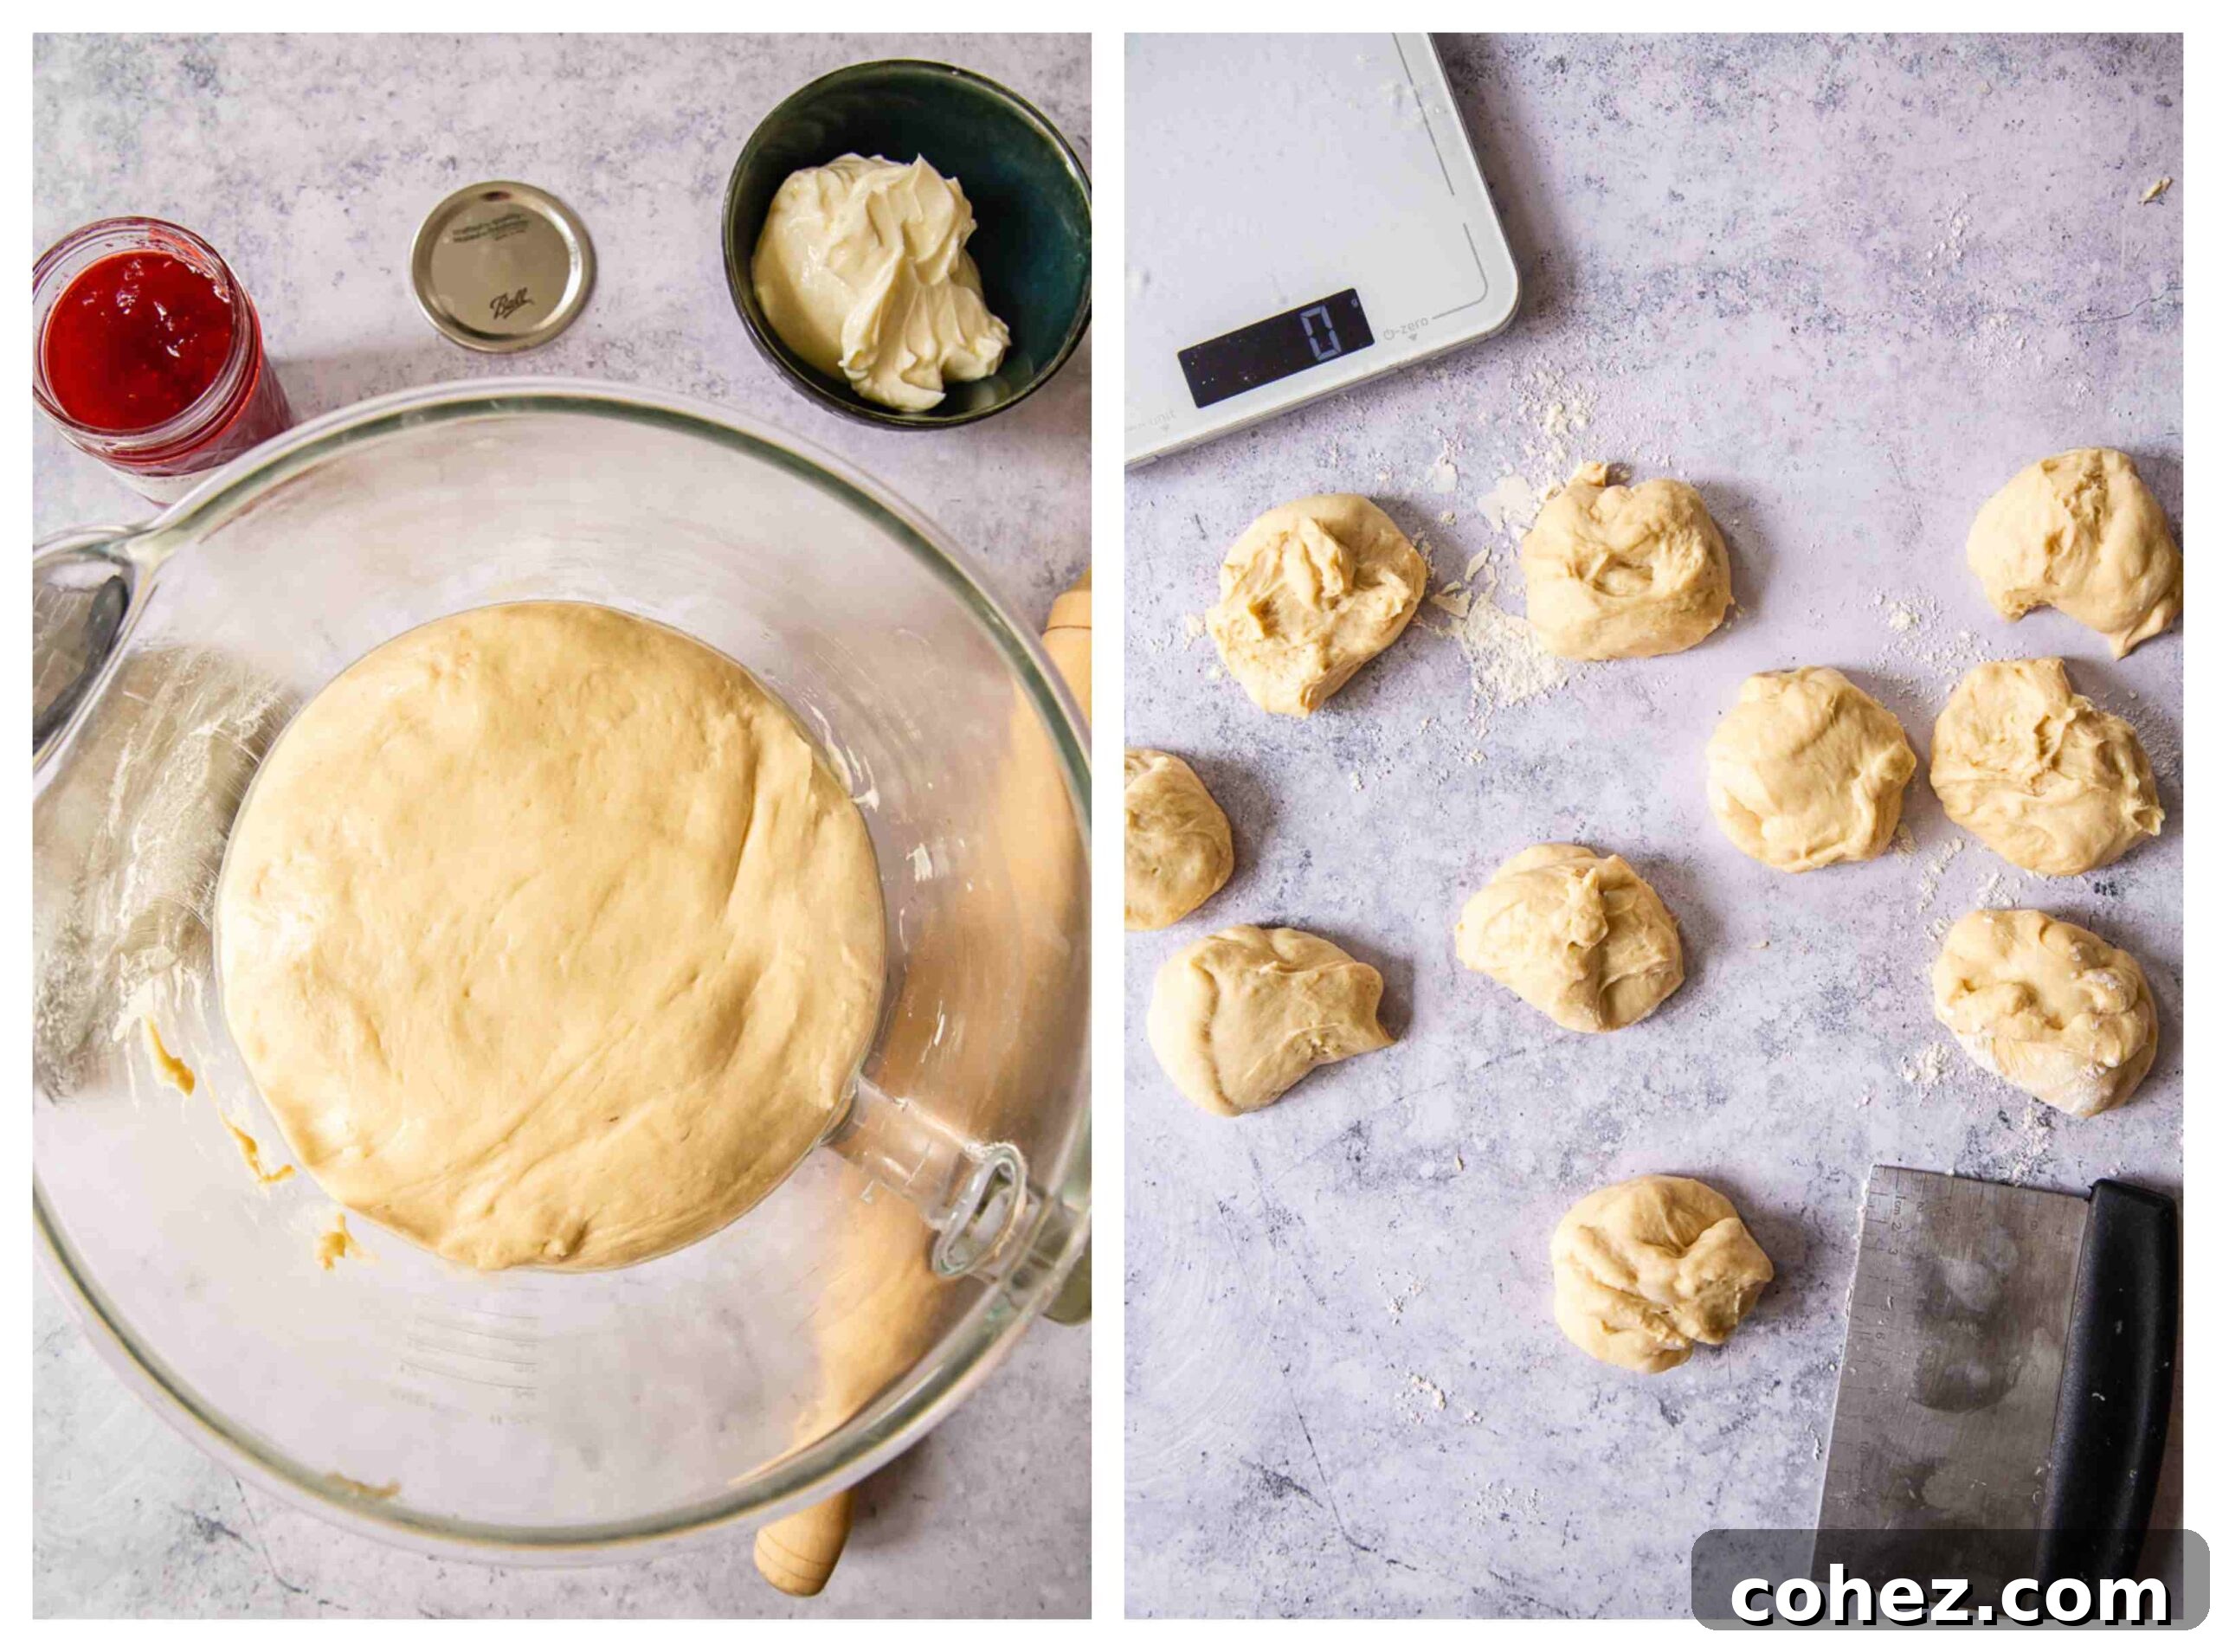
Once your dough has completed its first triumphant rise, it’s time to shape the individual Vatrushka buns. Gently transfer the dough from the bowl onto a lightly floured surface. For uniform results, I highly recommend weighing the dough and then dividing it into 12 equal portions, aiming for approximately 60g (about 2 oz) per piece. If a scale isn’t available, simply divide the dough in half, then divide each half into six equal parts.
Each portion is then shaped into a tight, smooth ball. This is achieved by taking a dough piece and tucking its sides under itself, then rolling it in a circular motion against your work surface until a perfect sphere forms. Place these perfectly shaped dough balls onto a baking pan lined with parchment paper, ensuring they are spaced at least 3 inches apart. This generous spacing is crucial to prevent the buns from merging together during their second rise and baking, allowing them to maintain their beautiful individual shape. Cover the pans with a clean tea towel and let them undergo a second, shorter rise for 20-30 minutes, depending on your room temperature. During this time, the dough balls will expand noticeably, though they won’t quite double in size again.
Assembling and Baking Your Vatrushka Masterpiece
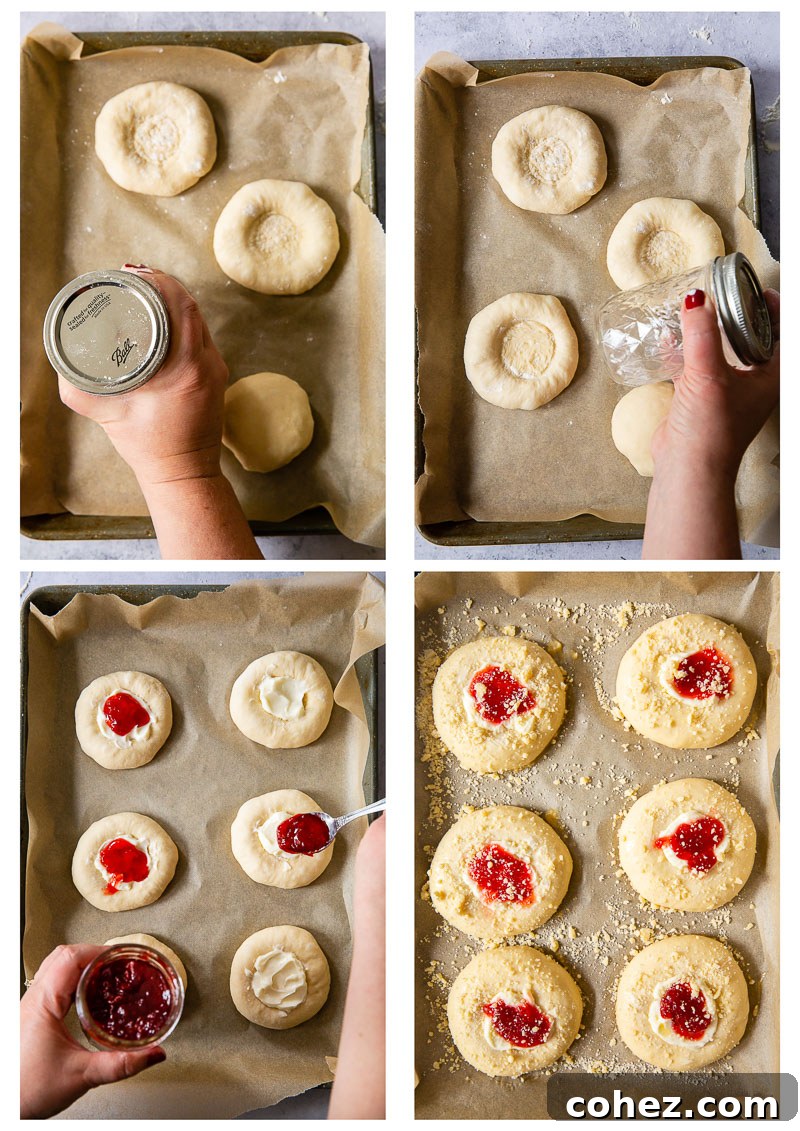
With the buns having completed their second rise, it’s time for the signature Vatrushka step: creating the central well for the filling. Using the bottom of a small jar (a jam jar works perfectly) or your fingers, firmly press down into the center of each dough ball. The goal is to create a well that is deep and wide enough to comfortably hold about two tablespoons of your creamy filling. This depression will cradle the delicious strawberry cheesecake mixture, ensuring it stays neatly contained during baking.
Now, fill each well with approximately one tablespoon of the sweetened cream cheese mixture. To make space for the jam, use the back of a spoon to create a slight indentation in the center of the cream cheese. Then, carefully spoon a generous dollop of strawberry jam on top of the cream cheese layer. The combination creates a visually appealing and incredibly flavorful center.
For that beautiful golden-brown finish, brush the exposed sides of each bun (the raised dough edges around the filling) with a beaten egg. Finally, sprinkle a generous amount of the streusel topping over the egg-washed edges. The streusel, made from flour, butter, and sugar, adds a delightful textural contrast and a hint of extra sweetness.
Bake your Vatrushka buns in a preheated oven at 180°C (350°F) for about 20 minutes, or until they turn a gorgeous golden brown and the filling is bubbly. The aroma that fills your kitchen during this stage is truly intoxicating! Once baked, let them cool slightly before indulging. The anticipation will only make them taste even better.
Essential Tips for Vatrushka Baking Success
Recipe Tips and Notes
- Embrace Bread Flour: For the best texture, always opt for bread flour. Its higher protein content is key to developing strong gluten, which in turn gives your buns that signature fluffy, soft interior and a delightfully chewy crust. All-purpose flour can work in a pinch, but the results won’t be quite as remarkable.
- Mindful Spacing: Traditional Vatrushka buns are perfectly round. To ensure they maintain their individual shape and don’t merge into one giant pastry during baking, arrange them at least 3 inches apart on your baking pan. If necessary, use two pans to give them ample room to expand.
- Perfectly Sized Wells: When creating the depression in the center of each dough piece, make sure it’s both deep and wide enough to accommodate approximately two tablespoons of the filling. A small jam jar bottom is an ideal tool for this, providing consistent size and depth.
- Filling Flexibility: While I’ve used cream cheese for a cheesecake-inspired flavor, the traditional filling often calls for farmer’s cheese, also known as “tvorog” or “twarog.” Tvorog has a slightly tangy taste and a firmer texture compared to cream cheese, offering a different but equally delicious experience. Feel free to use either, or even a blend!
- Jam or No Jam, Cream Cheese or No Cream Cheese: This recipe is wonderfully adaptable. You can choose to make the buns with only jam for a simpler fruit pastry, or with only the sweetened cream cheese for a pure, creamy delight. Both variations are incredibly tasty!
- Flavorful Jam Choices: While strawberry jam is a classic, don’t hesitate to explore other fruit jams. Blackberry is particularly fantastic, offering a lovely tartness. Other excellent options include apricot, cherry, or even a mixed berry compote.
- Ingredient Temperatures Matter: For optimal results, ensure your milk is warm (not hot!) to activate the yeast, and your butter for the streusel topping is firm but not straight from the fridge – slightly softened to room temperature allows for easy crumbling.
Serving Suggestions: When and How to Enjoy Your Vatrushka
One of the many charms of Vatrushka buns is their versatility; there’s truly no wrong time or place to enjoy them. They are equally delightful served for a special breakfast or brunch, providing a sweet start to your day. They make an ideal accompaniment to your afternoon coffee or tea, transforming an ordinary break into a moment of pure indulgence. Pack them in a picnic basket for an elevated outdoor meal, or serve them as a comforting dessert after dinner. Anytime is genuinely the right time for these sweet treats.
While they are incredibly amazing at room temperature, releasing all their subtle flavors and aromas, there’s no strict need to heat them up before serving. However, if you’ve stored them in the refrigerator, allowing them a bit of time to warm up to room temperature will enhance their texture and taste, bringing out their inherent goodness. Pair them with a freshly brewed cup of coffee, a soothing herbal tea, or even a cold glass of milk for a truly satisfying experience.
Storage and Freezing: Keeping Vatrushka Fresh
These delightful Vatrushka buns are perfect for making ahead, ensuring you always have a delicious treat on hand whenever a craving strikes. Properly stored, they maintain their wonderful texture and flavor for several days. To keep them fresh for longer, store the cooled buns in an airtight container at room temperature for up to 2-3 days. For extended freshness, they can be kept in the refrigerator for up to a week. When retrieving from the fridge, allow them to come to room temperature for the best eating experience.
For long-term storage, Vatrushka buns freeze exceptionally well. Once completely cooled, place them in a single layer on a baking sheet and freeze until solid. Transfer the frozen buns to a freezer-safe bag or container, removing as much air as possible, and store for up to two months. When you’re ready to enjoy them, simply thaw at room temperature. You can gently warm them in a low oven (around 150°C/300°F) for 5-10 minutes to refresh them, making them taste as if they were freshly baked.
Explore More Summer Fruit Bakes
If you love baking with seasonal fruits, here are more delightful recipes to inspire your culinary adventures:
- Italian Plum Cobbler
- Rhubarb and Redcurrant Jam Swirled Bread
- Victoria Sponge Cake with Blackberry Compote
- Rustic Strawberry and Cream Cheese Galette
Strawberry Cheesecake Vatrushka Buns Recipe
By Julia Frey of Vikalinka
Prep Time: 1 hr 30 mins | Cook Time: 20 mins | Servings: 12

These sweet and pillowy soft Vatrushka buns are filled with the most delicious strawberry cheesecake filling, making them a perfect rustic bake for any occasion.
Ingredients
For the Dough
- 220ml / 1 cup warm milk, full fat or skimmed
- 7g / 1 tbsp active dried yeast
- 1/2 tbsp granulated sugar
- 85ml / 1/3 cup vegetable oil
- 1 egg
- 0.5 tsp salt
- 400g / 3 cups + 2 tbsp bread flour
For the Filling
- 125g / 4 oz cream cheese, full fat
- 2 tbsp granulated sugar
- 125ml / 1/2 cup strawberry jam, or any jam of your choice
For the Streusel Topping
- 2 tbsp flour
- 1 tbsp butter
- 1 tbsp granulated sugar
- 1 egg for brushing
Instructions
For the Dough
- In a small jar, combine the warm milk, yeast, and 1/2 tbsp sugar. Let the yeast bloom for 5 minutes until frothy. Then, add the egg and vegetable oil, mixing well with a fork.
- In a large bowl of a stand mixer, combine the bread flour with the salt. Pour in the liquid ingredients. Using the dough hook attachment, mix on slow speed for 1 minute, then increase the speed and continue mixing for 10 minutes until you have a very soft and pliable dough. Alternatively, you can mix and knead the dough by hand for about 15 minutes.
- Remove the dough from the bowl. Lightly brush the same bowl with a bit of vegetable oil, then return the dough to the bowl, flipping it over so the oily side is on top. Cover with a tea towel and let it proof in a warm spot of your house for 1 hour. At the end of the proving time, the dough should have more than doubled in bulk.
- Once the dough is ready, take it out of the bowl and weigh it. This will help you divide the dough into 12 equal parts, approximately 60g each. If you don’t have a scale, simply divide the dough into two equal halves, then divide each half into 6 equal parts.
- Take a dough piece and start tucking its sides under itself until you form a rough ball. Then, roll it in a circular motion on a lightly floured surface until you have a tight, smooth ball. Place each ball on a parchment paper-lined baking pan, ensuring they are at least 3 inches apart. Use two pans if necessary. (The space between them will shrink after they have risen and flattened.) Cover with a clean tea towel and let them rise for another 20-30 minutes, depending on the temperature of your house. The dough balls will expand but won’t necessarily double in size during this second rise.
For the Filling
- Meanwhile, in a small bowl, combine the cream cheese with 2 tbsp granulated sugar and set aside until needed. The sugar should completely dissolve in the cream cheese by the time the buns are ready to be filled.
For the Streusel Topping
- In another small bowl, combine the firm (but not fridge-cold) butter, flour, and 1 tbsp sugar with a fork. The streusel should have a sandy texture with a few clumps throughout.
To Shape and Fill the Vatrushka Buns
- Using either the bottom of a small jar or your fingers, firmly press down in the center of each risen bun to create a well deep and wide enough to hold approximately 2 tablespoons of filling.
- Fill each bun with 1 tablespoon of the sweetened cream cheese mixture. Then, make a small indentation in the middle of the cream cheese filling with the back of a spoon to create space for the jam. Drop a spoonful of strawberry jam on top of the cream cheese.
- Brush the exposed dough sides of each bun with a beaten egg, then sprinkle generously with the prepared streusel topping.
- Bake in the preheated oven at 180°C / 350°F for 20 minutes, or until the buns are golden brown. Let cool slightly before serving and enjoying!
Nutrition Information
Calories: 249kcal | Carbohydrates: 41g | Protein: 7g | Fat: 6g | Saturated Fat: 3g | Polyunsaturated Fat: 1g | Monounsaturated Fat: 2g | Trans Fat: 0.04g | Cholesterol: 43mg | Sodium: 161mg | Potassium: 104mg | Fiber: 1g | Sugar: 12g | Vitamin A: 240IU | Vitamin C: 1mg | Calcium: 46mg | Iron: 1mg
Nutrition information is automatically calculated, so should only be used as an approximation.