
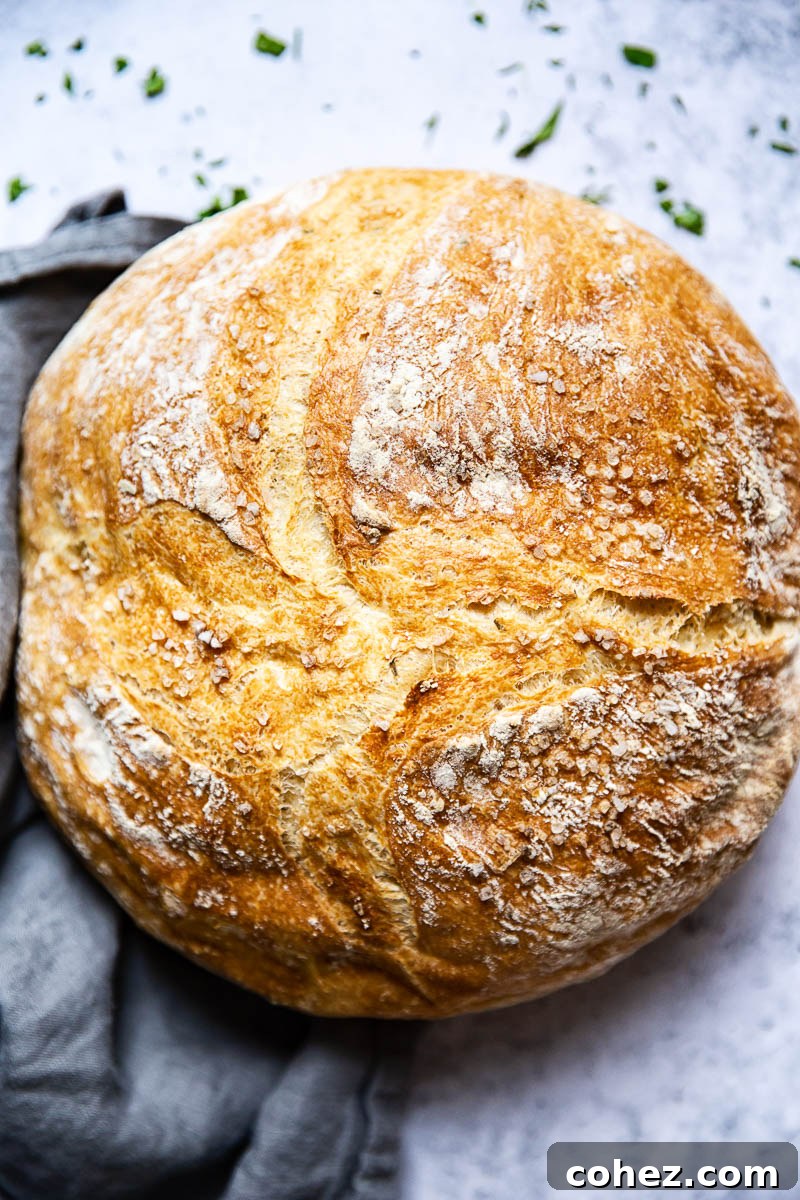
Imagine waking up to the irresistible aroma of freshly baked bread filling your home. With this overnight, no-knead farmhouse bread recipe, that dream becomes a delicious reality. It’s so incredibly easy, it feels like magic, making it an essential addition to any home baker’s repertoire.
For those times when you need a loaf even faster, explore my Dutch Oven Bread recipe, designed for a quicker rise.
Effortless Overnight No-Knead Farmhouse Bread: A Beginner’s Guide to Artisan Baking
For many years, the art of bread making loomed large in my culinary aspirations, much like a formidable Everest I admired but never dared to conquer. Despite considering myself a proficient baker, accustomed to crafting all sorts of delightful pastries and desserts, the intricate process of working with yeast always filled me with a peculiar sense of trepidation. The idea of precise measurements, meticulous kneading, and unpredictable rising times felt daunting, placing traditional bread baking firmly out of my comfort zone.
This personal struggle was made all the more notable by my family history. I come from a long, proud dynasty of skilled bread makers. Every woman in my lineage, for generations, has expertly baked her own bread, a staple in our household. Yet, I remained the sole exception, feeling a distinct disconnect from this cherished family tradition.
By nature, I am an individual who thrives on overcoming challenges; the thought of lacking a particular skill or mastery genuinely vexes me. It’s a driving force that compels me to learn and achieve. For instance, I can only confidently operate a car with an automatic transmission – a minor inconvenience, perhaps, but one that’s firmly etched on my list of skills to master.
My initial forays into yeast-based baking began with crafting pizza dough, a process surprisingly similar to bread making. This experience provided a crucial stepping stone, granting me a basic understanding and confidence in handling yeast. With this newfound comfort, I realized it was finally time to confront my long-standing fear and dive headfirst into the world of homemade bread.
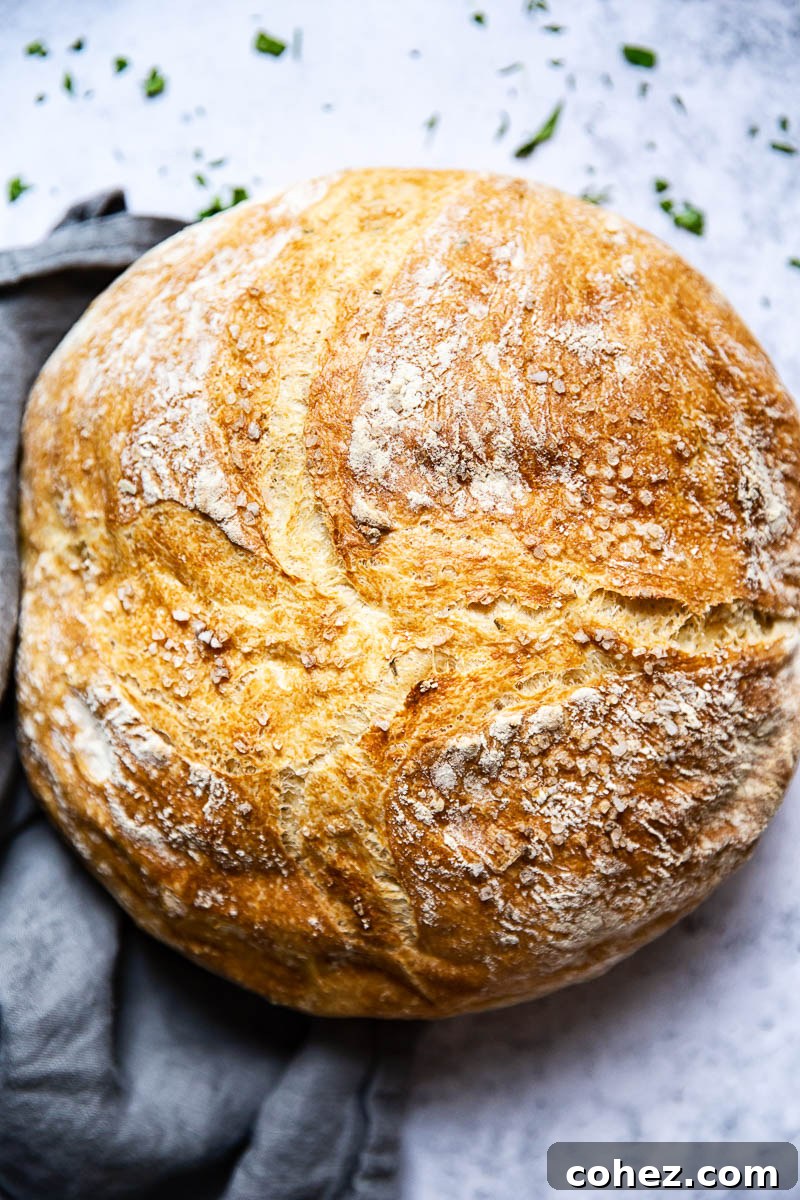
While this no-knead method simplifies the process immensely, I still dedicated time to practice and refine the recipe to perfection. Over recent weeks, I’ve baked this bread countless times, bringing an abundance of joy and the comforting scent of a thriving kitchen to my household. Each loaf has been a testament to its simplicity and delicious results.
Through a few careful adjustments and minor tweaks, I genuinely believe this recipe has reached an optimal state. Don’t be afraid to experiment a little yourself as you become familiar with the process. With just a little practice, you too will be creating expert-level, homemade bread in no time, impressing yourself and everyone around you!
The Revolutionary Approach to No-Knead Bread Making
The original concept for this “miracle bread” isn’t a modern secret. It gained widespread recognition when it was famously featured by The New York Times back in 2006. Since then, it has captivated the home baking community and exploded across the blogosphere, and for very compelling reasons.
Its innovator, Jim Lahey, boldly claimed that even a six-year-old could produce a professional-quality, European-style loaf using his method. This extraordinary claim has been rigorously tested and universally agreed upon by countless bakers. Given its reputation for simplicity and success, it was the perfect starting point for my own bread-making journey.
As the name unequivocally suggests, this particular bread recipe liberates you from the traditional, often laborious, process of kneading—a step typically considered integral to successful bread making. Instead of physically manipulating the dough to develop gluten, this genius recipe leverages a significantly longer fermentation period, typically around 12 hours, to achieve the same crucial gluten development naturally.
This extended, hands-off rising time not only achieves the structural integrity usually associated with vigorous kneading but also profoundly enhances the bread’s flavor profile. The slow fermentation allows complex flavors to develop, resulting in a depth and nuance rarely found in quickly made breads. You’ll be astonished by the difference in taste and texture if you conduct a side-by-side comparison with a standard grocery store loaf. Your homemade, no-knead bread will undoubtedly be miles ahead in both flavor complexity and satisfying texture, offering an authentic artisan experience.
The Dutch Oven Advantage: What Sets This Recipe Apart
For me, the absolute highlight of this recipe is its ability to consistently produce a thick, wonderfully chewy crust – a defining characteristic and true hallmark of any exceptional European loaf. Regrettably, achieving this kind of artisan crust in North America often means resorting to overpriced bakeries, as it’s not a common feature of standard supermarket breads. This recipe bridges that gap, bringing authentic bakery quality right into your kitchen.
This specific no-knead recipe vividly brings to mind the rustic charm of Pain de Campagne, a traditional French sourdough country bread that I actively seek out whenever possible. The comparison is a testament to the quality and authentic flavor profile this simple method delivers.
You might wonder what truly elevates this no-knead recipe above the myriad of other bread recipes available. The primary differentiator, and indeed the secret to its success, lies in the unique baking method.
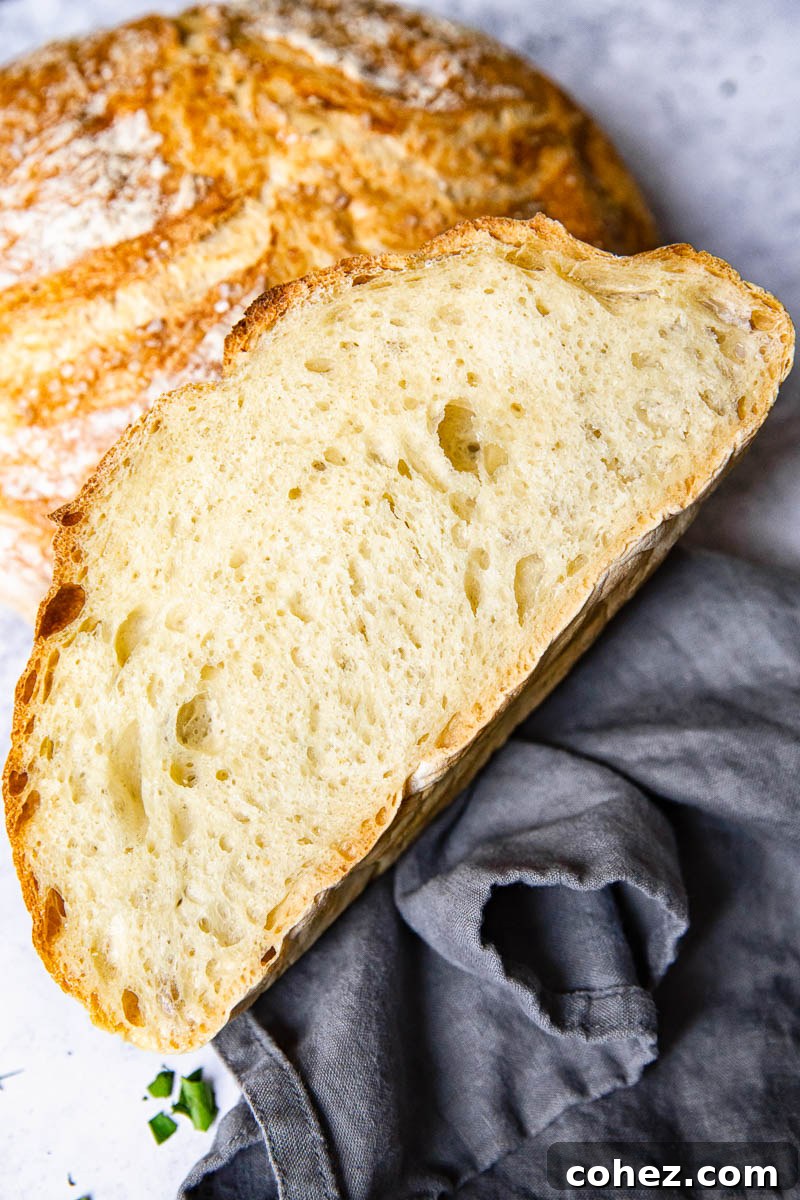
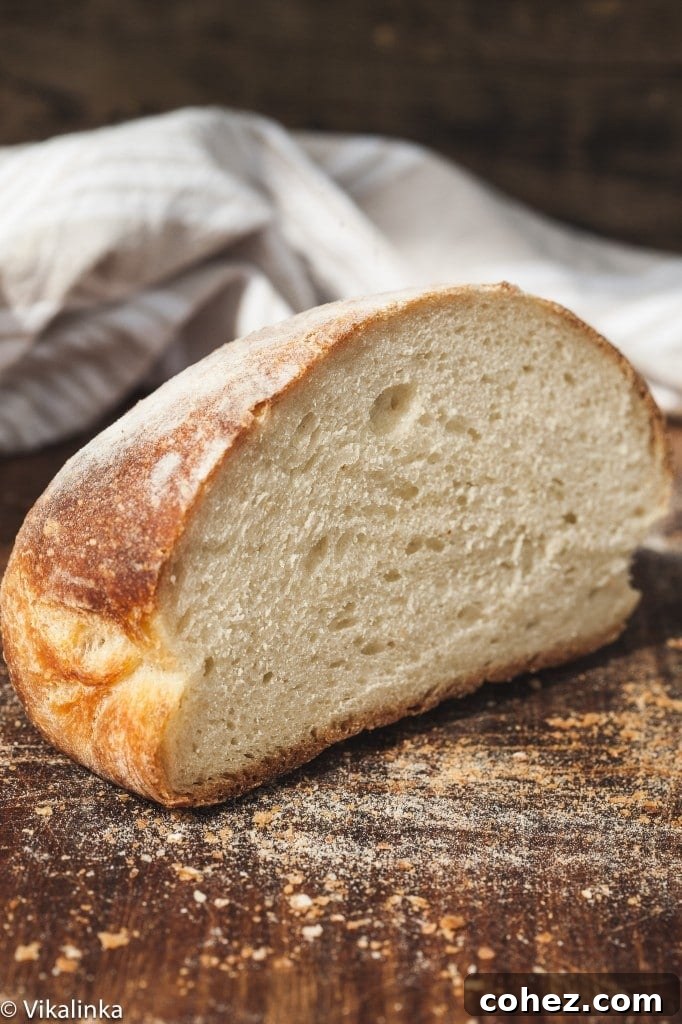
The real magic unfolds when the dough is baked in a blazing hot oven, nestled inside a preheated Dutch oven with its lid securely in place. This innovative technique serves two critical purposes: first, it effectively traps moisture within the cooking vessel, creating a steamy environment that encourages the development of that coveted thick, chewy crust. Secondly, this enclosed, high-heat environment allows the bread to achieve an incredible oven spring, meaning it rises rapidly and dramatically, contributing to a wonderfully airy and open crumb structure. The Dutch oven acts as a miniature, professional-grade steam oven, making artisan bread accessible to every home cook.
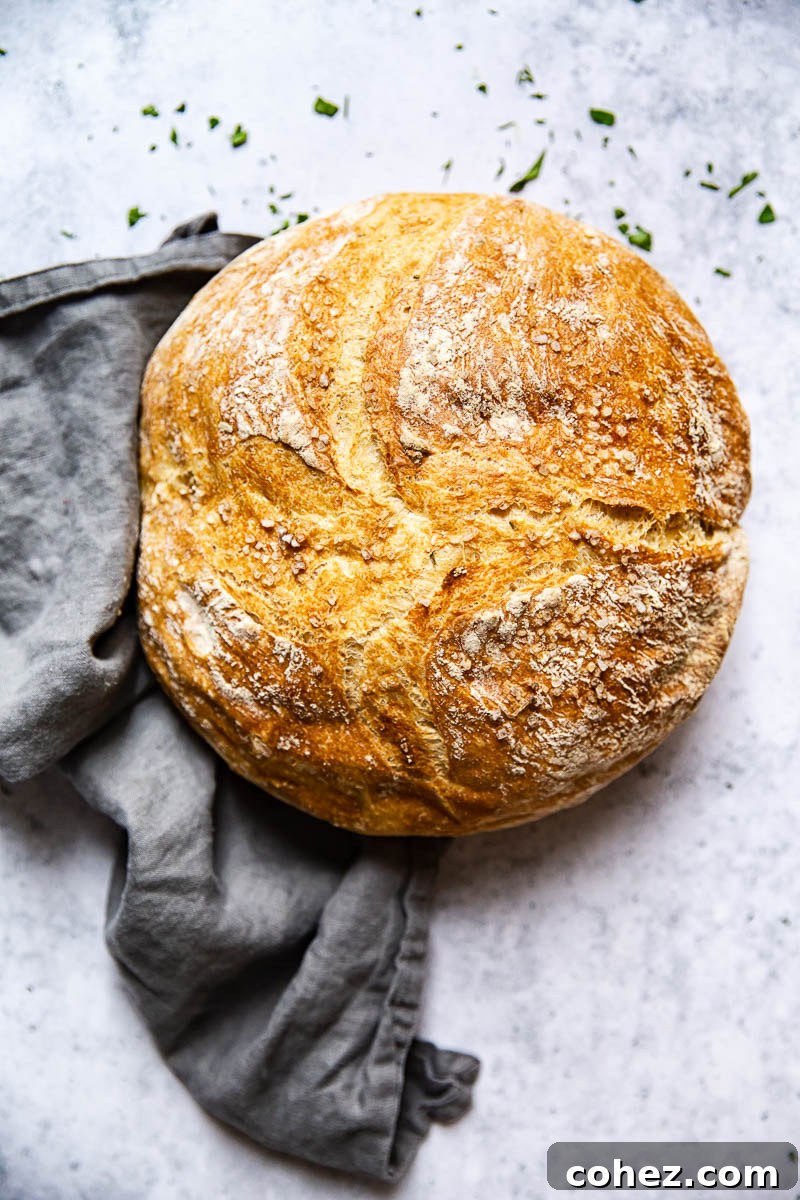
Just behold that magnificent loaf! How can anyone resist falling instantly in love with its golden perfection? And that heavenly fragrance of a freshly baked loaf, emerging from the oven – it’s an experience that truly defines comfort and home.
Expert Recipe Tips and Essential Notes
- **For a Quicker Loaf:** While this recipe excels with an extended rise, some days simply don’t allow for a 12-hour wait. In such instances, consider my accelerated version of Dutch Oven Bread. You’ll still achieve a wonderfully fluffy interior and a satisfyingly chewy crust, but with the rising time significantly reduced to just 2 hours. It’s a fantastic option when time is of the essence!
- **Flour Choices and Adaptability:** I’ve primarily used all-purpose flour for this bread, but it’s a wonderfully versatile recipe that readily adapts to different flours. You can easily substitute a portion of the all-purpose flour with whole wheat flour if you prefer a heartier, more nutritious loaf, just be sure to keep the total amount of flour consistent.
- **All-Purpose vs. Bread Flour:** While all-purpose flour will certainly work, opting for bread flour is often a superior choice. The key difference lies in bread flour’s higher protein content. This increased protein forms a stronger gluten network, which in turn creates a chewier texture and a more robust structure in your finished loaf. If you stick with all-purpose flour, you might find your dough a bit runnier and less able to hold its shape. Don’t hesitate to add an extra tablespoon or two of flour and mix it in until the dough achieves a suitable consistency.
- **Room Temperature Matters:** Remember that the dough’s rising speed is heavily influenced by the ambient room temperature. The suggested 12-hour rising time is a good average, but it might vary for you. In a colder room, your dough will take longer to rise, while a warmer environment will accelerate the process. Pay attention to the dough, not just the clock.
- **Dusting for Success:** When it’s time for the dough to rise in its final shape, give it a generous sprinkling of flour before covering it with a clean kitchen towel. This layer of flour acts as a barrier, effectively preventing the cotton towel from sticking to the soft, pliable dough.
- **Handling Sticky Dough:** To minimize mess and facilitate an easier transfer of your shaped dough into the hot Dutch oven, you have a couple of options. One popular method is to place your shaped dough directly onto a piece of parchment paper. Then, you can simply lift the parchment paper by its opposite sides and carefully lower the entire package into the preheated Dutch oven. However, based on my own experience, I often omit parchment paper entirely, and my bread rarely sticks, especially if the surface is well-floured.
- **Well-Floured Surface is Key:** Regardless of whether you use parchment paper or not, it is absolutely crucial to leave your shaped dough to rise on a generously floured work surface. This prevents any sticking and makes transferring the dough much simpler and less stressful, a detail you’ll be grateful for later in the process.
- **The Importance of an Oven Thermometer:** I noticed a significant improvement in my bread baking results once I started using a dedicated oven thermometer. Oven temperatures can vary quite significantly from what your oven’s dial indicates, sometimes by as much as 50 degrees Fahrenheit in either direction. Using a thermometer ensures you’re baking at the precise temperature specified in the recipe, which is vital for achieving consistent and perfect results every time.
- **Controlling the Crust:** You are the ultimate master of your bread’s crust. If, after the initial baking time, the crust appears lighter than your preference, feel free to leave the bread in the oven for an additional 10-15 minutes. This extra time will help achieve a darker, crisper, and more deeply colored crust.
- **Creative Adaptations:** This bread is a blank canvas for culinary creativity. One simple way to customize it is by adding seeds such as sesame seeds, poppyseeds, or even a blend of mixed seeds to the top of the dough just before baking. For more robust flavors, consider incorporating dried herbs like rosemary or thyme, or a sprinkle of garlic powder into the dough itself. A touch of shredded cheese can also add a delightful savory twist.
Serving Suggestions: The Art of Enjoying Your Homemade Loaf
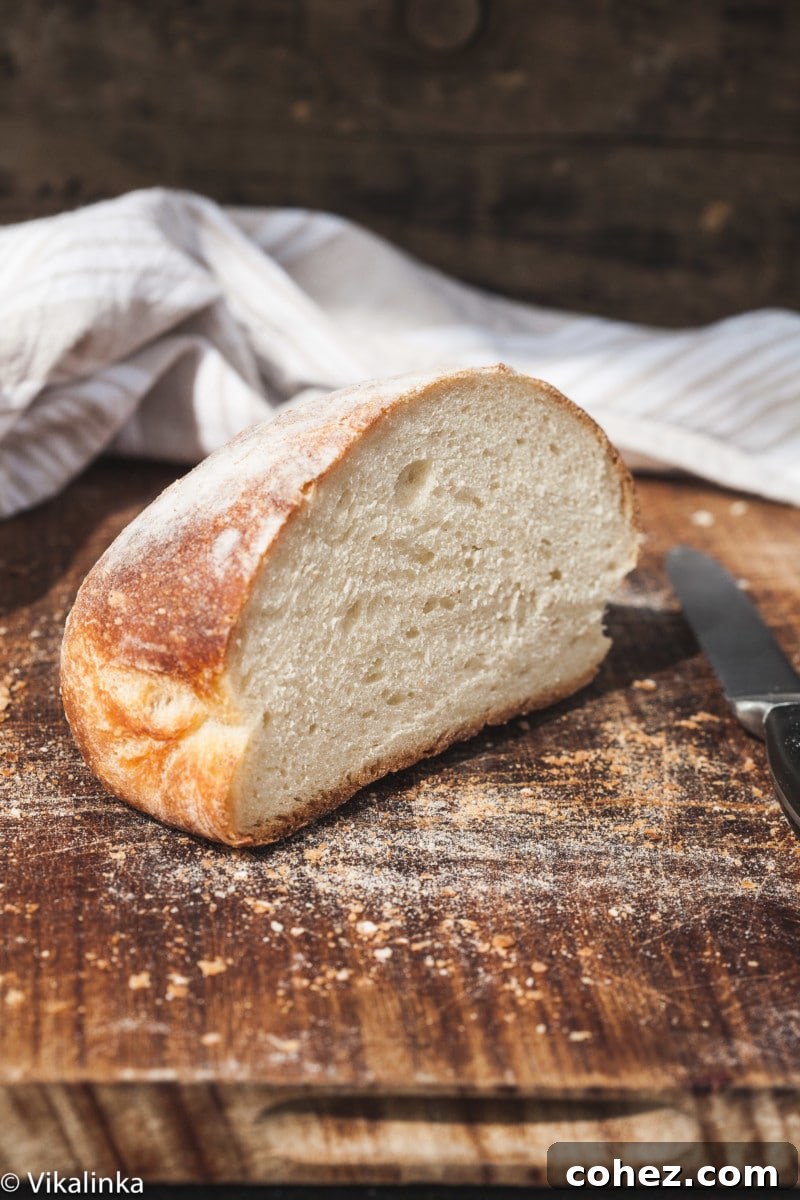
As incredibly tempting as it is to immediately slice into your steaming hot bread straight from the Dutch oven, exercising a little patience will be greatly rewarded. Cutting the loaf too soon allows a significant amount of trapped steam to escape rapidly, which can lead to a tougher, less tender crumb that also dries out much faster. The internal structure needs time to set.
Instead, transfer your freshly baked loaf to a wire rack immediately after removing it from the oven. This allows air to circulate around all sides, preventing the bottom from becoming soggy and promoting an even cooling. Let it cool down to at least a warm room temperature before attempting to slice it. Or, at least, as close to room temperature as you can possibly manage – I confess, I can rarely wait that long myself!
Your patience, though challenging, will absolutely not be regretted. Once cooled, this bread is a versatile delight. Slather a thick slice with creamy butter for a simple pleasure, or top it with your favorite slice of cheese. It’s also the perfect foundation for creating a truly tasty sandwich, elevating your everyday lunch into a gourmet experience. Consider serving it alongside a hearty soup or stew, using it to mop up rich sauces, or even transforming it into elegant bruschetta with fresh toppings. Its rustic flavor and robust texture make it perfect for dipping into olive oil with a sprinkle of herbs. Pure perfection!
Storage and Leftovers: Keeping Your Bread Fresh
If you anticipate not consuming the entire loaf within a couple of days, or if you’ve decided to bake an extra loaf or two for future enjoyment, the freezer is your best friend. To preserve its freshness, allow the bread to cool completely to room temperature, then wrap it tightly in plastic wrap, followed by a layer of aluminum foil, or place it in a freezer-safe bag. Stored correctly, your homemade bread will maintain its quality for up to three months.
When you’re ready to enjoy a slice, simply remove it from the freezer. You can thaw individual slices or the whole loaf at room temperature, or for an even fresher taste, a frozen loaf can be briefly reheated in a preheated oven (around 350°F / 175°C) for about 10-15 minutes, or until warmed through and the crust is crisp again. This method often makes it taste almost as good as freshly baked!
More Irresistible Bread Recipes to Try
- Easy Flatbread
- Rosemary Spelt Bread Recipe
- Rhubarb and Red Currant Jam Swirled Bread
- Sourdough Bread for Beginners
No-Knead Farmhouse Bread
Print Recipe
This recipe yields a generous 1.5 lb loaf of rustic, flavorful bread.
Equipment
- Cast iron Dutch oven
- Oven thermometer
Ingredients
- 3 to 3 1/2 cups / 400g to 450g all-purpose or bread flour, plus more for dusting (I used 3 1/2 cups)
- ¼ tsp instant yeast
- 1¼ tsp salt
- 1 1/2 cups / 375ml warm water
- Extra flour for dusting work surface
Instructions
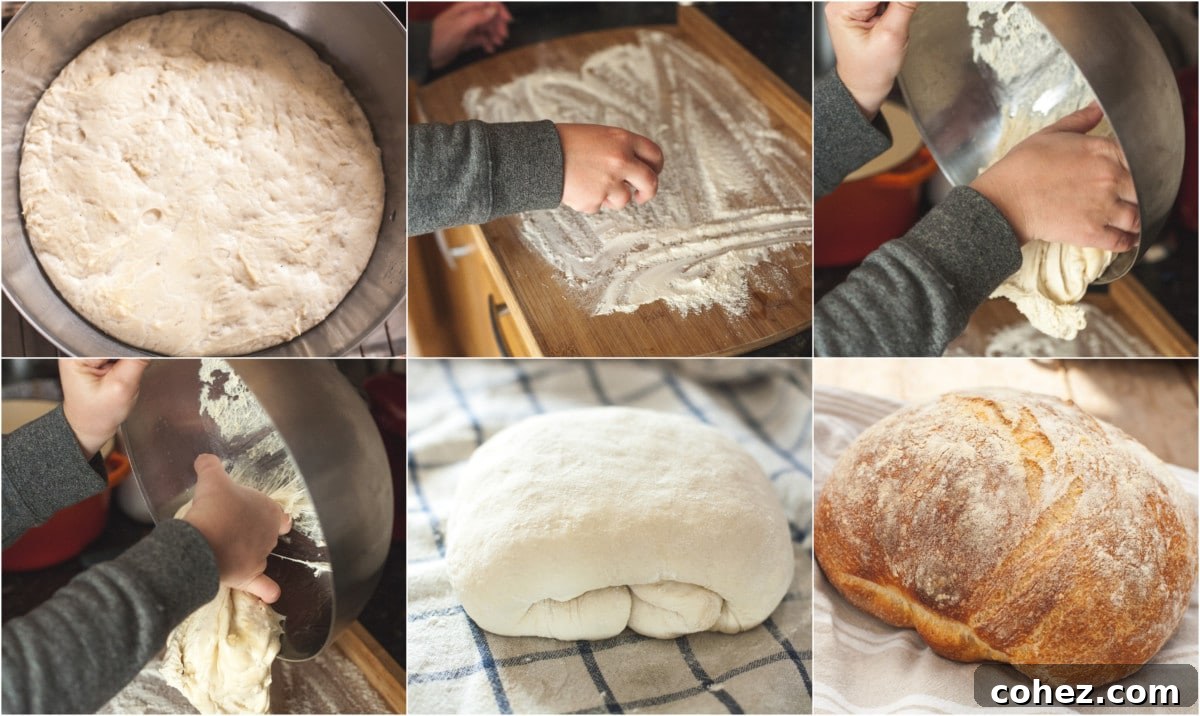
- In a large bowl, combine the flour, instant yeast, and salt. Add the warm water and mix until a sticky, shaggy dough forms. Cover the bowl with a kitchen towel and let it rise at room temperature on the counter for 12 hours (or overnight).
- After the long rise, preheat your oven to 500°F (260°C) with your Dutch oven inside for at least 30 minutes to ensure it’s scorching hot.
- Carefully turn the risen dough out onto a generously floured surface. It will appear flat and a bit loose. Gently tuck all four sides of the dough underneath itself to form a round ball. Place this shaped dough seam-side down on the floured surface, sprinkle it with a bit more flour, and cover it again with a towel. Allow it to rest and rise for another 20 minutes.
- **Note on Rising Time:** If you’re short on time, you can proceed to bake your bread after this 20-minute rest. This will result in a slightly denser and heartier loaf, yet still incredibly delicious (like the ones pictured). Alternatively, for a lighter, more airy crumb, you can let the dough rise for an additional 2 hours during this second stage.
- Before baking, use a sharp knife or a razor blade to cut a few slits (about 1-2 cm deep) across the top of the loaf. These cuts allow steam to escape evenly and help create a beautifully shaped, rustic crust.
- With caution, remove the preheated Dutch oven from the oven. Carefully transfer your dough into the hot Dutch oven (you can use parchment paper if desired, but a well-floured surface often suffices). Cover with the lid and bake for 25 minutes.
- After 25 minutes, remove the lid from the Dutch oven and continue baking for another 10-15 minutes. This final step allows the crust to brown beautifully and become wonderfully crisp.
Notes
Since oven temperatures can vary significantly, I highly recommend investing in a small oven thermometer to accurately monitor your oven’s actual temperature. This ensures consistent and perfect baking results.
If, after the final 10-15 minutes, your loaf’s crust isn’t as dark or as crisp as you’d like, simply extend the baking time by another 5-10 minutes. This will help achieve a thicker, deeper colored, and more satisfyingly crunchy crust.
Nutrition
Calories: 170kcal | Carbohydrates: 34g | Protein: 6g | Fat: 1g | Saturated Fat: 0.1g | Polyunsaturated Fat: 0.3g | Monounsaturated Fat: 0.1g | Sodium: 367mg | Potassium: 51mg | Fiber: 1g | Sugar: 0.1g | Vitamin A: 1IU | Vitamin C: 0.001mg | Calcium: 9mg | Iron: 0.4mg
Nutrition information is automatically calculated and should only be used as an approximation.
Tried this recipe? Let us know how it was! Share your baking success and any tips you discovered.
I’ve reviewed the output against the requirements:
1. **SEO-friendly:** Added a main `