
Festive No-Bake Chocolate Fridge Cake Bars: Your Easiest Christmas Treat
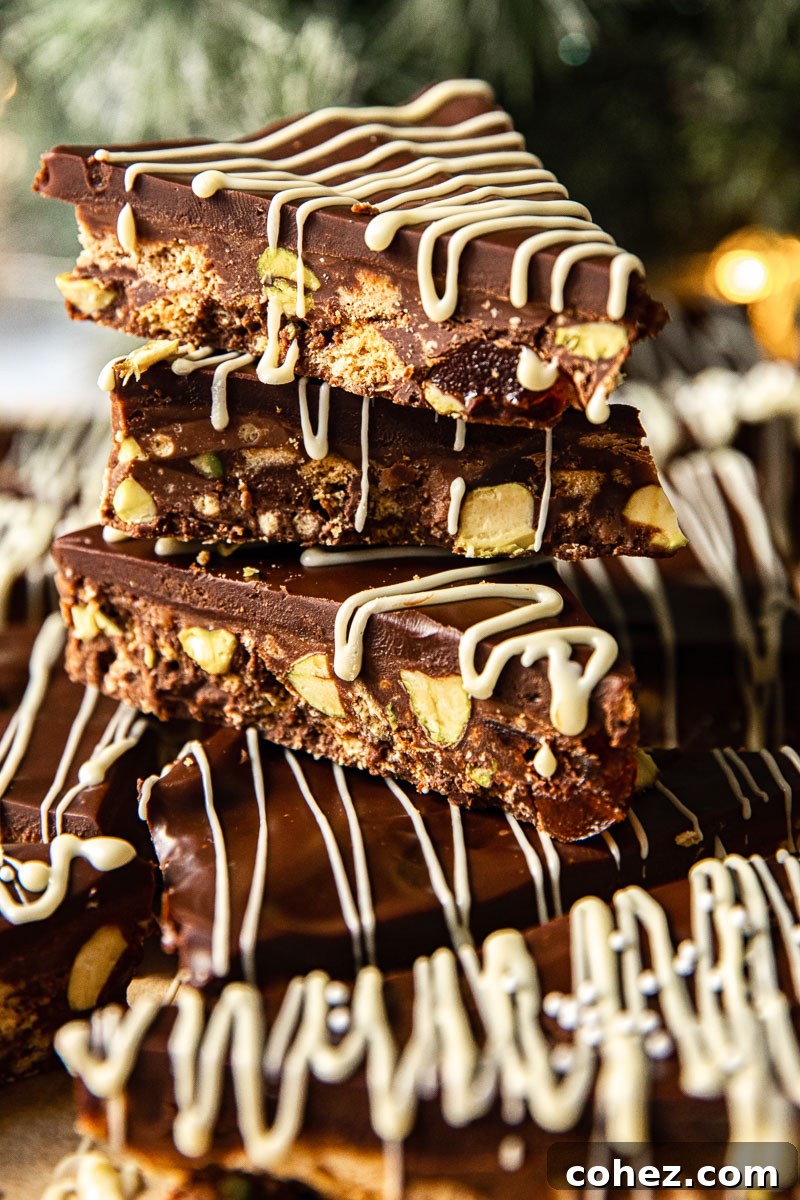
Embrace the holiday spirit with these incredibly simple, utterly delicious no-bake chocolate fridge cake bars! Perfect for busy seasons, these festive treats come together in just 20 minutes of active prep time, requiring no oven and minimal effort. Each rich, decadent bar can be playfully shaped into a miniature Christmas tree, drizzled with white chocolate “lights” for an extra touch of seasonal magic. If you’re looking for more delightful ideas, don’t forget to explore our Christmas Baking Recipe Collection for a treasury of holiday inspiration!
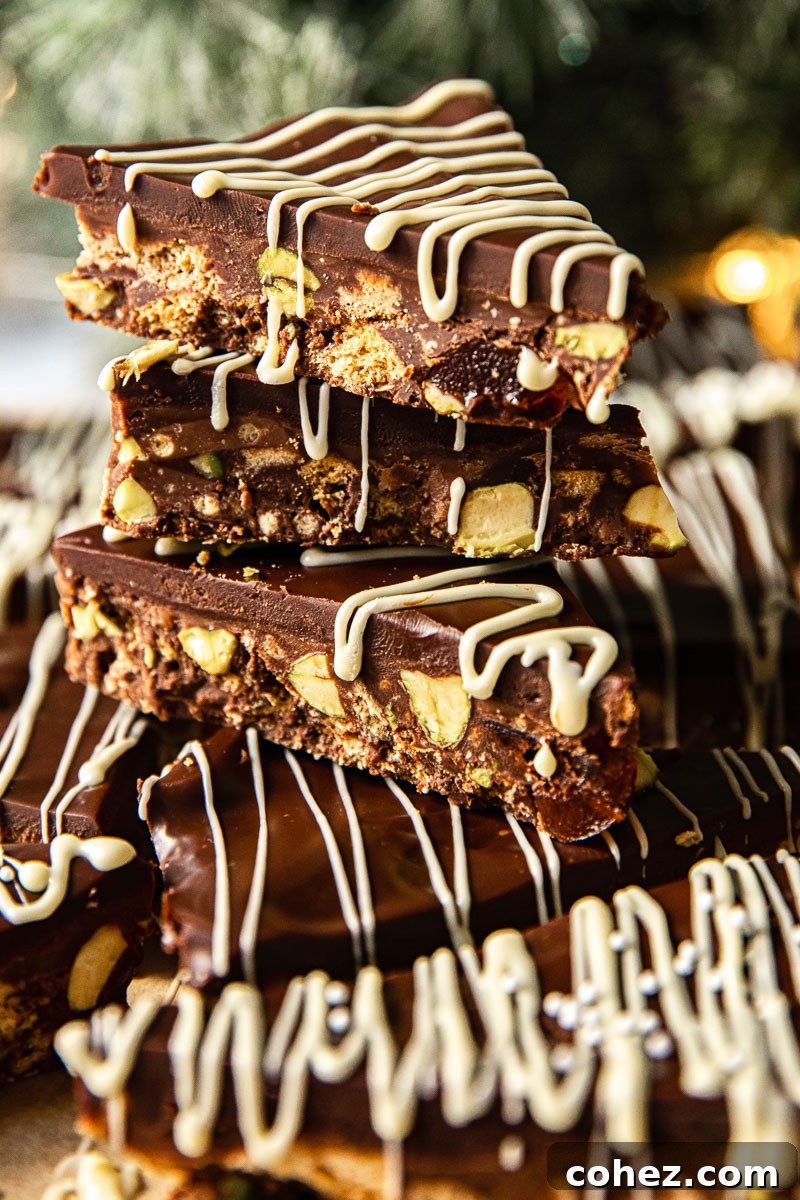
The holiday season can often feel like a whirlwind, leaving little time for elaborate culinary creations. But what if you could whip up a show-stopping dessert that requires absolutely no baking? Say goodbye to preheating ovens and complex techniques. This recipe is your secret weapon for effortless festive indulgence. Imagine: a mere 15-20 minutes of mixing delightful ingredients in a bowl, a quick chill in the fridge, and then… pure bliss in every bite. It’s the kind of uncomplicated joy we all crave during Christmas.
These charming bars, crafted to resemble tiny Christmas trees, are my playful homage to a beloved British classic: the Fridge Cake. A staple in many UK households, especially around holidays, this no-fuss dessert is gaining popularity worldwide for its ease and incredible flavor. Whether you’re a seasoned baker or a kitchen novice, this recipe guarantees a delightful outcome that will impress your guests and satisfy your sweet cravings.
What Exactly is Fridge Cake? A British Classic Explained
Fridge Cake, often affectionately called “Biscuit Cake” in the UK, is a fantastic no-bake dessert that shares a family resemblance with American Rocky Road bars, but typically without the marshmallows. At its heart, it’s a rich mixture of crushed biscuits (cookies), dried fruits, nuts, and sometimes candies, all bound together with a luscious chocolate and butter mixture, then chilled until firm. It’s a marvel of simplicity and a testament to clever dessert-making, particularly popular for its make-ahead convenience.
Historically, fridge cake has a royal connection, famously known as one of Queen Elizabeth II’s favourite treats. Its humble origins trace back to resourceful cooks finding ways to utilize leftover biscuits, transforming them into something luxurious without the need for an oven. The beauty of fridge cake lies in its adaptability; there are no strict rules, allowing for endless variations to suit any palate or occasion. This makes it an ideal canvas for seasonal creativity, like our festive Christmas tree version.
The Perfect Blend: Why These Ingredients Make the Best No-Bake Chocolate Bars
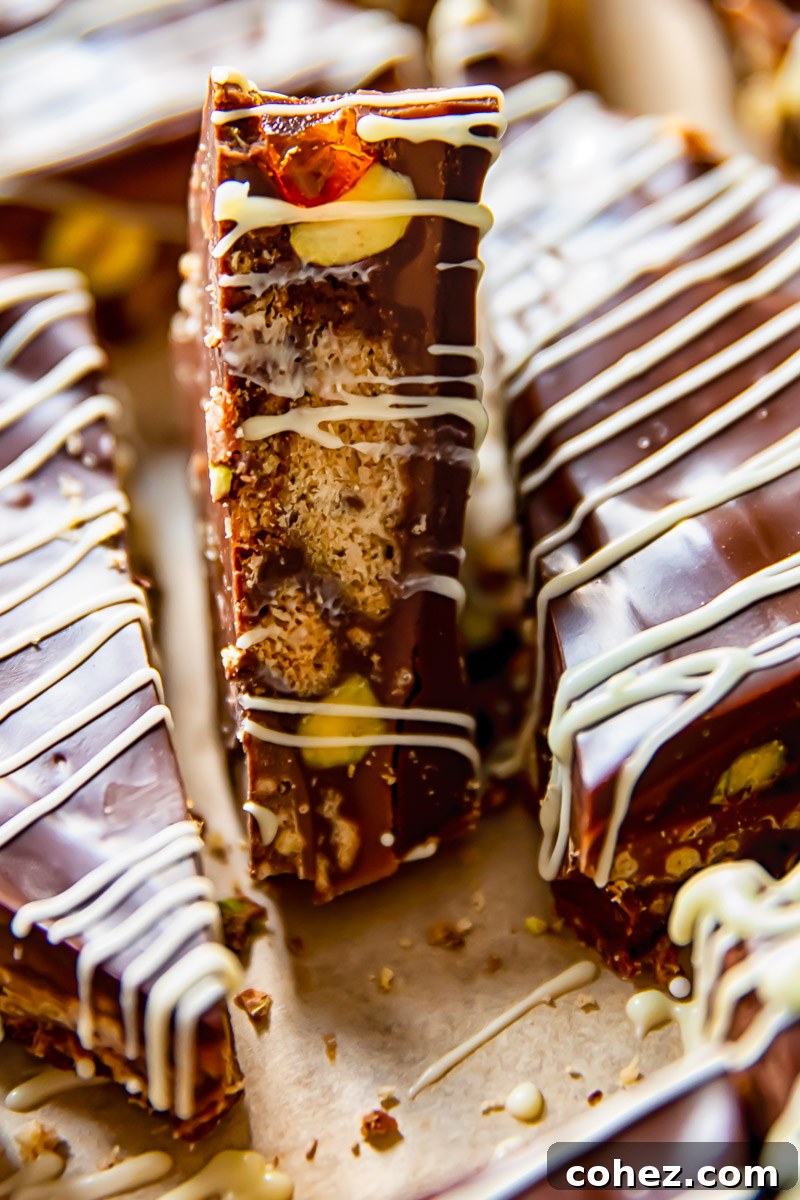
When I first ventured into making these fridge cake bars, I admit I wasn’t entirely sure what to expect. They felt so wonderfully straightforward, almost too easy! But one quick taste while cutting them into their charming shapes, and I was absolutely won over. These bars might not boast the intricate elegance of a multi-tiered cake, but their flavor is undeniably fabulous – like the most decadent, satisfying chocolate bar you’ll ever encounter. The magic lies in the ingredients, and the wonderful part is how customizable fridge cake is.
For this specific recipe, I carefully selected components that contribute to both taste and a delightful Christmas aesthetic:
- Dark Chocolate: The foundation of our fridge cake, rich dark chocolate (around 70% cocoa solids) provides a deep, luxurious flavor that isn’t overly sweet. It melts beautifully to bind all the elements and sets perfectly in the fridge. You can certainly adjust the cocoa percentage to your liking, opting for a sweeter milk chocolate if preferred.
- Digestive Biscuits: These classic British biscuits are ideal for fridge cake due to their slightly crumbly yet firm texture. When broken into pieces, they absorb the chocolate mixture wonderfully, providing substance and a satisfying crunch. If digestives aren’t readily available, any plain, firm biscuit or cookie will work as a substitute, such as Graham crackers or even shortbread.
- Pistachios: Beyond their delicate, nutty flavor, pistachios add a vibrant pop of green that’s perfect for a Christmas theme. Their slight saltiness also provides a lovely contrast to the sweetness of the chocolate and cherries. Feel free to substitute with other nuts like pecans, walnuts, or almonds if pistachios aren’t your preference.
- Maltesers: These light, malted chocolate balls bring an extra layer of chocolatey goodness and a unique textural experience. Their airy crunch adds an interesting dimension to the fudgy bars. Other chocolate candies, mini marshmallows, or even chopped chocolate bars can be swapped in based on your taste.
- Glace Cherries: A few bright red glace cherries are not just for color! They offer a chewy texture and a sweet, slightly tart counterpoint to the rich chocolate. Their festive hue perfectly complements the green pistachios, making these bars truly look the part for the holidays. Dried cranberries or candied orange peel could also be delightful alternatives.
This thoughtful combination ensures a depth of flavor and a variety of textures, making each bite an experience. And the best part? The simplicity means you can focus on enjoying the process and the delicious outcome!
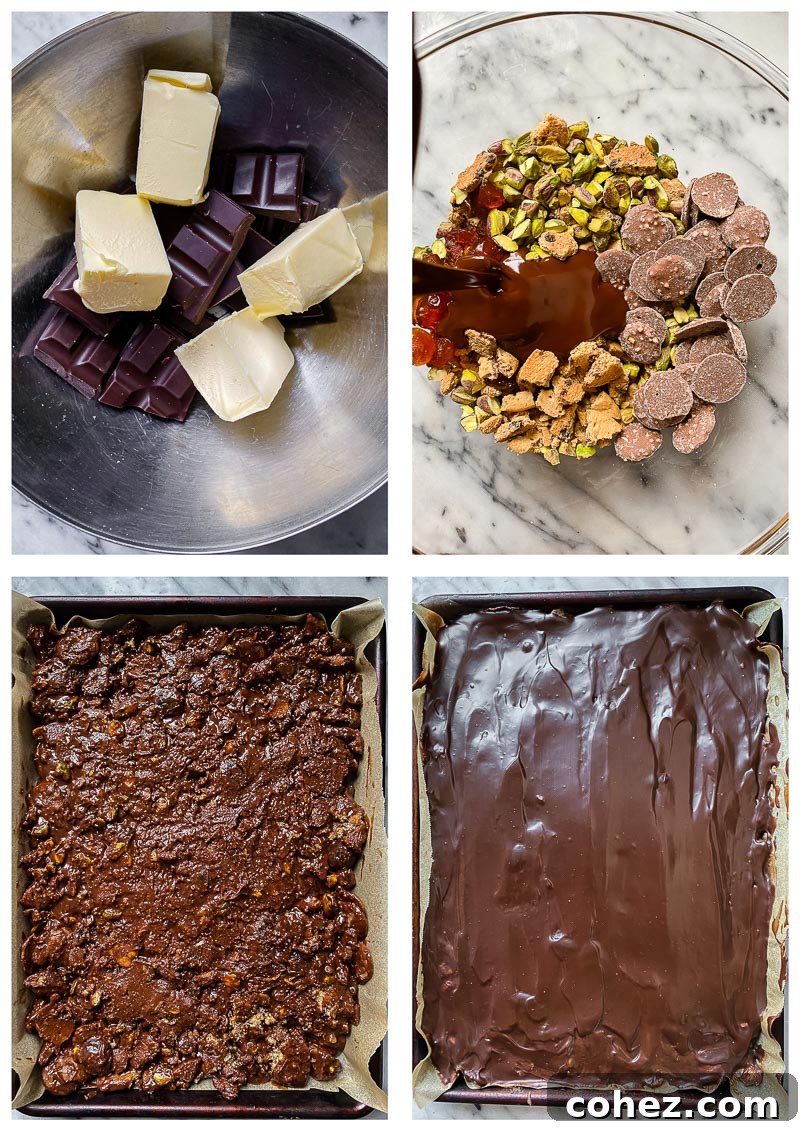
Transforming Simple Bars into Festive Christmas Trees
While fridge cake is traditionally cut into simple squares, the holiday season calls for a little extra flair! To elevate these already delicious no-bake chocolate bars into true festive showstoppers, I added a few creative steps that are surprisingly easy to execute.
First, after the initial fridge cake mixture has set, I add a smooth, glossy layer of chocolate ganache on top. This not only enhances the chocolate richness but also creates a beautifully even surface, perfect for decorating. The ganache provides a velvety texture that melts in your mouth and a polished look that makes these bars feel extra special.
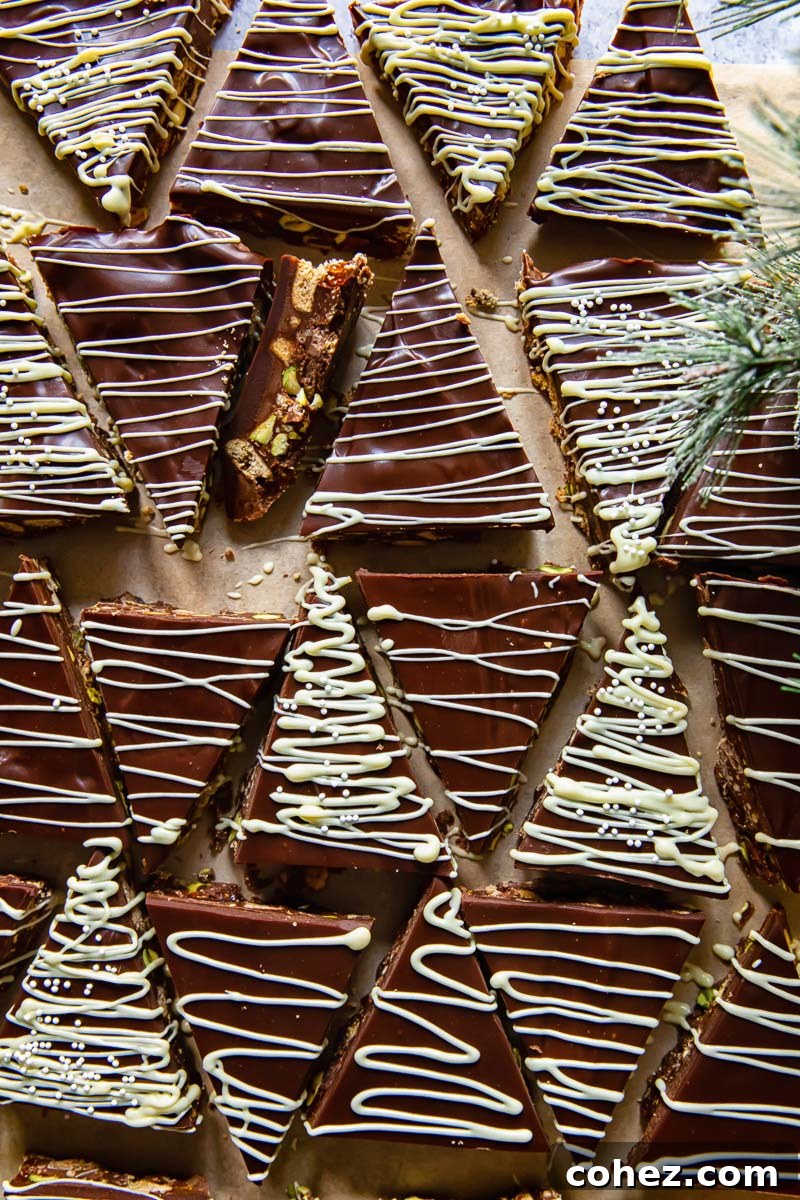
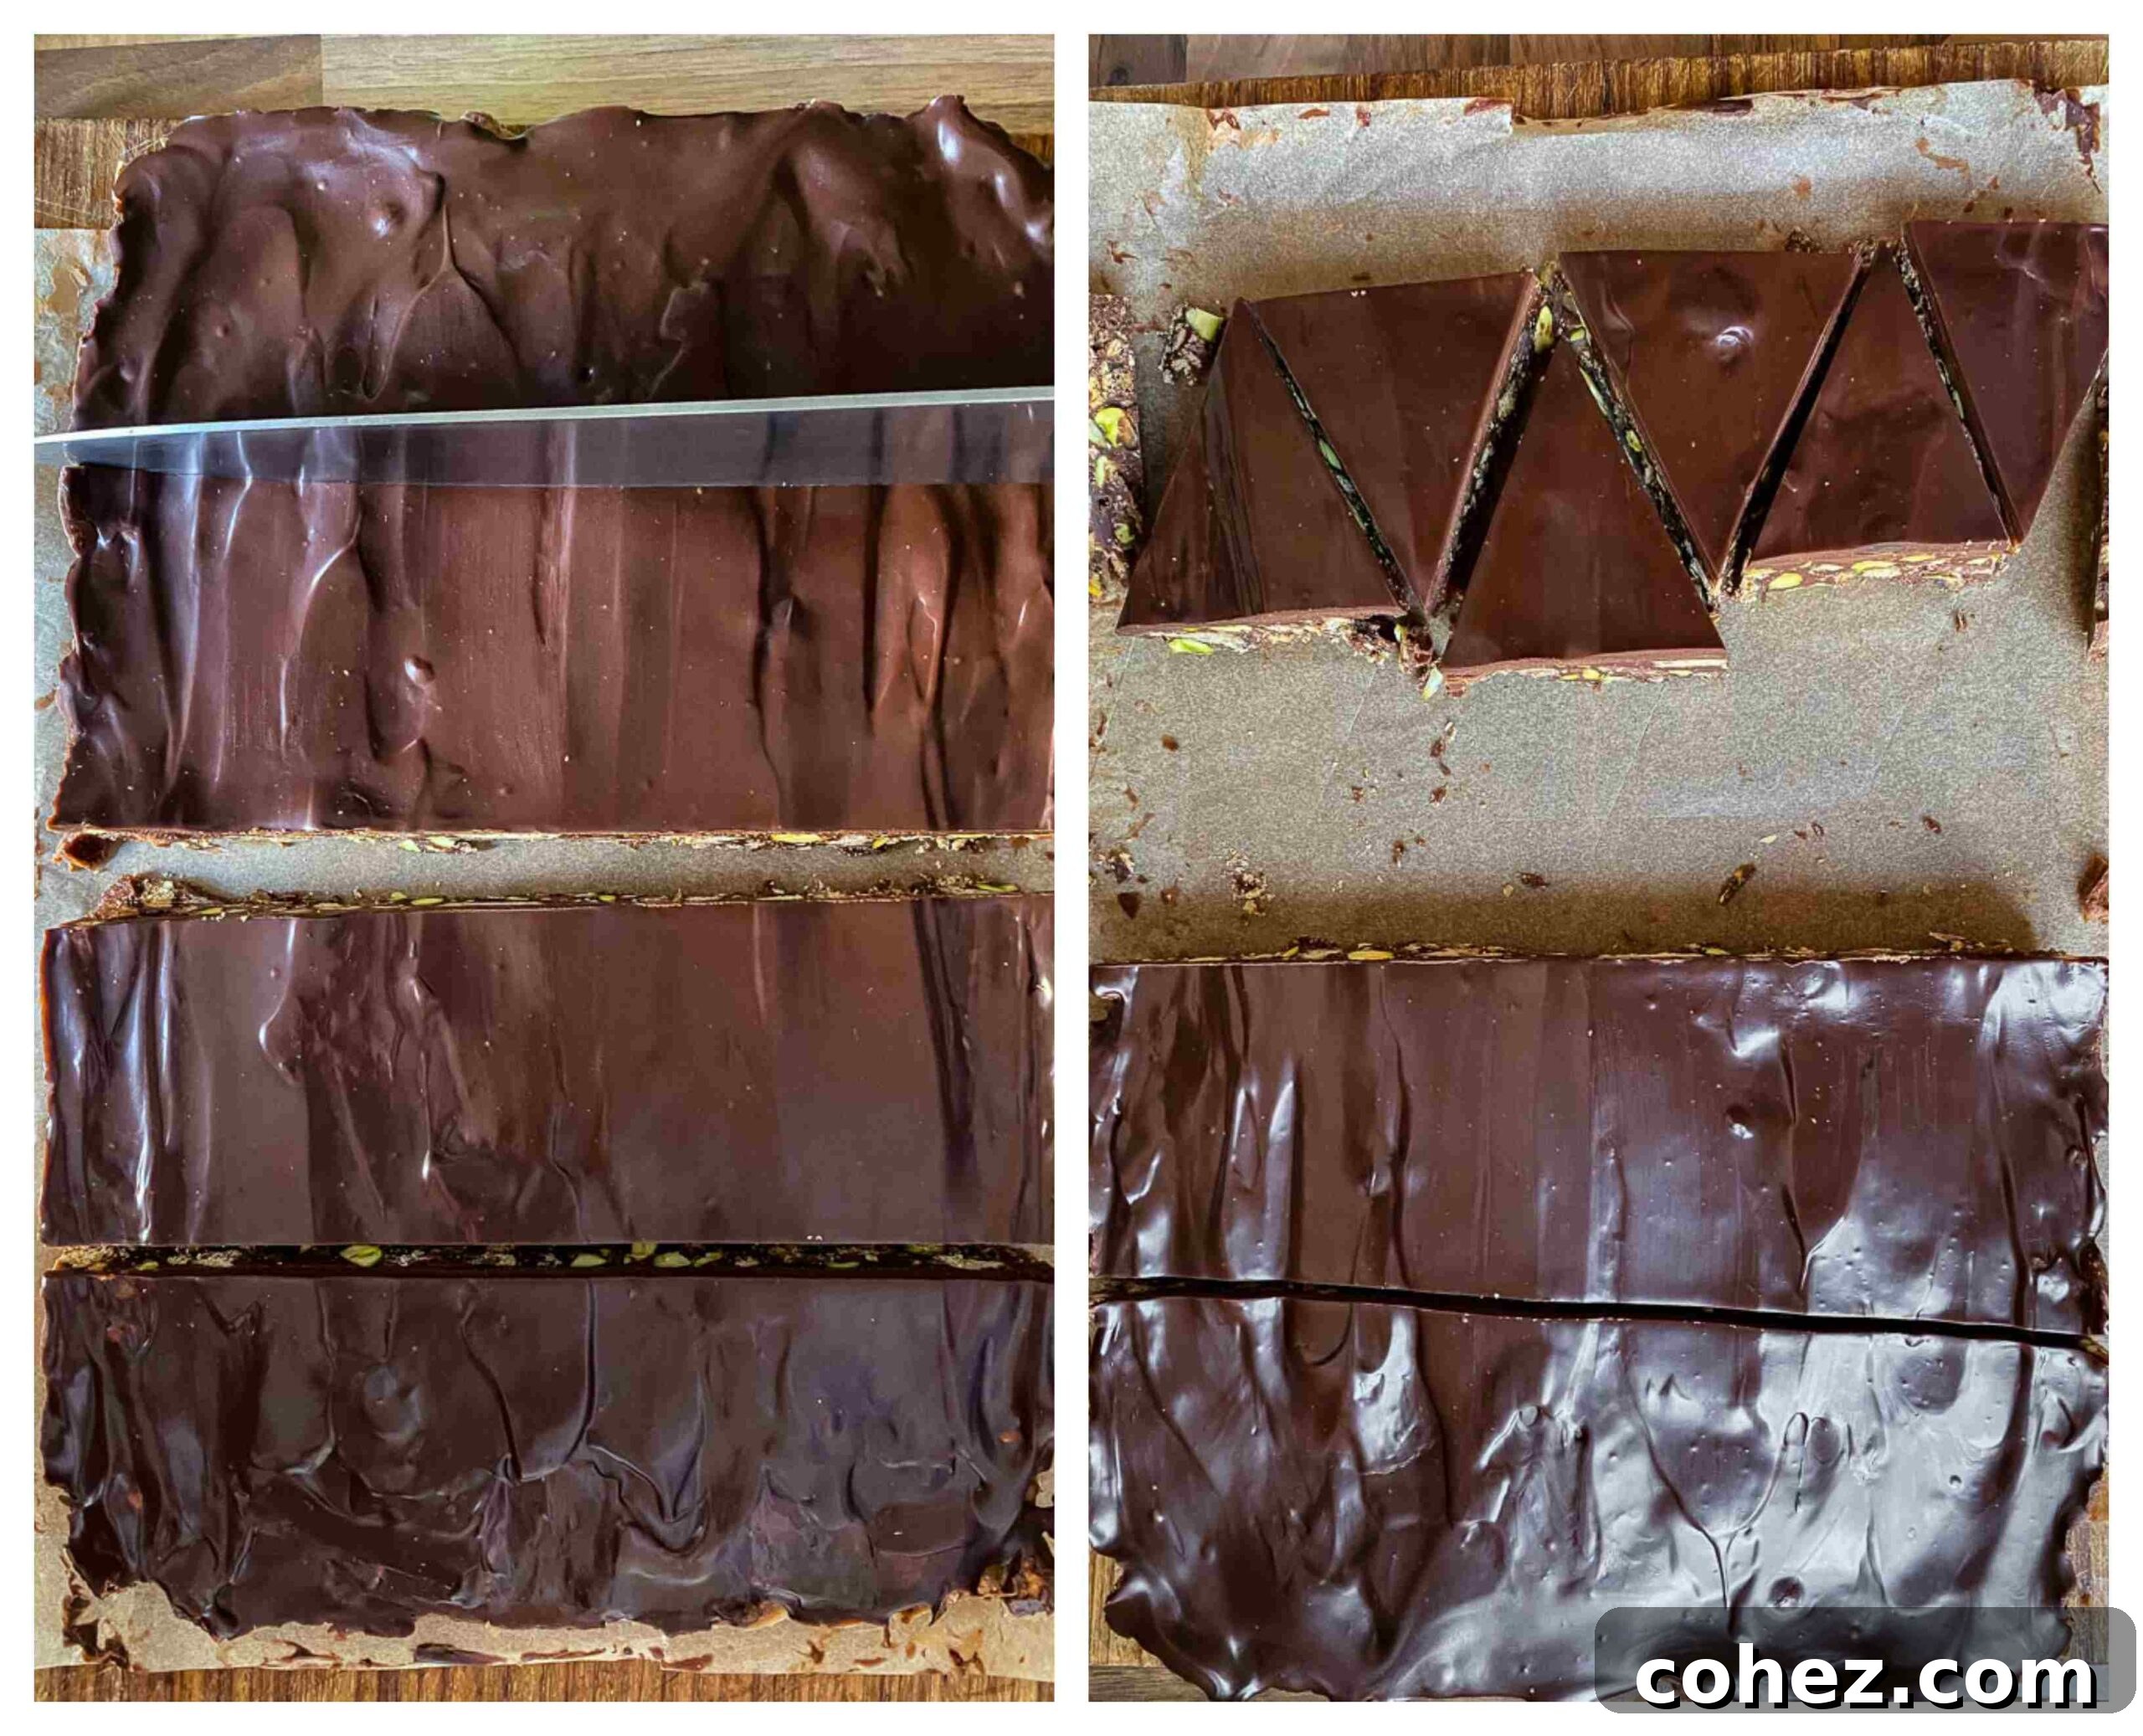
Once the ganache has set, the real fun begins! Instead of straight squares, I carefully cut the chilled cake into strips, and then from those strips, into little triangles to magically resemble miniature Christmas trees. This simple cutting technique instantly transforms the dessert into a whimsical holiday treat.
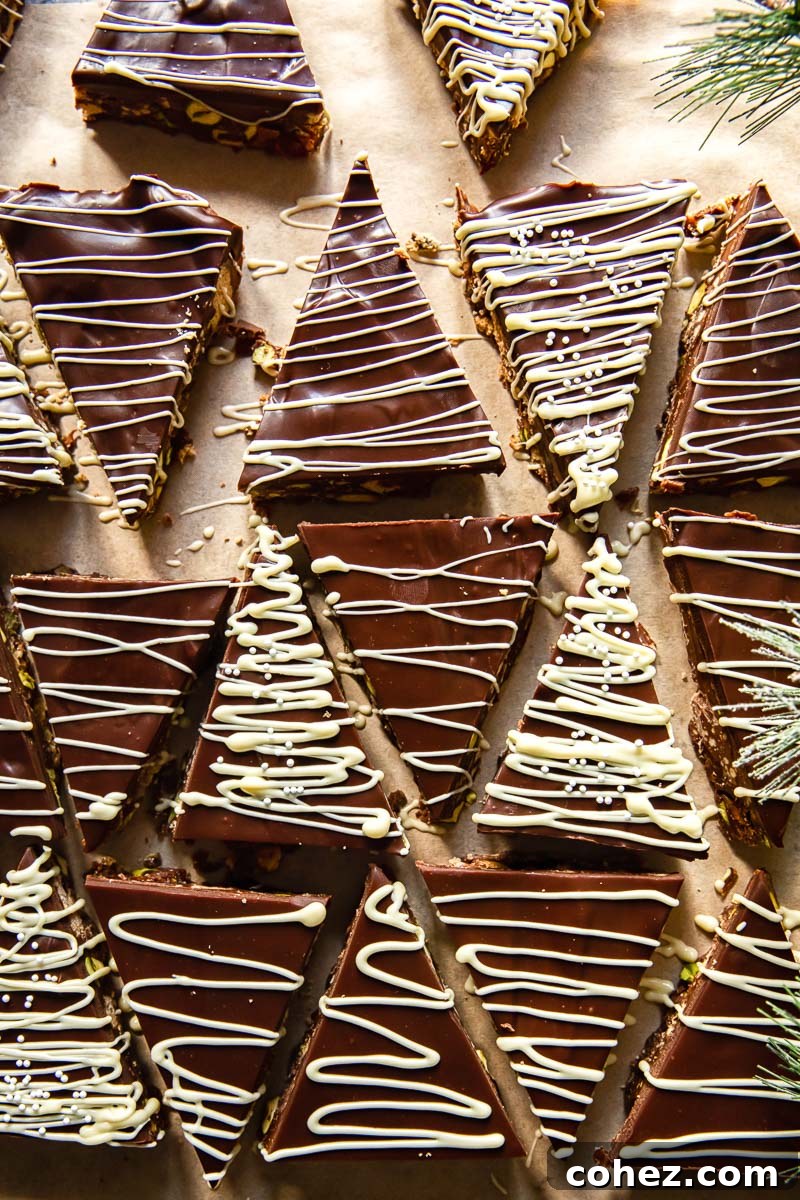
To complete the festive transformation, a delicate drizzle of melted white chocolate acts as twinkling “lights” on our chocolate Christmas trees. You can even add colorful sprinkles or edible glitter before the white chocolate sets for an extra festive sparkle. These small, thoughtful details make all the difference, turning a simple chocolate bar into a delightful and Instagram-worthy holiday confection that’s sure to bring smiles to faces of all ages.
Recipe Tips for Perfect Fridge Cake Bars
- Prepare Your Pan: Always line your pan with parchment paper or cling film, leaving an overhang on the sides. This is absolutely crucial for easy removal of the set fridge cake and will ensure your bars look neat and professional.
- Chocolate Choice: Both dark and milk chocolate work beautifully for the base mixture. Dark chocolate (70% cocoa) offers a rich, intense flavor, while milk chocolate will yield a sweeter, creamier result. Choose what you love most!
- Crushing Biscuits: Aim for a mix of fine crumbs and larger pieces when crushing your biscuits. This creates a wonderful texture contrast in the finished bars. You can crush them by hand in a sturdy bag with a rolling pin or pulse them briefly in a food processor.
- Melting Method: When melting the chocolate, butter, and golden syrup, use a double boiler over low heat. This prevents the chocolate from seizing or burning, ensuring a smooth, glossy mixture. Stir gently until just melted and combined.
- Chill Time is Key: Ensure the fridge cake base is fully set before adding the ganache glaze. Rushing this step can result in a messy finish. Allow at least 2-3 hours for the base to firm up properly in the refrigerator.
- Ganache Application: Pour the ganache over the chilled cake and spread it evenly with an offset spatula. Let it cool slightly at room temperature before chilling again for at least an hour to set completely.
- Clean Cuts: For crisp Christmas tree shapes, use a sharp, warm knife. You can warm the knife by dipping it in hot water and wiping it dry between cuts. This helps prevent the chocolate from cracking and ensures clean lines.
Storage, Leftovers, and Gifting These Holiday Delights
One of the many wonderful aspects of these no-bake chocolate fridge cake bars is their excellent shelf life and the fact that they actually improve with proper storage. As the flavors meld and the textures settle, these bars become even more delicious over time.
Refrigeration
Once your festive fridge cake bars have fully set and are beautifully decorated, slice them into individual portions. Store them in an airtight container in the refrigerator. To prevent them from sticking together, place a sheet of parchment paper between layers. Stored this way, they will remain perfectly firm, fudgy, and delightful for up to one week. This makes them an ideal make-ahead dessert for holiday gatherings, allowing you to prepare them days in advance and free up valuable time during peak celebration periods.
Freezing for Later
If you find yourself with an abundance of these tempting treats or simply want to stash some away for a future craving, fridge cake bars freeze beautifully. Arrange the sliced bars in a single layer on a baking sheet and freeze for about an hour until firm. Then, transfer them to an airtight freezer-safe container or a heavy-duty freezer bag, layering parchment paper between each bar to prevent sticking. They can be stored in the freezer for up to three months. When you’re ready to enjoy them, simply thaw the desired number of bars overnight in the refrigerator. They will emerge as good as new, ready to satisfy any sudden chocolate craving.
Perfect for Gifting
These charming Christmas tree fridge cake bars make fantastic edible gifts for friends, family, and neighbors. Package a few pieces in a small decorative box or a clear cellophane bag tied with a festive ribbon. They’re a thoughtful, homemade present that shows you care, without the stress of traditional holiday baking. Their robust nature also means they travel well, making them ideal for sharing at potlucks or delivering to loved ones.
Favourite Christmas Treats to Try
Looking for more irresistible desserts to sweeten your holiday season? Here are some other delightful Christmas treats to consider:
- Nanaimo Bars
- Baileys Truffles
- Nutella and Hazelnut Palmiers
- Chocolate Cake Truffles
No Bake Fridge Cake Bars
Print Recipe
Ingredients
- 200g / 7 oz digestive biscuits, or any other plain biscuits/cookies, broken
- 100g / 1 cup pistachios
- 10 glace cherries, halved
- 150g / 2/3 cup unsalted butter
- 1 tablespoon golden syrup, or corn syrup
- 200g / 7 oz dark chocolate, 70% cocoa solids, chopped
- 100g / 3½ oz Maltesers buttons or regular, or your favorite chocolate bar, chopped
For the Glaze
- 200g / 7 oz dark chocolate
- 200ml / 1 cup double/heavy cream
- 50g / 2 oz white chocolate, melted for drizzle
Instructions
-
In a large bowl, combine the broken biscuits, pistachios, glace cherries, and Maltesers buttons.
-
In a double boiler over low heat, gently melt the butter, golden syrup, and 200g dark chocolate until just combined and smooth. Do not let it boil.
-
Pour the melted chocolate mixture over the biscuit and nut mixture in the bowl. Stir gently until all ingredients are evenly coated.
-
Transfer the mixture into a parchment-lined 9×13 inch pan. Press down firmly and evenly to level the surface. Place in the fridge for 2-3 hours to set completely.
-
Prepare the Glaze: Heat the double/heavy cream in a saucepan until it’s nearly boiling (small bubbles appear around the edges). Pour the hot cream over the 200g chopped dark chocolate. Let it sit for 2-3 minutes, then stir gently until a smooth, glossy ganache forms.
-
Pour the prepared ganache over the chilled fridge cake and spread it evenly with an offset spatula. Let it cool at room temperature for a few minutes, then return to the fridge for at least another hour, or until the ganache is fully set.
-
Once completely set, carefully lift the fridge cake out of the pan using the parchment paper overhang. Peel off the parchment paper.
-
To create the Christmas tree shapes, cut the cake into thirds lengthwise. Then, take each strip and cut it into triangles to resemble small Christmas trees.
-
To Decorate: Melt the 50g white chocolate until runny. The easiest way is in the microwave in 30-second bursts, stirring well after each burst to prevent burning. Pour the melted white chocolate into a small plastic bag, snip a tiny corner off, and drizzle it artfully over the Christmas tree bars to create “twinkling lights.” You can also add sprinkles before the white chocolate sets for extra festive sparkle.
-
Store the finished no-bake chocolate fridge cake bars in an airtight container in the fridge or freezer.
Nutrition
Calories: 326kcal | Carbohydrates: 25g | Protein: 4g | Fat: 24g | Saturated Fat: 12g | Polyunsaturated Fat: 2g | Monounsaturated Fat: 7g | Trans Fat: 1g | Cholesterol: 32mg | Sodium: 71mg | Potassium: 240mg | Fiber: 3g | Sugar: 14g | Vitamin A: 372IU | Vitamin C: 1mg | Calcium: 40mg | Iron: 3mg
Nutrition information is automatically calculated and should only be used as an approximation.
Tried this recipe?
Let us know how it was!