
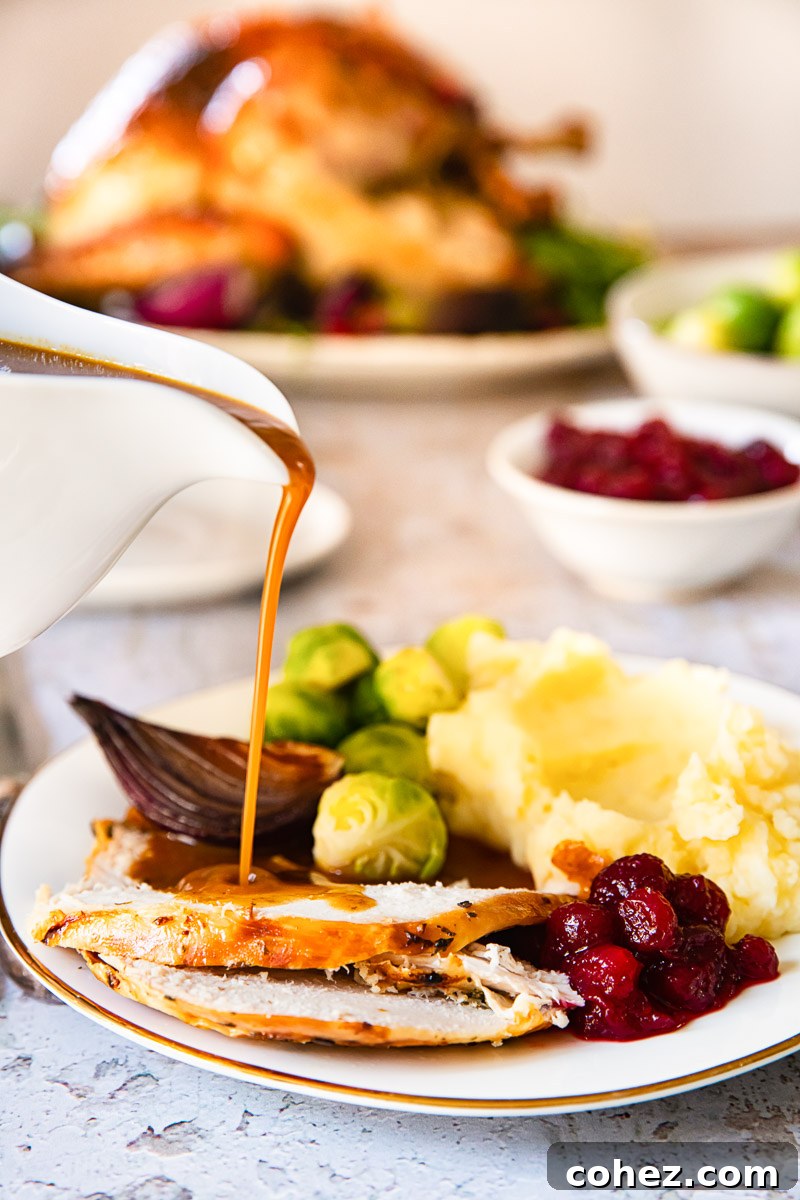
Easy Homemade Gravy Recipe: Your Secret to a Perfect Roast Dinner
Every memorable roast deserves an exceptional gravy. Forget store-bought packets and discover how to create a rich, savory, and silky-smooth homemade gravy with minimal effort. This easy recipe leverages the incredible flavors from your roast drippings, enhanced by a touch of wine, delivering an unforgettable gravy in just over 10 minutes. It’s the essential accompaniment that will transform your holiday meals and Sunday dinners into truly special occasions.
Looking for the perfect main course to complement this sensational gravy? Don’t miss our cherished recipe for a herb and garlic rubbed roast turkey, specifically designed to create those precious pan drippings you’ll need for the ultimate gravy base!
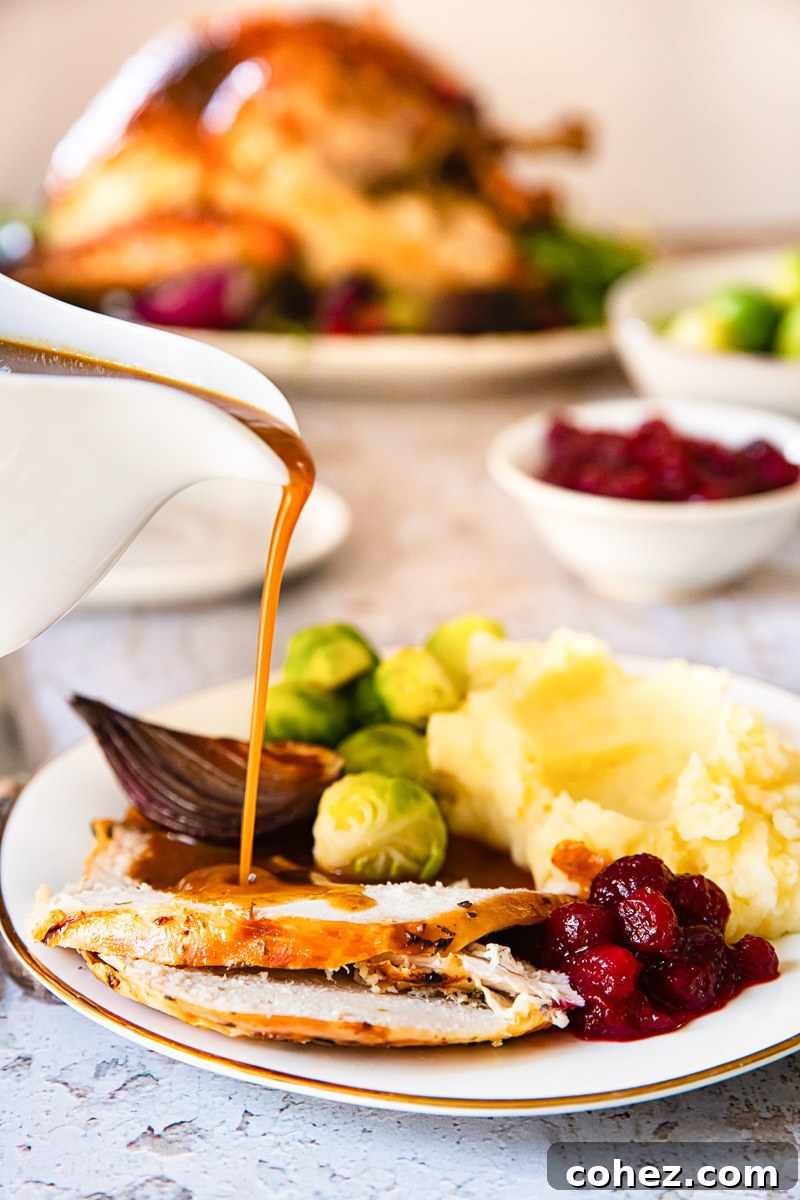
For many culinary enthusiasts and home cooks, planning a holiday feast or a comforting Sunday supper often involves meticulous attention to the main course, an array of vibrant side dishes, and a delectable dessert. Yet, the humble gravy, the unsung hero that seamlessly ties the entire meal together with its warm, savory embrace, frequently goes unlisted. Not because its role is insignificant—far from it! In fact, its importance is so implicitly understood that its presence is simply assumed, an indispensable component without which no roast is truly complete. This inherent understanding might be precisely why it took me some time to finally distill and share my tried-and-true recipe. Sometimes, the most fundamental and cherished elements, those we rely on without a second thought, are inadvertently overlooked in the flurry of recipe sharing.
Why Homemade Gravy Is Always the Superior Choice
The difference between a mass-produced, store-bought gravy and a lovingly crafted homemade version is profound, and once you experience the latter, there’s truly no turning back. Homemade gravy offers an unparalleled freshness and a depth of flavor that can only be achieved through real, high-quality ingredients. It grants you complete control over every aspect, from the seasoning to the consistency, allowing you to tailor it perfectly to the specific roast you’re serving. You can avoid artificial additives, excess sodium, and unfamiliar ingredients often found in commercial gravies. The true magic lies in harnessing the natural juices and caramelized bits—known as “fond”—left behind in the roasting pan. These precious remnants are culinary treasures that infuse your gravy with an authentic, savory richness that simply cannot be replicated by any packet mix or jarred alternative. This recipe teaches you to tap into that natural goodness.
The Secret to Perfect Homemade Gravy Every Time
My recipe is remarkably straightforward, yet it consistently delivers flawless results, producing a gravy that is rich, deeply flavored, and wonderfully smooth. The foundation of truly great gravy rests upon a few key ingredients, each playing an indispensable role in achieving that coveted savory taste and silky texture we all adore.
The Essential Core: Meat Drippings and Fond
The single most important component, the heart and soul of this recipe, is the collection of fat and meat juices—affectionately known as “drippings”—that gather at the bottom of your roasting pan. These drippings are a concentrated source of pure flavor, packed with caramelized meat sugars, rendered fat, and all the savory goodness released during the roasting process. They are solely responsible for the deep, complex umami notes that define a truly well-made gravy. They capture the very essence of your roast, ensuring that your gravy complements it in the most harmonious way possible.
When your roast is beautifully cooked and resting, do not under any circumstances discard these precious remnants! They are culinary liquid gold that will elevate your gravy from merely good to absolutely extraordinary. The quantity of drippings will naturally vary depending on the type of meat, its fat content, and your cooking method, but even a modest amount can contribute significantly to the gravy’s overall profile. These bits, combined with the fat, form the rich base for our roux.
The Flavor Enhancer: A Strategic Splash of Wine
Second only to the drippings in importance is the strategic addition of a good quality wine. While I don’t maintain a rigid preference for the type of alcohol, I frequently find myself reaching for fortified wines such as Port or Sherry, primarily because I typically have a bottle stashed away in my pantry. These particular wines, owing to their more profound flavor profiles and notably longer shelf life compared to standard table wines, contribute a wonderful layer of complexity and a robust character to the gravy. Marsala wine is another superb choice that can introduce a unique, subtly sweet, and nutty undertone, adding another dimension of flavor. For lighter meats like roasted chicken or succulent turkey, a crisp and dry white wine often proves to be the ideal choice, offering a brighter, more delicate counterpoint to the richness of the pan drippings.
Beyond simply adding flavor, the alcohol in the wine serves a crucial functional purpose: it acts as a powerful deglazing agent. As it simmers in the hot pan, it helps to lift and dissolve all those delectable, caramelized browned bits (the fond) that cling to the bottom of the roasting pan. This process further enriches the gravy’s flavor and deepens its color, ensuring every ounce of potential taste is utilized.
Building Body and Silky Texture: Flour and Quality Stock
To provide the gravy with its desired body, luxurious richness, and velvety thickness, we systematically incorporate all-purpose flour and a high-quality stock. Homemade stock, whether chicken, turkey, or beef, is undeniably always the gold standard, offering the freshest, most authentic, and deeply nuanced flavors. Its slow-simmered goodness creates a foundation that’s hard to beat. However, if the time and effort required for making your own stock aren’t feasible for a particular meal, a good store-bought alternative will certainly perform admirably. My personal favorites are concentrated stock pots, such as those produced by Knorr, which provide a surprisingly robust and well-balanced flavor base that can easily stand in for homemade.
Beyond these essential core ingredients, there’s always room for culinary creativity. You can experiment with additional elements to customize your gravy and make it uniquely yours. For instance, incorporating finely chopped red onions, as brilliantly demonstrated in my Red Onion Gravy recipe, can introduce an exciting layer of sweetness, a slight tang, and aromatic depth that elevates the entire profile.
Essential Tips for a Lump-Free and Exquisitely Flavorful Gravy
- Begin in the Roasting Pan: The absolute best place to initiate the gravy-making process is directly within the very roasting pan where your magnificent meat was cooked. The bottom of this pan will be generously coated with incredibly delicious, caramelized “burnt-on” bits—these are concentrated flavor bombs that will infuse your gravy with unparalleled depth! The more rich, caramelized fond you have, the darker and more intensely flavored your gravy will become. While you *could* theoretically transfer the drippings to a separate saucepan, doing so inevitably adds extra washing up and, more crucially, you risk losing some of those precious flavorful bits during the transfer. Embrace the delicious mess and keep all that flavor where it belongs!
- Ensure Even Heat Distribution: A large roasting pan, by its very nature, often requires placement over two elements of your stovetop to guarantee uniform and effective heating across its surface. This step is critically important for properly browning the flour and thoroughly deglazing the pan. Begin by adding butter to the heated pan, allowing it to melt completely and seamlessly combine with any residual fat from the roast.
- Craft a Perfect, Smooth Roux: Once the butter has fully melted and integrated, sprinkle the all-purpose flour evenly over the drippings and butter. Crucially, whisk vigorously and continuously to create a smooth, homogenous paste, often referred to as a “roux.” This diligent whisking is the absolute key to preventing any unwelcome lumps and ensuring your gravy thickens beautifully and uniformly. Cook this roux for approximately one to two minutes, stirring constantly, to lightly toast the flour and eliminate any raw flour taste.
- Deglaze with Precision: Next, with a steady hand, pour in your carefully chosen wine. Observe how the liquid immediately begins to lift and release those wonderfully flavorful browned bits from the bottom of the pan. Continue whisking energetically as the mixture bubbles, allowing the wine to reduce slightly for about one minute. This reduction process concentrates its flavor intensely and ensures any raw alcohol notes are cooked off.
- Incorporate Stock and Simmer to Perfection: Finally, gradually add the stock to the pan, maintaining continuous whisking to ensure all ingredients are thoroughly combined into a smooth, cohesive liquid. Bring the gravy to a gentle boil, then reduce the heat to a steady simmer. Continue to cook, stirring frequently, for approximately 5-7 minutes, or until your gravy achieves your desired consistency—typically a smooth, pourable thickness that gracefully coats the back of a spoon.
- Master the Art of Seasoning: Always, always taste your gravy before serving! Season generously with salt and freshly ground black pepper to your personal preference. Remember that the inherent saltiness of your stock and the roast drippings can vary significantly, so it’s vital to adjust the seasoning judiciously at the very end.
- Optional Flavor Enhancements: For a truly delightful and unexpected twist, particularly when serving with pork roasts, consider stirring in a tablespoon of blackcurrant jelly or redcurrant jelly at the very end of the cooking process. Allow it to melt completely into the hot gravy, which will impart a subtle, fruity sweetness and an added layer of nuanced depth that complements the meat beautifully.
- Achieve Silky Smoothness: As a final touch for an exceptionally refined gravy, I invariably recommend straining it through a fine-mesh sieve before pouring it into your elegant gravy boat. While some individuals don’t mind tiny bits or flecks, I personally adore my gravy to be utterly silky smooth, providing a truly luxurious and sophisticated finish that elevates the entire dining experience. This extra step also acts as an excellent insurance policy, removing any small lumps that might have cleverly eluded your whisking efforts.
Troubleshooting Common Gravy Problems Like a Pro
Even with the simplest and most foolproof recipe, sometimes a culinary curveball can be thrown. Here are quick, actionable fixes for the most common gravy dilemmas:
- Lumpy Gravy: This is arguably the most common issue, often resulting from adding flour too rapidly or insufficient whisking. If you find yourself with lumps, do not despair! Your best first course of action is to pass the gravy through a fine-mesh sieve (as highly recommended in our tips) to effectively capture and remove them, then give it a good, final whisk. For particularly stubborn or numerous lumps, an immersion blender can be a secret weapon, creating a super smooth, uniform result in seconds.
- Gravy is Too Thin: If your gravy isn’t thickening to your desired consistency, you have several straightforward options. The simplest is to continue simmering it gently, allowing more excess liquid to evaporate, thereby concentrating the flavors and thickness. Alternatively, prepare a quick slurry: vigorously mix one teaspoon of cornstarch or additional all-purpose flour with an equal amount of cold water or cold stock until a smooth paste forms. Slowly whisk this slurry into your simmering gravy, allowing it a minute or two to thicken before adding more if necessary.
- Gravy is Too Thick: This is an incredibly easy fix! Simply whisk in a splash more stock, plain water, or even a little milk or cream (for added richness) until your gravy reaches your preferred pourable consistency. Add gradually until perfect.
- Lack of Flavor: If your gravy tastes bland or lacks punch, a generous adjustment of salt and freshly ground black pepper can make an immense difference. You can also deepen the umami and overall savory profile with a dash of Worcestershire sauce, a few drops of soy sauce, or a bit more of your chosen wine. A small pinch of dried herbs like thyme, sage, or rosemary can also contribute aromatic complexity.
- Gravy is Too Fatty/Greasy: If your roast drippings were excessively fatty to begin with, the ideal approach is to carefully spoon off some of the rendered fat before you even begin adding the butter and flour for the roux. This preventative step ensures your gravy isn’t overly greasy. If you realize it’s still too fatty after the gravy is made, a useful trick is to chill it slightly in the refrigerator. The excess fat will solidify on the surface, making it much easier to skim off before reheating.
Serving Suggestions for Your Perfect Gravy
A glorious, meticulously prepared roast dinner simply feels incomplete, almost naked, without a generous, glistening pour of rich, homemade gravy to finish it off. This incredibly versatile recipe is precisely what you need to add that essential, comforting touch, elevating any meal from merely delightful to truly magnificent. Fortunately, this all-purpose gravy pairs exquisitely with a wide and wonderful array of meats, demonstrating its universal appeal. It’s fantastic with a tender Roast Chicken, adds robust depth to a flavorful Pork Roast, and is an absolute necessity for a majestic Prime Rib. Indeed, it is a universal crowd-pleaser that enhances virtually any roasted protein.
To fully appreciate and showcase the exquisite flavors and luxurious texture of this homemade gravy, serve it alongside dishes that are specifically designed to soak up every last, precious drop. I wholeheartedly recommend pairing it with creamy, dreamy Herb and Garlic Mashed Potatoes, where every spoonful becomes a symphony of flavors, and, of course, fluffy, golden Yorkshire Puddings, perfect vessels for capturing its savory essence! Other fantastic companions include perfectly roasted vegetables (especially root vegetables), savory stuffing, or even simple, crusty bread slices for an irresistible dipping experience.
Storage and Leftovers: Effortless Gravy Management
It’s a common, and indeed a welcome, occurrence to find yourself with a healthy amount of delicious gravy leftover after a satisfying meal. Thankfully, this is never an issue with homemade gravy, as it’s incredibly versatile for repurposing in subsequent culinary endeavors! Simply transfer any remaining gravy into an airtight container and store it promptly in the refrigerator. It will maintain its freshness and delightful flavor for a solid 3-4 days, ready to enhance your next meal.
For extended preservation, homemade gravy freezes exceptionally well, making meal prep a breeze. Pour it into freezer-safe containers, or for convenient, single-serving portions, freeze it in ice cube trays. Once frozen solid, transfer the cubes to a freezer bag. Gravy can be stored safely in the freezer for up to 6 months. When you’re ready to use it, simply thaw it overnight in the refrigerator before reheating.
While gravy can be conveniently reheated in a microwave, for the absolute best results and to preserve its smooth texture, I invariably recommend warming it gently in a saucepan over medium-low heat on the stovetop. This method allows for more even heating and facilitates easier, continuous whisking, which prevents separation. If your gravy appears a little too thick or clumpy after refrigeration or thawing, don’t worry—it’s easily remedied! Simply whisk in a splash of water, chicken broth, or even a little milk to restore it to its perfect, pourable consistency.
More Amazing Side Dishes to Complete Your Perfect Meal
- Sausage, Pear and Sage Stuffing
- Port Cranberry Sauce
- Herb and Garlic Mashed Potatoes
- Fresh Green Bean Casserole
- Sweet Potato and Rutabaga Mash
Easy Homemade Gravy Recipe
Julia Frey of Vikalinka
2 mins
10 mins
12 mins
12

Print Recipe
This easy homemade gravy recipe is a must-have for any roast dinner, offering rich flavor and a silky-smooth texture in just minutes. Using pan drippings and a hint of wine, it guarantees success every time.
Ingredients
-
2
tbsp
butter -
2
tbsp
all-purpose flour - Fat and meat juices from the bottom of your roasting pan (aka drippings)
-
125ml / ½ cup
red or white wine (see notes for choice) -
1 litre / 4 cups
stock (chicken, turkey, or beef) - Salt and black pepper to taste
Instructions
-
Prepare the Pan: Once your roast meat is cooked, carefully remove it from the roasting pan and cover it loosely with foil to rest. Place the roasting pan, containing all the precious drippings and fond, directly onto your stovetop. If your pan is large, center it over two elements and turn them on medium heat. If your roast was particularly fatty, spoon off and discard some of the excess fat, leaving approximately 2-3 tablespoons in the pan for flavor and roux.
-
Make the Roux: As the meat juices begin to bubble gently, add the butter to the pan and allow it to melt completely, seamlessly incorporating with any residual fat and drippings. Once melted, evenly sprinkle the all-purpose flour over the butter and drippings. Whisk continuously and vigorously to blend it in until you achieve a smooth, lump-free paste, which is your roux. Cook this roux for about 1-2 minutes, stirring, to lightly toast the flour and cook out any raw taste, developing a nutty flavor.
-
Deglaze and Reduce: Next, carefully pour in your chosen wine. Continue to whisk energetically as the wine deglazes the pan, effectively scraping up all those flavorful, caramelized bits (the fond) from the bottom. Let the mixture simmer and reduce slightly for approximately 1 minute, allowing the alcohol to cook off and the wine’s rich flavor to concentrate into the base.
-
Thicken the Gravy: Finally, gradually add the stock to the pan, continuing to whisk constantly to ensure a perfectly smooth and uniform mixture. Bring the gravy to a gentle boil, then reduce the heat to a steady simmer. Cook, stirring frequently, for 5-7 minutes, or until the gravy reaches your desired consistency – it should be thick enough to coat the back of a spoon, but still delightfully pourable.
-
Season and Serve: Taste the gravy and season generously with salt and freshly ground black pepper to your preference. For an extra-silky texture, strain the finished gravy through a fine-mesh sieve into a warm gravy boat. Serve piping hot alongside your perfectly roasted meat and accompanying delicious side dishes.
Notes
- Wine Choice: For robust beef or pork roasts, red wine is generally more suitable due to its deeper, richer flavor profile. For lighter meats like turkey or chicken, a crisp white wine might be preferred, offering a brighter complement. For a unique, deeper, and subtly sweet taste, consider using fortified wines such as Marsala, Sherry, or Port.
- Seasoning Adjustment: The amount of salt required will significantly depend on the inherent saltiness of your meat drippings and the specific stock you use. Always taste your gravy at the very end of cooking to accurately determine if more seasoning is needed before adding.
- Optional Additions: A tablespoon of blackcurrant or redcurrant jelly can be stirred in at the end of cooking for an added layer of fruity sweetness and complexity, which is particularly delicious when serving with pork.
- Fat Management: If your drippings contain an excessive amount of rendered fat, it is advisable to carefully spoon off some of the excess before adding butter and flour to ensure your finished gravy is rich, but not overly greasy.
Nutrition Information
Per Serving (approx. 1/12th of recipe):
- Calories: 59 kcal
- Carbohydrates: 1g
- Protein: 1g
- Fat: 5g
- Saturated Fat: 4g
- Cholesterol: 5mg
- Sodium: 18mg
- Potassium: 7mg
- Fiber: 1g
- Sugar: 1g
- Vitamin A: 59 IU
- Calcium: 1mg
- Iron: 1mg
Nutrition information is automatically calculated and should be used as an approximation only. Actual values may vary based on specific ingredients, portion sizes, and preparation methods.