
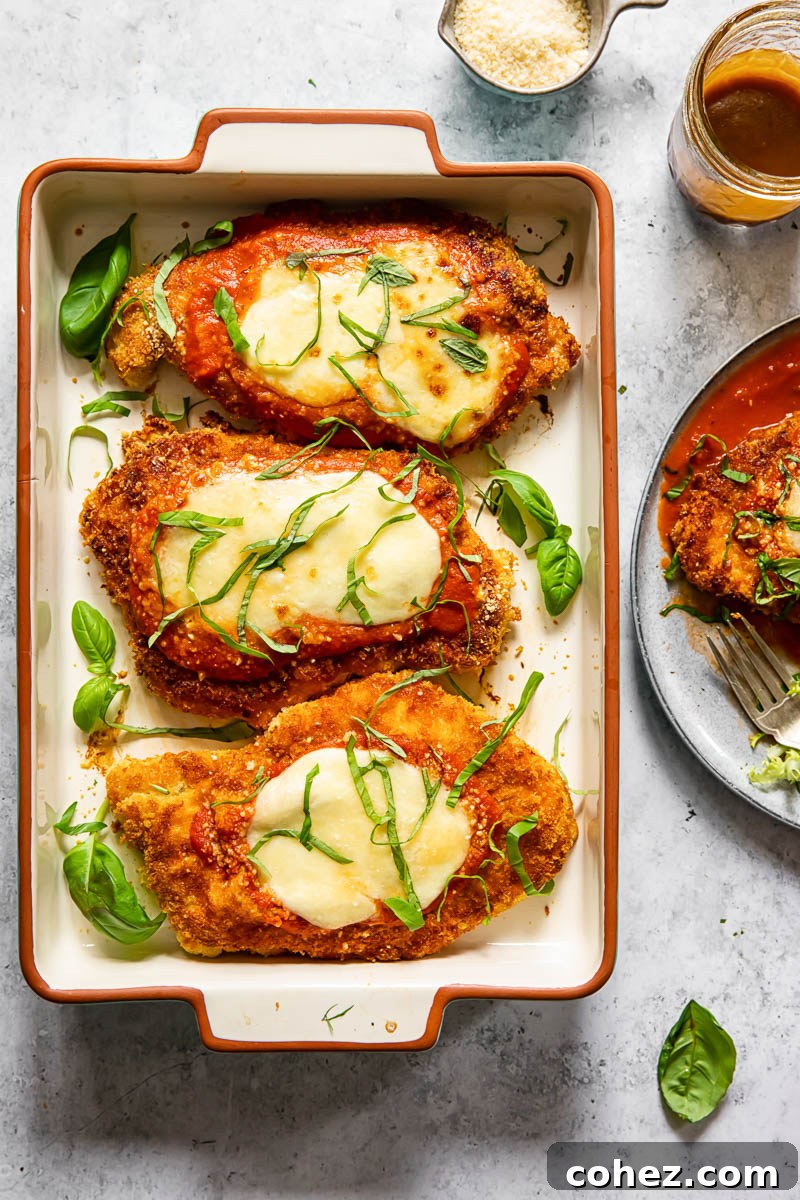
Craving a hearty, satisfying, and utterly delicious meal that’s surprisingly easy to make? Look no further than this classic crispy Chicken Parmesan recipe! It’s the quintessential Italian-American comfort food, featuring tender chicken cutlets coated in a perfectly golden, crunchy breading, smothered in a vibrant, tangy tomato sauce, and crowned with a generous layer of melted mozzarella and Parmesan cheese. This dish promises to be a showstopper at any family dinner or special occasion, offering a delightful balance of textures and flavors that will have everyone asking for seconds.
For a lighter, yet equally flavorful complement, consider serving this magnificent dish with our refreshing Tomato Salad. It’s the perfect way to balance the richness of the Chicken Parm!
Few dishes evoke the warmth and nostalgia of Italian-American cuisine quite like Chicken Parmesan, often affectionately shortened to “Chicken Parm.” While its flavors are undeniably Italian-inspired, this beloved culinary creation is a distinctly American invention. Despite popular belief, if you scour the picturesque regions of Italy, you won’t find a direct counterpart to the Chicken Parm we know and love. This culinary gem, though deeply rooted in Italian traditions, blossomed on American soil, a testament to the innovative spirit of Italian immigrants who adapted their heritage to new ingredients and tastes.
The Origins of a Classic: What’s in a Name?
When you picture a plate of classic Chicken Parmesan, what sensations come to mind? Is it the satisfying “crisp” of the golden-brown crust, or the luscious “sauce” that envelops each bite? Perhaps it’s the “gooey” melted cheese stretching tantalizingly from fork to plate. Remarkably, this dish masterfully achieves all three, creating a symphony of textures and tastes that is truly unique.
At its heart, Chicken Parmesan is characterized by perfectly breaded chicken cutlets paired with a vibrant, aromatic tomato sauce, often infused with fresh basil and garlic. And, of course, a generous abundance of cheese is non-negotiable. This trio forms the foundation of a dish that has captured the hearts (and stomachs) of millions.
The history of Chicken Parmesan, or Chicken Parmigiana as it’s also known, is relatively recent, dating back less than a century. It emerged from Italian immigrant communities in the United States, who drew inspiration from two venerable Italian dishes. The first is Melanzane alla Parmigiana (Eggplant Parmesan), a layered dish of fried eggplant, tomato sauce, and cheese. The second is “Cotoletta,” typically a breaded and fried cutlet of veal (though pork and chicken versions exist), common in Northern Italy. Italian-Americans ingeniously combined the breaded meat cutlet of Cotoletta with the saucy, cheesy preparation style of Eggplant Parmesan, swapping eggplant for chicken to create a more accessible and hearty main course that quickly became an American staple. This fusion represents a beautiful culinary adaptation, showcasing how traditions evolve and new classics are born in a melting pot of cultures.
The Secret to Truly Crispy Chicken Parm: No More Soggy Crusts!
For many years, Chicken Parmesan has been a dish that evokes strong feelings – both adoration and frustration. While its concept is undeniably appealing, countless versions I’ve encountered have fallen short, often leaving diners with an underwhelming experience. The core challenge with Chicken Parm lies in a seemingly contradictory expectation: we yearn for a beautifully crispy, golden-brown breaded exterior that encases succulent, juicy chicken, yet the dish is traditionally baked submerged in a rich tomato sauce. These two desires, crispiness and sauciness, often appear to be at odds, leading to the common lament of a soggy breading.
The usual outcome is a heavy, sauce-laden chicken that has lost its textural integrity, becoming soft and mushy rather than delightfully crunchy. This dampens the entire experience, transforming what should be a dynamic dish into something one-note and dense. For me, that simply doesn’t cut it. A truly great Chicken Parmesan must deliver on its promise of crispness, even with all that delicious sauce and cheese.
But fear not, for there is indeed a method to achieve this culinary paradox – a way to ensure the chicken’s coating remains wonderfully crispy without sacrificing the rich, flavorful sauce that is integral to the dish. The secret lies in a subtle but crucial adjustment to the traditional preparation method: strategically delaying the full embrace of the sauce until the very last minute. This innovative approach allows the chicken to develop and retain its magnificent crispness, offering that satisfying crunch with every bite, while still delivering all the aromatic depth and moisture of the tomato sauce.
My version of Chicken Parmesan, which I confidently believe stands out as one of the best, utilizes this simple yet transformative technique. By applying a measured “dollop” of sauce directly onto each chicken breast just before the final bake, and then serving the remaining sauce generously on the side or underneath, we prevent the breading from becoming saturated and soft during the cooking process. The chicken experiences just enough sauce to meld the flavors and melt the cheese to perfection, but not so much that it becomes waterlogged. The result is a Chicken Parmesan that truly delivers on all fronts: juicy, perfectly cooked chicken, an irresistibly crispy coating, and a luscious, basil-infused tomato sauce, all without the compromise of sogginess. It’s a game-changer for anyone who loves Chicken Parm but has been disappointed by less-than-crispy versions.
Essential Recipe Tips for Perfect Chicken Parmesan
- Start with the Sauce: Begin your Chicken Parmesan journey by preparing the tomato sauce. A simple yet robust red sauce, flavored generously with fresh garlic and basil, sets the stage for success. This versatile sauce is also ideal for dishes like Eggplant Parmesan, making it a valuable addition to your culinary repertoire. Allow it to simmer gently to deepen its flavors while you prepare the chicken.
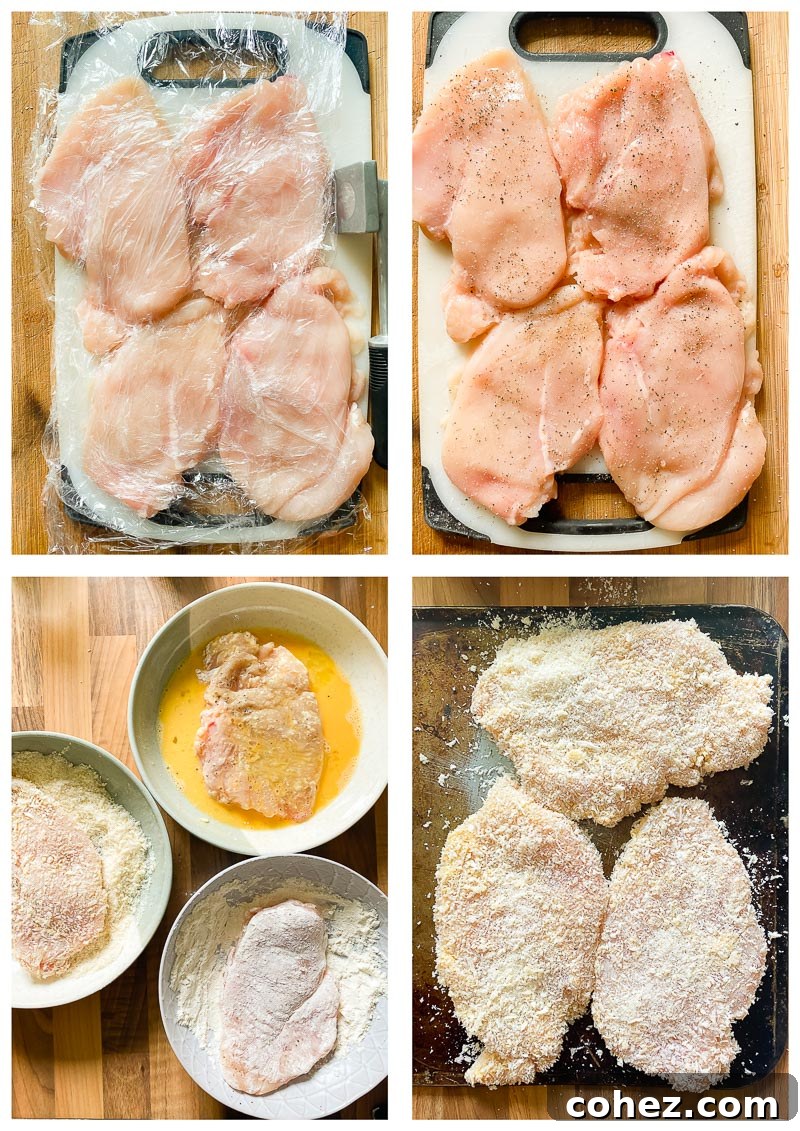
- Evenly Pounded Chicken: To ensure even cooking and prevent the chicken breasts from drying out, there’s no need to butterfly them. Instead, place each breast on a cutting board, cover it with two layers of plastic wrap, and pound the thicker end until it matches the thickness of the thinner part. A meat mallet works wonders for this, though a sturdy rolling pin can also do the trick. This technique ensures that every part of the chicken cooks uniformly, remaining tender and juicy.
- Seasoning is Key: Don’t rely solely on the breading for flavor. I highly recommend seasoning the chicken breasts directly with salt and pepper before breading. This foundational seasoning ensures that the chicken itself is flavorful, preventing an otherwise bland interior, even with a seasoned crust.
- Panko for Unbeatable Crispness: For an unparalleled crispy coating, Panko breadcrumbs are absolutely essential. These Japanese-style breadcrumbs are renowned for their light, airy, and flaky texture, which results in a far crisper crust compared to traditional breadcrumbs. Their unique manufacturing process creates larger, more porous crumbs that absorb less oil and stay crispier longer. It’s a culinary hack worth embracing!
- Parmesan in the Breading: Elevate your breading by mixing finely grated Parmesan cheese directly into the Panko breadcrumbs. This adds an extra layer of savory, nutty flavor and contributes to a richer, more golden crust, enhancing the overall taste and aroma.
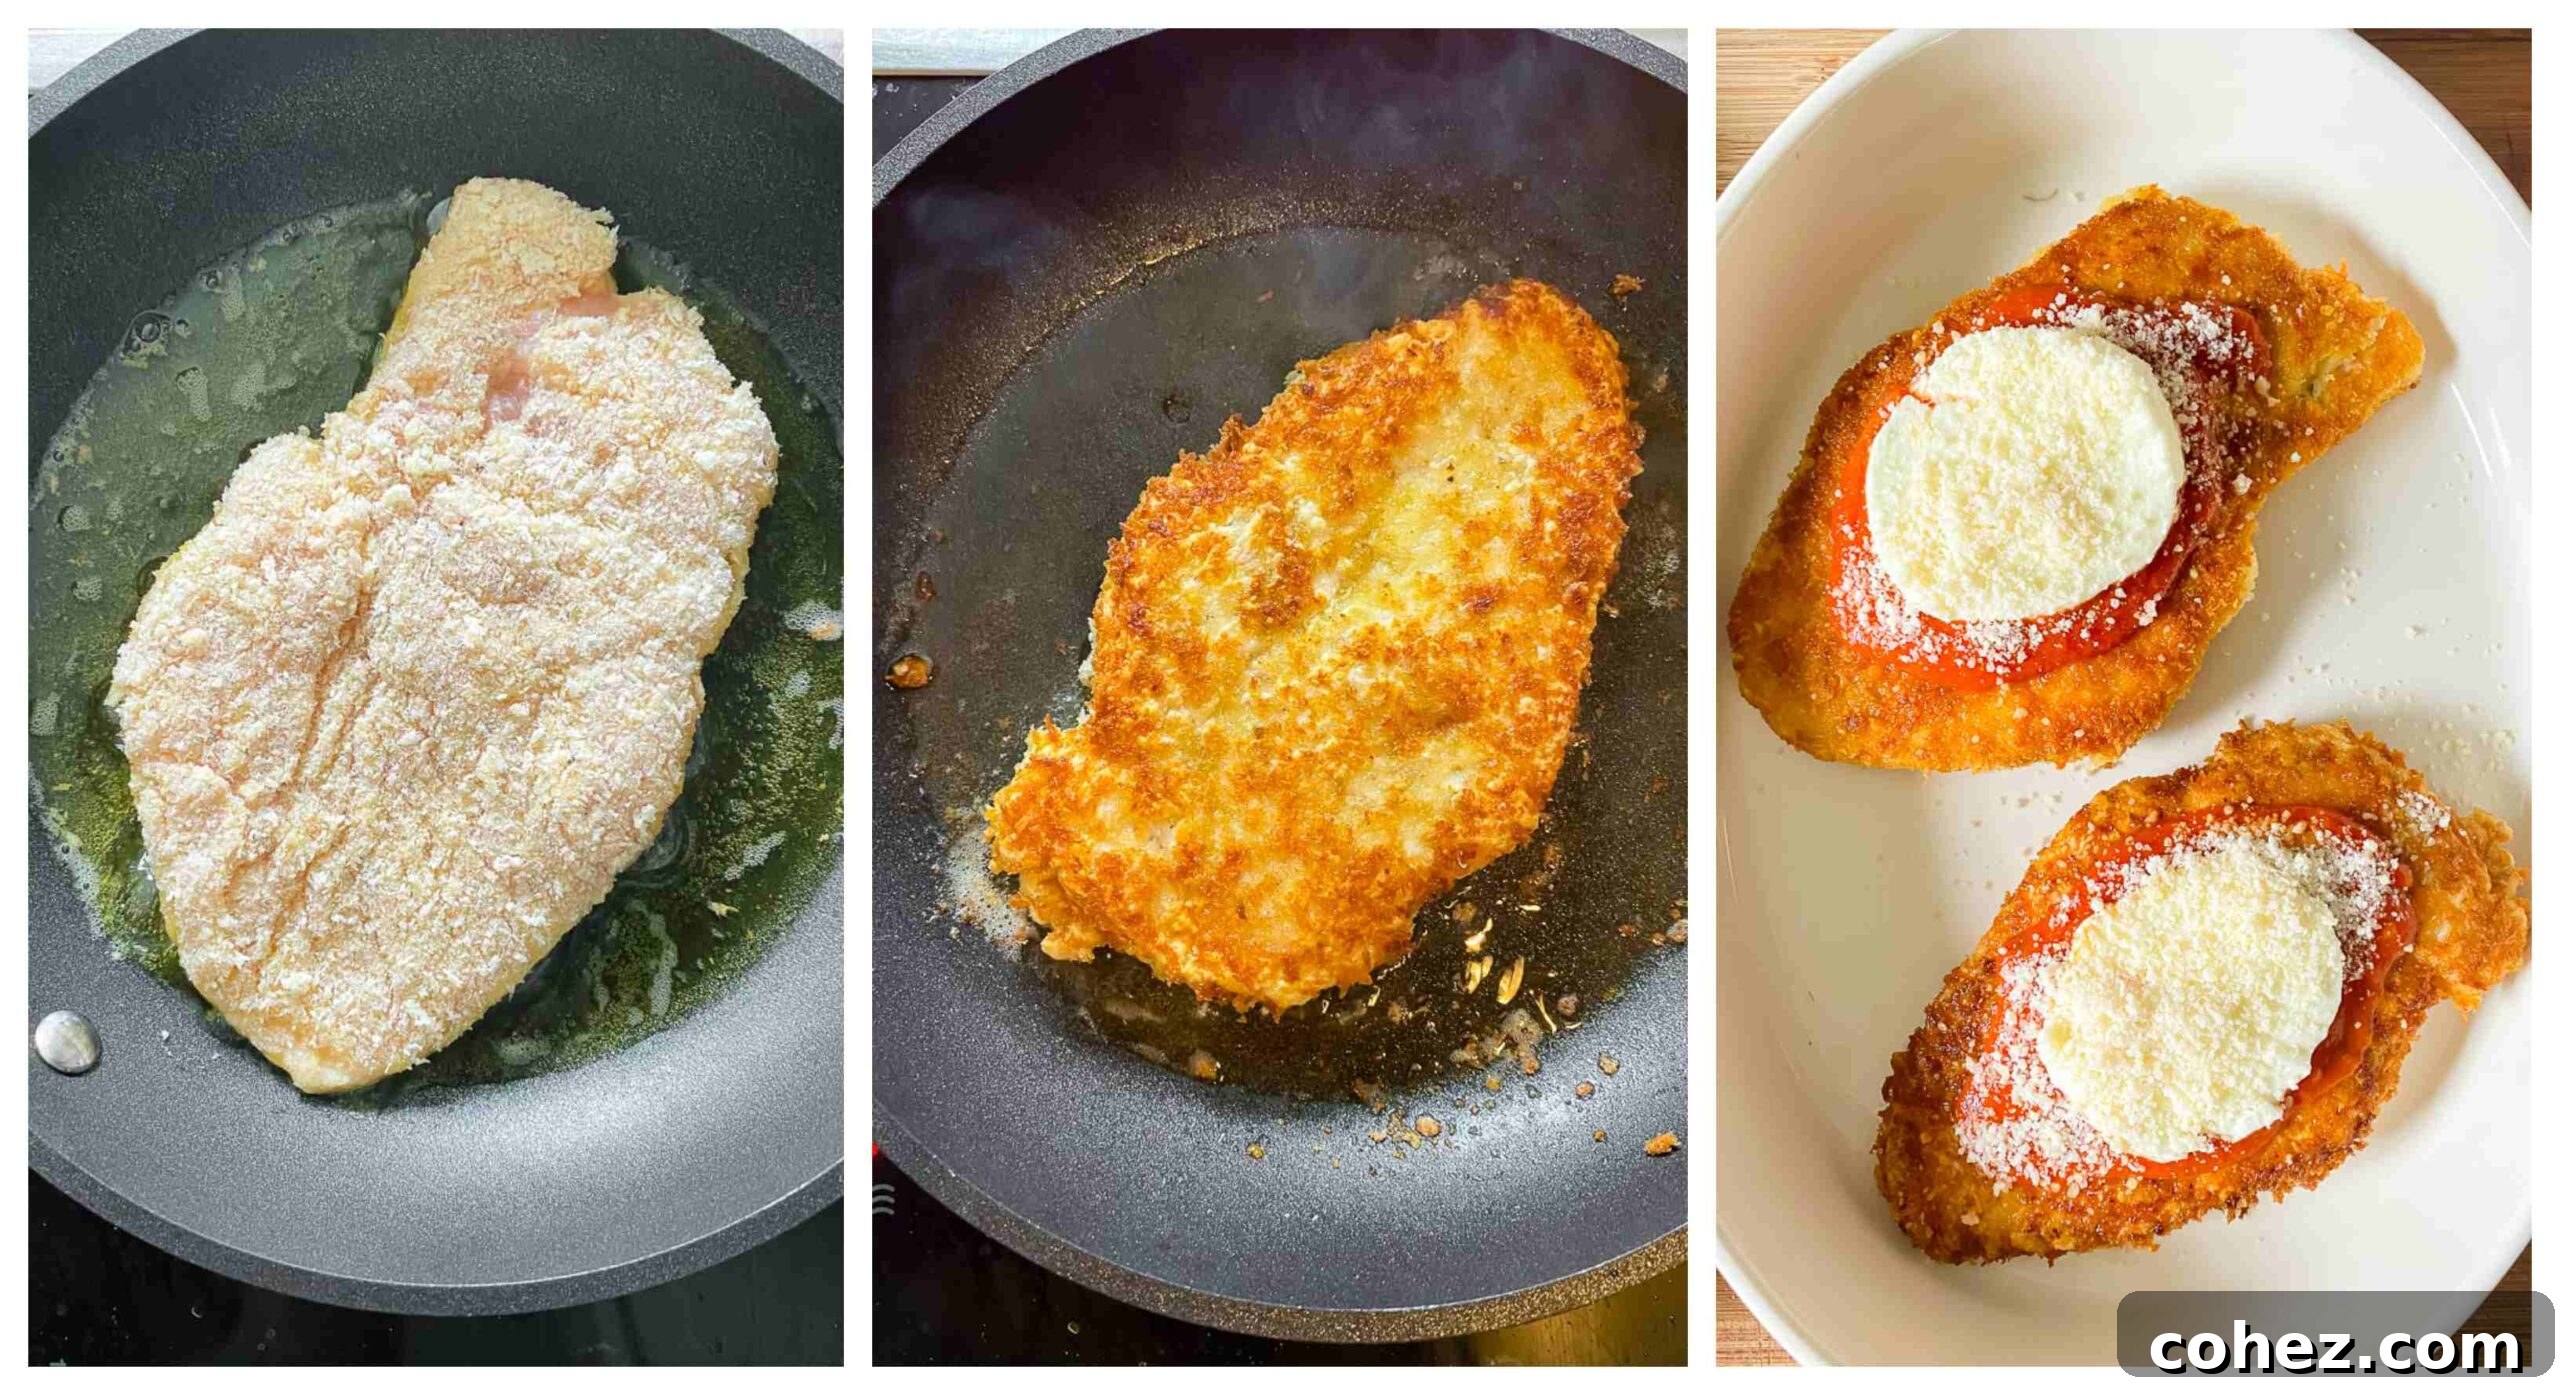
- Frying to Golden Perfection: After dredging the chicken in seasoned flour, then egg wash, and finally the Panko-Parmesan mix, it’s time for a quick fry. Heat a generous amount of extra virgin olive oil (or butter for a richer flavor) in a large frying pan over medium heat. Fry the chicken cutlets until they are beautifully golden brown on both sides. Remember, the goal here isn’t to cook the chicken through completely, but rather to establish that gorgeous, crispy crust. A quick tip: press down gently on the chicken during the initial seconds of frying to ensure maximum contact with the hot pan, promoting an even, crisp crust.
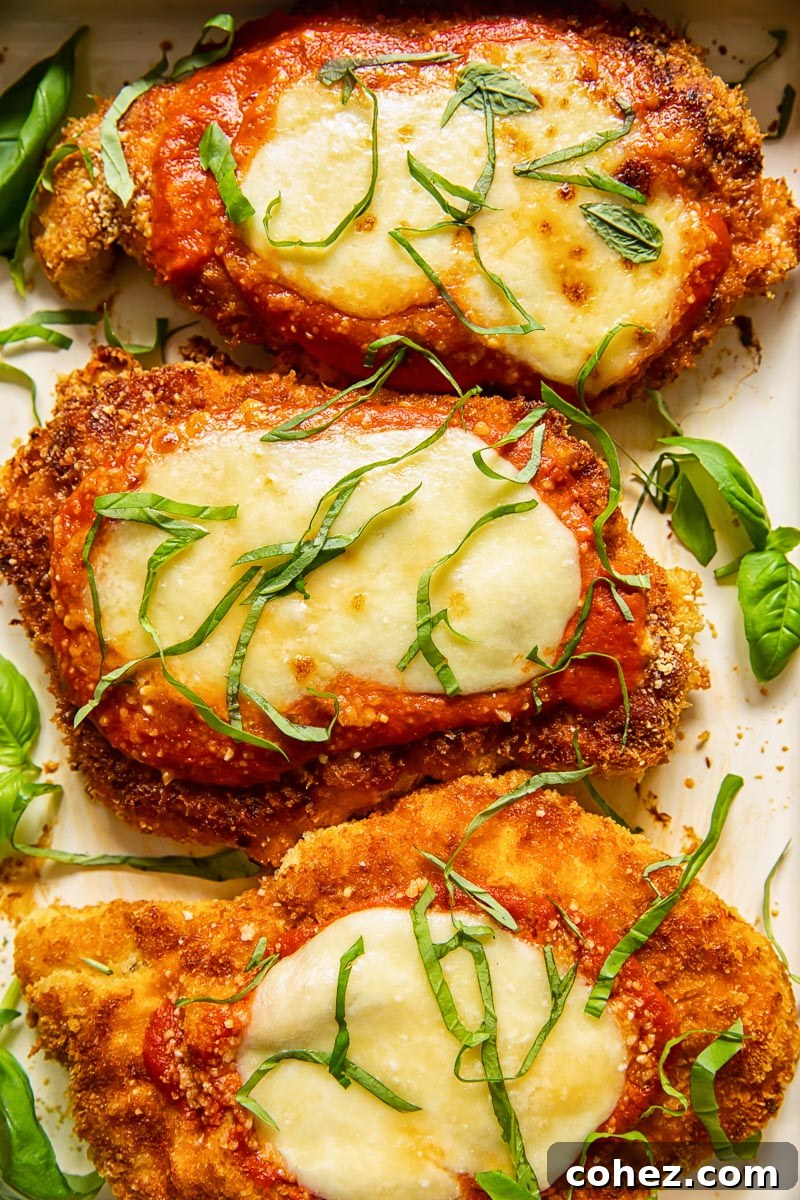
- The Strategic Sauce and Cheese Layer: This is where the magic happens to maintain crispiness. Transfer the fried chicken to a shallow baking dish. Instead of drenching it, spread a measured dollop (about ¼ cup) of your warm tomato sauce over each chicken breast. Crucially, allow some of the crispy breading to remain exposed. Immediately top with a slice of fresh mozzarella cheese and a final sprinkle of the remaining Parmesan. A quick bake in a hot oven will then melt the cheese into a luscious, bubbly topping without turning your carefully crafted crispy coating soggy.
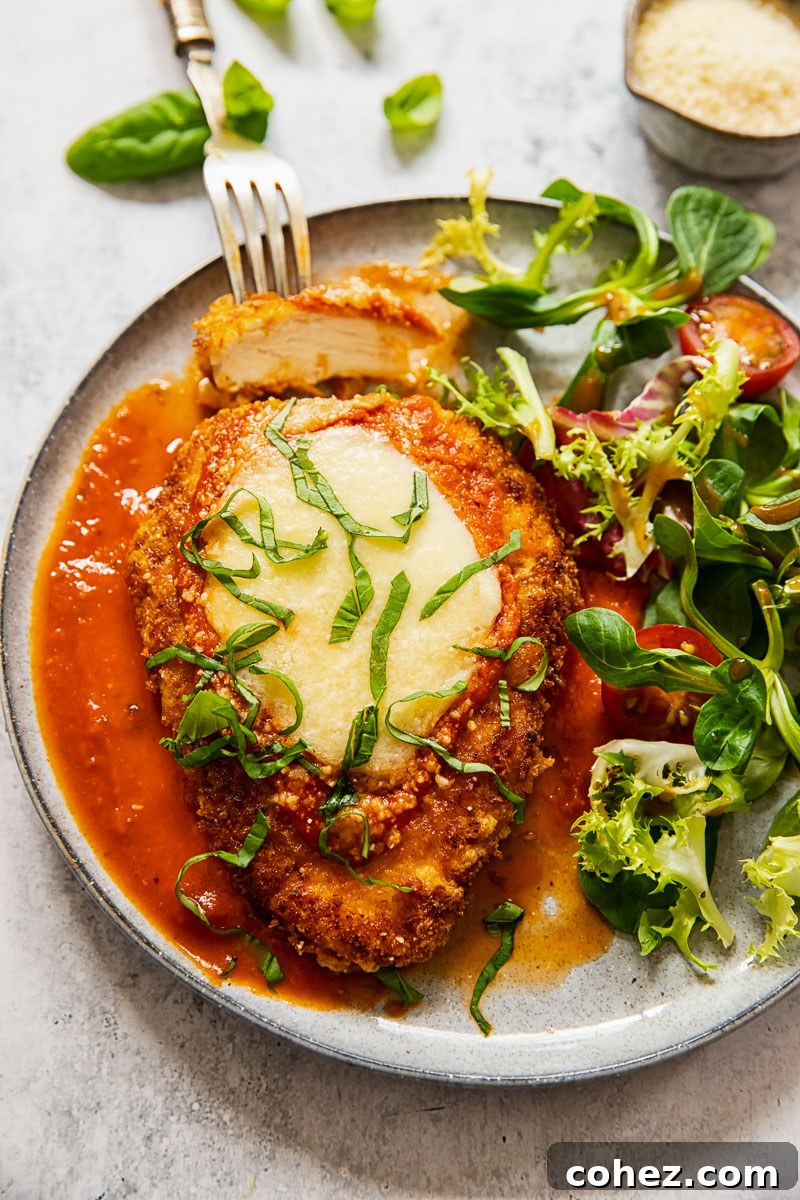
- Serving with Sauce in Mind: You’re probably wondering about the rest of that delicious tomato sauce. Don’t worry, it won’t go to waste! The key to our crispy Chicken Parm is to serve each portion on a fresh ladleful of the warm sauce, rather than baking the chicken in the sauce. This final touch allows diners to enjoy the full richness of the tomato sauce with every bite, while guaranteeing that the chicken’s crispy exterior remains intact right up to the moment it’s devoured. This simple serving adjustment makes all the difference!
Perfect Pairings: Serving Suggestions for Chicken Parmesan
Traditionally, Chicken Parmesan is often served with a side of pasta, allowing the delectable tomato sauce to coat and flavor it beautifully. Classic choices include spaghetti, linguine, or penne, tossed simply with some of the leftover sauce. However, the versatility of this dish means you can easily customize your meal to suit your preferences or dietary needs.
For those looking to lighten up the meal without sacrificing flavor, pairing Chicken Parm with a fresh green salad or a medley of cooked vegetables is an excellent choice. Our Roasted Parmesan Broccoli with Sun-Dried Tomatoes and Chillies offers a fantastic burst of savory flavors and a textural contrast. Alternatively, a Warm Zucchini Salad can provide a refreshing and elegant accompaniment. Both of these vegetable-centric sides are infused with delightful Italian flavors, complementing the main dish perfectly without making the meal too heavy.
Regardless of your chosen side, a final flourish of freshly chopped basil sprinkled over the Chicken Parmesan just before serving adds a wonderful aromatic brightness and a pop of vibrant color. This simple garnish elevates the dish, making it look as good as it tastes.
Storage, Reheating, and Make-Ahead Tips
Chicken Parmesan is a fantastic dish for meal prepping or enjoying as leftovers. Properly stored, any remaining portions will keep beautifully for 3-4 days when refrigerated in an airtight container. For longer storage, you can freeze individual portions for up to 6 months. To freeze, allow the cooked chicken to cool completely, then wrap each piece tightly in plastic wrap and aluminum foil before placing them in a freezer-safe bag or container.
Since we’ve put so much effort into achieving that wonderfully crispy exterior, preserving it during reheating is crucial. The best method for bringing your Chicken Parmesan back to life with its crispness intact is using an air fryer. Depending on your model, it can transform a cold piece of Parm into a hot, crispy delight in less than 5 minutes. Be sure not to overcrowd the air fryer basket; this allows the hot air to circulate freely around each piece, ensuring maximum crispness. Reheat in batches if necessary.
If an air fryer isn’t available, your oven is the next best option. Preheat your oven to 200°C (400°F). Place the chicken on a baking sheet or in a shallow baking dish, ideally on a wire rack set over the sheet. This setup allows air to circulate around the chicken, helping to crisp up the bottom as well. Reheat for 10-15 minutes, or until thoroughly heated through and the cheese is bubbly again. Avoid using a microwave for reheating, as it will inevitably lead to a soggy crust, undoing all your hard work.
For those who like to plan ahead, you can prepare the tomato sauce a day or two in advance. You can also bread and fry the chicken cutlets ahead of time, storing them in the refrigerator. Just before baking, top with sauce and cheese and proceed with the oven instructions. This makes for a quicker and less stressful weeknight dinner!
More Italian-Inspired Chicken Recipes to Explore
If you love the flavors of Italy and are looking for more delicious ways to prepare chicken, explore these fantastic recipes:
- Spicy Chicken Arrabiata with Herb and Garlic Breadcrumbs
- Creamy Tuscan Chicken with Saffron Cream Sauce
- The Best Classic Chicken Marsala
- Fragrant Italian Rosemary Chicken
Classic Chicken Parmesan Recipe
By Julia Frey of Vikalinka
Prep Time: 15 mins | Cook Time: 40 mins | Total Time: 55 mins | Servings: 4
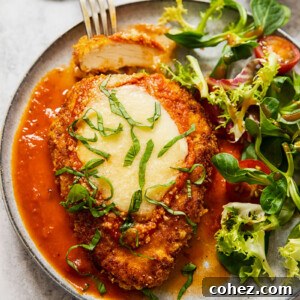
Chicken coated in crispy and cheesy breadcrumbs, topped with melted cheese and served with a rich tomato sauce.
Rating: 5 from 1 vote
Pin Recipe
Print Recipe
Equipment
- Ceramic baking dish
- Non-stick frying pan
- Meat tenderizer
Ingredients
- 3 tbsp olive oil(for sauce and frying)
- 1 clove garlic (for sauce)
- 500g/2 cups tomato passata/crushed tomatoes
- 2-3 basil leaves, chopped (for sauce)
- 125ml/1/2 cup water (for sauce)
- Salt to taste
- 4 skinless boneless chicken breasts
- 2 tsp salt, divided (for chicken and flour)
- 1 tsp pepper (for chicken)
- 70g/1/2 cup flour (for dredging)
- 2 eggs (beaten, for egg wash)
- 120g/1 cup Panko breadcrumbs
- 50g/1/2 cup grated Parmesan cheese (for breading and topping)
- 125g/4 oz fresh mozzarella ball, sliced (for topping)
Instructions
- Prepare the Sauce: In a medium-sized saucepan, heat 1 tablespoon of olive oil over medium heat. Add the whole garlic clove and cook for about 30 seconds until fragrant, then remove and discard it. Pour in the tomato passata (or crushed tomatoes), torn basil leaves, and a pinch of salt. Stir in ½ cup of water. Bring to a gentle simmer and cook for 10 minutes, allowing the flavors to meld. Taste and adjust seasoning with more salt if needed. If the sauce tastes too acidic, add a tiny pinch or a teaspoon of sugar to balance it. Keep the sauce warm and set aside. Preheat your oven to 200°C (400°F).
- Prepare the Chicken: Place each chicken breast on a clean work surface and cover with two layers of plastic wrap. Using a meat mallet or rolling pin, pound the thicker end of the chicken breast until its thickness is uniform with the thinner end. This ensures even cooking. Season both sides of the pounded chicken breasts generously with salt (use 1 teaspoon of the divided amount) and pepper.
- Set Up Breading Stations: Prepare three shallow bowls. In the first bowl, whisk the 2 eggs for the egg wash. In the second bowl, combine the 70g (1/2 cup) flour with the remaining 1 teaspoon of salt. In the third bowl, mix the 120g (1 cup) Panko breadcrumbs with half of the grated Parmesan cheese.
- Bread the Chicken: Take each seasoned chicken breast and dredge it first in the seasoned flour, ensuring it’s fully coated and shaking off any excess. Next, dip it into the beaten eggs, letting any extra drip off. Finally, coat it thoroughly in the Panko and Parmesan breadcrumb mixture, pressing gently to ensure the crumbs adhere well. Set the breaded chicken aside on a clean plate or wire rack until ready to fry.
- Fry the Chicken: Heat 2 tablespoons of olive oil in a large non-stick frying pan over medium heat. Once the oil is shimmering, carefully place the breaded chicken breasts into the pan in a single layer (cook in batches if necessary to avoid overcrowding). Fry for about 5 minutes per side, or until golden brown and crispy. During the first few seconds of frying, gently press down on the chicken breasts with a spatula to ensure full contact with the pan surface, which helps create a uniform crust. The chicken does not need to be fully cooked through at this stage; we are focusing on developing a beautiful, crispy crust. Add more oil if needed for subsequent batches.
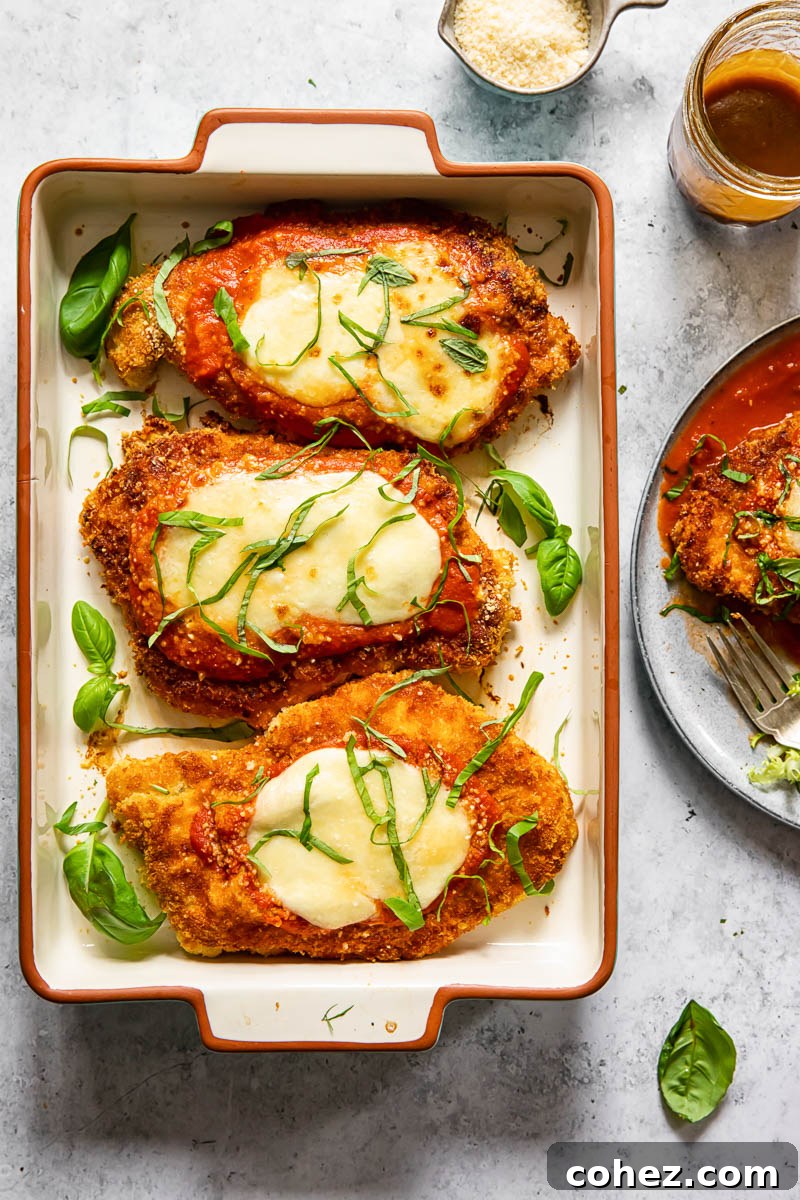
- Assemble for Baking: Transfer the fried chicken breasts to a shallow baking dish, arranging them in a single layer. Spoon approximately ¼ cup of the warm tomato sauce over the center of each chicken breast, being careful to leave some of the crispy breading exposed around the edges. Top each with a slice of fresh mozzarella cheese, ensuring good coverage. Finish by sprinkling the remaining grated Parmesan cheese over the mozzarella.
- Bake and Serve: Place the baking dish into the preheated oven and bake for 15 minutes, or until the mozzarella cheese is fully melted, bubbly, and slightly golden, and the chicken is cooked through to an internal temperature of 74°C (165°F). To serve, ladle a generous amount of the remaining warm tomato sauce onto individual plates, then place a baked chicken Parmesan cutlet on top. Garnish with fresh basil, if desired, and serve immediately to enjoy maximum crispness!
Notes
- There is no need to butterfly the chicken. Instead, pound the thicker end of the breast until it’s even with the thinner end. A meat mallet or rolling pin work well for this. This step prevents the chicken from drying out after being fried and then baked in the oven, ensuring tender, juicy results.
- Panko breadcrumbs are highly recommended for this recipe. They consistently deliver a much crispier and lighter breading than traditional breadcrumbs, due to their unique flaky structure.
- For frying, extra virgin olive oil is preferred for its flavor, but butter can also be used for a richer taste. Ensure enough oil is used to achieve an even golden-brown crust.
- The key to maintaining crispiness is strategic sauce application. Only a dollop of sauce goes on each breast before baking. The remaining sauce is served with the chicken, allowing diners to add as much as they like without compromising the chicken’s texture. This prevents the breading from becoming soggy by sitting in sauce too long.
Nutrition
Nutrition information is automatically calculated and should only be used as an approximation.
- Calories: 503kcal
- Carbohydrates: 24g
- Protein: 42g
- Fat: 26g
- Saturated Fat: 9g
- Polyunsaturated Fat: 3g
- Monounsaturated Fat: 12g
- Trans Fat: 1g
- Cholesterol: 187mg
- Sodium: 2472mg
- Potassium: 880mg
- Fiber: 3g
- Sugar: 6g
- Vitamin A: 744IU
- Vitamin C: 13mg
- Calcium: 375mg
- Iron: 4mg