
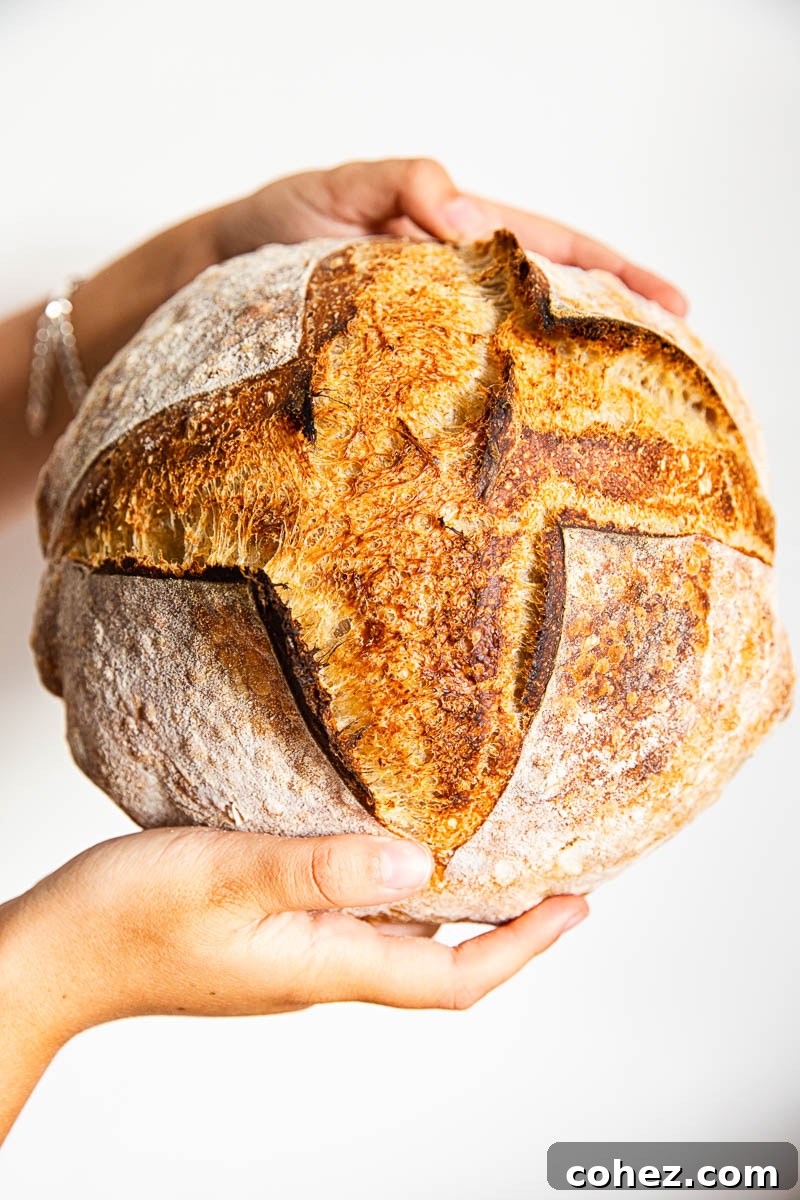
Unlock the secrets to baking irresistible sourdough bread from scratch. This comprehensive guide covers everything from cultivating your active sourdough starter to mastering the baking process and troubleshooting common issues.
For those who love baking but are seeking a classic, quicker yeasted bread, explore our Easy No-Knead Farmhouse Bread Recipe.
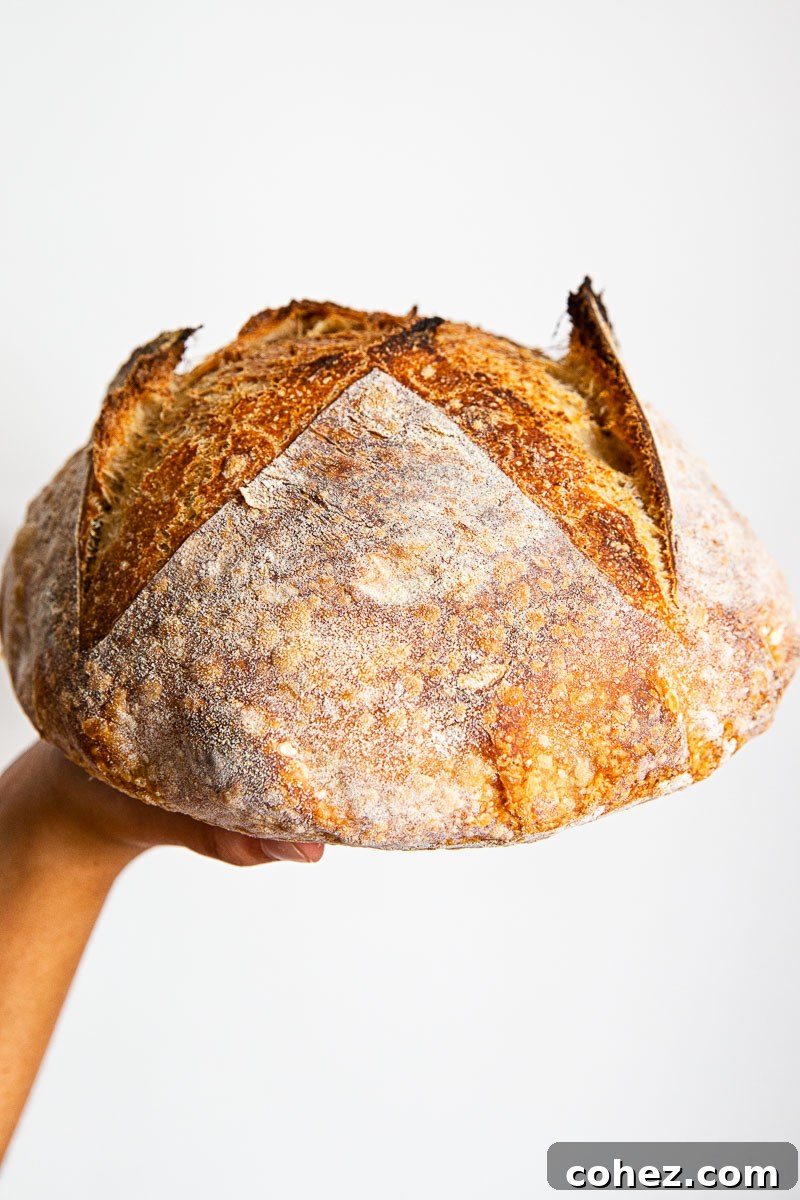
Understanding Sourdough: More Than Just Bread
While many types of bread grace our tables, sourdough stands apart with its distinctive tangy flavor and chewy texture. Unlike conventional breads that rely on commercial yeast, sourdough derives its leavening power from a live fermented culture known as a “sourdough starter.” This natural leavening agent is a magical blend of flour and water, nurtured over time to capture wild yeasts and beneficial bacteria prevalent in our environment. These microorganisms work in harmony to ferment the dough, producing carbon dioxide that gives sourdough its characteristic rise and an exquisite depth of flavor.
The creation of a robust and active sourdough starter typically spans 7 to 10 days, a process that is surprisingly straightforward yet demands a touch of patience. This slow fermentation is crucial; it’s what defines sourdough. The dough needs ample time—often several hours, including an overnight rest—to undergo its transformation, resulting in a complex flavor profile and superior digestibility. Therefore, quick sourdough bread is an oxymoron; the journey to a truly delicious loaf is one of anticipation and natural progression.
While the steps to bake sourdough bread are not inherently difficult, the overall process is significantly longer than that of breads made with commercially produced yeast. There are no shortcuts if you wish to achieve that coveted open crumb, robust crust, and signature tang. The wait is an integral part of the experience, a testament to the artisan craft, and ultimately, it’s worth every moment for the unparalleled taste and texture of a freshly baked sourdough loaf.
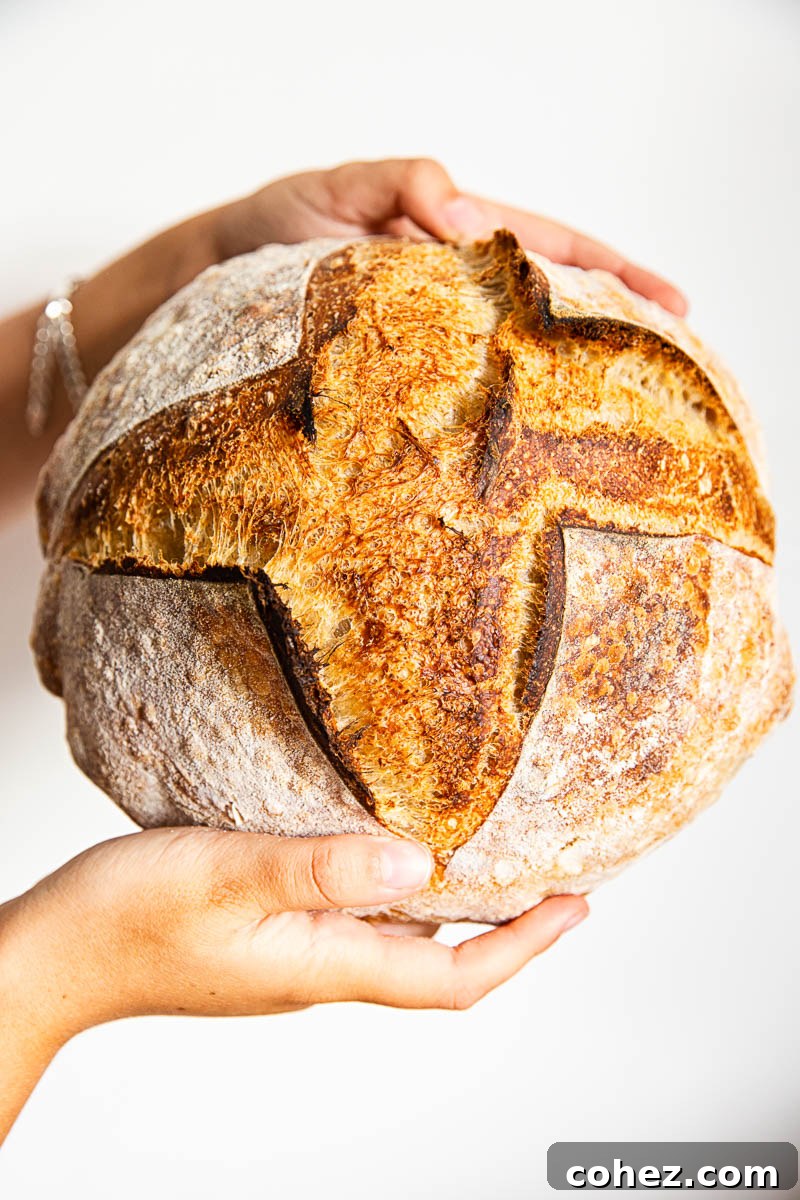
Crafting Your Own Sourdough Starter: The Heart of Your Bread
My own sourdough journey began out of necessity during the unprecedented times of March 2020, when commercial yeast became a rare commodity. Like many, I found myself exploring alternatives for baking fresh bread at home. Initially, the concept of creating a sourdough starter seemed daunting, yet the instructions I received were surprisingly simple. “Just mix equal parts flour and water and wait,” I was told. My skepticism was high, but to my delight, it truly is that easy!
A sourdough starter is a living, breathing culture, a blend of flour and water that, when exposed to the ambient air, captures wild yeasts and lactic acid bacteria. These microorganisms feed on the sugars in the flour, producing gas (which makes your bread rise) and acids (which give sourdough its characteristic flavor). Nurturing your own starter is a rewarding experience, connecting you directly to the ancient art of bread making.
Alternatively, if you’re eager to bypass the initial 7-10 day waiting period, you can often acquire a piece of an existing starter from a fellow sourdough enthusiast. Most sourdough bakers are more than happy to share their thriving cultures, especially since regular “discarding” (removing a portion of the starter before feeding) is part of the maintenance routine, ensuring there’s plenty to go around.
A Step-by-Step Guide to Making Your Sourdough Starter
Embarking on your sourdough adventure starts with these simple steps:
- **Initial Mix:** In a clean glass jar with a loose-fitting lid, combine 50g of whole wheat or rye flour with 50g of lukewarm water. These whole grain flours are rich in nutrients and wild yeasts, providing an ideal environment for your starter to flourish. Ensure your jar is spotless, free from any detergent residue, though sterilization isn’t necessary.
- **First Fermentation:** Place the lid loosely on top of the jar (don’t screw it on tightly) to allow air circulation, inviting wild yeasts while preventing dust contamination. Store the jar in a warm spot in your kitchen, ideally between 70-78°F (21-26°C), as warmth encourages yeast activity.
- **Daily Feeding:** The following day, observe your starter for any signs of activity. Gently stir, then scoop out and discard approximately half of the mixture. To the remaining starter, add another 50g of whole wheat or rye flour and 50g of water. Mix thoroughly until no dry spots of flour remain.
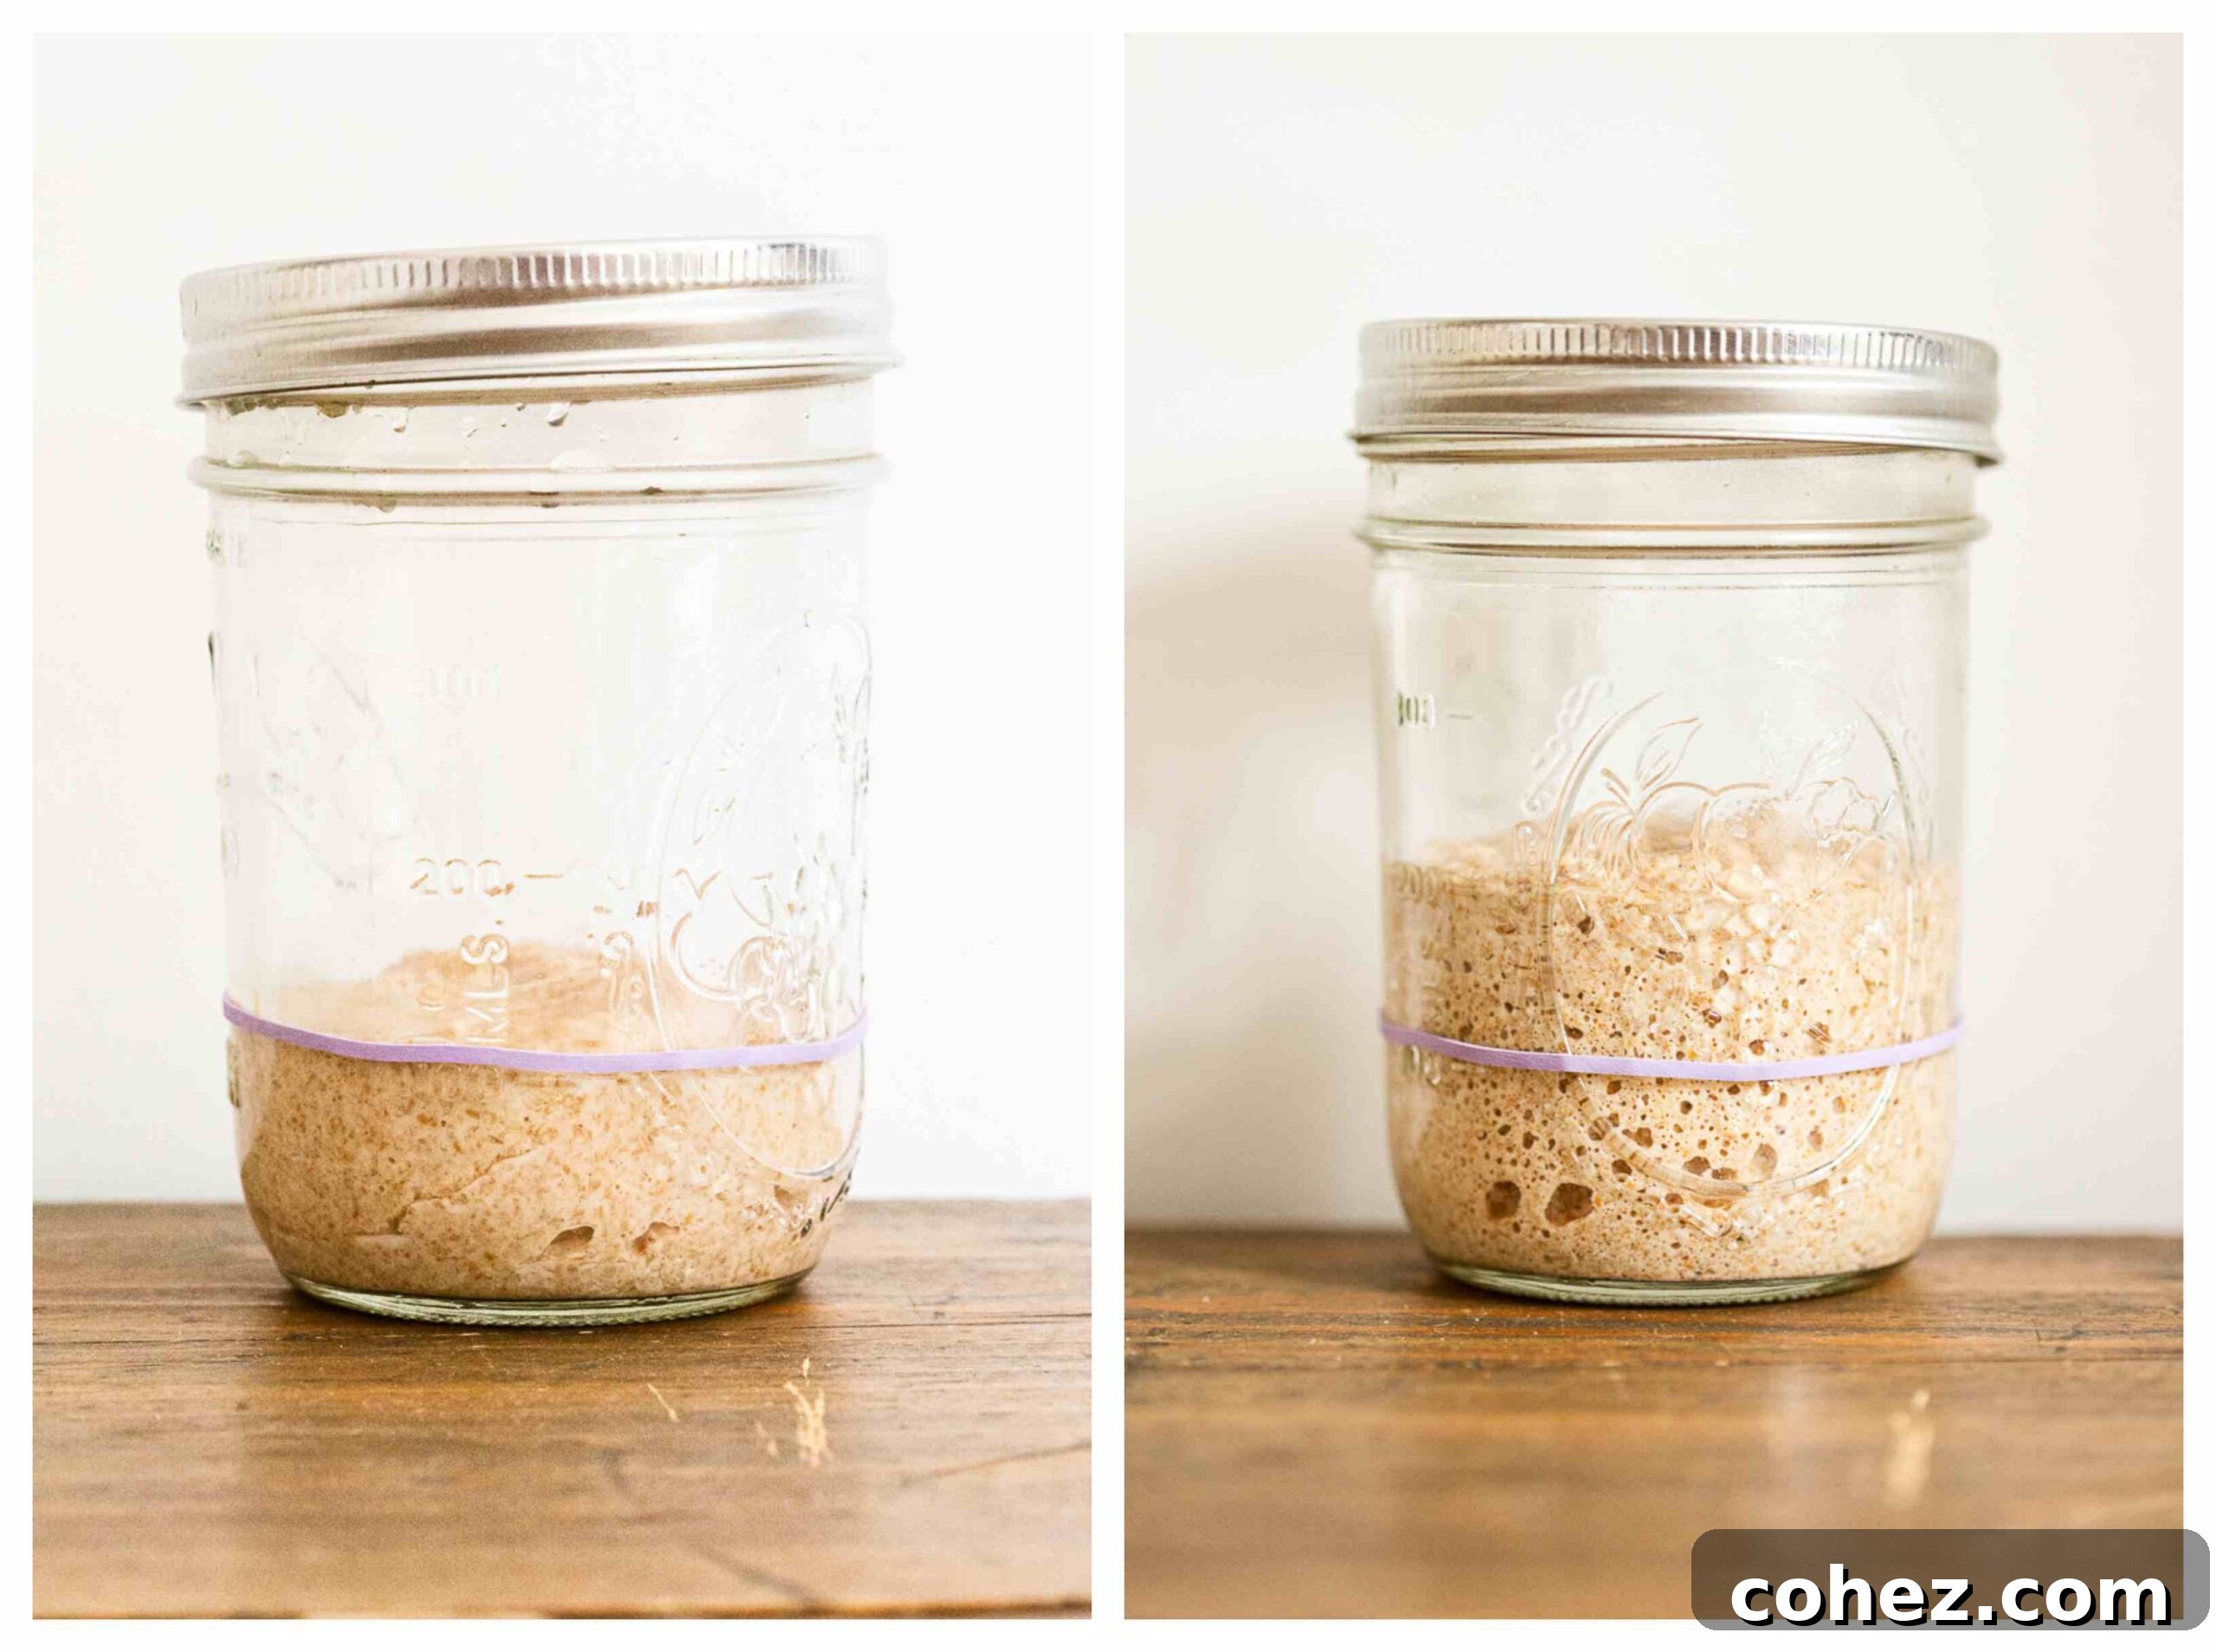
- **Continue and Observe:** Repeat this daily feeding process for at least 7 days. During this period, you should begin to notice small bubbles forming on the surface and throughout the mixture, indicating that your starter is becoming active and developing its leavening power. A healthy starter will typically rise after feeding and then slowly fall back down as it consumes its food.
Common Sourdough Starter Challenges and Solutions
New sourdough bakers often encounter a few predictable hurdles. Here’s how to navigate them:
Problem 1: I don’t have whole grain flours. Can I use all-purpose flour/white flour?
Solution 1: Yes, absolutely! You can certainly use white flour (all-purpose or bread flour) to create and maintain your starter. However, be aware that it might take a little longer for your starter to become fully active and robust. Whole grain flours, such as whole wheat or rye, are more abundant in the essential nutrients and naturally occurring microorganisms that sourdough starter needs to thrive and develop quickly. If using white flour, allow for a few extra days of feeding before your starter is consistently bubbly and active.
Problem 2: My starter separated, and there’s a clear liquid (hooch) formed on top.
Solution 2: Don’t panic! This clear liquid, often called “hooch,” is a natural byproduct of fermentation. It typically indicates that your starter is hungry and needs to be fed. Simply stir it back into the starter before discarding and feeding as usual. As long as your starter maintains a regular color (not pink or orange) and doesn’t emit an offensive, rotten smell (a mild sour aroma is normal), it’s all part of the process. Dark hooch might suggest your starter is very hungry and could benefit from more frequent feedings or a slightly larger feeding ratio.
Problem 3: My starter turned black or pink on top and smells foul.
Solution 3: Unfortunately, a starter with black, pink, or orange discoloration, accompanied by a truly foul or rotten smell, indicates undesirable mold or bacterial growth. In this rare instance, it’s best to discard the entire starter and begin anew to avoid any health risks. A healthy, active starter should have plenty of bubbles on the surface and throughout, and emit a pleasant, somewhat yeasty, sour, or even fruity aroma.
Thankfully, such extreme issues are uncommon. Sourdough fermentation is a remarkably resilient and straightforward natural process, and with consistent feeding, your starter will likely flourish.
Mastering the Basic Sourdough Bread Dough
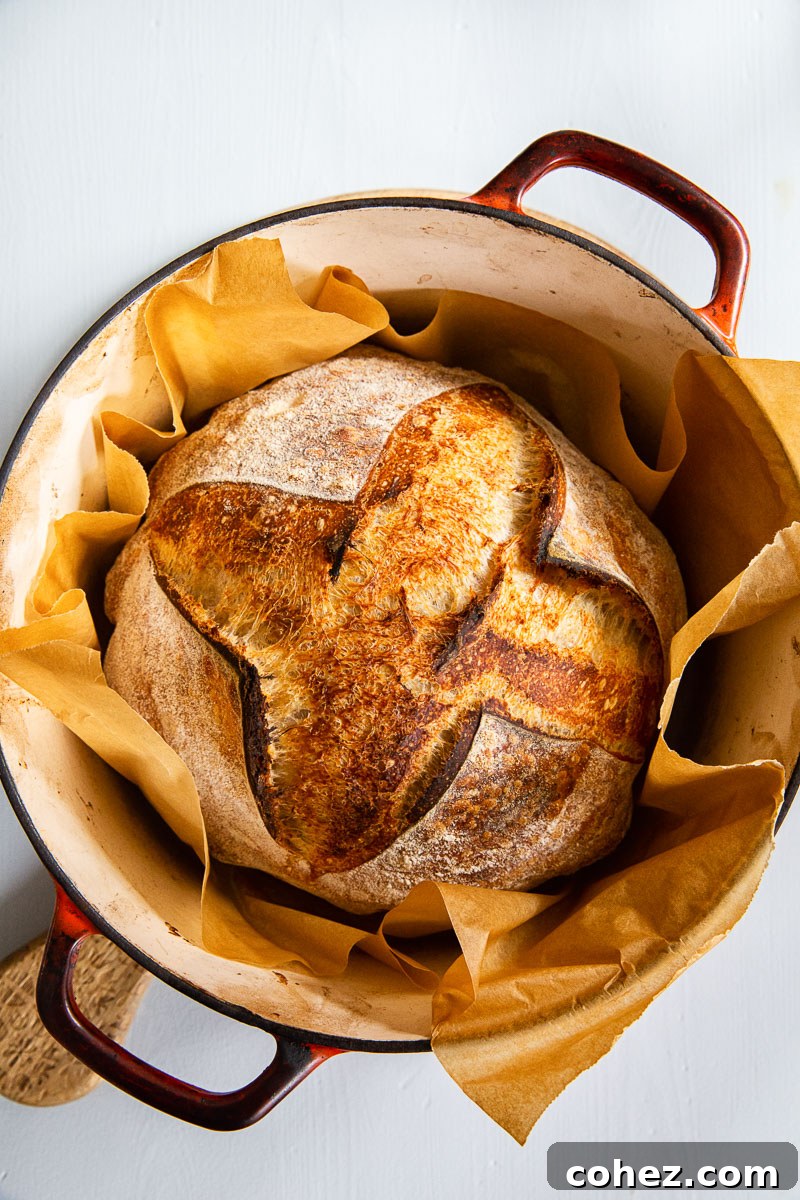
The foundation of exceptional sourdough lies in its simplicity. My weekly recipe uses just four core ingredients: flour, water, active sourdough starter, and salt. This minimalist approach allows the unique characteristics of the sourdough culture to truly shine, developing complex flavors that are impossible to achieve with commercial yeast.
Once you’ve mastered this fundamental recipe, the culinary possibilities are endless! Feel free to unleash your creativity by incorporating additions like savory cheeses and herbs, sweet dried fruits, crunchy nuts, or even various seeds. You can also experiment with different flours; I often use a blend of white bread flour with a whole wheat or rye sourdough starter, yielding a loaf that’s approximately 20% whole grain and 80% white, balancing structure with rustic flavor.
To deepen your understanding of the process, you might find a visual guide helpful. While the original content included an embedded video player, a simple link to a video demonstrating the techniques can be just as effective for learning. Visuals often clarify steps that text alone cannot fully convey, especially for techniques like shaping and scoring. (Note: Specific video embedding code has been removed as per instructions.)
The Art of Fermentation: Patience is Key in Sourdough Baking
Once your sourdough starter is reliably active and robust, you are ready to embark on the truly rewarding journey of baking sourdough bread. The entire process might initially seem a little intimidating due to its multi-day timeline, but with this detailed guide and consistent practice, you’ll soon be producing stunning, artisanal loaves with confidence. Remember, the beauty of sourdough lies in its natural rhythm.
A crucial aspect to embrace when baking sourdough is forward planning. Almost all sourdough recipes necessitate an overnight fermentation period. This means that if you envision a fresh, warm loaf gracing your breakfast table, you’ll need to begin the process the morning or afternoon of the day before. While this sounds like a significant time commitment, much of the sourdough process is passive waiting rather than active labor. The wild yeasts and bacteria do most of the hard work; your role is primarily to guide and facilitate their activity.
Decoding the Sourdough Fermentation Stages
1. Activating Your Sourdough Starter for Baking
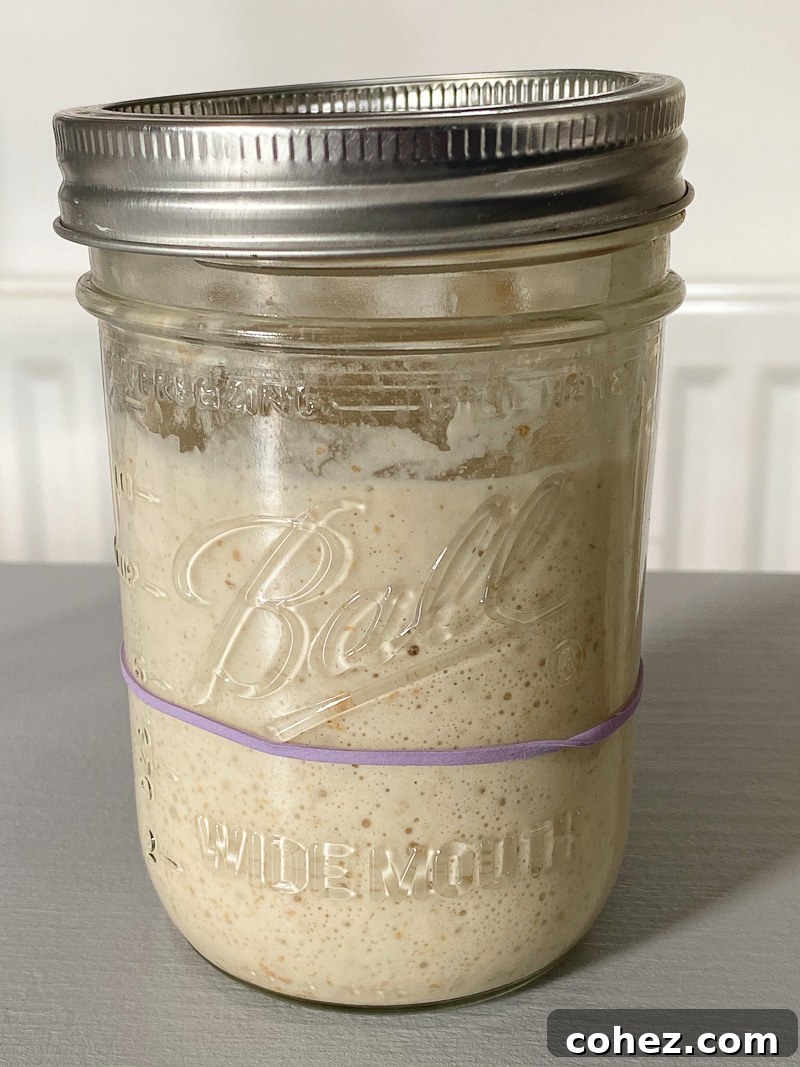
The journey to a perfect loaf begins with an active, lively starter. In the morning, typically 8-12 hours before you plan to mix your dough, “feed” your starter. This involves discarding half of your existing starter, then mixing the remainder with fresh flour (e.g., 50g) and water (e.g., 50g). Mark the initial level of your fed starter on the jar. This mark will help you track its growth, as you want your starter to at least double in size before incorporating it into your dough. This “peak activity” indicates that the yeast population is at its most vigorous, ready to provide optimal lift to your bread. Observing your starter reach its peak is a satisfying visual cue.
The Sourdough Float Test: Is Your Starter Ready?
An invaluable method to confirm your starter’s readiness is the float test. Gently scoop a small, teaspoon-sized amount of your peaked starter and drop it into a glass of room-temperature water. If the starter floats on the surface, it signifies that it contains enough trapped gas from active fermentation to effectively leaven your bread. This means it’s primed and ready to be added to your dough. If it sinks, it likely needs a little more time to develop strength, or perhaps another feeding.
2. The Autolyse Stage: Hydration and Gluten Development
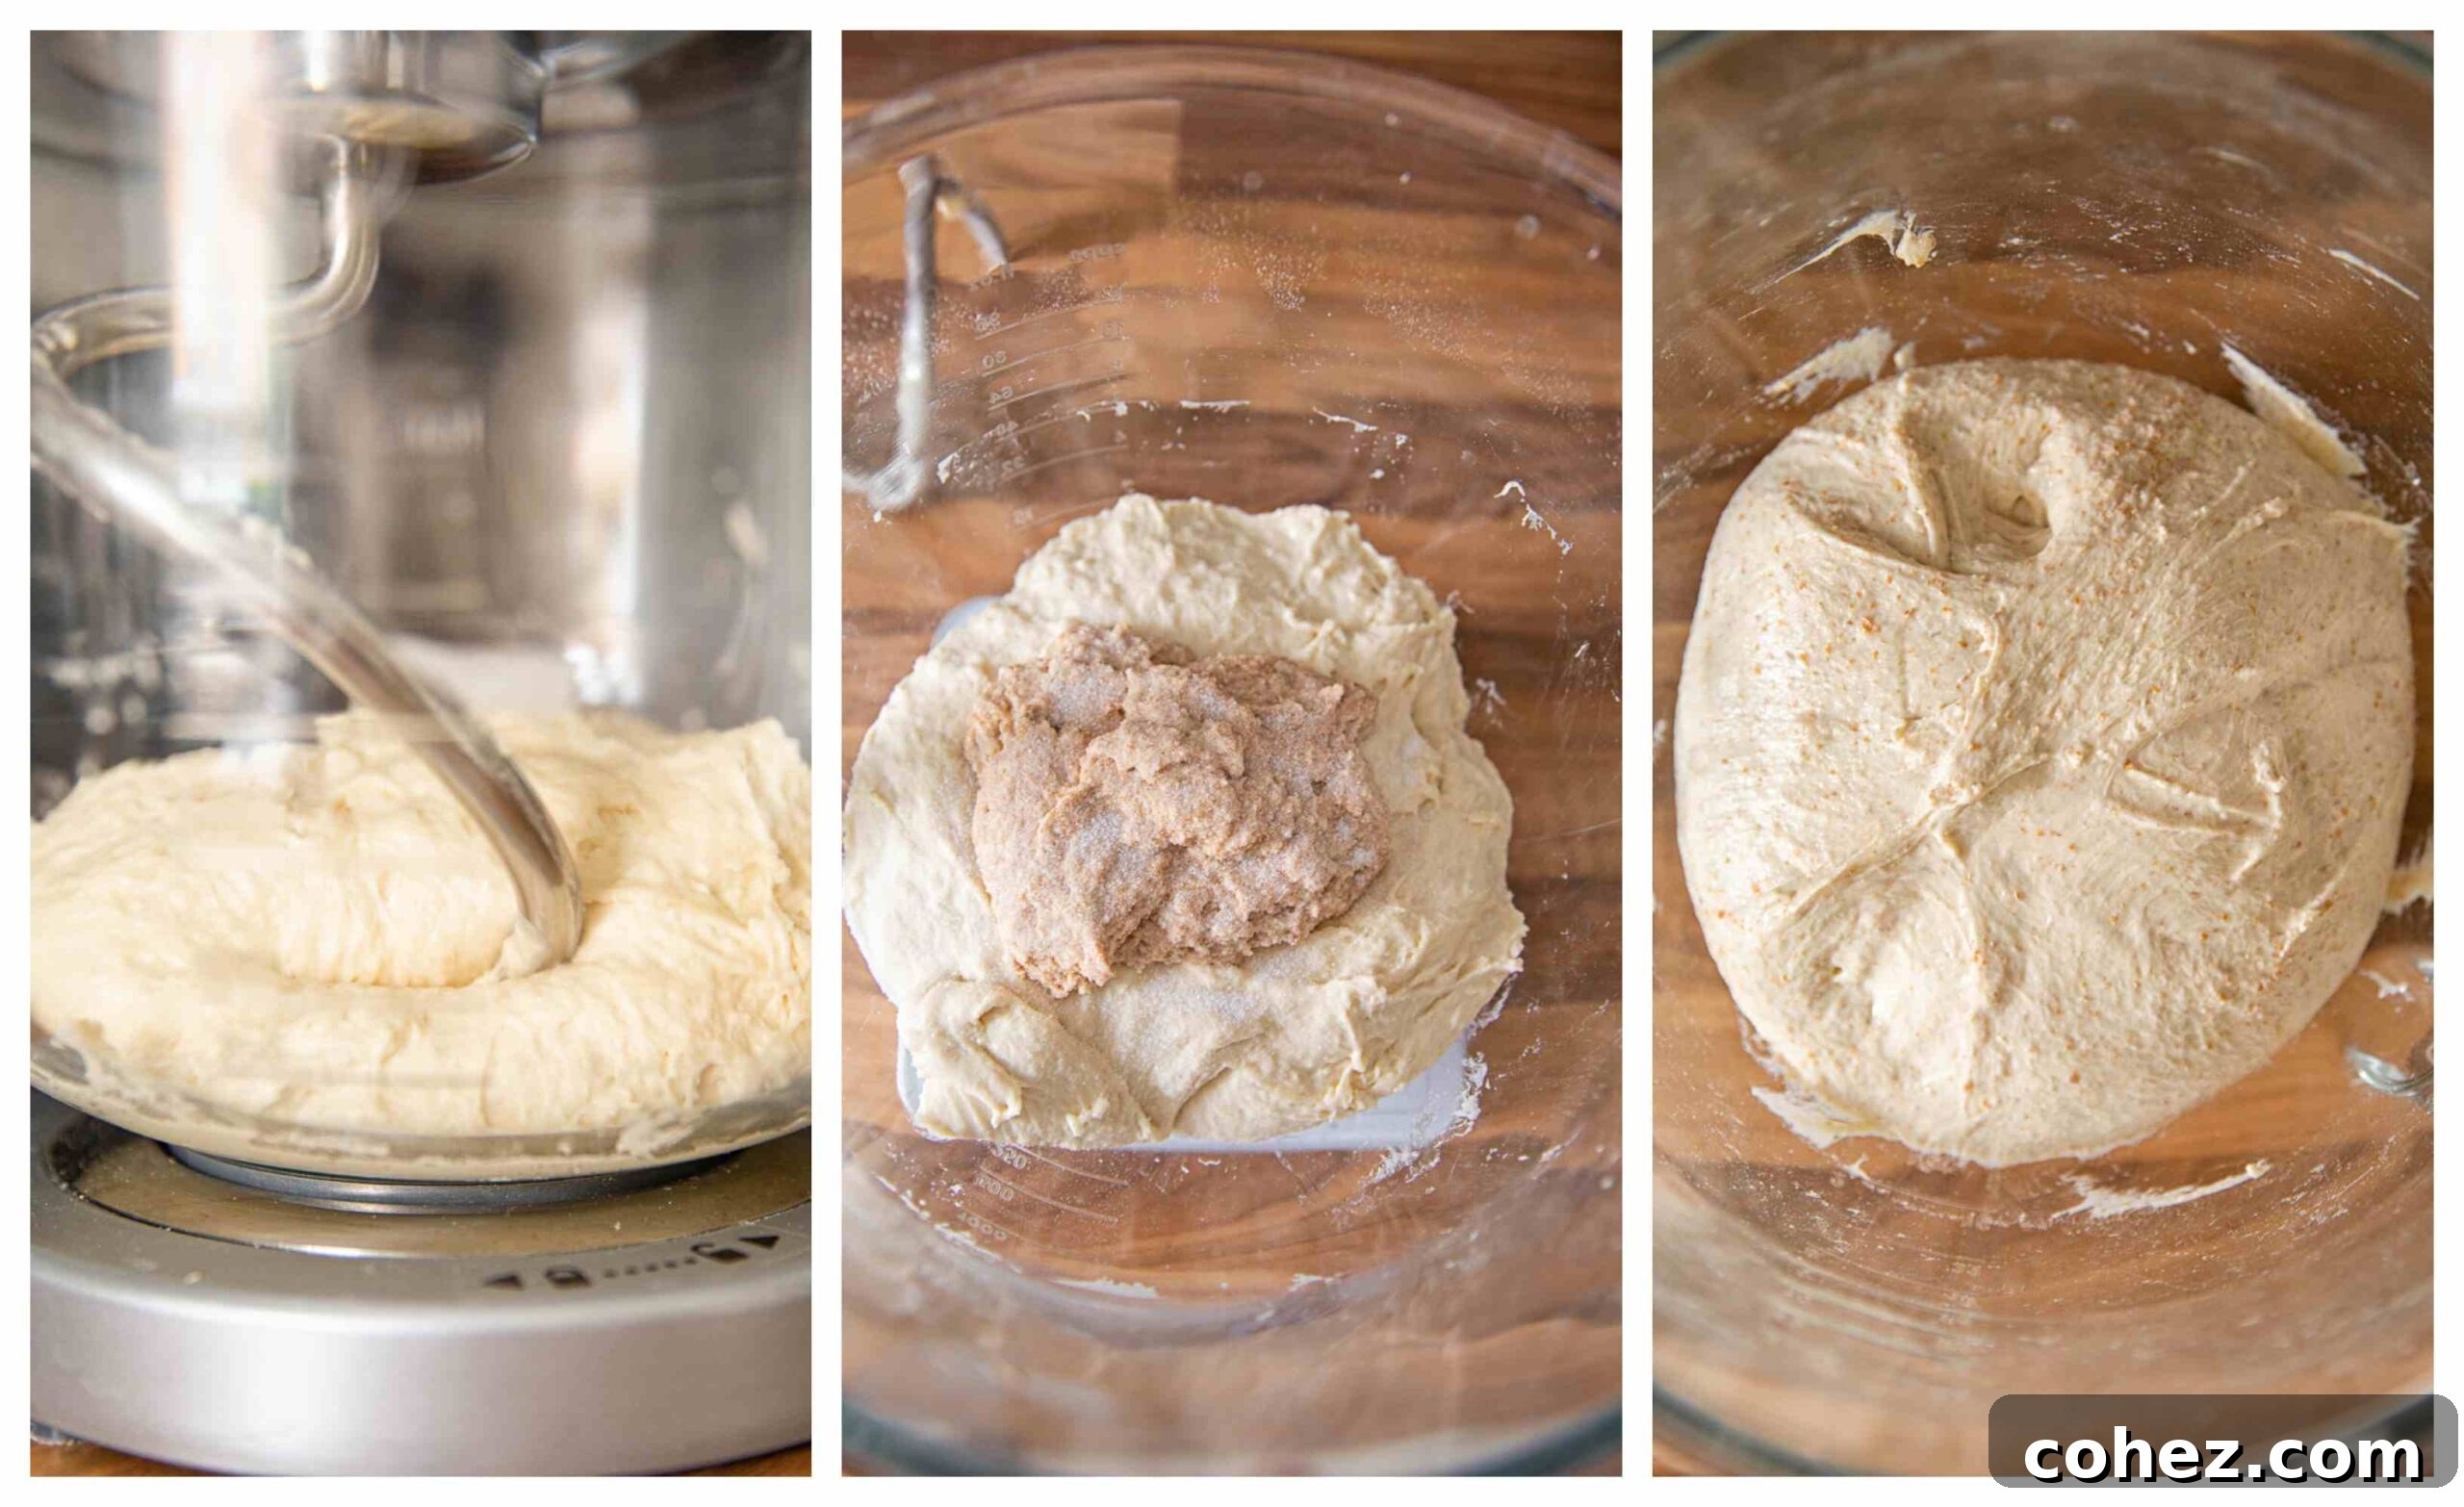
Before adding your active starter and salt, it’s highly recommended to perform an autolyse. This simple yet transformative step involves mixing just the flour and water for your dough and letting it rest for anywhere from 30 minutes to an hour. The primary purpose of autolyse is to fully hydrate the flour and kickstart the gluten development process without the interference of salt or yeast. During this resting period, enzymes naturally present in the flour begin to break down complex starches into simpler sugars, which will later serve as food for the yeast. More visibly, after just 30 minutes, you’ll observe a magical change: your initially clumpy, shaggy mixture will relax and transform into a much softer, more pliable, and noticeably stretchy mass. This prepared dough is then perfectly ready for the final two ingredients: your active sourdough starter and salt.
3. Bulk Fermentation: Building Strength and Flavor
The first image in the collage above captures the dough directly after the autolyse stage – a hydrated blend of flour and water, ready for the next additions. At this point, I incorporate 100g of my activated starter and 9-10g of salt. Following this, I knead the dough for approximately 10 minutes. Whether you choose to knead by hand or use a stand mixer with a dough hook, the goal is to develop the gluten structure, which is vital for trapping gases and creating a good crumb. The final photo in the collage illustrates the dough’s appearance post-kneading: it should feel notably soft, elastic, and slightly rounded on top, indicating that significant strength has been built.
Once kneaded, I cover the bowl with plastic wrap or a damp towel to prevent it from drying out, and allow the dough to ferment at room temperature for about 4-5 hours. This critical stage is known as **bulk fermentation** or the “first rise.” By the end of this period, your dough won’t necessarily double in size, but its volume will increase noticeably, and it should appear bubbly and feel bouncy to the touch. When you gently shake the bowl, the dough should exhibit a slight jiggle, a sign of successful fermentation and gas production within the gluten network.
Understanding the Stretch and Fold Technique
While I personally opt for a kneading approach, no discussion of bulk fermentation would be complete without mentioning the stretch and fold method. This technique is widely employed to build strength and structure into the dough, ultimately contributing to a beautifully shaped and well-risen sourdough loaf with an open crumb.
The first set of stretch and folds is typically performed 30 minutes to an hour after the initial mixing of all ingredients. To execute, simply pick up a handful of the dough from one side, gently stretch it upwards as far as it can go without tearing, then fold it over onto itself towards the center of the bowl. Repeat this action four times, rotating the bowl a quarter turn each time to work on a different side of the dough. Ideally, you would perform at least 3 sets of these stretch and folds, spaced at 30-minute intervals throughout the bulk fermentation period. This method indeed yields excellent results by strengthening the dough progressively. However, I personally found it quite time-consuming, as it requires active engagement with the dough for up to two hours. While not difficult, the frequent interruptions can be bothersome for some bakers, which is why I prefer the efficiency of kneading once and then allowing the dough to ferment undisturbed.
4. Cold Proofing: The Overnight Fermentation Advantage
Once bulk fermentation is complete, the dough is ready for its final shaping and a slow, cold proof. I typically shape my sourdough in the late evening, around 8-9 PM, and then transfer it to the refrigerator for an overnight fermentation period of up to 16 hours. This cold proofing stage is incredibly beneficial: it slows down the yeast activity, allowing for deeper flavor development and making the dough much easier to handle and score the following morning.
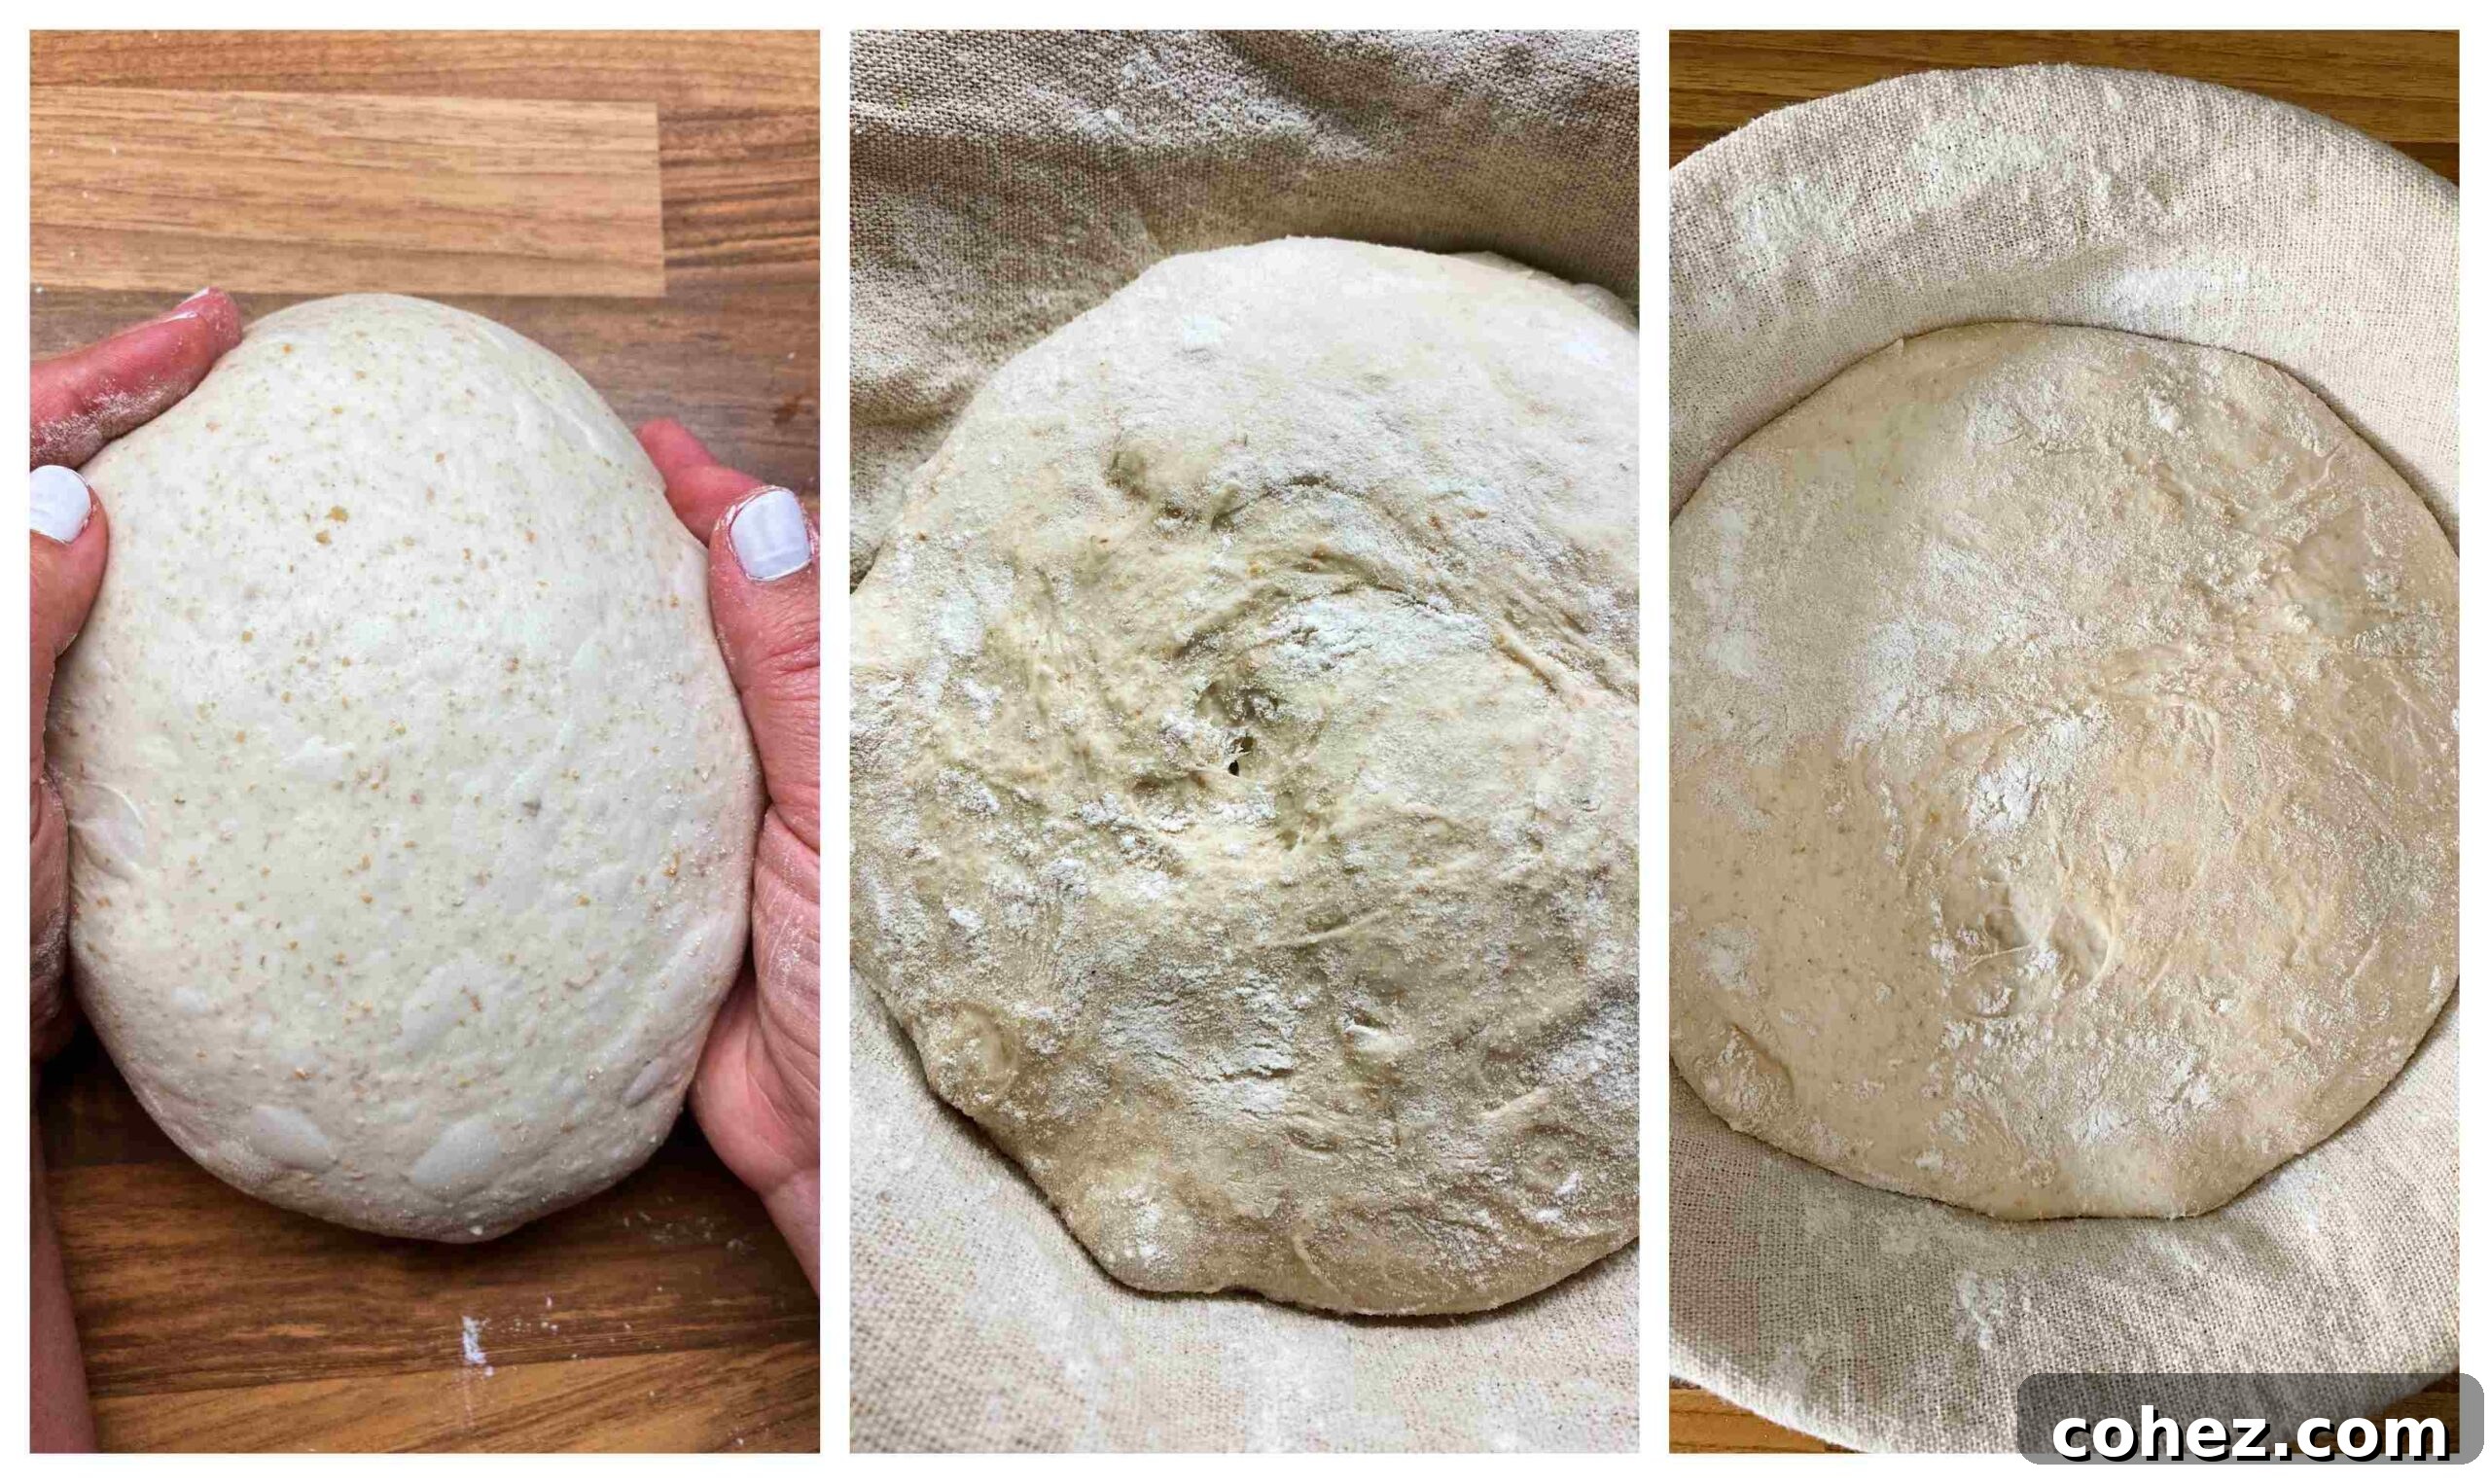
In the photos below, you can see the dough expertly shaped and placed into a banneton, a traditional wicker proofing basket. If you don’t own a banneton, a regular bowl lined with a floured kitchen towel works perfectly well, as the dough requires a round-bottomed vessel to maintain its shape during this final rise. If you look closely at the surface of the dough, you might observe tiny bubbles resembling blisters. These are fantastic indicators that your dough has undergone a successful initial fermentation and is now perfectly prepared for its extended cold rest in the fridge.
The middle photo displays the dough just before it enters its overnight refrigeration, while the third photo shows the same dough 16 hours later. You’ll notice the continued presence of these desirable surface bubbles in all stages, signifying ongoing healthy fermentation.
Shaping Your Sourdough Loaf: The Boule Method Explained
Shaping the sourdough loaf was, for me, one of the most intimidating steps when I first started baking. I spent countless hours watching professional bakers in videos, striving to replicate their fluid movements. While visual aids were certainly helpful, the true breakthrough came with consistent practice. There’s no substitute for getting your hands on the dough and developing a feel for its texture and elasticity.
While I am by no means a professional, the following pointers and the instructions within the recipe card (or a linked video if available) should provide ample guidance to help you master the art of shaping a beautiful boule.
Key Principles for Perfect Sourdough Shaping
- **Gentle Handling is Paramount:** Carefully scrape the fermented dough out of its bowl onto a lightly floured work surface. The keyword here is ‘gently.’ Unlike yeasted doughs that tolerate vigorous punching down, sourdough requires a delicate touch. Rough handling can deflate the precious gas bubbles that contribute to its open crumb, and the dough will struggle to recover.
- **The Envelope Fold:** With lightly floured hands, gently pull one side of the dough outwards and fold it over itself towards the center. Repeat this motion with the other three sides, essentially forming a neat package or “envelope.” At this stage, your dough should be visibly full of air bubbles, so take care not to knock them out during this process.
- **Creating Surface Tension:** Using a bench scraper, gently pick up the dough and flip it over, so the pinched seam (the “knot” from your envelope fold) is now facing the countertop. Next, begin to shape it into a tight ball (boule) by tucking the sides of the dough inwards and underneath with your hands. As you tuck, continuously spin the dough on the work surface. This simultaneous tucking and spinning action creates crucial surface tension, resulting in a smooth, taut, and perfectly rounded top. A minimal amount of flour on your work surface helps the dough catch and pull, facilitating the creation of this taut surface (refer to the first photo in the collage above for visual guidance).
- **Prepare for Cold Proofing:** Generously dust your banneton (wicker proofing basket) with rice flour. Rice flour is excellent for this purpose because it contains no gluten, effectively preventing the dough from sticking to the basket during its long proof. Carefully transfer your shaped loaf into the banneton, seam-side up. Cover the banneton with a clean tea towel and place it in the refrigerator for the final cold fermentation, typically lasting 16-20 hours.
Baking Your Sourdough Masterpiece: The Dutch Oven Method
After all the careful preparation and patient waiting, baking your sourdough loaf is surprisingly the most straightforward part of the entire process, yet it yields the most dramatic results. The key to a professional-quality crust and rise at home is utilizing a Dutch oven, which effectively mimics a commercial steam-injected oven environment.
- **Preheat with Precision:** One hour before you plan to bake, place your empty Dutch oven (with its lid) inside your oven. Preheat your oven to its highest possible temperature, typically 450°F (220°C) or even higher. Allowing the Dutch oven to preheat thoroughly for a full hour ensures it reaches an optimal, consistent temperature, which is crucial for achieving an excellent oven spring and a crispy crust.
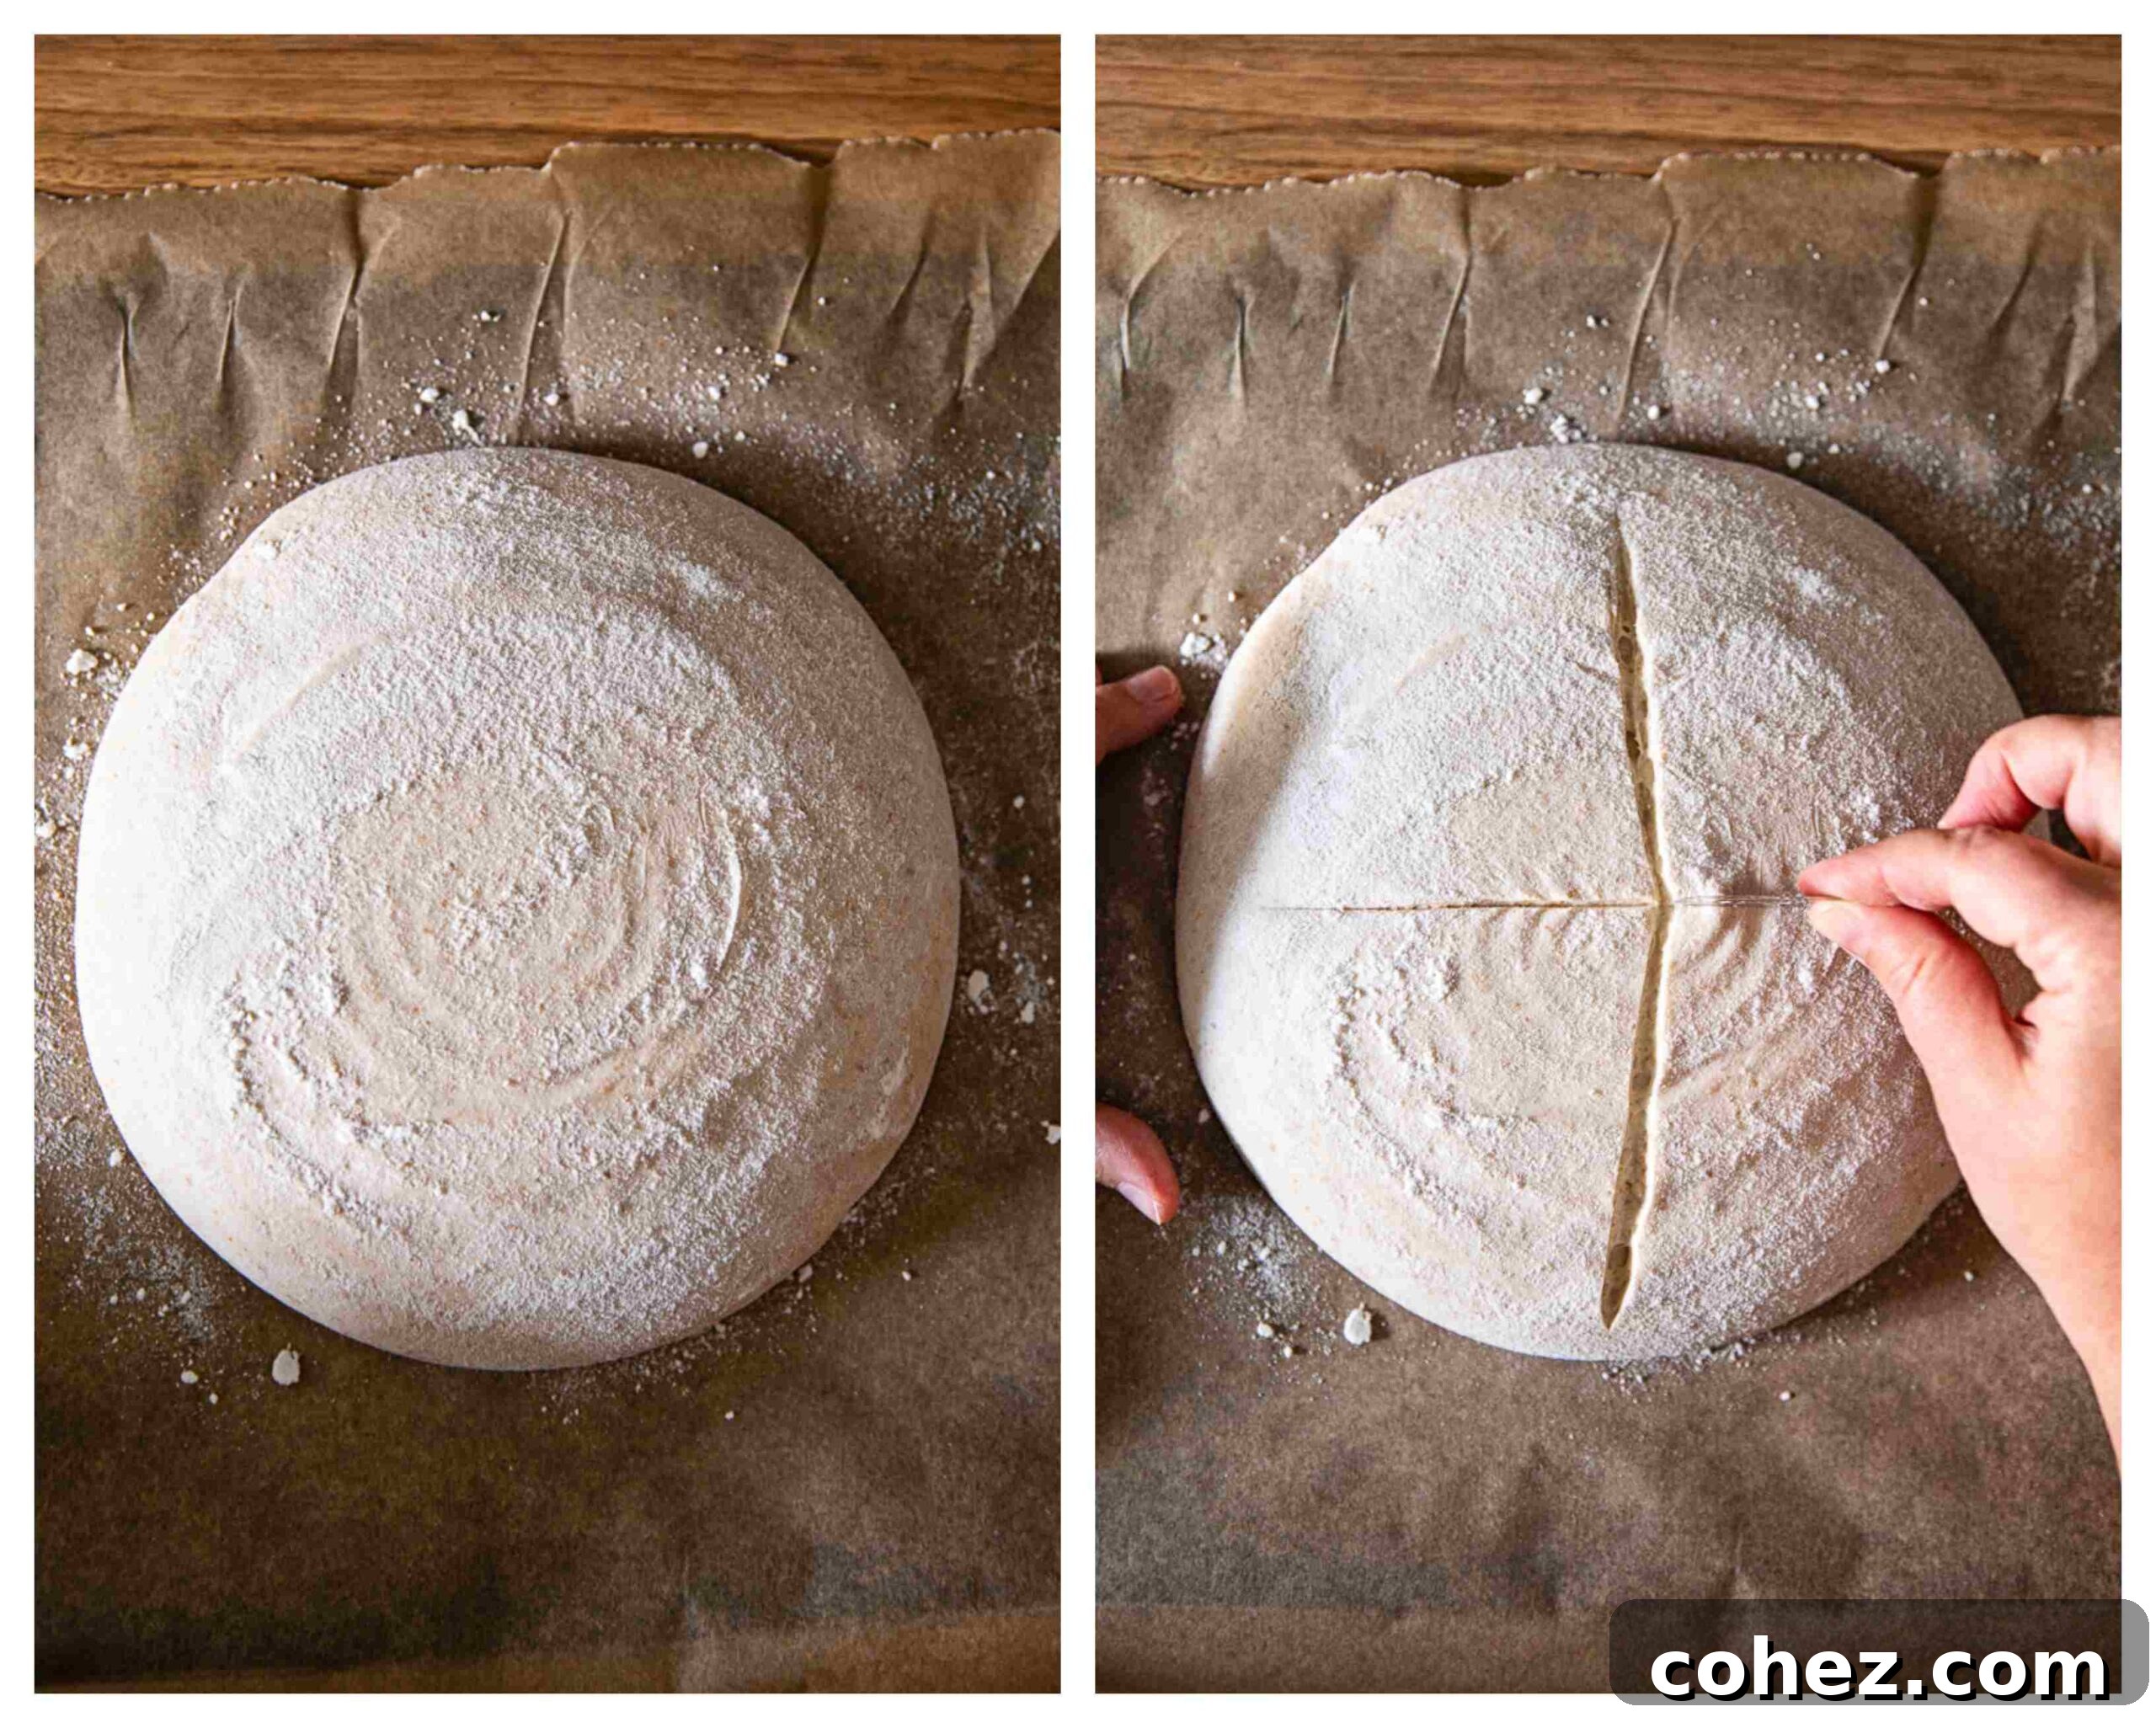
- **Prepare for Baking and Score:** While the Dutch oven is heating, carefully remove your cold-proofed dough from the refrigerator. Gently invert the dough out of the banneton onto a piece of parchment paper. Placing the parchment paper on a flat baking sheet can make this transfer easier. Using a very sharp knife or a specialized bread lame, score the dough with your desired pattern. Scoring isn’t merely decorative; it’s a functional step that guides the expansion of the loaf during baking, allowing steam to escape in a controlled manner and preventing uncontrolled ruptures in the crust.
- **The Dutch Oven Bake:** Once the oven and Dutch oven are fully preheated, carefully remove the searing hot Dutch oven. Using the parchment paper as a sling, quickly and carefully lower the shaped and scored loaf into the hot pot. Immediately place the lid back on the Dutch oven. Bake with the lid on for 30 minutes. This initial covered period traps steam, preventing the crust from setting too quickly and allowing the loaf to achieve maximum rise (oven spring) and develop its signature chewy texture. After 30 minutes, remove the lid and continue baking for another 15-20 minutes, or until the crust is a deep golden brown and sounds hollow when tapped. This final uncovered bake crisps the crust beautifully.
Troubleshooting Common Sourdough Baking Problems
Even experienced bakers face challenges, and sourdough is no exception. Here are solutions to some of the most common issues you might encounter:
- Problem 1: My bread didn’t rise adequately in the oven (poor oven spring).
- Solution 1: The most frequent cause of poor oven spring is under-proofing. Before your dough goes into the oven, perform a gentle “poke test” with a floured finger:
- If the indentation immediately springs back completely, the dough is significantly under-proofed. Return it to the fridge for more time.
- If the indentation stays completely down and doesn’t spring back at all, it’s likely over-proofed. Bake it as soon as possible and hope for the best; over-proofed dough tends to spread rather than rise.
- If it bounces back slowly, leaving a slight indentation, your dough is perfectly proofed and ready to bake!
- Problem 2: My dough stuck to the proofing basket (banneton).
- Solution 2: This is a common frustration! The simple fix is to swap out wheat flour for rice flour when dusting your banneton. Rice flour has no gluten, making it an excellent non-stick agent for sourdough. A generous dusting ensures an easy release every time.
- Problem 3: The crumb (interior) is sticky and gummy.
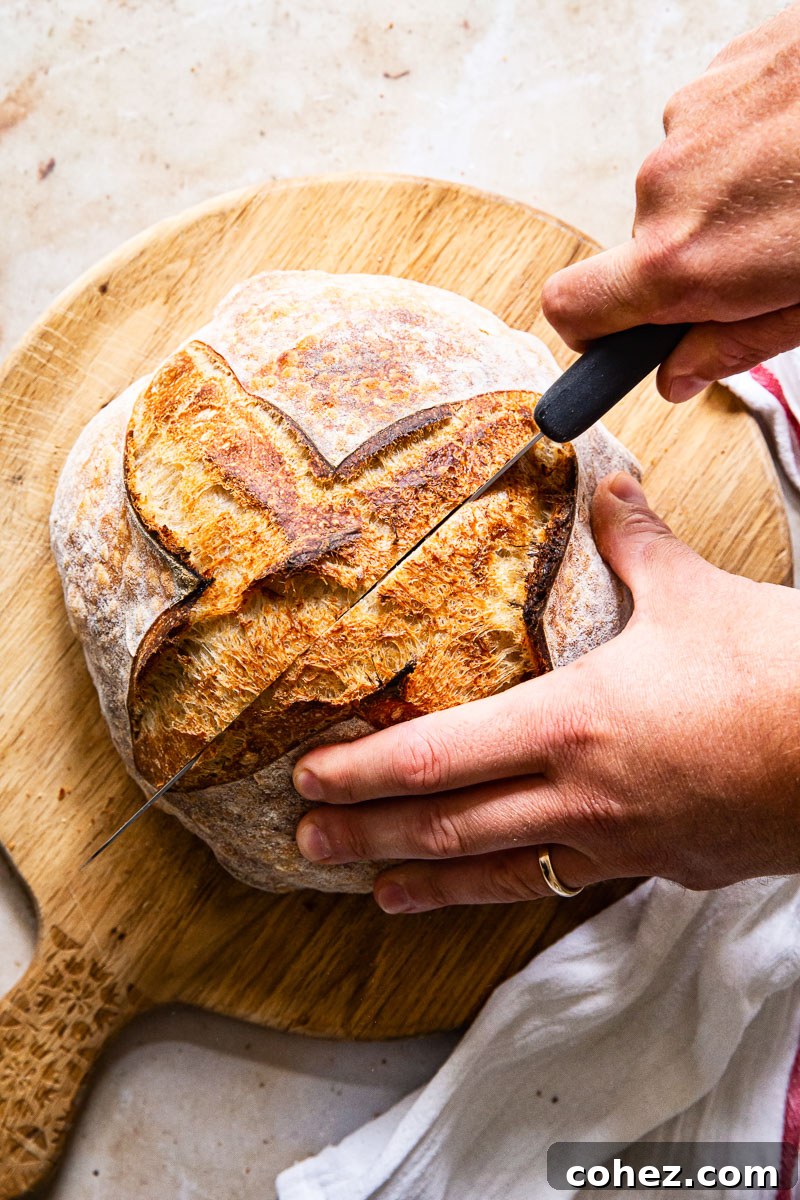
- Solution 3: Patience is key, even after baking! This issue almost always stems from cutting into your beautiful loaf too soon. Sourdough bread needs to cool completely for at least 3-4 hours on a wire rack before slicing. During this cooling period, the internal structure continues to set, and moisture redistributes. Cutting too early disrupts this process, leading to a gummy texture.
- Problem 4: My crumb is too dense, with large holes at the top and small holes at the bottom, or uniformly small holes throughout.
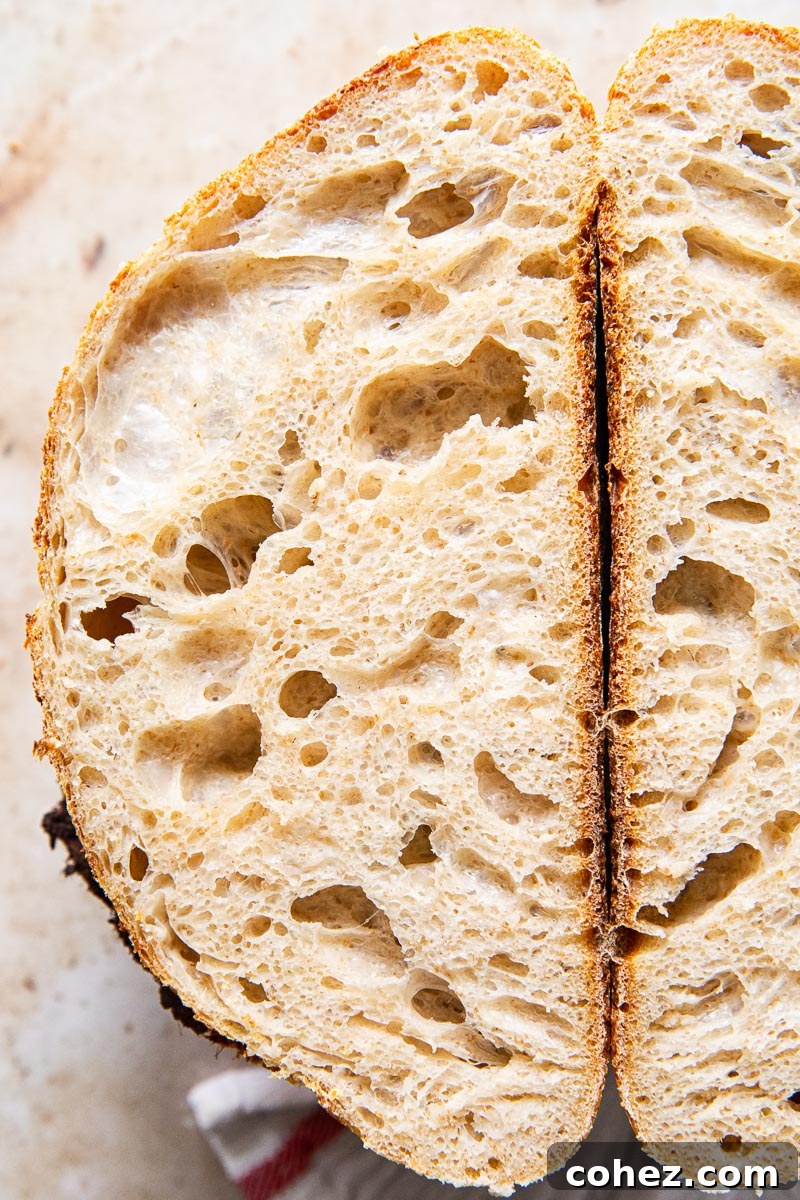
- Solution 4: A dense crumb, or an uneven crumb structure, typically indicates that your dough was under-proofed. Under-proofing prevents the full development of gases and the optimal gluten network required to trap those gases, resulting in a less airy interior and a less developed, often bland, flavor. Ensure your bulk fermentation and cold proofing times are adequate, and always rely on visual cues and the poke test.
I genuinely hope this comprehensive guide and the detailed recipe below empower you on your sourdough baking journey. Remember, practice truly makes perfect, and every loaf is a learning experience! Once you feel confident with the basics, I encourage you to venture into more exciting variations. Give our Walnut and Raisin Sourdough Bread a try, and don’t forget the incredible possibilities of sourdough for other culinary delights like our Sourdough Pizza and Sourdough Focaccia!
Explore More Favorite Bread Recipes:
- Dutch Oven Bread (Ready in 2 Hours)
- Rosemary Spelt Bread Recipe
- Classic Rye Bread Recipe
- Sweet Rhubarb Jam Swirled Bread
Rating: 4.86 from 7 votes
Sourdough Bread for Beginners
By Julia Frey of Vikalinka
Prep: 20 mins
Cook: 45 mins
Total: 1 day 1 hr 5 mins
Servings: 15

Pin This Recipe (Removed JS-driven buttons, replaced with static link concept): Pin on Pinterest
Print Recipe (Removed JS-driven buttons, replaced with static link concept): Print Recipe
Everything you need to know to start baking delicious sourdough bread. From making the starter to troubleshooting common issues.
Ingredients
- 100g / 1/2 cup sourdough starter (active)
- 500g / 4 cups white bread flour
- 350ml / 1 1/3 cups + 1 tablespoon water
- 9-10g / 1/2 tablespoon salt
Instructions
- In the morning, discard half of your active sourdough starter. Feed the remaining starter by mixing in 50g of flour and 50g of water. Let it ferment at room temperature until it doubles in size (approximately 4-5 hours, depending on starter strength and ambient temperature; it may take 6-7 hours in colder conditions).
- When your starter is nearly at its peak (almost doubled in size), begin the autolyse. In a large bowl, thoroughly mix the bread flour and water until no dry spots remain. Cover the bowl with plastic wrap and let it rest for 30 minutes to 1 hour, allowing the flour to fully hydrate and gluten to begin developing.
- Once the starter has peaked, add 100g of it to the autolysed flour and water mixture. Then, add the salt and mix everything thoroughly until well combined. (Keep any remaining starter to feed as usual for your next bake).
- Knead the dough to develop the gluten. You can do this either in the bowl of a stand mixer fitted with a dough hook (for about 10 minutes on low speed, e.g., speed 1 or 2) or by hand on a lightly floured surface. To check for sufficient gluten development, perform the “windowpane test”: pull a small piece of dough and gently stretch it between your fingers. It should stretch easily into a transparent membrane without tearing, indicating proper kneading.
- Cover the kneaded dough with plastic wrap to prevent it from drying out, and allow it to bulk ferment at room temperature for 5-7 hours. After bulk fermentation, gently scrape the dough out of the bowl onto a lightly floured work surface. With floured hands, carefully pull one side of the dough, fold it over itself towards the center, and repeat with the other three sides to form an envelope shape. Pinch the seams at the top to seal. Be gentle to preserve the accumulated bubbles.
- Using a bench scraper, pick up the dough and flip it over so the pinched seam faces the countertop. Shape it into a taut ball (boule) by tucking the sides of the dough inwards and underneath with your hands. Continuously spin the dough while tucking to create surface tension, resulting in a smooth, round top. (Minimal flour on the surface helps the dough grip and create tension; refer to photos for visual guidance).
- Generously dust your banneton (or a flour-dusted bowl lined with a tea towel) with rice flour to prevent sticking. Place the shaped loaf into the banneton, seam-side up. Cover with a tea towel and transfer to the refrigerator for a cold fermentation (cold proofing) of 16-20 hours.
- The following day, one hour before baking, preheat your oven with your Dutch oven (with lid) inside to its highest temperature, typically 450°F (220°C) or higher. Remove the dough from the refrigerator and gently flip it out of the proofing basket onto a piece of parchment paper (a flat baking sheet beneath the paper can assist with transfer). Score the dough with a sharp knife or a bread lame in your desired pattern. Carefully remove the hot Dutch oven from the oven, use the parchment paper to quickly lower the loaf into it, and replace the lid. Bake for 30 minutes. Then, remove the lid and continue baking for another 15-20 minutes, or until the crust is deeply golden brown.
- Crucially, cool your baked sourdough bread on a wire rack for at least 4-5 hours before attempting to slice it. This allows the internal structure to set and moisture to redistribute, preventing a gummy crumb.
Video
A video demonstrating the sourdough baking process can be helpful. (Removed original video embed, as per instructions. You may link to a video here if available, e.g., Watch the Sourdough Baking Process)
Notes
Please note:
You need to start this bread recipe a day before you actually bake the bread.
Nutrition
Calories: 127kcal | Carbohydrates: 27g | Protein: 4g | Fat: 1g | Saturated Fat: 1g | Sodium: 234mg | Potassium: 36mg | Fiber: 1g | Sugar: 1g | Calcium: 6mg | Iron: 2mg
Nutrition information is automatically calculated, so should only be used as an approximation.
Tried this recipe? Let us know how it was!