
Classic Canadian Nanaimo Bars: The Ultimate No-Bake Holiday Treat
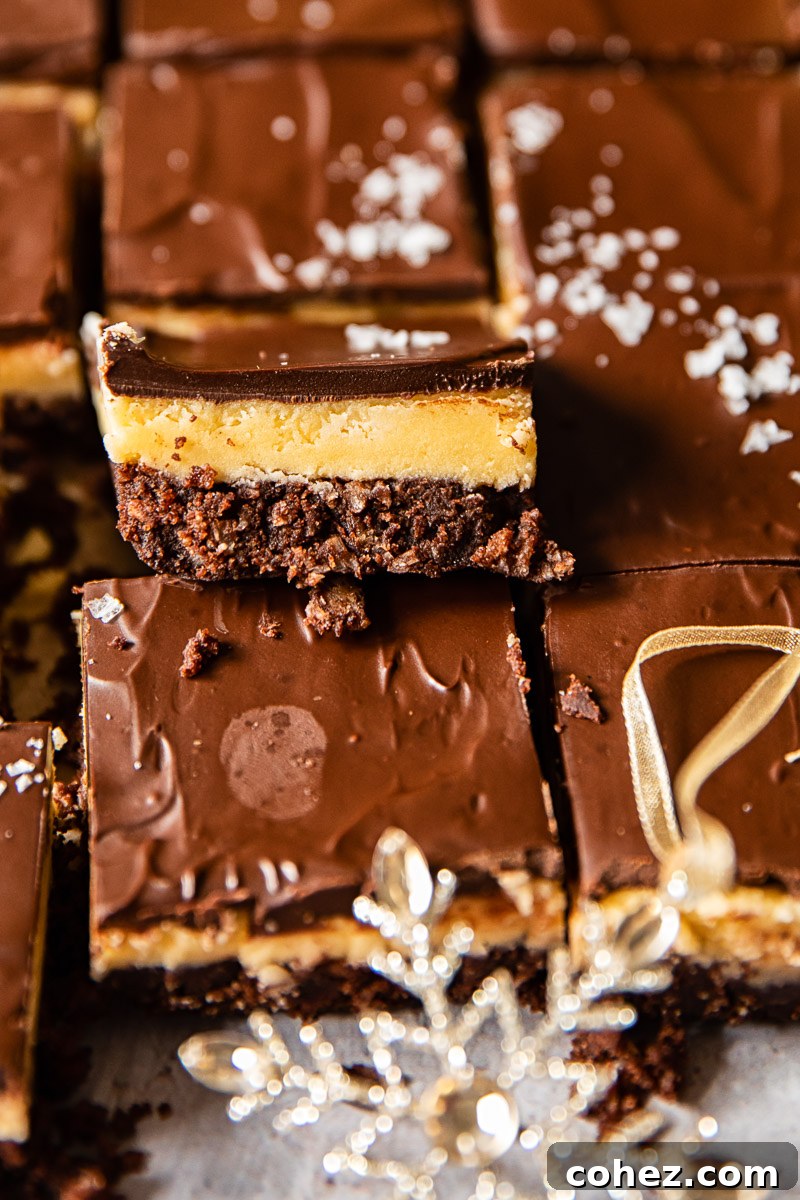
Discover the magic of Nanaimo Bars, Canada’s iconic three-layer no-bake dessert that promises to captivate your taste buds! These irresistible bars feature a rich chocolate and coconut crumb base, a luscious creamy custard filling, and a smooth chocolate ganache topping. A true Canadian classic, Nanaimo Bars are ready to conquer the world, just as they have charmed an entire nation.
Looking to explore more delightful Canadian desserts? Don’t miss our indulgent Maple Butter Tarts! Or dive into our extensive Holiday Dessert Section within our Christmas Recipe Collection for a festive treat for every occasion.
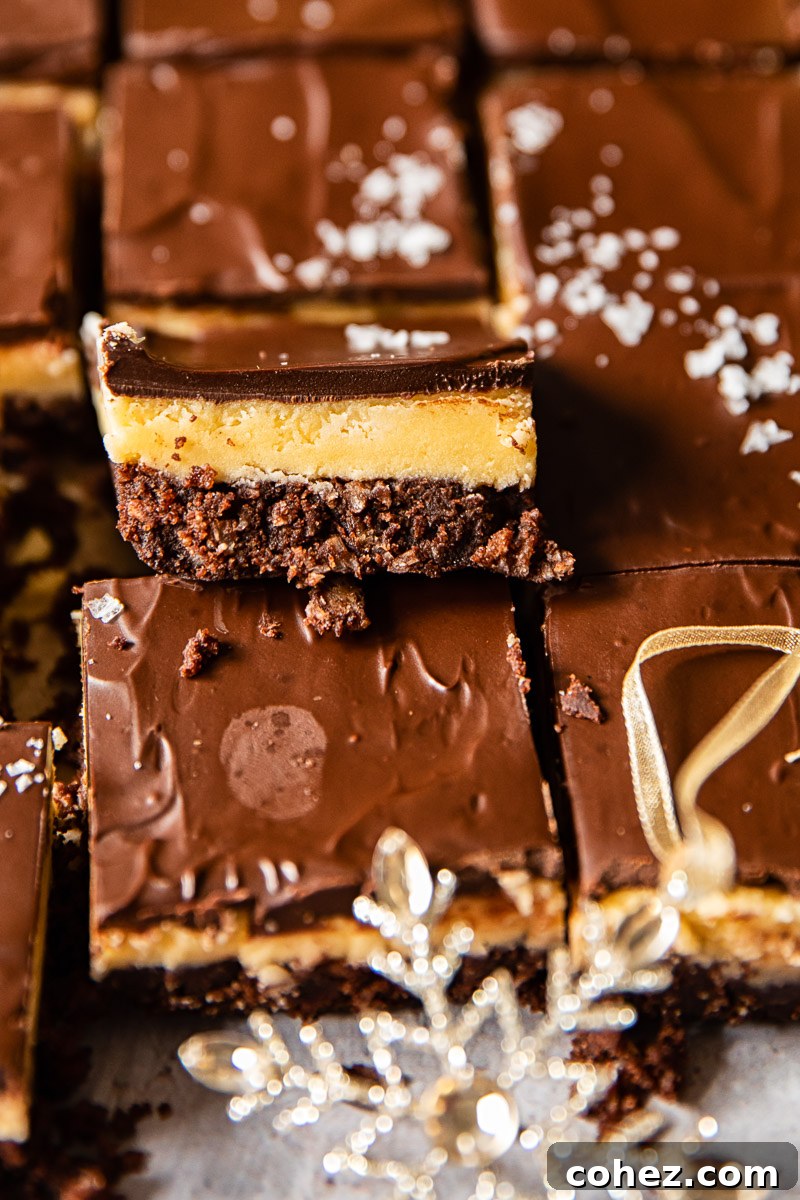
Are you craving a decadent dessert but unsure where to start? Nanaimo Bars offer a delightful solution! Their rich flavor profile and straightforward, no-bake preparation make them an ideal choice for both novice and experienced bakers. Get ready to embark on a culinary journey that brings the authentic taste of Canada right into your kitchen.
Alongside beloved Butter Tarts, Nanaimo Bars hold a special place in Canadian hearts. For those of us living away from home, these treats become more than just a dessert; they are a comforting link to our roots, evoking cherished memories of family gatherings and festive celebrations. This holiday season, if you find yourself longing for a taste of Canada, baking a batch of these classic bars is a wonderful way to bring that comfort home.
What Exactly Are Nanaimo Bars?
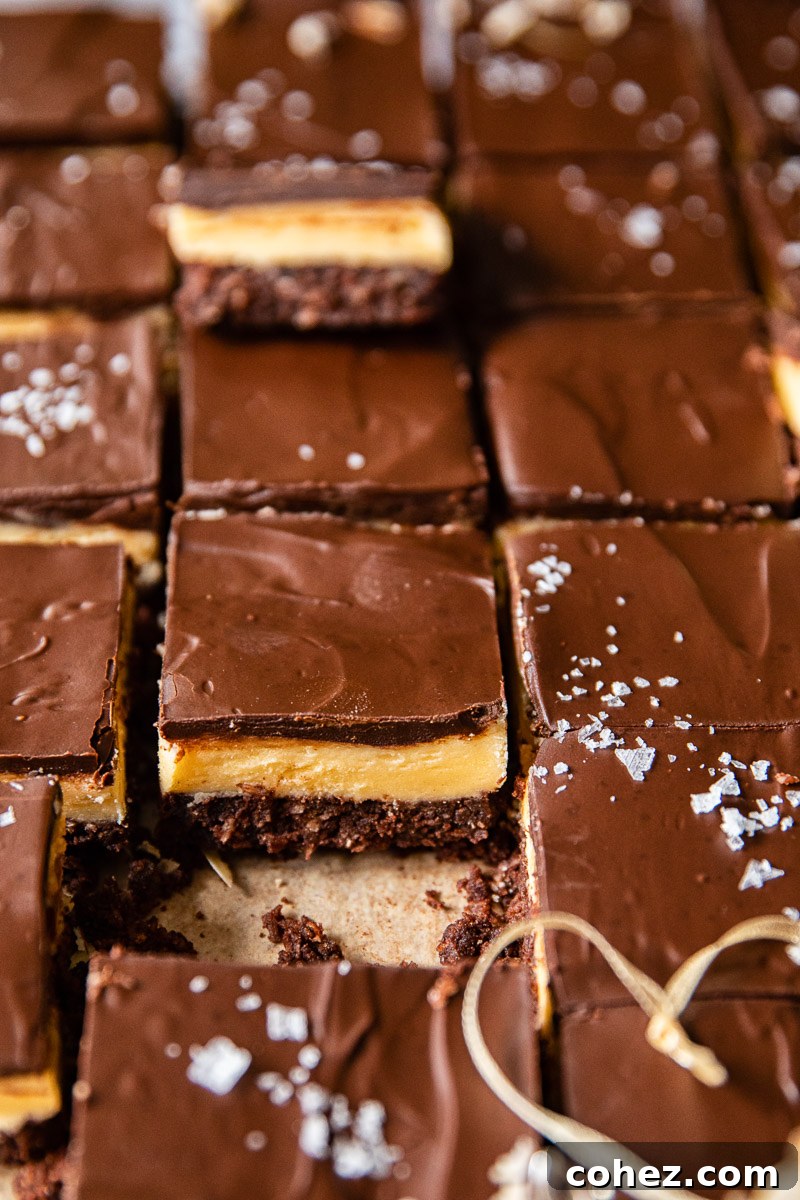
Nanaimo Bars are a celebrated Canadian confection, distinguished by their luxurious triple-layer construction. The base is a delectable mixture of crunchy chocolate and coconut, providing a satisfying texture. This is topped with a smooth, creamy custard filling, offering a melt-in-your-mouth sweetness. The entire bar is then crowned with a glossy, rich chocolate glaze, creating a symphony of flavors and textures in every bite.
These bars are deeply ingrained in Canadian culinary tradition, with their origins often attributed to the city of Nanaimo in British Columbia. This charming West Coast town, which we once lived just an hour away from, is rumored to be the birthplace of this iconic dessert. While the exact inventor remains a subject of historical debate and endless curiosity, Nanaimo Bars gained significant recognition and widespread popularity during the 1950s.
The rise of Nanaimo Bars in post-war Canada tells an interesting story about a nation’s renewed passion for sweet indulgences. After years of rationing and scarcity, butter and sugar became more readily available. People were eager to embrace the richness and sweetness that these ingredients offered, leading to the creation of lavish, comforting desserts like the Nanaimo Bar. It was a culinary expression of joy and abundance, reflecting a desire to celebrate and enjoy life’s simple pleasures once more.
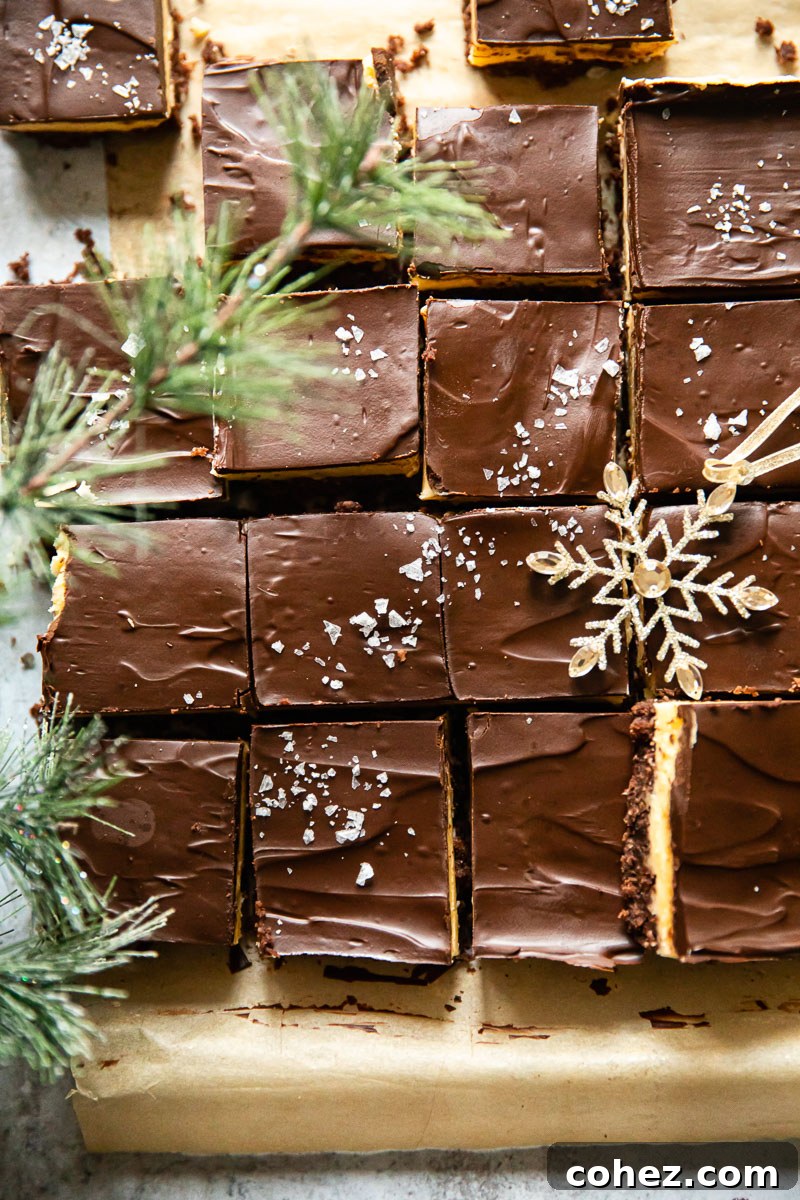
The Nanaimo Bar commands a fiercely devoted following in its homeland, and it’s not hard to understand why after just one bite. You’ll be utterly captivated by this delightful triple-layer dessert, with its unique blend of a chocolate coconut base, a velvety custard center, and a perfectly smooth chocolate glaze. It’s a taste experience that truly stands apart.
During our time living in Canada, crafting these bars from scratch was rarely necessary. They were a ubiquitous presence, served generously in nearly every home we visited during the festive Christmas season. It was a staple, a given, and always a welcome sight.
However, now that we reside in England, the desire for familiar comforts from home has grown immensely. This longing for a taste of Canada has inspired us to bake these traditional treats ourselves. It’s more than just a dessert; it’s a connection to our memories, a warm embrace that brings a much-needed sense of home and happiness across the miles.
Crafting Your Own Nanaimo Bars: A Simple Guide
One of the many charms of Nanaimo Bars is their remarkable ease of preparation. These are no-bake wonders, making them an ideal project for a fun afternoon with kids or for anyone seeking a delicious dessert without the fuss of complex baking. The most challenging part of this recipe isn’t the mixing or assembling, but rather the patience required to allow each luscious layer to properly set before moving on to the next!
The No-Bake Method Explained
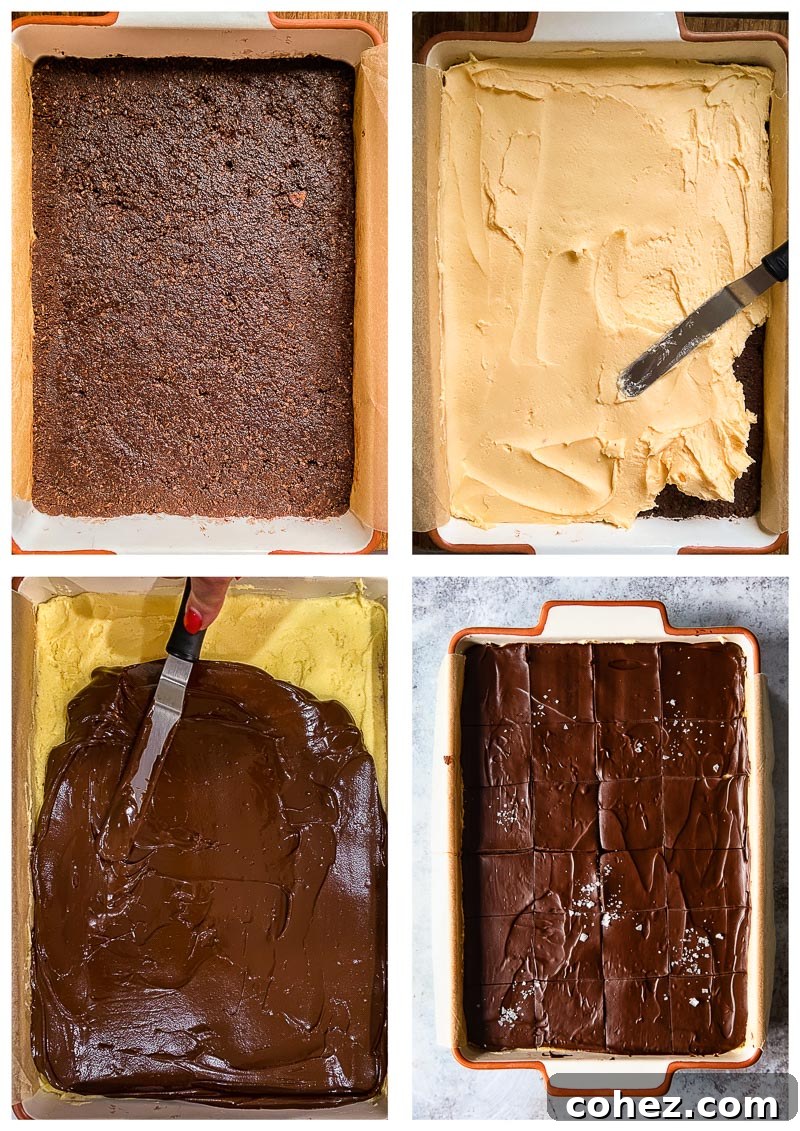
The process for Nanaimo Bars shares a comforting similarity with creating a classic cheesecake. It all begins with a sturdy, flavorful base. For this, you’ll combine a simple mixture of graham cracker crumbs, rich cocoa powder, melted butter, sugar, shredded dried coconut, and a single egg. This combination creates a deeply satisfying, crumbly foundation that holds everything together beautifully. For those in the UK or places where graham crackers are hard to find, plain Digestive biscuits are an excellent and highly recommended substitute, yielding equally delicious results.
Once your base mixture is ready, it’s packed firmly into your prepared pan and briefly baked to set. This quick bake provides stability and a slight toastiness to the coconut and crumbs. After cooling, the magic truly begins as you spread on the star of the show: the creamy, no-bake custard filling. Finally, a silky layer of melted chocolate is poured over the custard, encapsulating the deliciousness beneath. And just like that, with minimal effort, you’re on your way to enjoying these exquisite bars!
Expert Tips for Perfect Nanaimo Bars
- The Essential Custard Powder: The distinctive, creamy middle layer of authentic Canadian Nanaimo Bars gets its signature yellow hue and unique flavor from custard powder. This ingredient is truly indispensable for achieving the traditional taste and texture.
- Custard Powder Sourcing: While vanilla pudding mix can be a substitute, it won’t replicate the exact taste of a classic Nanaimo Bar. We highly recommend seeking out Bird’s custard powder. It’s often available in the international or baking aisle of larger supermarkets, or readily found online.
- Graham Crackers vs. Digestive Biscuits: The traditional base calls for crushed graham crackers. However, when living in the UK, I found Digestive biscuits to be an exceptional alternative. They work wonderfully and are a fantastic option if graham crackers aren’t easily accessible.
- Patience is Key: Layer Setting: For beautifully defined layers that don’t bleed into each other, it’s crucial to allow each layer ample time to set. While it doesn’t take an excessively long time, this step is vital for the structural integrity and aesthetic appeal of your bars.
- Pre-Cutting for Clean Slices: Approximately 30 minutes after you’ve applied the final chocolate layer, when it’s partially set but still yielding, take the time to pre-cut your bars. This vital step prevents the chocolate topping from cracking and shattering once the bars are fully chilled and firm, ensuring neat and attractive slices.
- A Pinch of Sea Salt (Optional but Recommended): Although not part of the original recipe, I adore sprinkling my Nanaimo Bars with flaked sea salt just before the chocolate fully sets. The delicate salt crystals provide a much-needed balance to the bars’ inherent sweetness, elevating the flavor profile. As an added bonus, the sea salt flakes resemble a light dusting of snow, making these already gorgeous bars even more visually appealing – perfect for the holidays!
Serving Your Delicious Nanaimo Bars
Nanaimo Bars are known for their delightful sweetness, which means a little goes a long way! To truly savor their rich flavors without being overwhelmed, it’s best to cut them into manageable, bite-sized portions. I typically recommend cutting them into squares no larger than 5 cm (2 inches). Smaller portions are perfectly acceptable and can even encourage guests to try more than one!
As someone who doesn’t have the sweetest tooth, I find that Nanaimo Bars pair wonderfully with a balancing beverage. You don’t need anything elaborate to complement their intricate flavors. A steaming cup of freshly brewed coffee, with its robust and slightly bitter notes, provides an excellent contrast to the bars’ sweetness. Alternatively, a comforting mug of hot tea, whether it’s a classic black tea or a fragrant herbal blend, offers a soothing counterpoint. These simple pairings enhance the overall indulgence without overshadowing the star of the show.
Storage and Enjoying Leftovers
One of the fantastic qualities of Nanaimo Bars is how well they store, particularly in the freezer. In Canada, freezing these bars is a common practice, ensuring a supply of this beloved treat throughout the holiday season and beyond. To freeze them effectively, simply arrange the cut bars in an airtight container, placing a layer of parchment paper or wax paper between each row to prevent sticking. They can be frozen for several weeks, ready to be enjoyed whenever a craving strikes.
When you’re ready to indulge, simply remove the desired number of bars from the freezer approximately 30-40 minutes before serving. This allows them sufficient time to thaw gently, bringing them to their ideal consistency. Nanaimo Bars truly taste their best when served at room temperature, as this allows the chocolate, custard, and coconut flavors to fully meld and shine, offering the most delicious experience.
Explore More Holiday Bar Recipes
- English Fridge Cake Bars
- Raspberry Cheesecake Bars
- Blackberry Crumble Bars
- Slow Cooker Chocolate Butterscotch Cookie Bars
Nanaimo Bars
Julia Frey of Vikalinka
30 mins
10 mins
1 hr 40 mins
24
Equipment
-
Mixing bowl
-
9×13 baking pan
Ingredients
Base
- 190g / 3/4 cup butter, melted
- 50g / 1/4 cup sugar
- 6 tbsp cocoa powder
- 1 large egg
- 1 tsp vanilla extract
- 220g / 2 cups graham cracker crumbs (or Digestive biscuits in the UK)
- 100g / 1 cup dried coconut
Middle Layer
- 125g / 1/2 cup butter, softened
- 6 tbsp milk
- 4 tbsp custard powder (Bird’s Custard powder recommended)
- 520g / 4 cups icing sugar (confectioners’ sugar)
Top Layer
- 250g / 8 oz dark or milk chocolate, chopped
- 2 tbsp butter
Instructions
-
Preheat your oven to 350F/180C. In a large bowl, mix all ingredients for the base until well combined. Line your 9 inch x 13 inch baking pan with parchment paper, leaving an overhang on the sides for easy removal. Press the crumb mixture firmly and evenly into the prepared pan. Bake for 10 minutes. Remove from oven and set aside in the pan to cool completely.
-
While the base is cooling and chilling, prepare the middle layer. In a separate bowl, beat together the softened butter, milk, custard powder, and icing sugar until the mixture is completely smooth and creamy. Spread this luscious custard cream layer evenly over the chilled base. Place the pan in the refrigerator and chill for at least 60 minutes to allow the custard layer to set firmly.
-
For the top layer, melt the chopped chocolate with 2 tablespoons of butter. You can do this using a double boiler: place a heatproof bowl with chocolate and butter over a pot of simmering water, ensuring the bottom of the bowl does not touch the water. Stir gently until smooth and fully melted. Alternatively, you can use a microwave, heating in 30-second intervals and stirring until smooth.
-
Carefully pour the melted chocolate mixture over the set cream layer, spreading it evenly to cover the entire surface. Allow the chocolate to set at room temperature for about 30-40 minutes until it is partially firm but still soft enough to cut. At this point, use a sharp knife to score or partially cut the bars into your desired serving sizes. This crucial step prevents the chocolate layer from cracking later when it fully hardens. Once scored, chill the bars in the refrigerator for several hours or preferably overnight until they are completely firm before making final cuts and serving.
Nutrition
Carbohydrates: 38g |
Protein: 2g |
Fat: 19g |
Saturated Fat: 12g |
Cholesterol: 44mg |
Sodium: 163mg |
Potassium: 108mg |
Fiber: 2g |
Sugar: 29g |
Vitamin A: 379IU |
Vitamin C: 1mg |
Calcium: 25mg |
Iron: 1mg
Nutrition information is automatically calculated, so should only be used as an approximation.
Tried this recipe?
Let us know how it was!