
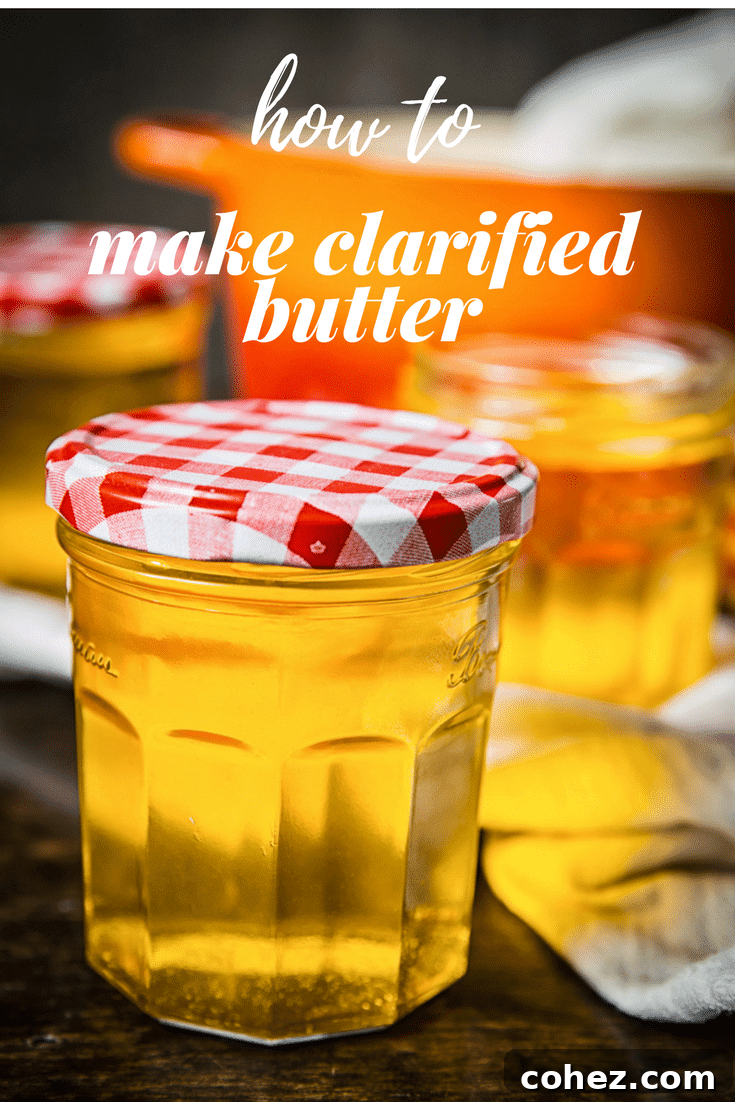
Master the art of clarified butter and transform your cooking! Whether you’re a seasoned chef or just starting your culinary journey, learning how to make clarified butter at home is a game-changer. This golden, liquid gold offers unparalleled versatility and a rich, nutty flavor that regular butter simply can’t match. Forget burning butter in your pan or compromising on taste; clarified butter, often known as ghee, is your ticket to elevating everyday meals and mastering complex dishes.
I am incredibly passionate about clarified butter, a passion passed down from my mother who always emphasized its importance in the kitchen. Yet, when I recently shared a photo of my homemade clarified butter on Instagram, I was surprised to find that 80% of my followers weren’t familiar with it! This revelation fueled my desire to demystify this essential ingredient and help every home cook discover its wonders. It’s incredibly simple to prepare, requiring just one ingredient, and its benefits are far-reaching. Let’s dive in and unlock the secrets of this culinary staple!
Just like mastering Tuscan Kale Pesto, investing a little effort now to make clarified butter will save you a lot of time and elevate your dishes significantly in the long run.
What is Clarified Butter and How Does it Differ from Ghee?
At its core, clarified butter is pure butterfat. It’s made by gently melting regular butter and simmering it over low heat, allowing the water to evaporate and the milk solids (proteins and sugars like lactose) to separate and rise to the surface. These milk solids are then carefully skimmed away, leaving behind a clear, golden liquid. This process effectively removes the components of butter that are prone to burning and spoiling, resulting in a more stable and flavorful fat. It is the culinary equivalent of refining an ingredient to its most perfect and pure form, ensuring peak performance in your cooking.
You might have heard of ghee, especially if you’re familiar with Indian or South Asian cuisine. Clarified butter and ghee are fundamentally similar, sharing the same core process of separating butterfat from milk solids and water. The primary distinction between the two lies in the duration of the cooking process and the subsequent flavor profile. Traditional clarified butter, often referred to as ‘toplenoe maslo‘ in Russia, is typically cooked just long enough for the milk solids to separate and be skimmed off, yielding a clean, delicate, and pure butter flavor.
Ghee, conversely, is cooked for a slightly extended period. During this prolonged simmering, the milk solids that settle at the bottom of the pan undergo a gentle caramelization, turning a light golden to a deeper golden-brown hue. This caramelization imparts a distinct, intensely nutty, and complex aroma and flavor to the ghee, often described as having notes of toasted nuts, caramel, and a slightly richer depth than standard clarified butter. While both forms offer a significantly higher smoke point than regular butter and are virtually lactose and casein-free, ghee boasts a more pronounced and intricate taste, making it a revered fat in traditional Ayurvedic practices and diverse culinary traditions worldwide.

The Unbeatable Benefits: Why Clarified Butter is a Kitchen Essential
Beyond its simple preparation, clarified butter offers a multitude of advantages that make it an indispensable ingredient for any home cook looking to elevate their culinary skills. Let’s explore the key reasons why you should make it a regular part of your cooking arsenal and transform your kitchen into a haven of rich flavors and efficient cooking:
1. Exceptionally High Smoke Point
One of the most significant and practical benefits of clarified butter is its remarkably high smoke point, which typically ranges from 450°F to 485°F (232°C to 252°C). To put this into perspective, regular butter has a much lower smoke point of around 302°F to 350°F (150°C to 177°C). The dramatic difference is due to the removal of water and milk solids during the clarification process. These components are precisely what cause regular butter to burn, smoke, and blacken at lower temperatures, producing an unpleasant acrid taste and potentially harmful free radicals.
With its elevated smoke point, clarified butter allows you to cook at much higher temperatures without fear of scorching. This makes it the ideal fat for searing meats to achieve a perfect, caramelized crust, sautéing vegetables until beautifully tender-crisp and golden, or pan-frying delicate ingredients like fish and eggs without them sticking or developing a burnt flavor. It ensures your food develops a rich, inviting color and a superior texture, making every dish a culinary success.
2. Dairy-Free and Lactose-Friendly for Sensitive Diets
For individuals with dairy sensitivities, lactose intolerance, or even mild casein allergies, clarified butter is a fantastic and often safe alternative to traditional butter. The meticulous clarification process effectively separates and removes almost all of the lactose (milk sugar) and casein (the primary proteins in milk) that are typically responsible for allergic reactions and digestive discomfort. While it’s always prudent for those with severe allergies to consult a healthcare professional, the vast majority of people who are lactose intolerant find clarified butter or ghee to be easily digestible. It allows them to enjoy the beloved rich, buttery flavors without experiencing adverse effects, opening up a world of culinary possibilities that might otherwise be off-limits.
3. Rich, Pure, and Concentrated Butter Flavor
When you clarify butter, you are essentially concentrating its pure butterfat, stripping away the components that dilute its essence. This process results in an intensified, nuanced flavor that is often described as rich, deeply buttery, subtly nutty, and even slightly sweet, sometimes with an almost caramel-like aroma. Unlike regular butter, which has a creamier, milder, and more delicate taste, clarified butter offers a deeper and more profound buttery essence that truly stands out. This makes it an excellent choice for applications where you want the butter flavor to be prominent and shine through, adding a gourmet touch and complex depth to both savory and sweet dishes that will impress even the most discerning palates.
4. Extended Shelf Life and Pantry Stability
The careful removal of water content and milk solids during clarification significantly increases butter’s natural shelf stability. Water is a breeding ground for microbial growth, and milk solids contain proteins and sugars that are more prone to oxidative rancidity. By eliminating these perishable elements, clarified butter becomes far less susceptible to spoilage. As a result, it can be stored at room temperature for several weeks, or even months, without requiring refrigeration (provided it’s kept in an airtight container in a cool, dark place away from direct sunlight and heat). This attribute makes it an incredibly convenient pantry staple, always ready for use without the need to soften it from the fridge, and reducing food waste in your kitchen.
Versatile Uses in the Kitchen: Where Clarified Butter Shines
The culinary applications of clarified butter are vast and varied. Once you start incorporating it into your cooking, you’ll wonder how you ever managed without this incredible ingredient. Its unique properties make it ideal for a multitude of delicious dishes, transforming ordinary meals into extraordinary culinary experiences. Here are some common and exceptional ways to leverage this golden fat in your daily cooking:
- High-Heat Frying and Sautéing: This is arguably where clarified butter truly excels. Its high smoke point makes it the perfect fat for pan-frying delicate chicken cutlets, flaky fish fillets, succulent shrimp, or achieving that coveted, perfectly seared crust on a steak. You can cook at higher temperatures, ensuring a beautiful, crisp, and golden-brown exterior on your food without the risk of burnt butter imparting bitter notes. Try frying steak in clarified butter for an unforgettable flavor and texture – you’ll thank me later for this simple yet profound upgrade!
- Building Exquisite Sauces: Clarified butter is an indispensable component for creating stable, luxurious emulsified sauces, most notably classic French creations like Hollandaise and Béarnaise. Its pure butterfat allows for a robust and silky-smooth emulsion, preventing the sauce from “breaking” or separating. Imagine effortlessly preparing rich, velvety Hollandaise for Eggs Benedict every weekend, or a perfect Béarnaise to accompany a tender beef fillet! It’s also fantastic for finishing delicate pan sauces, enriching gravies, or making compound butters that truly pop with flavor.
- Perfect Popcorn Perfection: Ditch the bland, often chemically-laden oils often used for popcorn. Popping corn in clarified butter infuses every single kernel with a deep, authentic, and utterly delicious buttery flavor that microwave popcorn or standard vegetable oils can only dream of. A generous drizzle over freshly popped corn takes it to an entirely new level of gourmet snack bliss.
- Gourmet Grilled Cheese & Sandwiches: Elevate a simple, comforting grilled cheese sandwich into a gourmet experience by generously spreading clarified butter on the outside of the bread before toasting. The result is an incredibly crispy, uniformly golden crust with an intensified, savory buttery taste – pure comfort food perfection that’s a step above the ordinary. Use it on any grilled sandwich for a superior finish.
- Roasting Vegetables with a Golden Touch: When roasting vegetables, using clarified butter ensures they caramelize beautifully and develop a delightful sweetness without the risk of the butter burning at high oven temperatures. It helps achieve a wonderfully crisp exterior and a tender interior, adding a rich depth of flavor.
- Baking Applications: While not used for all baking, clarified butter can add immense richness to certain pastries, flaky pie crusts, or specific cakes where you desire a pure butter flavor without the moisture content of regular butter, which can sometimes alter texture.
- Essential in Indian and Middle Eastern Cuisine: Known as ghee, this clarified butter is a fundamental fat in these culinary traditions. It’s used extensively for tempering spices to release their full aroma, making rich and flavorful curries, frying various flatbreads, and adding a sublime, aromatic finishing touch to countless traditional dishes like dals, biryanis, and pilafs.
Clarified Butter Recipe: Homemade Liquid Gold
Making clarified butter is surprisingly simple and requires minimal effort for maximum reward. This foundational skill will empower you to create your own batch of this versatile kitchen staple, transforming your everyday cooking with its pure flavor and high-heat stability.
Equipment You’ll Need:
- A heavy-bottomed pot or Dutch oven (this is crucial for even heat distribution and preventing the butter from burning or scorching at the bottom)
- Fine-mesh sieve or strainer
- Cheesecloth (optional, but highly recommended for achieving the clearest possible clarified butter)
- Clean, heat-proof glass jar(s) with airtight lid(s) for storage
- A spoon or small ladle for skimming foam
Ingredients:
- 1 kg / 2 lbs unsalted butter (Crucial Tip: Ensure your butter has at least 80% fat content. Avoid low-fat or reduced-fat butter, as they contain more water and milk solids, making them unsuitable for proper clarification.)
Instructions:
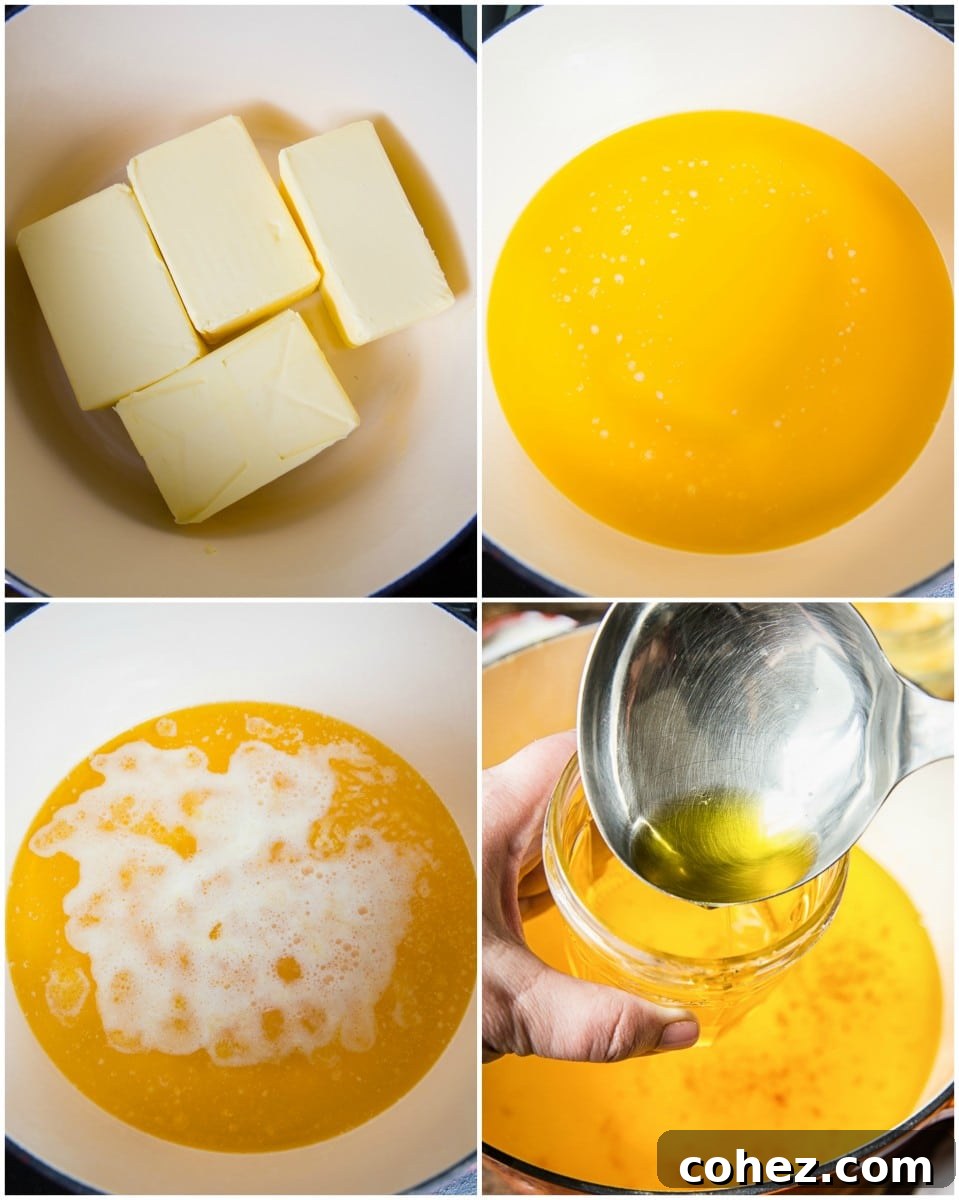
- Prepare the Butter: Begin by unboxing your unsalted butter. For more even melting, cut the butter into smaller, relatively uniform pieces (e.g., 1-inch cubes). Place all the butter into your heavy-bottomed pot or Dutch oven.
- Melt on Lowest Heat: Place the pot over the lowest possible heat setting on your stovetop. The key here is patience and gentleness. The goal is to melt the butter slowly and steadily, without allowing it to boil vigorously or brown rapidly at this initial stage. This slow rendering process is fundamental for allowing the butter’s components to separate properly and for achieving perfectly clear clarified butter.
- Observe the Layers Forming: As the butter gradually melts and begins to heat, it will naturally separate into distinct layers. You will observe a foamy white layer rising to the top (these are the milk proteins/solids), a clear, golden-yellow butterfat layer forming in the middle, and some heavier milk solids settling and clinging to the bottom of the pot.
- Skim the Foamy Milk Solids: Once the butter is fully melted and starts to simmer very gently (you’ll notice tiny bubbles, not a rolling boil), the milk solids will coagulate and accumulate as foam on the surface. Using a clean spoon or a fine-mesh skimmer, carefully and gently skim off this foamy layer. Continue to skim periodically as more milk solids rise to the surface. Discard these skimmed solids if you wish, or set them aside for other culinary uses (see notes below).
- Continue Gentle Simmering for Clarity: Allow the butter to continue simmering very gently, maintaining the lowest heat setting. You’ll notice a gradual decrease in the crackling or bubbling sounds emanating from the pot; this indicates that the water content is evaporating. Keep a very close eye on the butter’s appearance: it should transform into a clear, luminous, amber color. You should eventually be able to distinctly see the bottom of the pot through the translucent butterfat. This entire simmering process typically takes about 45-50 minutes for 2 lbs of butter, or roughly 25 minutes per pound. If you are aiming for ghee, you would continue cooking past this stage until the milk solids at the bottom begin to turn golden brown and emit a distinct, nutty aroma.
- Remove from Heat: Once the butter has achieved its clear, amber hue and the crackling sounds have mostly subsided, carefully remove the pot from the heat source. Do not let it sit on the hot burner if you have an electric stove, as residual heat can cause it to overcook.
- Strain and Store: Allow the clarified butter to cool slightly in the pot for a few minutes (about 5-10 minutes) to make it easier and safer to handle. Then, carefully ladle or pour the warm, liquid clarified butter into your clean, heat-proof glass jars. For the absolute clearest and purest result, especially for the very last portions, line your fine-mesh sieve with a layer or two of cheesecloth and pour the butter through it. This extra step will effectively filter out any minute remaining sediment or milk solids that may have settled at the bottom.
- Cool and Seal: Leave the jars of clarified butter uncovered at room temperature to cool completely. Once entirely cooled (it will solidify), seal the jars with their airtight lids.
Recipe Notes and Essential Tips:
- This recipe, using 1 kg (2 lbs) of unsalted butter, typically yields approximately 750 ml (3 cups) of clarified butter. The exact yield can vary slightly based on the butter’s specific moisture content and fat percentage.
- Butter Quality Matters: Always prioritize using high-quality unsalted butter with a minimum of 80% fat content. Low-fat or reduced-fat butters contain an increased amount of water and milk solids, making them inherently unsuitable for successful clarification.
- Don’t Waste the Milk Solids! The milk solids you skim off the top, and any that settle at the bottom, are packed with a wonderfully concentrated buttery flavor. Do not discard them! These savory morsels can be a delightful addition to various dishes. Stir them into soups or broths for extra richness, mix them into scrambled eggs for an enhanced flavor profile, incorporate them into mashed potatoes, or even spread them on toast for a unique savory treat.
- Minimize Stirring: Once the butter begins to simmer and the layers form, it’s best to avoid excessive stirring. Stirring too much can reintegrate the separated milk solids back into the butterfat, making it more challenging to achieve a clear, pure clarified butter.
- Pot Color Advantage: If available, use a light-colored pot or Dutch oven. A lighter interior makes it significantly easier to observe the subtle color changes of the butter and to monitor the browning (or lack thereof) of the milk solids at the bottom, which is crucial for perfect clarification.
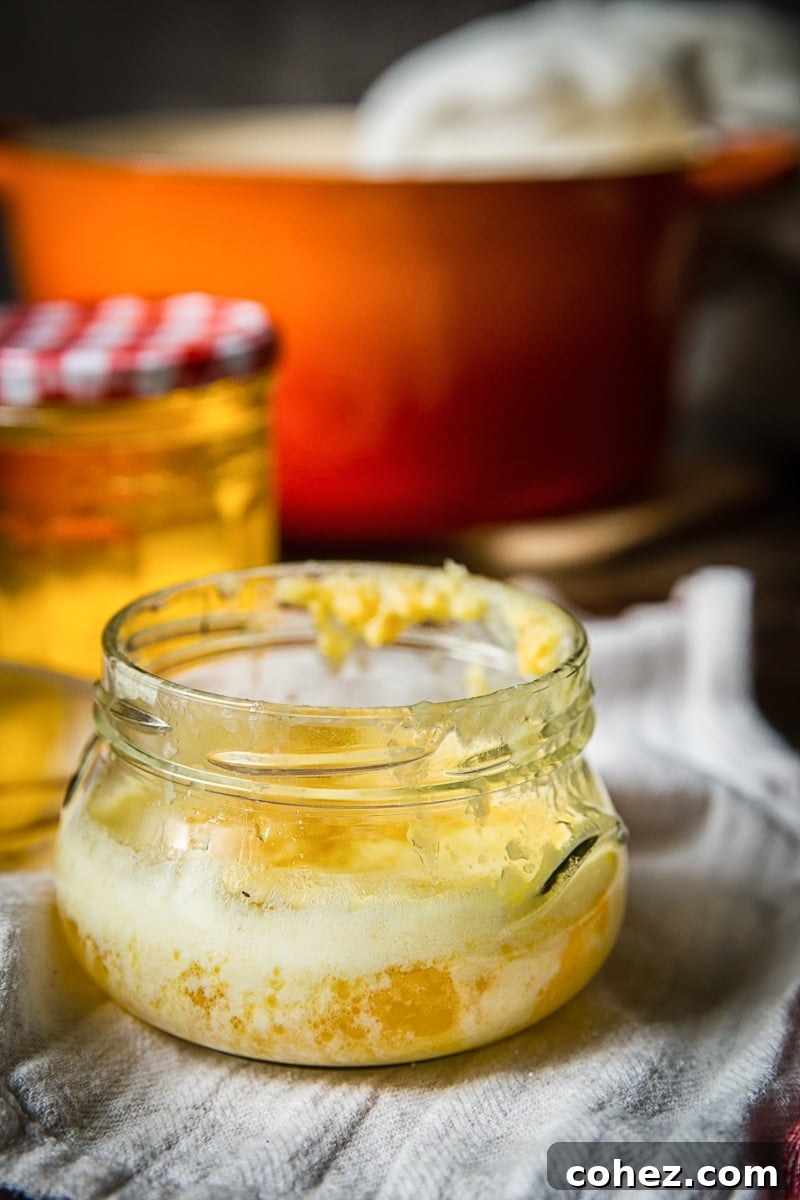
Proper Storage for Maximum Shelf Life
One of the fantastic and often overlooked advantages of clarifying butter is its significantly enhanced shelf life. By meticulously removing the water and milk solids, you effectively eliminate the primary culprits for spoilage. Here’s how to properly store your homemade liquid gold to ensure its freshness and flavor for as long as possible:
Room Temperature Storage (Short to Medium Term):
For convenience and immediate use, clarified butter can be stored at room temperature in a cool, dark pantry or cupboard. When stored correctly in an airtight container, it can last for up to 2 months. The key here is “cool and dark” – avoid direct sunlight or warm spots near appliances, which can accelerate rancidity. This method keeps the clarified butter soft and spreadable, making it incredibly convenient for daily cooking without the need to soften it from the refrigerator.
Refrigeration (Medium to Long Term):
For even longer-term storage, refrigeration is an excellent option. When kept in an airtight container in the refrigerator, clarified butter can easily last for 6 months, and often even longer, without any significant loss of quality or flavor. When refrigerated, the butterfat will naturally solidify and become firm, much like regular butter. If you need it in a softened or liquid form, simply allow it to come to room temperature for a short period, or gently warm it over low heat if a liquid consistency is required quickly.
Freezing (Long-Term Storage):
If you prefer to make large batches or wish to store your clarified butter for an extended period, it freezes exceptionally well. Pour the cooled clarified butter into freezer-safe, airtight containers or even ice cube trays for convenient portioning. Stored in the freezer, it can last for up to a year without any degradation in flavor or quality. When you’re ready to use it, simply thaw it in the refrigerator overnight or at room temperature. Its texture will return to normal once thawed.
Important Storage Tips: Always ensure that your storage containers are perfectly clean and thoroughly dry before adding the clarified butter. Any residual moisture can introduce bacteria and significantly shorten its shelf life. While clarified butter is highly stable, it’s always wise to perform a quick check before use: if you notice any unusual odors, discoloration, or any signs of mold growth, it’s best to err on the side of caution and discard it.
Recipes That Excel with Clarified Butter
Now that you’ve mastered the art of making clarified butter, it’s time to put your homemade liquid gold to good use! Its unique properties make it ideal for a wide variety of delicious dishes, where its high smoke point and pure flavor truly shine:
- Eggs Benedict with Easy Hollandaise Sauce: The quintessential use for clarified butter, ensuring a smooth and stable emulsion for this classic breakfast staple.
- Beef Fillet with Easy Béarnaise Sauce: A perfect companion for steak, this tarragon-infused sauce thrives on the stable fat provided by clarified butter.
- Nepalese Red Lentil Dahl: Ghee (clarified butter) is a cornerstone of many South Asian dishes, lending a rich, authentic flavor to lentils and curries.
- Butter Chicken Curry: Essential for achieving the signature richness and depth of flavor in this beloved Indian dish.
- Crispy Pan-Seared Salmon: Achieve a beautifully crisp skin and perfectly cooked, flaky salmon without burning the butter.
- Lemon Butter Shrimp Scampi: The high smoke point allows for quick cooking of shrimp while infusing it with pure buttery goodness.
- Fluffy Scrambled Eggs or Omelets: Cook your morning eggs in clarified butter for an incredibly rich flavor and perfectly tender texture without browning.
- Sautéed Asparagus or Green Beans with Garlic: Elevate simple vegetable sides with a pure, nutty butter flavor that won’t burn.
Nutrition Facts for Clarified Butter
Please note: The nutrition information provided below is an approximation per 1 tablespoon (approximately 14 grams) serving of clarified butter. Nutritional values can vary slightly based on the brand of butter used and the precise preparation method. It should be used as a general guide.
Typical Nutritional Values Per 1 Tablespoon (approx. 14g) Serving:
- Calories: Approximately 120-130 kcal
- Total Fat: Approximately 14 g
- – Saturated Fat: Approximately 9-10 g
- – Polyunsaturated Fat: Approximately 0.4-0.6 g
- – Monounsaturated Fat: Approximately 3.5-4.5 g
- – Trans Fat: Approximately 0.2-0.5 g
- Cholesterol: Approximately 30-40 mg
- Sodium: 0 mg (as unsalted butter is used and water removed)
- Total Carbohydrates: 0 g
- – Sugars: 0 g
- Protein: 0 g
- Vitamin A: Approximately 400-500 IU (a significant source)
- Calcium: 0 mg
- Iron: 0 mg
- Potassium: 0 mg
Clarified butter is essentially pure butterfat, hence its high calorie and fat content. The removal of milk solids means it contains negligible amounts of carbohydrates (lactose) and protein (casein), making it suitable for certain dietary preferences like keto or paleo, and for those avoiding lactose.
Ready to try this recipe and experience the incredible difference clarified butter can make in your kitchen? We’d love to hear how it turned out for you! Share your thoughts, tips, and culinary creations in the comments below – your experience could inspire another home cook!