
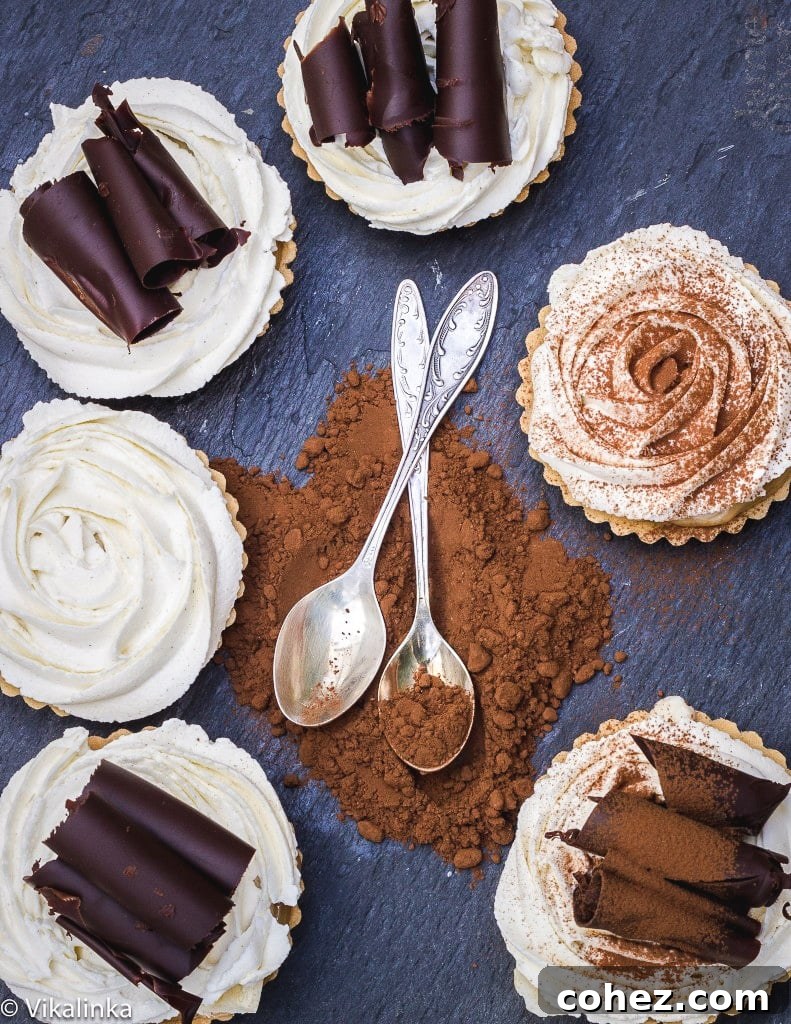
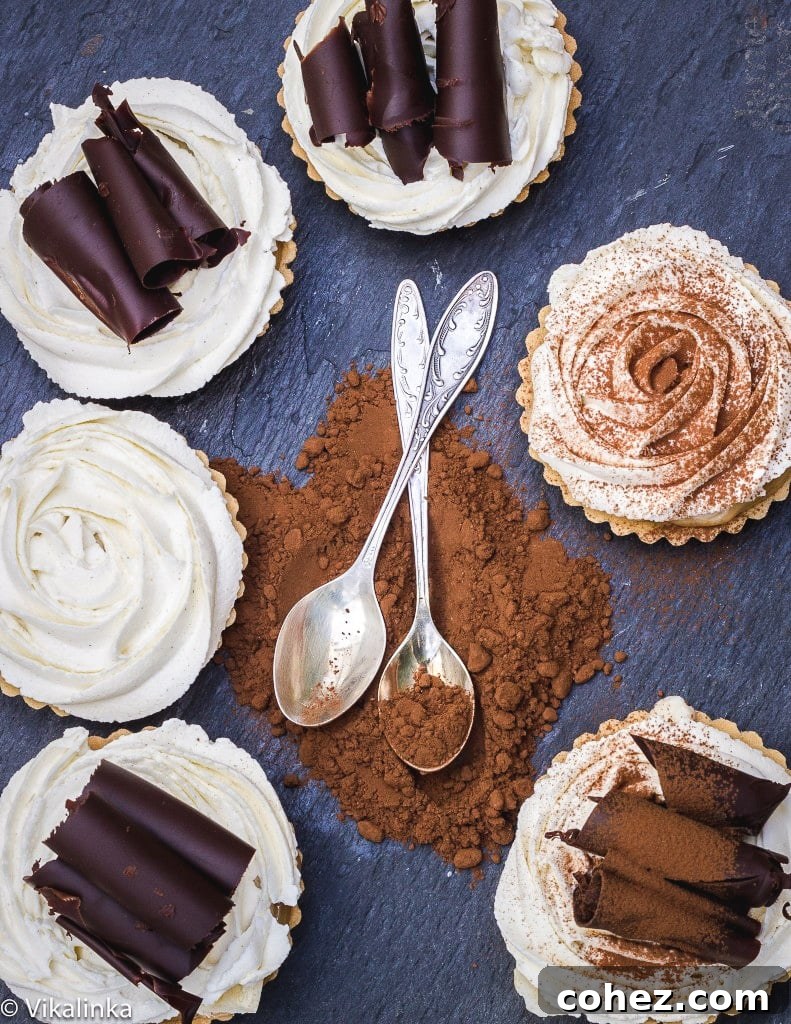
Indulge in the divine taste of Banoffee Tarts, the charming miniature version of the beloved, gloriously indulgent pie! These delightful treats combine the sweet freshness of bananas with rich, velvety toffee, all nestled in a buttery, crumbly tart base and crowned with a light-as-air cloud of whipped cream, often adorned with stunning chocolate curls. Whether you opt for prepared tart shells for a speedy dessert or bake your own for an extra touch, these Banoffee Tarts are a perfect choice for any occasion, from an impromptu sweet craving to an elegant dinner party.
For those who love the classic, larger-than-life version, be sure to explore my Easy Banoffee Pie recipe.
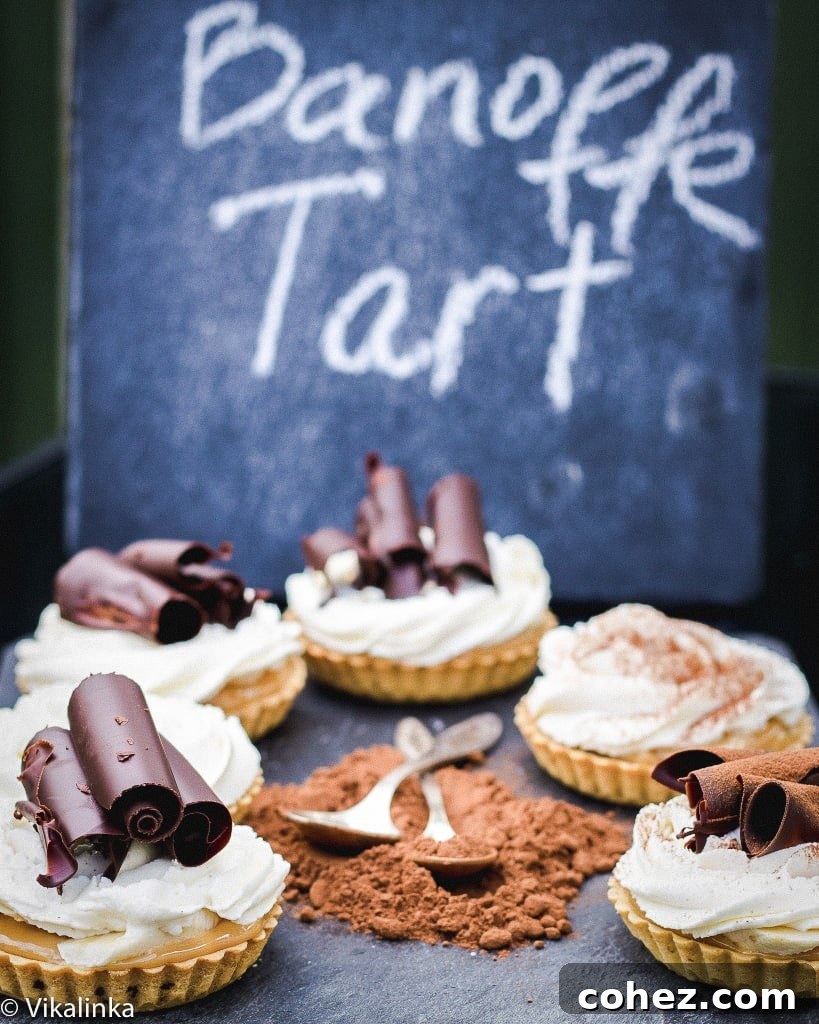
The Ultimate Indulgence: Easy Banoffee Tarts Recipe
If you’re not from the United Kingdom, there’s a good chance the name “Banoffee Pie” might sound a little unfamiliar, and that truly is a missed opportunity. This iconic British dessert, a testament to culinary ingenuity, deserves a place among other great British inventions. While perhaps not on the same revolutionary scale as the industrial revolution or the discovery of DNA, Banoffee Pie has certainly revolutionized dessert tables with its simple yet profound magic.
At its heart, Banoffee Pie is a harmonious marriage of exquisite flavors and textures. The name itself is a portmanteau: the sweet and silky **Ban**ana perfectly complements the rich, decadent T**offee**. Together, they form a dessert that is nothing short of pure bliss. Add a sprinkle of chocolate, and you’ve got a masterpiece that caters to every sweet tooth, offering a sublime balance of fruitiness, caramel richness, and creamy delight.
Crafting Perfect Mini Banoffee Tarts: A Delightful Individual Dessert
The beauty of these mini banoffee tarts lies in their incredible ease of preparation and their even greater ease of enjoyment. They are a fantastic solution for entertaining, especially when you’re hosting a large dinner party. After spending considerable time preparing the main course, the last thing anyone wants is to fuss over a complicated dessert. These individual tarts remove that stress entirely.
Serving is a breeze since each guest gets their own perfectly portioned treat. Furthermore, as a cold dessert, they can be prepared well in advance and kept chilled in the refrigerator until the moment of serving, allowing you to relax and enjoy your guests. Despite their simple assembly, these banoffee tartlets consistently impress with their elegant appearance and gourmet appeal. They truly are a snap to make but look incredibly impressive!
To transform the classic Banoffee Pie into these delightful tartlets, I largely adhered to the original flavor profile, making only minor adjustments to enhance convenience and presentation. Instead of a traditional toffee, I opted for dulce de leche, which offers a slightly richer, more caramel-like depth. To ensure the whipped cream topping was firm enough to pipe into beautiful rosettes, I incorporated mascarpone cheese, adding a luxurious creaminess and stability.
A significant time-saver, and a trick I highly recommend, is using good quality, pre-made tart shells. This shortcut drastically reduces preparation time, making this dessert incredibly quick and virtually stress-free. Despite this clever shortcut, the resulting banoffee tarts look utterly sophisticated and beautiful. Free from the labor of baking tart shells from scratch, I could dedicate more time to the fun part: decoration. Armed with a piping bag, I topped each tart with gorgeous, swirling rosettes, adding that extra touch of elegance.
The Irresistible Toffee Layer: Store-Bought or Homemade Dulce de Leche
The heart of any banoffee dessert is its luscious toffee layer. While you can certainly find excellent pre-made options at the store, such as Carnation canned caramel or ready-to-use dulce de leche, making your own at home is surprisingly simple and deeply rewarding, yielding a product that’s often richer and more satisfying.
To craft your own exquisite dulce de leche from sweetened condensed milk, begin by carefully removing the label from a can of sweetened condensed milk. Place the unopened can in a deep pot, ensuring it is completely submerged in water. Bring the water to a boil, then reduce the heat to a simmer, and continue cooking for 1.5 to 2 hours. This slow, gentle cooking process transforms the milk into a thick, golden caramel.
**Crucial Safety Note:** It is absolutely imperative that the can remains fully covered by water throughout the entire cooking process. If the water level drops and the can becomes exposed, there is a risk of it overheating and exploding, which can be very dangerous. Keep an eye on the water level and replenish it with hot water as needed.
Once the cooking time is complete, carefully remove the can from the pot and allow it to cool completely before opening. Patience is key here; opening a hot can of caramelized milk can be hazardous. When cool, crack open the can to discover the magical transformation: your plain can of sweetened condensed milk has become a glamorous, silky smooth, and intensely flavorful dulce de leche, ready to elevate your banoffee tarts. This homemade caramel can be prepared several days or even weeks in advance and stored in the refrigerator, making it a perfect component for make-ahead dessert planning.
Mastering Chocolate Curls: An Elegant Garnish
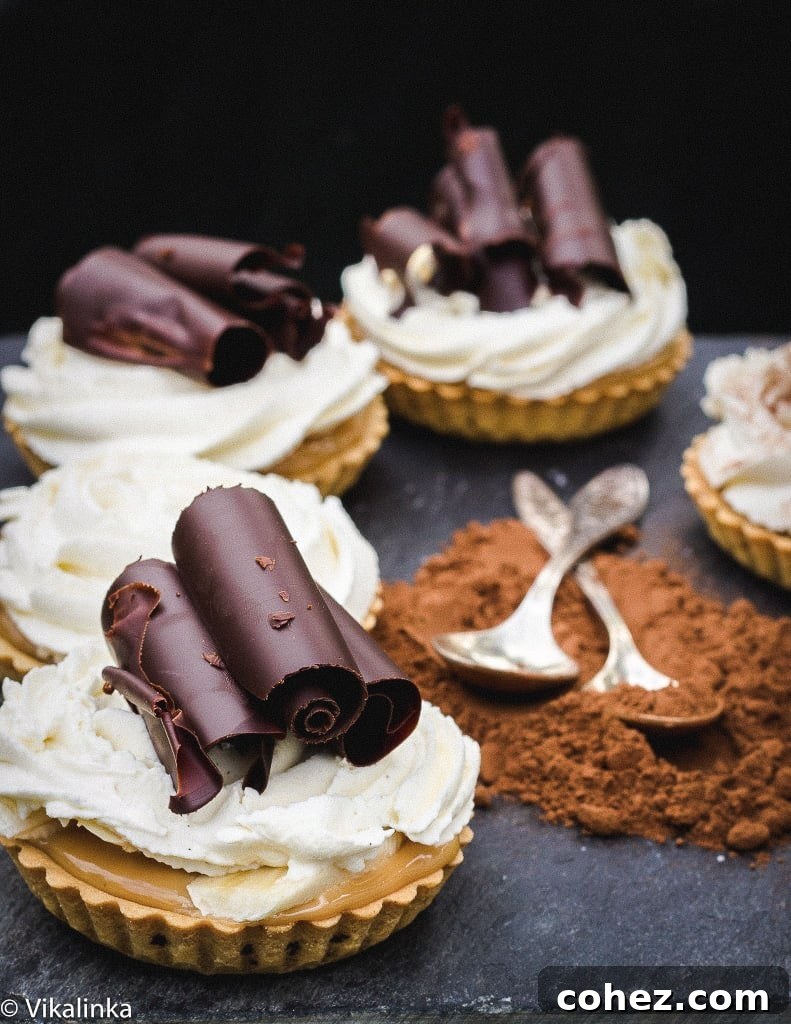
Chocolate curls add a touch of professional elegance to your banoffee tarts, making them look even more irresistible. Creating them is simpler than you might think and adds a beautiful textural contrast to the creamy topping.
Start by melting your chosen chocolate in the microwave. Heat it in short bursts (15-30 seconds), stirring well after each interval, until it’s smooth and fully melted. Be careful not to overheat it. Once melted, spread the chocolate thinly and evenly onto a clean baking tray or the back of a cookie sheet. The thinner the layer, the more delicate and beautiful your curls will be. Pop the tray into the fridge for about 3 minutes to allow the chocolate to firm up slightly, but not become brittle.
Remove the tray from the fridge and let it stand at room temperature for just a couple of minutes. This brief period allows the chocolate to soften ever so slightly, making it pliable enough to curl without breaking. To create the curls, gently drag a cheese slicer, a vegetable peeler, or the edge of a sharp knife (held at a slight angle) along the surface of the set chocolate. Apply light, even pressure to create long, elegant curls that will naturally form as you scrape. Continue until you’ve produced enough beautiful curls to generously garnish all your tarts. Once you have your desired amount, carefully transfer them back to the fridge for a few more minutes to harden completely before placing them on your desserts.
Serving Suggestions for Optimal Enjoyment
Banoffee Tarts, much like their larger pie counterpart, are truly at their best when they’ve had ample time to chill. Allowing them to refrigerate for at least a few hours, or ideally overnight, gives the flavors an opportunity to meld together, deepening the caramel and banana notes, and allowing the textures to set perfectly. The tart shells absorb a bit of moisture from the filling, creating a delightful harmony that’s neither too soft nor too crisp.
This is a cold dessert, meant to be enjoyed refreshingly cool. Always keep the tarts in the fridge until just before you plan to serve them, ensuring each bite is a cool, creamy delight. For an extra touch of flair and to showcase the beautifully piped whipped cream rosettes, I often choose to leave one or two of my tartlets free of chocolate curls. Instead, these are finished with just a delicate dusting of cocoa powder, which provides a subtle bitterness that wonderfully balances the sweetness of the toffee and bananas.
Consider serving these tarts with a light coffee, or for an even more decadent experience, alongside a scoop of vanilla bean ice cream or an extra drizzle of caramel sauce.
Storage and Longevity of Your Banoffee Tarts
For the freshest and most optimal taste experience, it’s generally best to enjoy these banoffee tartlets within 24 to 30 hours of assembly. During this period, the flavors are fully integrated, and the tart shells retain their ideal texture, having softened just enough to complement the creamy fillings without becoming soggy. However, if you find yourself with leftovers, don’t despair! These tarts can be safely stored for 2 to 3 days. To maintain their quality, ensure they are covered in a sealed, airtight container or tightly wrapped with plastic wrap, and always kept in the refrigerator.
One common concern with banana desserts is the fruit turning brown. Thankfully, with banoffee tarts, this is rarely an issue. The sliced bananas are safely tucked away beneath a generous, fluffy layer of whipped cream, which acts as a protective barrier. This prevents them from being exposed to air, which is the primary cause of oxidation and discoloration. So, rest assured, your bananas will remain beautifully fresh and visually appealing throughout their refrigerated life.
Frequently Asked Questions (FAQ) about Banoffee Tarts
- Can I make these tarts vegan? While the classic recipe uses dairy, you can adapt it by using a plant-based condensed milk for the toffee, vegan tart shells, and a coconut cream or other plant-based whipping cream substitute.
- What kind of bananas should I use? Opt for ripe but firm bananas. They should be sweet but still hold their shape when sliced. Overly ripe bananas might become too mushy.
- Can I use a different crust? Absolutely! While a traditional shortcrust pastry or biscuit crust (like Graham cracker or digestive biscuit) is common, you could experiment with a chocolate cookie crust for a richer flavor profile.
- Is dulce de leche the same as toffee? Dulce de leche is a type of caramel, typically made by slowly heating sweetened milk until it caramelizes. Toffee is often made from sugar and butter boiled to a hard crack stage. For Banoffee Pie, a soft, pourable caramel or dulce de leche is ideal. Homemade dulce de leche from condensed milk is a perfect fit.
- Can I freeze Banoffee Tarts? Freezing is not recommended for assembled banoffee tarts, as the bananas and whipped cream can change texture upon thawing. However, the toffee layer can be made ahead and frozen separately.
More Decadent Tart Recipes to Try
If you’ve enjoyed the delightful experience of making and tasting these Banoffee Tarts, you’re in for a treat with these other fantastic tart recipes that are sure to impress:
- Salted Caramel Pear Tarts
- Summer Berry Tart
- Plum Tarte Tatin
- Roasted Rhubarb Bakewell Tart
Banoffee Tartlets
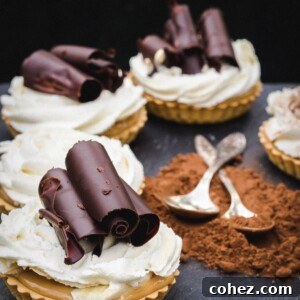
Tarts filled with layers of rich toffee, fresh sliced bananas, and fluffy whipped cream, a perfect individual dessert.
Ingredients
- 8 all-butter pre-made tartlet cases, you can of course make your own!
- 1 tin caramel sauce, 397g / 14oz (or homemade dulce de leche)
- 2 bananas, sliced
- 100g / 1/2 cup mascarpone cheese
- 250ml / 1 cup whipping cream/double cream
- 50g / 1/4 cup icing sugar
- 1 tsp vanilla extract
- 1 tbsp rum, optional
- 50g / 2oz chocolate for chocolate curls, or 1 tbsp of cocoa powder for dusting
Instructions
-
In a large bowl, whip together the mascarpone, double cream (or whipping cream), icing sugar, vanilla extract, and rum (if using) until the mixture forms firm peaks, suitable for piping. Be careful not to over-whip.
-
Evenly spoon or spread your caramel sauce (or homemade dulce de leche) into the bottom of each of the 8 tartlet cases.
-
Arrange the sliced bananas over the caramel layer in each tartlet.
-
Using a piping bag fitted with a star tip (or simply a spoon), pipe the mascarpone cream frosting generously on top of the bananas, creating beautiful rosettes or a smooth dome.
-
Garnish the tarts. You can either dust them lightly with cocoa powder for a simple finish or decorate them with homemade chocolate curls (see instructions below).
-
Chill the tarts in the refrigerator for at least 2-3 hours before serving to allow the flavors to meld and the tarts to set properly.
For Chocolate Curls
-
Melt the chocolate in a microwave-safe bowl, heating in short bursts and stirring until smooth. Spread the melted chocolate thinly and evenly onto a clean baking tray.
-
Place the tray in the fridge for about 3 minutes to allow the chocolate to set, but not become too hard.
-
Remove the tray from the fridge and let it sit at room temperature for a minute or two to soften slightly.
-
Using a knife or a cheese slicer, gently drag it along the surface of the chocolate to create delicate curls. As you get enough curls, carefully transfer them back to the fridge for a couple of minutes to harden before decorating your tarts.
Notes
The tarts are best when given a few hours to chill in the fridge, which allows flavors to meld beautifully and the tart base to soften to the perfect consistency. For homemade dulce de leche, refer to the method described in the article above, ensuring the can is fully submerged in water during cooking for safety.
Nutrition
Calories: 322kcal
|
Carbohydrates: 24g
|
Protein: 4g
|
Fat: 24g
|
Saturated Fat: 14g
|
Polyunsaturated Fat: 1g
|
Monounsaturated Fat: 4g
|
Trans Fat: 0.01g
|
Cholesterol: 52mg
|
Sodium: 56mg
|
Potassium: 171mg
|
Fiber: 2g
|
Sugar: 14g
|
Vitamin A: 659IU
|
Vitamin C: 3mg
|
Calcium: 44mg
|
Iron: 2mg
Nutrition information is automatically calculated, so should only be used as an approximation.
Tried this recipe?
Let us know how it was!