
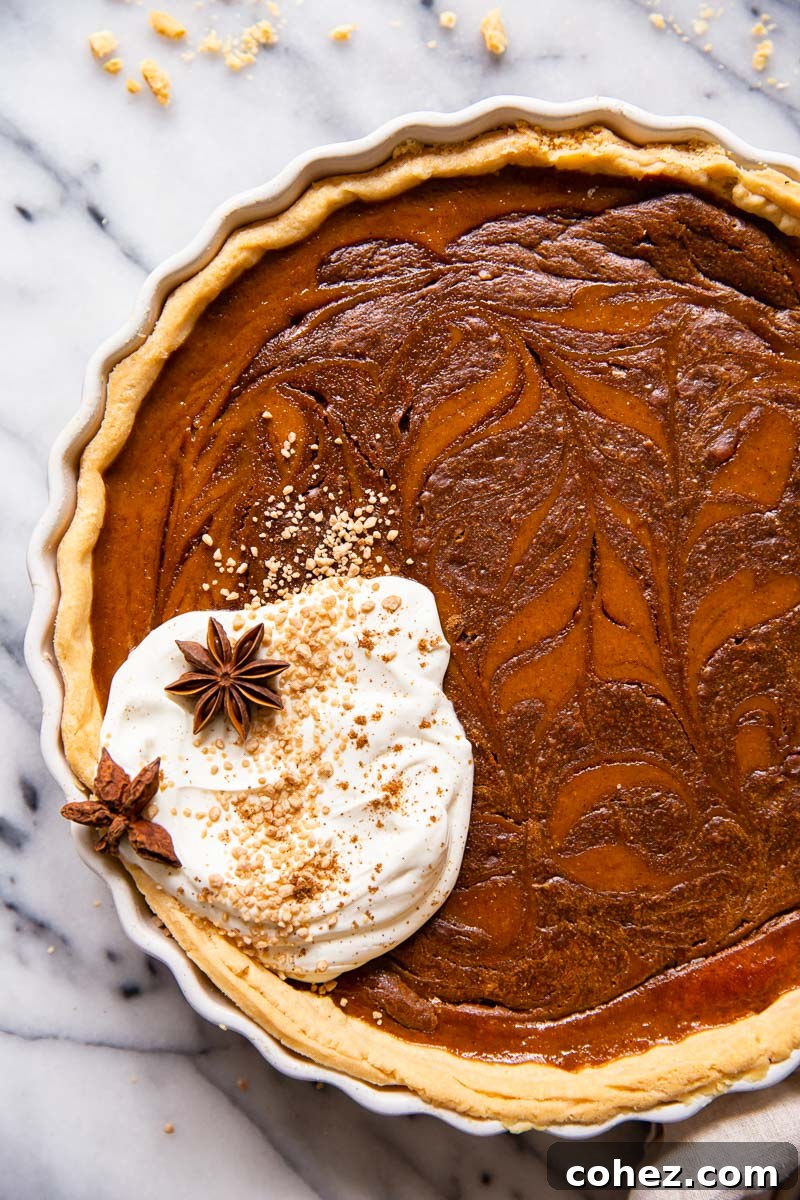
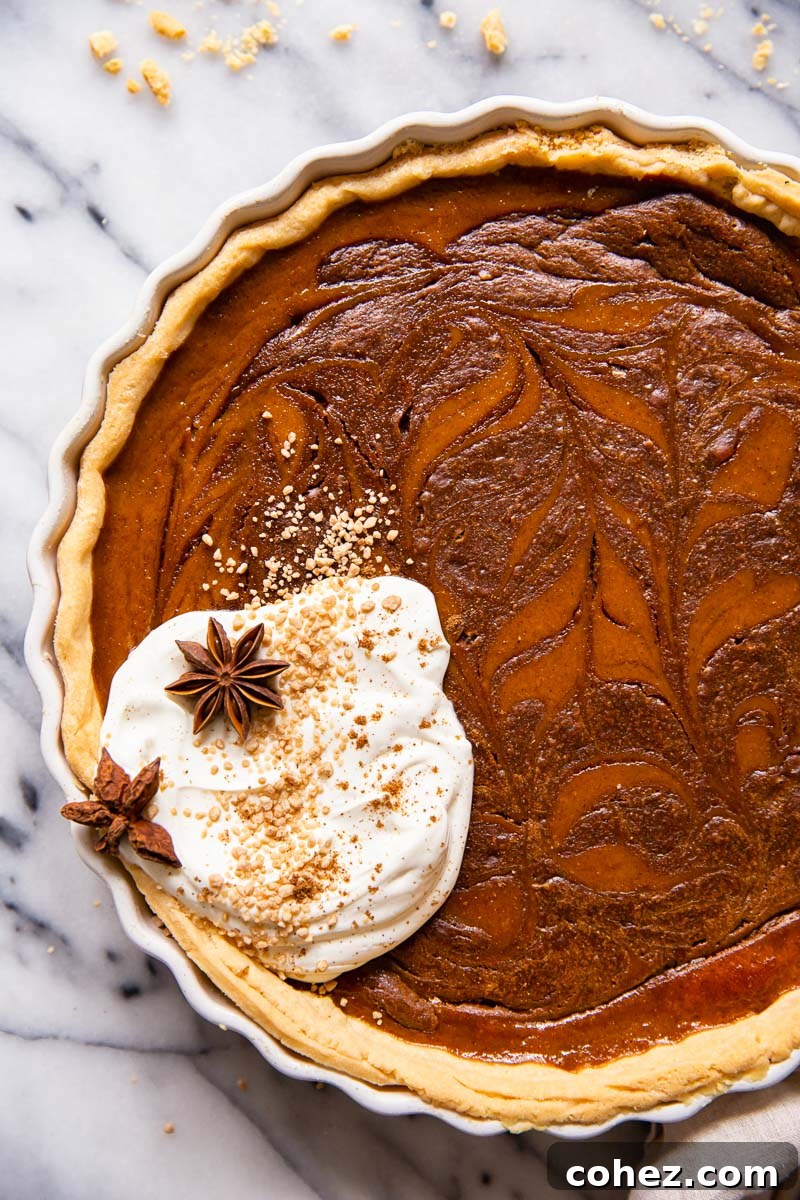
Prepare to redefine your dessert expectations with this extraordinary Chocolate Swirl Pumpkin Pie. We’re taking the beloved classic and elevating it to new heights of deliciousness, introducing a luscious chocolate swirl – specifically, a melt-in-your-mouth Toblerone infusion – that promises to make this your new favorite fall dessert. Get ready for a fabulous culinary journey!
For those who adore the warming spices of pumpkin pie but prefer to skip the pastry-making process, my Pumpkin Mousse Trifle offers a delightful and equally satisfying alternative.
For years, I was a purist, firmly convinced that the classic pumpkin pie recipe was an unassailable masterpiece, a paragon of autumnal perfection. Why tamper with something so inherently wonderful, right? While I still hold immense respect for the traditional approach – it truly is a culinary stroke of genius – there comes a time when even the most steadfast traditions can benefit from a playful, exciting twist. And that time, my friends, is now.
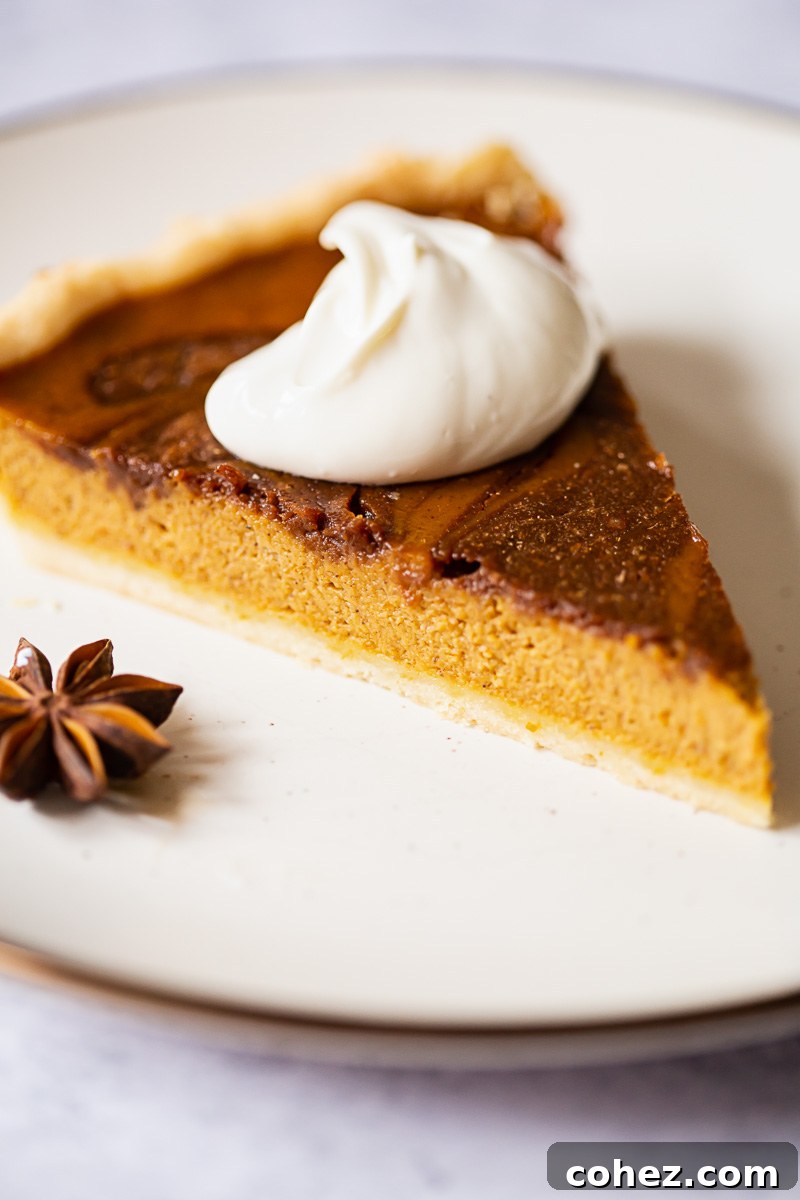
What if the comforting warmth of pumpkin pie met the exhilarating indulgence of one of the world’s most iconic chocolates? Imagine the familiar, earthy sweetness of pumpkin mingling with the rich, smooth embrace of chocolate, punctuated by those distinct, delightful crunchy bits of honey-almond nougat. Yes, you guessed it: Pumpkin Pie meets Toblerone. This seemingly unconventional pairing is nothing short of brilliant. The light, textural crunch of Toblerone chocolate provides a sensational counterpoint to the creamy, velvety pumpkin filling, creating a symphony of flavors and textures that will tantalize your taste buds and leave you craving more. It’s a truly winning combination that you simply have to experience!
Every exceptional pie begins with an equally exceptional crust. A truly outstanding pastry forms the foundation of a memorable dessert, providing that delicate, flaky texture that perfectly complements the rich filling. Luckily, I am fortunate enough to possess a time-tested, fool-proof pastry recipe that guarantees a golden, tender, and incredibly flaky crust every single time. It’s the secret weapon that transforms a good pie into an unforgettable one.
Crafting the Ultimate Flaky Pie Pastry: Secrets to Success
If there’s one thing all pie enthusiasts can agree on, it’s that the benchmark of a truly great pie is an irresistibly flaky pastry. The recipe I consistently turn to, and one that has brought countless smiles to generations, was lovingly passed down to me by my mother-in-law. Her pies are legendary within our family – so revered, in fact, that my father-in-law often opted for one of her magnificent pies over a traditional birthday cake. This speaks volumes about the quality and deliciousness of her crust!
What sets this particular pastry recipe apart and makes it truly unique is the inclusion of a surprising ingredient: vinegar. This often-overlooked addition plays a crucial role in achieving that coveted flakiness. The acidity in the vinegar helps to tenderize the gluten in the flour, preventing the dough from becoming tough and promoting the formation of those delicate, airy layers that define a perfect flaky crust. Additionally, this recipe calls for lard, and I cannot stress enough how vital its use is here. While other fats can be substituted in some pastry recipes, lard possesses a higher melting point and creates superior pockets of steam during baking, which are essential for developing the characteristic flaky texture. For this specific pie, lard is truly non-negotiable for achieving optimal results.
Beyond the ingredients, proper technique is paramount. It is incredibly important to handle the pastry as little as possible. Overworking the dough can cause the fat to melt and distribute too evenly, which hinders the formation of those distinct layers. The goal is to keep tiny bits of fat intact within the dough, as these pockets are what create steam and separate the layers during baking, resulting in a wonderfully tender and flaky texture. Another crucial step that cannot be rushed is chilling the pastry. After assembling the dough, a thorough chill in the refrigerator allows the gluten to relax and the fat to firm up. This not only makes the dough much easier to roll out evenly without tearing but also ensures those fat pockets remain solid, ready to work their magic in the oven. Patience with chilling is key to pastry success.
The Indispensable Step: Should You Blind Bake Your Pie Pastry?
When it comes to custard-based pies like pumpkin pie, the answer is an emphatic “absolutely yes!” Blind baking, also known as pre-baking, your pie crust is a non-negotiable step if you want to avoid the dreaded “soggy bottom.” There’s nothing quite as disappointing as a beautifully baked pie filling resting on a pale, undercooked, and wet crust. Blind baking ensures that your pastry cooks through evenly and develops a crisp, golden base that can stand up to a moist filling.
While “blind baking” might sound like a technical culinary term, it’s actually a straightforward process that’s easy for any home baker to master. Essentially, it means baking your pie crust without the filling. To do this, after fitting your pastry into the pie dish, you line it with parchment paper and then fill it with a weight. These weights prevent the pastry from shrinking down the sides of the dish and bubbling up during baking, helping it to maintain its shape and integrity. You can purchase specialized ceramic baking beans for this purpose, or you can use common pantry staples like dried beans or uncooked rice, which work just as effectively. For pumpkin pie, because the filling itself requires further baking, you only need to partially blind bake the crust. This allows the pastry to firm up and develop some color before it’s filled with the pumpkin mixture and returned to the oven to finish cooking, creating a perfectly balanced and delicious pie from crust to topping.
Mastering the Art of the Chocolate Swirl in Your Pumpkin Pie
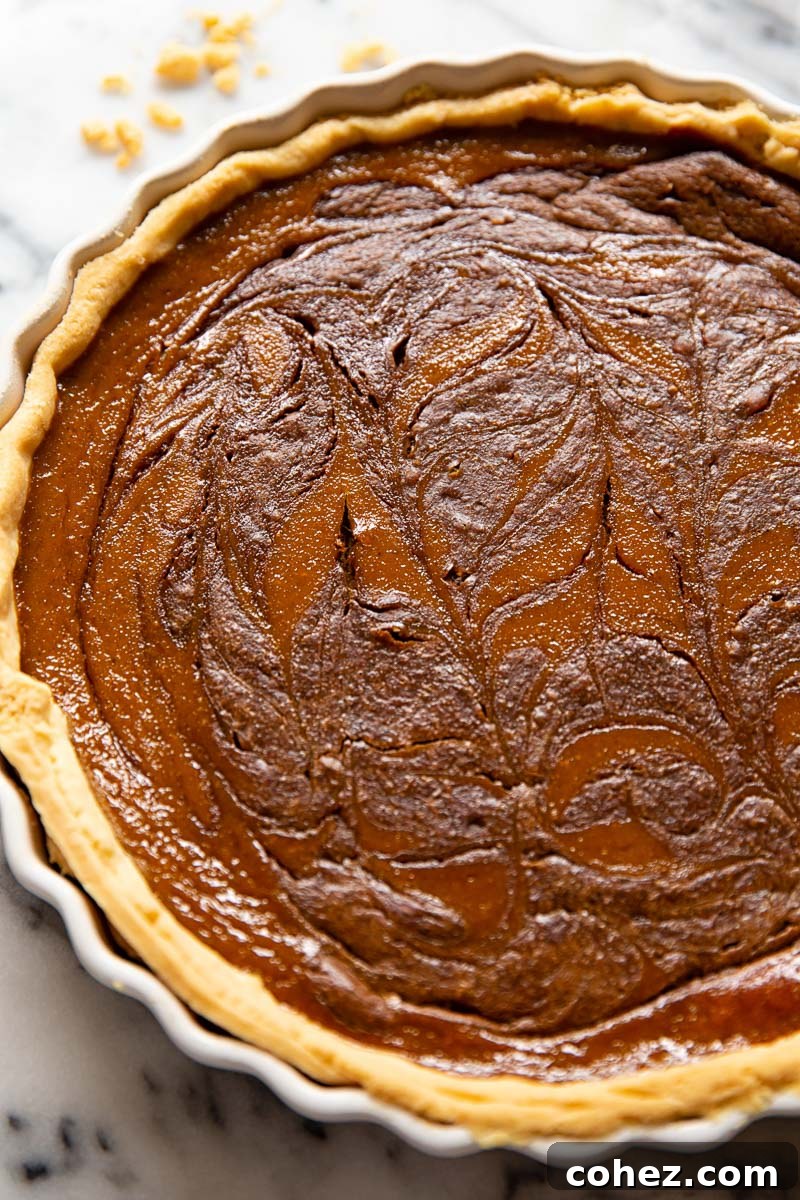
Adding a visually stunning and delicious chocolate swirl to your pumpkin pie is simpler than you might think, yet it transforms a classic into an extraordinary dessert. The key to achieving that beautiful marbling effect, and ensuring a successful bake, lies in a clever preparatory step. First, you’ll need to melt your chocolate of choice. While we highly recommend Toblerone for its unique texture and flavor, any good quality chocolate bar will work wonderfully. Once melted to a smooth consistency, the crucial next step is to combine this melted chocolate with a small portion of your prepared pumpkin pie filling – typically about half a cup. This step is absolutely vital for the structural integrity of your pie.
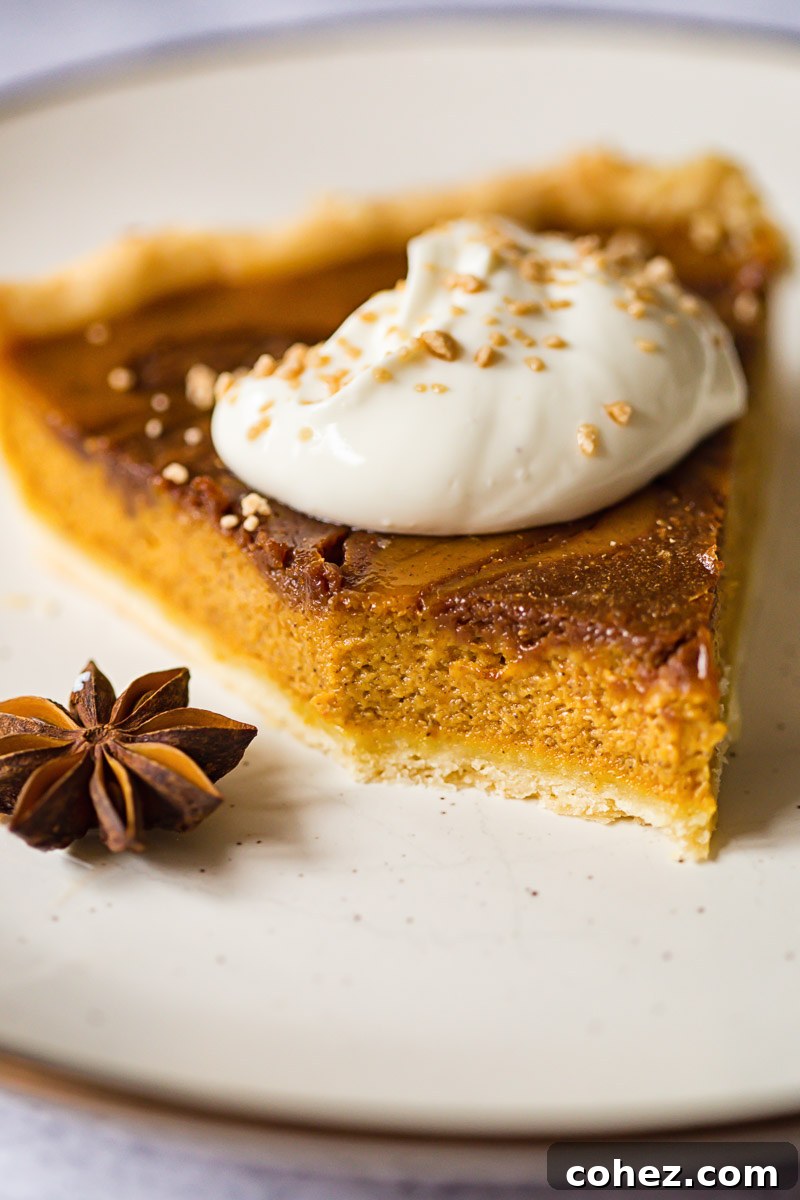
I learned this lesson from earlier, less successful attempts: skipping this step, and simply dropping pure melted chocolate into the pumpkin filling, often leads to cracking during baking. The reason is that the melted chocolate and the pumpkin filling have different densities and baking properties. By mixing a small amount of pumpkin filling into the melted chocolate, you create two filling mixtures that are much more similar in texture and viscosity. This equalization helps them bake more harmoniously together, preventing the chocolate from sinking or causing the pie surface to crack as it sets. Once you have your chocolate-infused pumpkin mixture, the fun begins! After pouring the main pumpkin filling into your partially baked pie crust, randomly spoon or dollop small amounts of the chocolate mixture on top. Then, with a knife or a skewer, gently swirl through the two mixtures. Don’t overmix; the goal is to create distinct, elegant ribbons and patterns, allowing the beautiful contrast between the pumpkin and chocolate to shine through. Keep swirling until you’re pleased with the artistic design.
Expert Serving Suggestions for Your Chocolate Swirl Pumpkin Pie
To truly appreciate the complex and harmonious flavors of this Chocolate Swirl Pumpkin Pie, it is best served at room temperature. When chilled, the cold can mute the delicate spices and the nuanced sweetness of both the pumpkin and the chocolate, causing the flavors to recede. Allowing the pie to come to room temperature allows all the aromatics to bloom and the textures to soften just enough, resulting in a richer, more vibrant tasting experience.
For an indulgent accompaniment, a generous dollop of freshly whipped cream is always a classic and perfect choice. Its light, airy texture and subtle sweetness provide a wonderful contrast to the dense, spiced filling. However, if you prefer to balance the sweetness or explore a different flavor profile, consider serving this pie with a spoonful of lightly sweetened crème fraîche. The slight tanginess of the crème fraîche cuts through the richness of the pie beautifully, offering a sophisticated counterpoint that many find utterly delightful.
When it comes to presentation, a little thoughtful decoration can elevate your dessert from delicious to truly stunning. I particularly love adorning autumn desserts with star anise pods. Their intricate star shape is inherently beautiful and adds an elegant, natural touch, while also offering a subtle, aromatic hint of warmth. For an extra special flourish, I sometimes sprinkle my pie with a touch of maple sugar – a wonderful gift from Canada that adds a delicate, caramelized sweetness and a lovely sparkle to the surface. Other elegant garnishes could include a dusting of cocoa powder, a scattering of mini chocolate chips, or even a few candied pecans for added crunch. Whichever you choose, these small touches will make your Chocolate Swirl Pumpkin Pie not just a treat for the palate, but also a feast for the eyes.
Discover More Delicious Pumpkin Creations
- Toffee Honeycomb Pumpkin Muffins
- DIY Pumpkin Spice Syrup
- Spiced Pumpkin and Chocolate Cake
- Pumpkin Bread with Butterscotch Streusel Topping
Chocolate Swirl Pumpkin Pie
A classic pumpkin pie made irresistibly delicious and exciting with a rich chocolate swirl, perfect for fall celebrations.
Prep Time: 50 mins | Cook Time: 55 mins | Total Time: 2 hrs 45 mins | Servings: 8
Equipment
- Rolling Pin
- Pie Dish
- Mixing Bowls
Ingredients
For the Pie Filling
- 1 (9 inch) pie crust, homemade or store-bought
- 400g / 15oz canned pumpkin puree, or your own freshly made
- 3 large eggs
- 125ml / 1/2 cup double cream or whipping cream
- 100g / 1/2 cup packed brown sugar
- 1 1/2 tsp ground cinnamon
- 1/4 tsp ground cloves
- 1/4 tsp ground ginger
- 1/4 tsp ground nutmeg
- 1 tsp vanilla extract
- 1/2 tsp salt
- 80g / 1/3 cup chopped Toblerone or regular chocolate bar
Instructions
For the Pie Crust
- Preheat your oven to 400°F (200°C). Prepare 1/3 of a standard pie crust recipe (or use your preferred 9-inch crust). On a lightly floured surface, roll out the pastry. Gently drape the pastry over your rolling pin and carefully transfer it to a 9-inch pie or tart plate. Ensure the edges are neatly trimmed and extend to the top of the pie plate. Place the pie crust in the refrigerator to chill for at least 20 minutes.
- Line the chilled, unbaked pie crust with a piece of parchment paper, ensuring it covers the bottom and sides. Fill the pie plate with baking beans, dried rice, or pie weights, distributing them evenly to the top edges of the crust. Bake at 400°F (200°C) for 15 minutes. Carefully remove the pie from the oven, reduce the oven temperature to 350°F (180°C). Let the crust cool for about 5 minutes, then carefully lift the parchment paper and baking weights out of the pie shell.
For the Pumpkin Pie Filling and Assembly
- While your pie crust is blind baking, prepare the rich pumpkin filling. In a large mixing bowl, beat the eggs together with the brown sugar until well combined and slightly lighter in color. Gradually add the pumpkin puree, heavy cream (or whipping cream), cinnamon, nutmeg, cloves, ginger, vanilla extract, and salt. Whisk everything together until the mixture is smooth and thoroughly blended. Set this luscious pumpkin filling aside momentarily.
- Now, prepare your chocolate swirl. Finely chop the Toblerone bar (or your chosen chocolate). Melt the chopped chocolate using a double boiler method, or carefully in a microwave in short 30-second bursts, stirring well between each interval until completely smooth and melted. From your prepared pumpkin filling, scoop out approximately 125ml (1/2 cup) and gently stir it into the melted chocolate. This crucial step helps to equalize the texture and consistency of the chocolate mixture with the main pumpkin filling, preventing cracks during baking.
- Pour the remaining pumpkin filling into your partially baked pie crust. Next, randomly drop small spoonfuls of the chocolate-infused pumpkin mixture over the surface of the pumpkin filling. Take a skewer or a toothpick and gently swirl through the two mixtures to create a beautiful marbled pattern. Be careful not to overmix; aim for distinct swirls rather than a fully blended color.
- Carefully transfer the pie to the preheated 350°F (180°C) oven. Bake for approximately 40 minutes, or until the pumpkin filling is set and a knife inserted near the center comes out clean (it may have a slight jiggle in the very middle, which will set as it cools). Remove the pie from the oven and let it cool completely on a wire rack before slicing and serving. Serve at room temperature with a dollop of fresh whipped cream or slightly sweetened crème fraîche.
Nutrition
Please note: Nutrition information is automatically calculated and should only be used as an approximation per serving.
- Calories: 292.66 kcal
- Carbohydrates: 33.75g
- Protein: 4.68g
- Fat: 16.57g
- Saturated Fat: 7.95g
- Cholesterol: 82.79mg
- Sodium: 269.37mg
- Potassium: 203.73mg
- Fiber: 2.73g
- Sugar: 19.04g
- Vitamin A: 8100.29 IU
- Vitamin C: 2.1mg
- Calcium: 52.97mg
- Iron: 1.93mg
Tried this delicious recipe? Let us know how it turned out! We love hearing from you.