
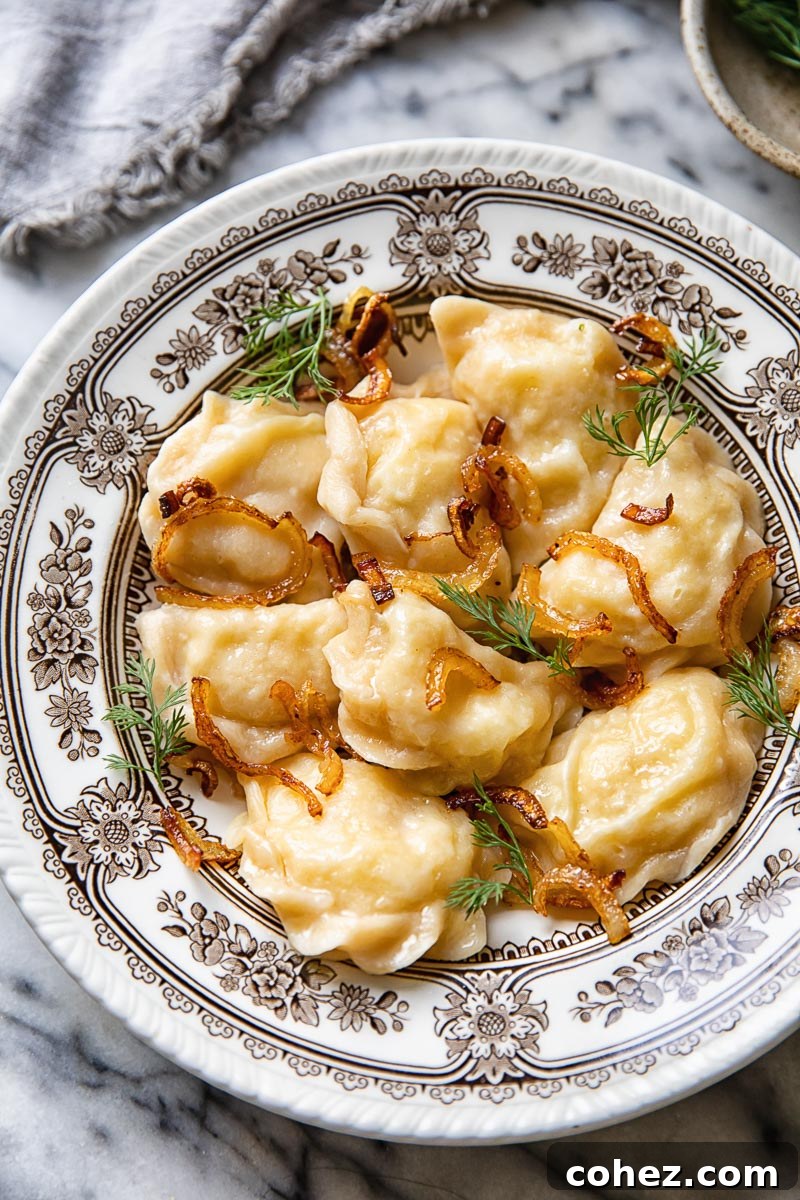
Homemade Potato & Caramelized Onion Pierogies: A Heartwarming Classic
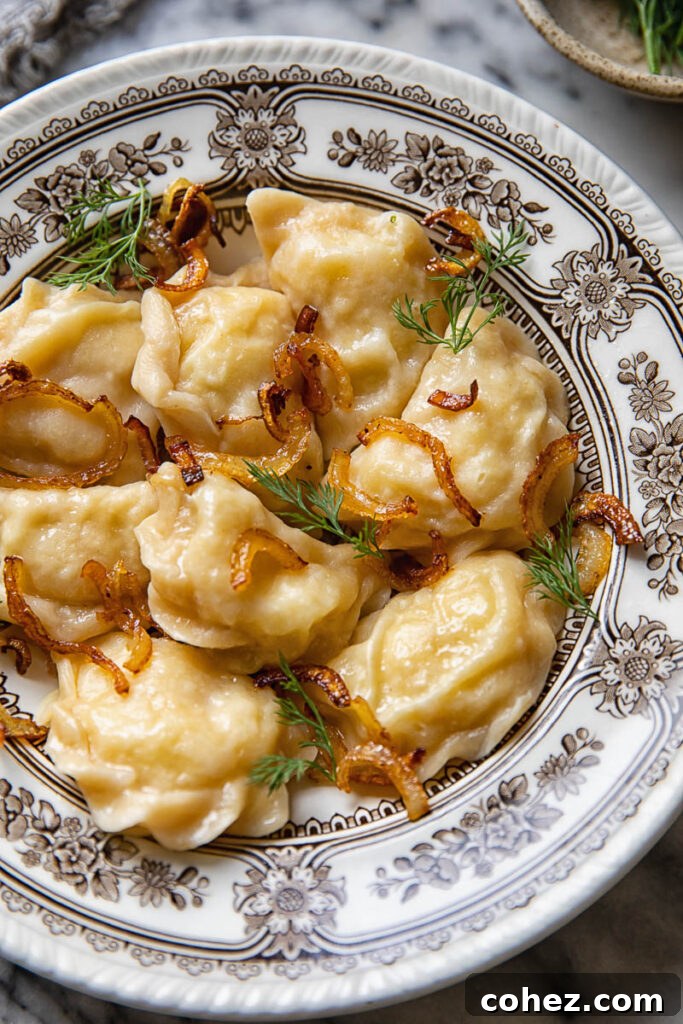
There’s nothing quite like a plate of freshly made dumplings, and these **potato-filled pierogies (also known as vareniki) are a true culinary delight.** Each tender parcel is bursting with savory flavor, making them wonderfully satisfying whether boiled or pan-fried to golden perfection. Serve them generously topped with sweet caramelized onions, a dollop of cool sour cream, and a sprinkle of fresh dill for a comforting and surprisingly tasty meal that truly fills the soul.
For an unforgettable two-course feast, consider pairing these delightful pierogies with a bowl of heartwarming Vegetarian Borscht – a match made in culinary heaven!
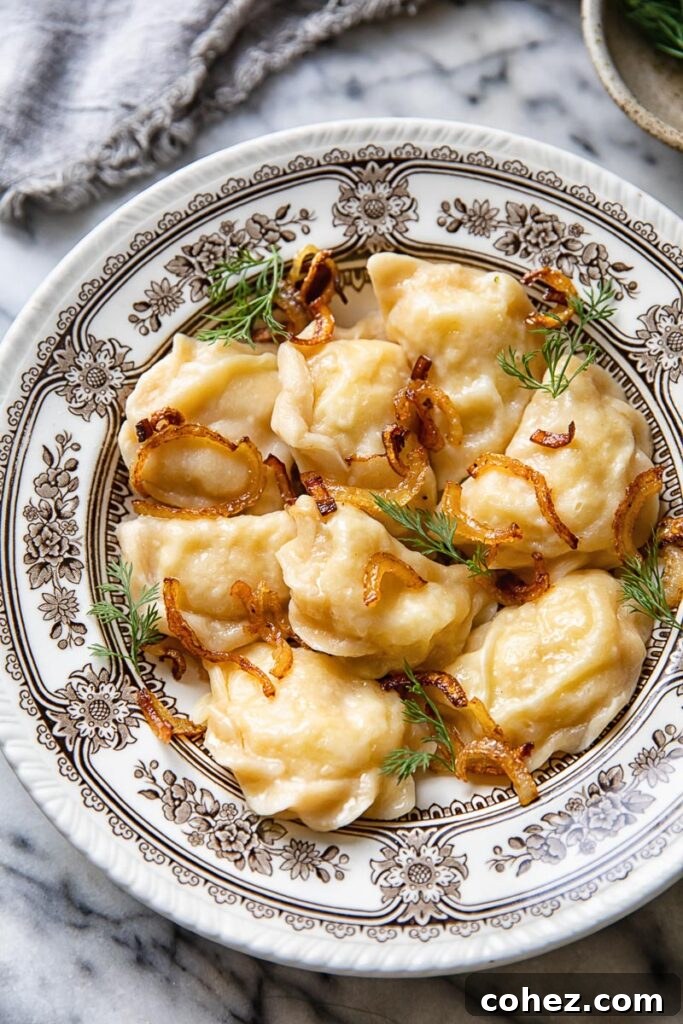
My culinary journey has taken me through a world of dumplings – from Italian tortellini to Japanese gyoza and German gnocchi. Each offers its unique charm, but there’s one type that holds an undeniably special place in my heart: pierogies. These delightful pockets of flavor instantly transport me back to cherished childhood memories. I recall lively family gatherings where we’d make vast quantities of pierogies, school lunches that brought comfort, and countless family dinners where they were always the star. They were a constant, comforting presence, and I adored every time they graced our table. It’s with immense joy that I now share this recipe for these little packets of happiness with you, hoping they bring as much warmth to your home as they do to mine.
A Culinary Journey: The Story of Pierogies
Pierogies, or vareniki as they are known in Ukraine and Russia, are more than just food; they are a cherished cultural icon, particularly in Eastern European cuisine. In Poland, they proudly bear the name pierogi, and their influence spans across borders and continents. Historically, these humble dumplings emerged from necessity, making the most of simple, readily available ingredients. They evolved into a staple, especially in peasant diets, becoming a symbol of celebration and comfort food.
The tradition of pierogi-making is often a communal affair, bringing families and communities together. Recipes are passed down through generations, each family adding its unique touch, making every batch a testament to heritage and love. When immigrants from these regions settled in places like Canada and the United States, they brought their beloved culinary traditions with them, establishing pierogies as a much-loved dish far beyond their original homelands. Growing up in Canada, for instance, pierogies were a dinner mainstay, often found in bags tucked away in the freezer, ready for a quick and easy meal. While convenient, those store-bought versions simply can’t compare to the rich flavors, tender texture, and sentimental value of a homemade batch.
Why Homemade Pierogies are Unbeatable
While convenience often dictates our meal choices, especially in our busy lives, taking the time to make pierogies from scratch offers rewards that extend far beyond just taste. The process itself is a therapeutic journey, a connection to culinary traditions, and an opportunity to infuse your food with personal care. Homemade pierogies boast a freshness and depth of flavor that mass-produced versions simply cannot replicate. The dough is tender and pliable, cooked to a perfect al dente bite, unlike the often rubbery texture of frozen varieties. The filling, made with perfectly seasoned, creamy potatoes and slow-cooked caramelized onions, offers a rich, sweet, and savory profile that is unparalleled.
Beyond the superior taste, there’s an immense satisfaction in crafting something delicious with your own hands. It’s an activity that can be shared with loved ones, creating new memories around the kitchen counter. The aroma of freshly made pierogies boiling and then frying is an experience in itself, promising a meal that is not just nourishing but deeply comforting and incredibly delicious. Once you’ve tasted homemade, you’ll understand why the extra effort is truly worth it.
Crafting the Perfect Potato and Onion Filling
While the dough forms the tender wrapper, the filling is truly the heart and soul of these pierogies. The classic potato and caramelized onion combination is a fan favorite for good reason – it’s simple, yet incredibly satisfying. The secret lies in treating each component with care.
First, select the right potatoes. Russet or Yukon Gold varieties work best as they mash up light and fluffy. Peel and boil them until they are fork-tender, then drain them thoroughly. Any excess moisture will make your filling watery and harder to manage. Mash the potatoes until smooth, incorporating a generous amount of butter for richness and creaminess. Seasoning is key here: ensure your potatoes are well-salted at this stage. Bland potatoes will result in bland pierogies, so don’t be shy with the salt and pepper.
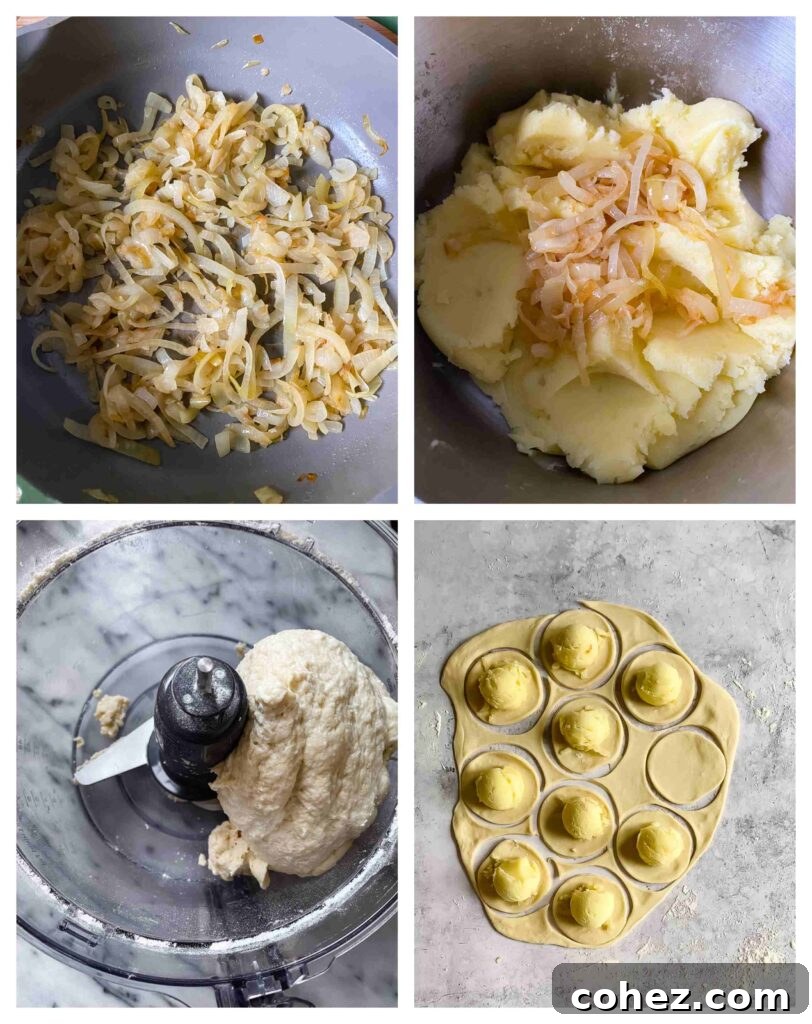
Next, the star of the filling: caramelized onions. This step cannot be rushed. Chop one large onion finely and sauté it in a tablespoon or two of butter over very low heat. This slow cooking process, typically for 20-30 minutes, allows the natural sugars in the onions to develop, transforming them into a sweet, golden, and incredibly flavorful component. This caramelization adds a depth that balances the savory potatoes beautifully. Once the onions are golden and tender, fold them into the mashed potatoes. Mix everything well, tasting and adjusting seasoning as needed.
While potato and caramelized onion is a traditional choice, the world of pierogy fillings is vast and exciting. Other popular savory variations include:
- Sauerkraut and Mushroom: A tangy and earthy combination, often found in traditional recipes.
- Bacon and Potato: Adding crispy bacon bits to the potato filling for a smoky, savory punch.
- Cheese: Farmer’s cheese, cottage cheese, or even cheddar can be mixed with potatoes for a richer, creamier texture.
Sweet pierogies are also popular, particularly with seasonal fruits like blueberries, cherries, or plums, often served with a dusting of sugar or a dollop of cream. Don’t hesitate to experiment with your favorite flavors!
Mastering the Pierogi Dough
The dough is the canvas for your delicious filling, and creating a tender, pliable dough is crucial for perfect pierogies. While the entire process takes some time, neither the dough nor the filling is inherently difficult to make. Patience and attention to detail are your best allies.
Essential Ingredients for the Dough:
- **All-purpose flour:** The base of your dough.
- **Salt:** Enhances flavor and elasticity.
- **Egg:** Adds richness and helps bind the dough.
- **Cold water:** Helps control the gluten development, making the dough easier to handle and more tender.
Dough Preparation:
Making the dough can be streamlined, especially with a food processor. Simply pulse the flour and salt together, then with the motor running, gradually add the egg and then the cold water. Let the processor continue to run for about a minute, or until a cohesive dough ball forms around the blade. This method makes quick work of what can otherwise be a slightly messy kneading process.
If you don’t have a food processor, don’t worry! You can easily make the dough by hand. Create a well in the center of your flour, add the egg, salt, and gradually incorporate the cold water, mixing with a fork until a shaggy dough forms. Then, turn it out onto a lightly floured surface and knead for 5-7 minutes until it’s smooth, elastic, and no longer sticky. The dough should feel soft and yielding.
Once your dough is ready, whether by machine or hand, transfer it to a bowl, cover it with a clean tea towel, and let it rest for at least 30 minutes at room temperature. This resting period is vital, allowing the gluten to relax, making the dough much easier to roll out thinly without springing back. You can even prepare the dough while your potatoes are boiling for the filling, effectively saving time.
The Art of Shaping Pierogies
Shaping pierogies is arguably the most intricate part of the process, but it’s a skill that anyone can master with a bit of practice. The key is to work systematically and keep the dough from drying out.
Step-by-Step Shaping:
- **Divide and Roll:** Divide your rested dough into quarters and form each into a ball. Take one dough ball, keeping the others covered to prevent them from drying out. On a well-floured surface, roll out the dough into a thin sheet, aiming for approximately 1/16th of an inch thick. The thinner the dough, the more delicate and delicious your pierogies will be.
- **Cut Circles:** Use a 2-inch to 3-inch round cookie cutter or scone cutter to cut out circles from the rolled-out dough. Gather any scraps, gently re-knead them, and let them rest for a few minutes before re-rolling to minimize waste.
- **Fill and Fold:** Place about a teaspoon of your potato and onion filling slightly off-center on each dough circle. Be careful not to overfill, as this can make sealing difficult.
- **Seal the Edges:** Fold the dough over the filling to create a half-moon shape. Press the edges firmly together with your fingertips to seal them shut, ensuring no filling leaks out during cooking.
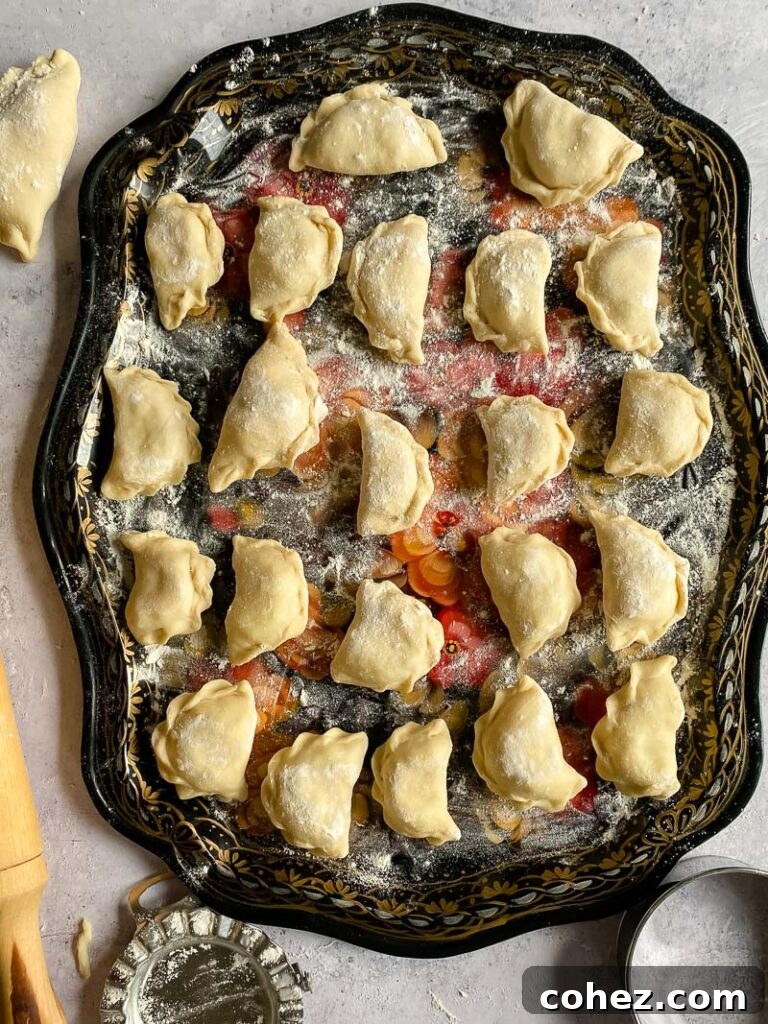
- **Create a Ruffled Edge (Optional, but Recommended):** For that classic, attractive ruffled edge, go over the sealed edge one more time. Using your two fingers and a thumb, gently pinch and twist the edges together, creating a beautiful decorative crimp. This not only adds visual appeal but also helps to further secure the filling.
Repeat this process with the remaining dough and filling. The recipe typically yields around 65 pierogies, making it perfect for batch cooking. Don’t worry if your first few pierogies aren’t perfect; you’ll quickly develop a rhythm and technique. If you’re a visual learner, many online videos can demonstrate the technique for the ruffled edge. Just search for “how to fold pierogi”!
Cooking and Serving Your Delicious Pierogies
Once your pierogies are shaped, they are ready for cooking. The process is straightforward, but a few tips can elevate your final dish.
Cooking Instructions:
- **Boiling:** Bring a large pot of generously salted water to a rolling boil. Carefully drop the pierogies into the boiling water, stirring gently to prevent them from sticking to the bottom of the pot. Cook them in batches to avoid overcrowding, which can lower the water temperature and make them gummy. The pierogies are cooked when they float to the surface – typically after 2-3 minutes for fresh pierogies, or a bit longer if cooking from frozen.
- **Draining:** Once they float, use a slotted spoon to carefully remove them from the water.
- **Pan-Frying (Optional, but Recommended):** While boiled pierogies are delicious on their own, a quick pan-fry takes them to the next level. In a large skillet, melt a tablespoon or two of butter over medium heat. Add the boiled pierogies and fry until golden brown and slightly crispy on both sides. This adds a wonderful texture contrast and a nutty, buttery flavor. If you’re conscious of extra calories, you can skip this step, but it truly enhances the experience.
Serving Suggestions:
Pierogies have a wonderfully mild and comforting taste, making them the perfect canvas for a variety of toppings that truly make all the difference. The right accompaniments elevate the entire meal:
- **Sour Cream:** This is an almost essential topping. Its tangy acidity cuts through the richness of the potato filling, creating a perfect flavor balance.
- **Caramelized Onions or Shallots:** Slowly sautéed onions (or the extra ones from your filling!) add a delicate sweetness and a soft texture that complements the dumplings beautifully.
- **Fresh Dill:** A sprinkle of chopped fresh dill not only adds a pop of vibrant green color but also a fresh, aromatic finish.
- **Bacon Bits:** For a smoky, savory crunch, crispy bacon bits are an excellent addition.
- **Sautéed Mushrooms:** Pan-fried mushrooms, perhaps with a touch of garlic, can add an extra layer of umami and savoriness.
- **Black Pepper:** A generous grind of fresh black pepper adds a subtle warmth and aroma.
- **Sauerkraut:** Tangy sauerkraut is another traditional side dish or even a delicious alternative filling.
For a heartier meal, you can also fry pierogies alongside smoky Polish sausages, such as Kielbasa, as demonstrated in our Pierogi and Kielbasa recipe. Whether served as a main dish or a comforting side, these pierogies are sure to be a hit!
Storage and Freezing Tips for Meal Prep
One of the best qualities of homemade pierogies is how well they lend themselves to meal preparation. While cooked pierogies don’t store particularly well (they tend to become soft or hard, losing their desirable texture), uncooked pierogies, especially when frozen, are a dream for batch cooking. This means you can prepare a large quantity, freeze them, and have a delicious, ready-to-cook meal waiting in your freezer for those busy weeknights.
Freezing Uncooked Pierogies:
To freeze pierogies, arrange the freshly shaped, uncooked dumplings in a single layer on a parchment-lined baking sheet. Ensure they are not touching, as they will stick together. Place the baking sheet in the freezer for 1-2 hours, or until the pierogies are completely frozen solid. Once frozen, transfer them to a freezer-safe bag or airtight container. This initial flash-freezing prevents them from clumping together.
Storage Duration:
Frozen pierogies can be kept for up to 6 months in the freezer. However, for the best quality in terms of taste and texture, it’s advisable to consume them within 3 months. Beyond this period, they are still safe to eat but might experience a slight decline in quality.
Cooking from Frozen:
There’s no need to thaw frozen pierogies before cooking! Simply add them directly to a pot of boiling salted water. Keep in mind that they will take a few minutes longer to cook than fresh pierogies. Stir gently to prevent them from sticking to the bottom. They are ready once they float to the top and are tender throughout. From there, you can either enjoy them boiled or proceed to pan-fry them as usual.
More Dumpling Recipes to Explore
If you’ve fallen in love with the art of dumpling making, there’s a vast and delicious world waiting to be explored:
- 5 Minute Ravioli Sauce: A quick and easy sauce perfect for any pasta or dumpling.
- Pelmeni Dumpling Soup: A comforting and savory soup featuring delicate Russian meat dumplings.
- Chicken Meatball Soup with Tortellini: A hearty and flavorful soup combining tender meatballs with cheese-filled tortellini.
- Meat Dumplings Pelmeni: A detailed recipe for classic Russian meat-filled dumplings, a true culinary staple.
Potato and Caramelized Onion Pierogies Recipe
By: Julia Frey of Vikalinka
Prep time: 1 hour 30 minutes
Cook time: 10 minutes
Yields: 8 servings (approximately 65 pierogies)
Traditional Ukrainian dumplings, wonderfully tender and flavorful, perfect boiled or pan-fried and served with sweet caramelized onions, sour cream, and fresh dill.
Ingredients
For the Dough
- 450g / 3⅓ cups all-purpose flour
- 1 tsp salt
- 1 egg
- 250ml / 1 cup cold water
For the Filling
- 5 medium potatoes
- 2 tbsp butter
- 1 large onion, finely chopped
- Salt and freshly ground black pepper, to taste
Instructions
- Peel the potatoes and boil them in salted water until they are very tender when pierced with a fork. Drain well.
- While the potatoes are boiling, prepare the dough. In a food processor, pulse the flour and salt together. With the motor running, add the egg, then gradually pour in the cold water until a dough ball forms around the blade (about 1 minute). Alternatively, mix by hand in a large bowl and knead until smooth. Transfer the dough to a bowl, cover with a tea towel, and let it rest for 30 minutes.
- In a skillet, melt 2 tablespoons of butter over very low heat. Add the chopped onion and cook slowly for 20-30 minutes, stirring occasionally, until deeply caramelized and sweet.
- Mash the cooked potatoes thoroughly. Add the caramelized onions and remaining butter to the mashed potatoes. Mix well, then season generously with salt and pepper to taste. The filling should be well-seasoned.
- Divide the rested dough into four equal quarters and form each into a ball. Take one dough ball (keeping the others covered to prevent drying) and roll it out on a well-floured surface into a thin sheet, approximately 1/16th of an inch thick.
- Using a 2-inch to 3-inch cookie or scone cutter, cut out circles from the dough. Place about one teaspoon of the potato filling slightly off-center on each dough circle.
- Fold the dough over the filling to create a half-moon shape. Pinch the edges firmly together with your fingertips to seal them completely. For a classic ruffled edge, go over the sealed edge again, pinching and twisting with your fingers and thumb.
- Repeat this process with the remaining dough and filling until all are used. This recipe should yield approximately 65 pierogies.
- To cook, bring a large pot of salted water to a rolling boil. Carefully add the pierogies in batches, stirring gently to prevent sticking. Cook until they float to the top (2-3 minutes for fresh, slightly longer for frozen). Drain well.
- For an extra layer of flavor and texture, melt additional butter in a large skillet over medium heat. Pan-fry the boiled pierogies until golden brown and slightly crispy on both sides.
- Serve immediately with generous dollops of sour cream, a sprinkle of fresh dill, and extra crispy fried onions or shallots.
Nutrition
Calories: 346kcal | Carbohydrates: 68g | Protein: 9g | Fat: 4g | Saturated Fat: 2g | Polyunsaturated Fat: 1g | Monounsaturated Fat: 1g | Trans Fat: 0.1g | Cholesterol: 28mg | Sodium: 623mg | Potassium: 649mg | Fiber: 5g | Sugar: 2g | Vitamin A: 120IU | Vitamin C: 27mg | Calcium: 33mg | Iron: 4mg
Nutrition information is automatically calculated and should only be used as an approximation.