
Adorable Stamped Birthday Cupcakes: A Creative DIY Treat for Kids’ Parties
There’s a unique magic in baking for children, especially when it comes to their birthdays. The pure delight in their eyes as they see a treat made just for them is truly priceless. Every year, I embark on a delightful challenge to create something special and new for my little ones, often inspired by their latest obsessions, be it a beloved cartoon character or a cherished animal. While these requests can sometimes feel daunting, the journey of research, trial, and error always leads to something we all cherish.
This year, my daughter Vika, a passionate animal lover with a particular soft spot for puppies, couldn’t quite decide on a single cake theme. Faced with a creative block and needing inspiration, I serendipitously stumbled upon the incredible work of Sweetapolita – my go-to resource for all things cake and confectionary. That’s where I discovered the ingenious concept of hand-stamped cupcakes by Rosie of Sweetapolita. The moment I saw them, I knew instantly that rubber stamps were the answer to Vika’s birthday dilemma and my quest for a unique, adorable treat.
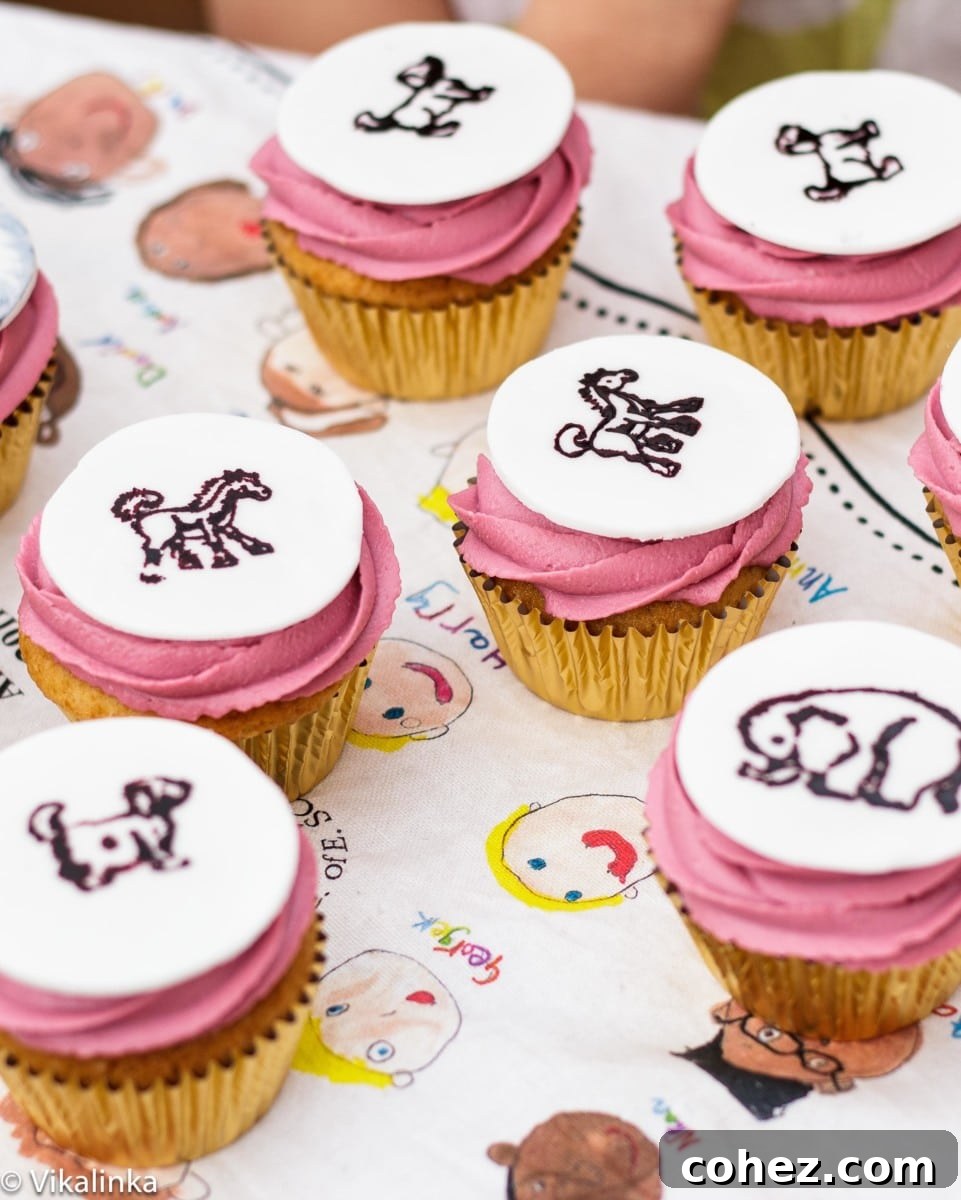
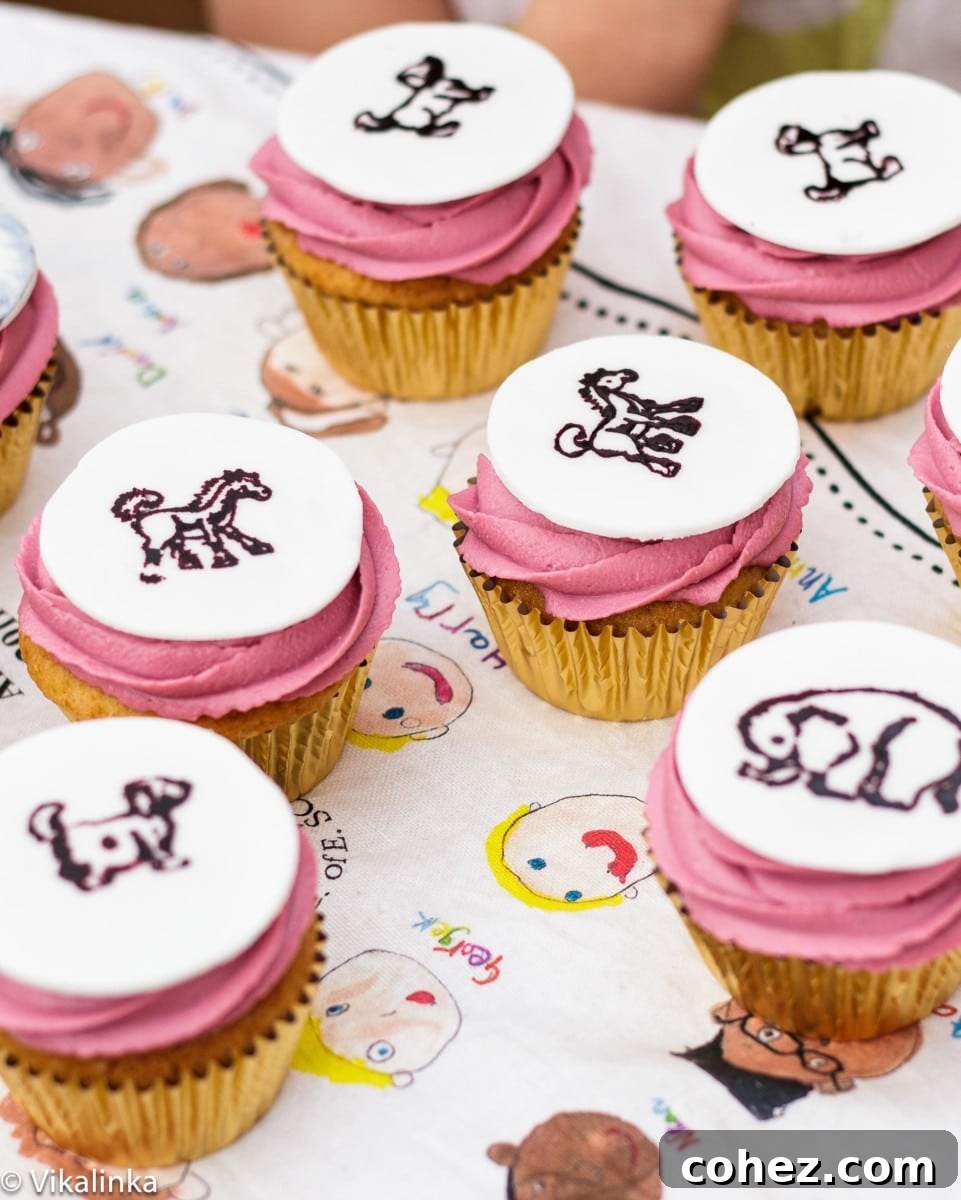
The beauty of these custom birthday cupcakes lies in their incredible versatility. Depending on the rubber stamps you choose, you can create an endless array of charming cupcake toppers, ensuring that each celebration feels fresh and unique. You’ll never have to repeat a design, offering limitless possibilities for themes, characters, and personal touches. For Vika’s party, the animal-themed stamps were an absolute hit, perfectly capturing her adoration for all creatures great and small, and adding an extra layer of joy to her special day.
The Charm of Stamped Fondant Cupcake Toppers
The resulting cupcakes were an absolute delight, and seeing the sheer excitement and joy sparkle in Vika’s eyes made all the effort worthwhile. These stamped birthday cupcakes were truly ideal for a little girl’s party. The playful, handcrafted aesthetic of the toppers immediately evoked the whimsical charm of a child’s own drawings, adding a touch of innocence and personal artistry that store-bought decorations simply cannot replicate. Each little animal face seemed to tell a story, sparking imagination and smiles all around.
To further enhance the personalized theme, the backdrop for some of these delightful treats was a special tea towel, lovingly created using “self-portraits” drawn by the children in Vika’s class. It was a beautiful way to incorporate her friends’ creativity into the celebration, making the entire experience even more memorable and heartwarming. The combination of the hand-stamped toppers and the children’s artwork created an atmosphere brimming with youthful charm and individuality.
Crafting Your Adorable Fondant Cupcake Toppers
Creating these charming toppers requires a few specialized items, but the technique itself is surprisingly straightforward and incredibly rewarding. While you can certainly use your favorite cupcake and frosting recipes, the essential elements for the stamped designs are fondant, a selection of rubber stamps, paste food colors, and a small, fine-tipped brush. If you’ve ever used a rubber stamp for crafting, you’ll quickly master this delightful decorating method.
Step 1: Preparing Your Fondant Medallions (A Day or Even a Week Ahead)
Start by rolling out your fondant as thinly as possible. Achieving a consistent, thin layer is key for delicate toppers. Work on a clean surface generously dusted with icing sugar to prevent sticking, as fondant can be quite tenacious. Using a circular cutter that matches the diameter of your cupcakes, cut out your medallions. Once cut, carefully lay these fondant circles on a baking sheet lined with parchment paper, allowing them to dry overnight, or even for several days. This drying process is crucial to ensure they harden sufficiently and hold their shape.
I learned this lesson firsthand while living in England, where the often rainy and humid climate presented a challenge. Getting the toppers completely dry required extra patience, and at one point, I even resorted to running a dehumidifier to draw out all the moisture! In drier climates, this step might be quicker, but always ensure your toppers are firm to the touch before proceeding. Properly dried toppers are less likely to smudge when stamped and will maintain their crisp design on your finished cupcakes.
Step 2: The Art of Stamping
Once your fondant toppers are thoroughly dry and firm, it’s time for the fun part: stamping! For coloring, I used a paste food color (Dusky Pink by Sugarflair, in this instance) mixed with just a single drop of water to create a paint-like consistency. The trick is to have the color opaque enough for a vibrant print but thin enough to spread smoothly on the stamp.
Using a small, clean paintbrush, carefully paint your chosen rubber stamp with the prepared food color. Ensure an even coating of color on the raised parts of the stamp. Then, gently but firmly press the painted stamp onto the center of each dried fondant medallion. Lift the stamp straight up to reveal your perfect design. If you need a more visual guide or additional tips on achieving crisp, clean impressions, I highly recommend checking out Rosie of Sweetapolita’s excellent tutorial on her website. With a little practice, you’ll be stamping like a pro in no time!
Deliciously Fluffy Vanilla Cupcakes: The Perfect Base
Every adorable topper needs an equally delicious base, and this vanilla cupcake recipe delivers a light, moist, and wonderfully flavorful foundation. This recipe, thoughtfully adapted from Sweetapolita, yields 24 perfect cupcakes, making it ideal for larger parties or simply for having extra treats on hand. The combination of cake flour, buttermilk (or kefir), and a whole vanilla bean ensures a tender crumb and an authentic, rich vanilla taste that complements any frosting.
Ingredients for the Cupcakes {Makes 24}:
- Cake Flour – 2 1/2 cups / 275 gr
- Baking powder – 1 tbsp.
- Salt – 1/2 tsp.
- Kefir or Buttermilk (I used Kefir) – 1 cup
- Eggs – 1 large, at room temperature
- Egg whites – 2 large, at room temperature
- Vanilla Bean (seeds scraped out) – 1
- Granulated Sugar – 1 1/2 cups
- Unsalted Butter – 8 tbsp / 115 gr, at room temperature
Method for the Cupcakes:
1. Preheat your oven to 325 F / 160 C. Prepare two 12-cup muffin tins by lining them with cupcake papers.
2. In a medium bowl, sift together the cake flour, baking powder, and salt. Sifting helps to aerate the flour and ensures a lighter cupcake texture.
3. In a separate bowl, whisk together the large egg, two egg whites, kefir (or buttermilk), and the scraped seeds from the vanilla bean until well combined. This wet mixture will be incorporated into the dry ingredients in stages.
4. In a large mixing bowl, using an electric mixer (stand or hand-held), cream together the softened butter and granulated sugar until the mixture is light, fluffy, and pale in color. This process typically takes about 3-5 minutes, allowing air to be incorporated for a tender crumb.
5. To the creamed butter and sugar mixture, begin adding the flour mixture and the egg mixture in alternating additions. Start with about one-third of the flour mixture, mixing on low speed until just combined. Then add half of the egg mixture, mixing until incorporated. Repeat this process, finishing with the last third of the flour mixture. Be careful not to overmix the batter, as this can lead to tough cupcakes; mix only until the ingredients are just combined.
6. Fill your lined muffin tins about two-thirds full with the cupcake batter. This ensures they rise nicely without overflowing.
7. Bake for 15-17 minutes, or until a wooden toothpick inserted into the center of a cupcake comes out clean. The tops should be lightly golden and spring back when gently touched. Once baked, let the cupcakes cool in the tins for a few minutes before transferring them to a wire rack to cool completely before frosting.
Velvety Mascarpone Cream Cheese Frosting
No cupcake is complete without a luscious frosting, and this mascarpone cream cheese frosting is simply divine. It’s incredibly creamy, rich, and holds its shape beautifully for piping, making it the perfect canvas for your adorable stamped medallions. The addition of mascarpone cheese gives it a luxurious texture and a subtle tang that perfectly balances the sweetness. For Vika’s party, a hint of Dusky Pink food coloring transformed it into a soft, inviting hue that perfectly matched the playful toppers.
Ingredients for Frosting:
- Mascarpone (chilled) – 8 oz / 250 gr
- Cream Cheese (chilled) – 8 oz / 250 gr
- Unsalted Butter (at room temperature) – 1/2 cup / 125 gr
- Icing sugar (powdered sugar) – 1 1/2 cups
- Vanilla extract – 2 tsp.
- Paste food colour (e.g., Dusky Pink by Sugarflair) – optional
Method for Frosting:
1. The key to a perfectly stiff and pipeable frosting is ingredient temperature. Ensure your mascarpone and cream cheese are thoroughly chilled, straight from the fridge. Conversely, your butter must be at true room temperature – soft enough to indent easily but not melted or greasy. This temperature contrast is vital for preventing the frosting from becoming too runny.
2. Combine the chilled mascarpone, chilled cream cheese, room temperature butter, icing sugar, vanilla extract, and your chosen paste food coloring (if using) in a food processor. Alternatively, you can use a stand mixer fitted with a paddle attachment or a hand mixer, but a food processor works exceptionally well for this specific frosting, creating an incredibly smooth texture quickly.
3. Pulse the mixture just until it becomes smooth and creamy. This is the most critical step: do not overprocess! Overmixing mascarpone and cream cheese can cause the frosting to become thin and curdled. As soon as it reaches a uniform, pipeable consistency, stop mixing. If using a stand or hand mixer, beat on medium-low speed until smooth, scraping down the bowl as needed, again, being careful not to overbeat.
4. Transfer the frosting to a piping bag fitted with your desired tip (a star tip works wonderfully for these cupcakes) and refrigerate for 15-30 minutes if it feels too soft, just until it’s firm enough to pipe neatly.
Assembling Your Masterpieces
With your perfectly baked cupcakes and velvety frosting ready, it’s time for the final, delightful step of assembly! Using a piping bag fitted with a star tip (or any tip you prefer), pipe a generous swirl of the mascarpone cream cheese frosting onto each cooled cupcake. Aim for a beautiful, even mound of frosting that will act as a cushion for your decorative toppers. Finally, gently place one of your charming, pre-stamped fondant medallions on top of the frosting. Press it lightly to ensure it adheres without sinking too deep.
The result is a collection of truly adorable, personalized birthday cupcakes that are sure to be the highlight of any child’s party. The contrast between the soft, creamy frosting and the firm, artfully stamped fondant creates both visual appeal and a delightful texture combination. These aren’t just cupcakes; they’re tiny canvases of joy, ready to bring smiles to every little face!
Conclusion: Create Unforgettable Birthday Memories
These stamped birthday cupcakes are more than just a sweet treat; they’re a labor of love that creates lasting memories. The joy of seeing children light up at a personalized creation, combined with the satisfaction of a successful DIY project, makes this endeavor truly special. Whether you choose playful animals, whimsical characters, or custom initials, the possibilities are endless for making each batch uniquely yours. So gather your ingredients, unleash your creativity with those rubber stamps, and prepare to bake up some unforgettable birthday magic. Happy baking!