
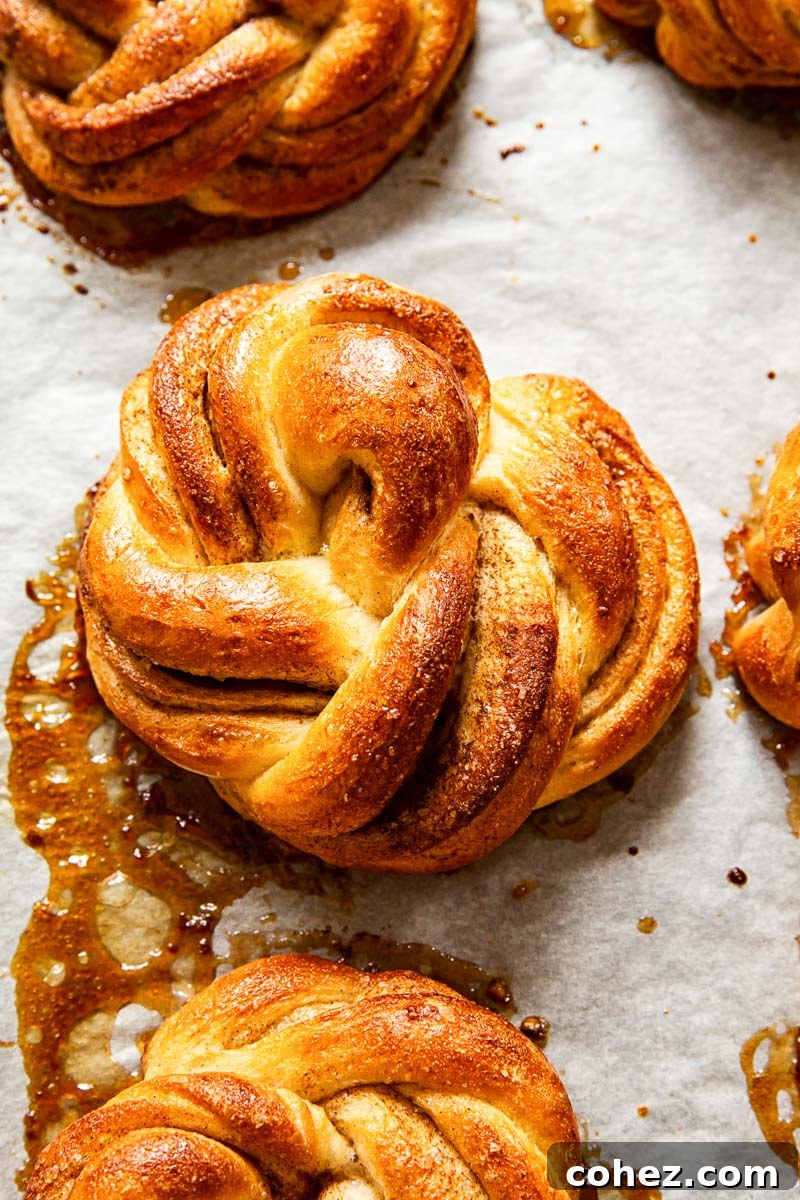
Imagine waking up to the irresistible aroma of freshly baked cinnamon buns, their golden-brown tops gleaming, their fluffy interiors promising pure bliss. These European-style cinnamon buns aren’t just a treat; they’re an experience, ready to become the star of every gathering and a delightful reason to embrace your mornings. Don’t be intimidated by their elegant, knot-like appearance – with our easy-to-follow video tutorial, shaping these sugary masterpieces into gorgeous knots is simpler than you think.
If you’re looking to expand your baking repertoire with more delightful sweet rolls, explore our Chocolate Almond Rolls for a decadent twist. Or, get creative and use the versatile dough from this recipe to craft your own batch of Homemade Hamburger Buns!
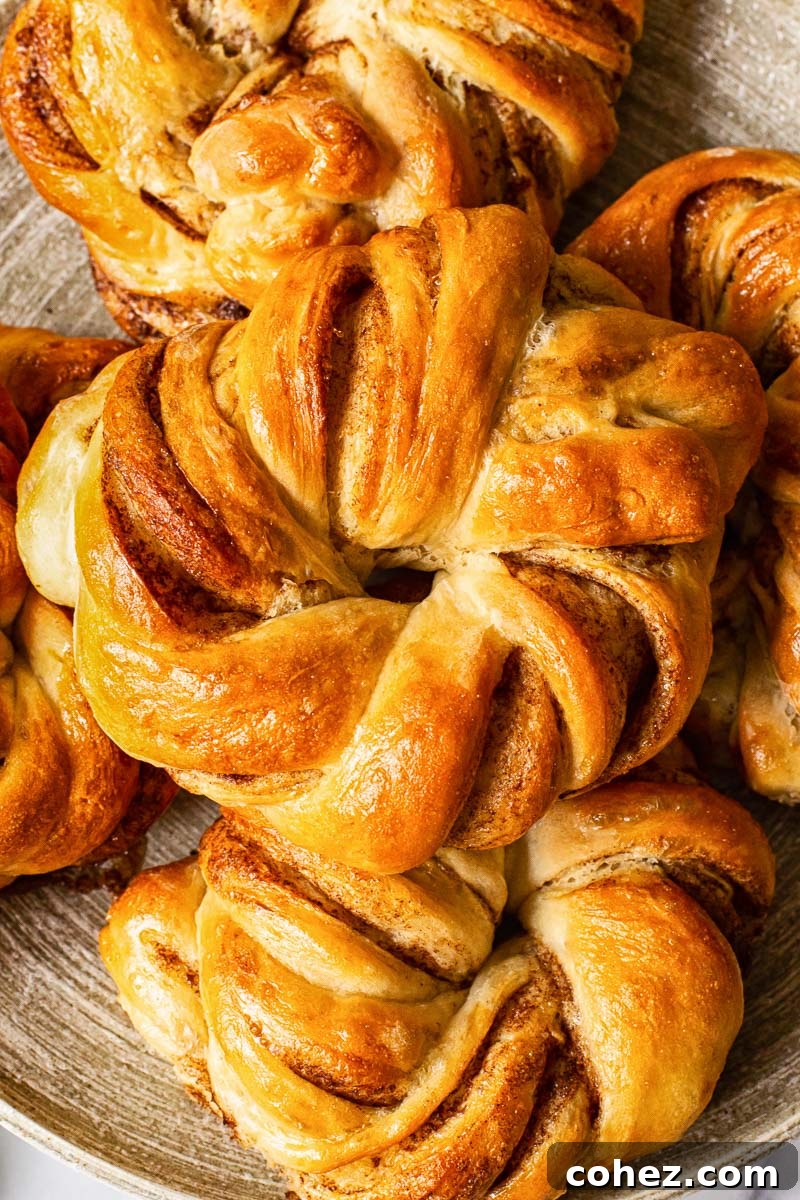
The Ultimate European-Style Cinnamon Bun Recipe: A Family Legacy
This cherished recipe for European-style cinnamon knots comes straight from my mother’s kitchen, a culinary treasure I am incredibly excited to finally share with you. My mom, you see, is renowned for her extraordinary cinnamon buns, affectionately known as “plushki” in Russian. These aren’t just any pastries; they are a staple, a comfort, and often, her unique form of currency.
Her plushki are so famously good that they have, on occasion, served as a delightful supplement to payments for a builder working on her flat, or as a sweet bribe to entice a tech-savvy nephew to fix her computer woes. Indeed, no family birthday celebration, no special occasion, passes without a generous platter of her signature sweet rolls. These legendary cinnamon buns are more than just food; they are her secret weapon, a testament to her love and baking prowess, and she knows their power well. For years, I yearned to possess her incredible recipe, but like many traditional Russian matriarchs, her culinary wisdom wasn’t meticulously documented. She crafted her stellar cinnamon rolls purely by instinct, by “eye” – a challenge for anyone trying to replicate them precisely!
After countless requests, she finally shared her loosely defined methods, which necessitated several rounds of meticulous testing on my part to pinpoint the exact measurements and optimal baking times. It was a labor of love, ensuring that every nuance of her original recipe was captured. To make this process seamless for you, I’ve also created a comprehensive video tutorial. Because when it comes to intricate shaping techniques, a picture – or in this case, a video – truly is worth a thousand words, offering invaluable visual guidance that written instructions alone cannot fully convey.
Crafting Irresistibly Fluffy Cinnamon Buns from Scratch
The secret to the unparalleled fluffiness of these cinnamon buns is readily apparent: it’s the yeast. My mother’s traditional recipe ingeniously calls for a generous quantity of yeast, which is precisely what enables these buns to rise remarkably quickly and expand to incredible heights in the oven, creating that signature light and airy texture. While her original method utilizes fresh yeast, a less common variety in many supermarkets today, I have thoughtfully adapted this recipe to perfectly suit your needs using readily available active dry yeast. Of course, if you have access to fresh yeast and prefer to use it, that option remains entirely viable and will yield equally delicious results.
What truly elevates these buns to a realm of extraordinary softness and rich, buttery flavor is the strategic inclusion of eggs, milk, and a touch of vegetable oil in the dough. Beyond these key ingredients, the preparation process for this recipe is remarkably straightforward, designed for ease and enjoyment. Simply combine all the listed ingredients in a large bowl, then knead the mixture briefly until it transforms into a wonderfully soft and elastic dough. This initial kneading ensures the development of gluten, which is essential for that coveted fluffy texture.
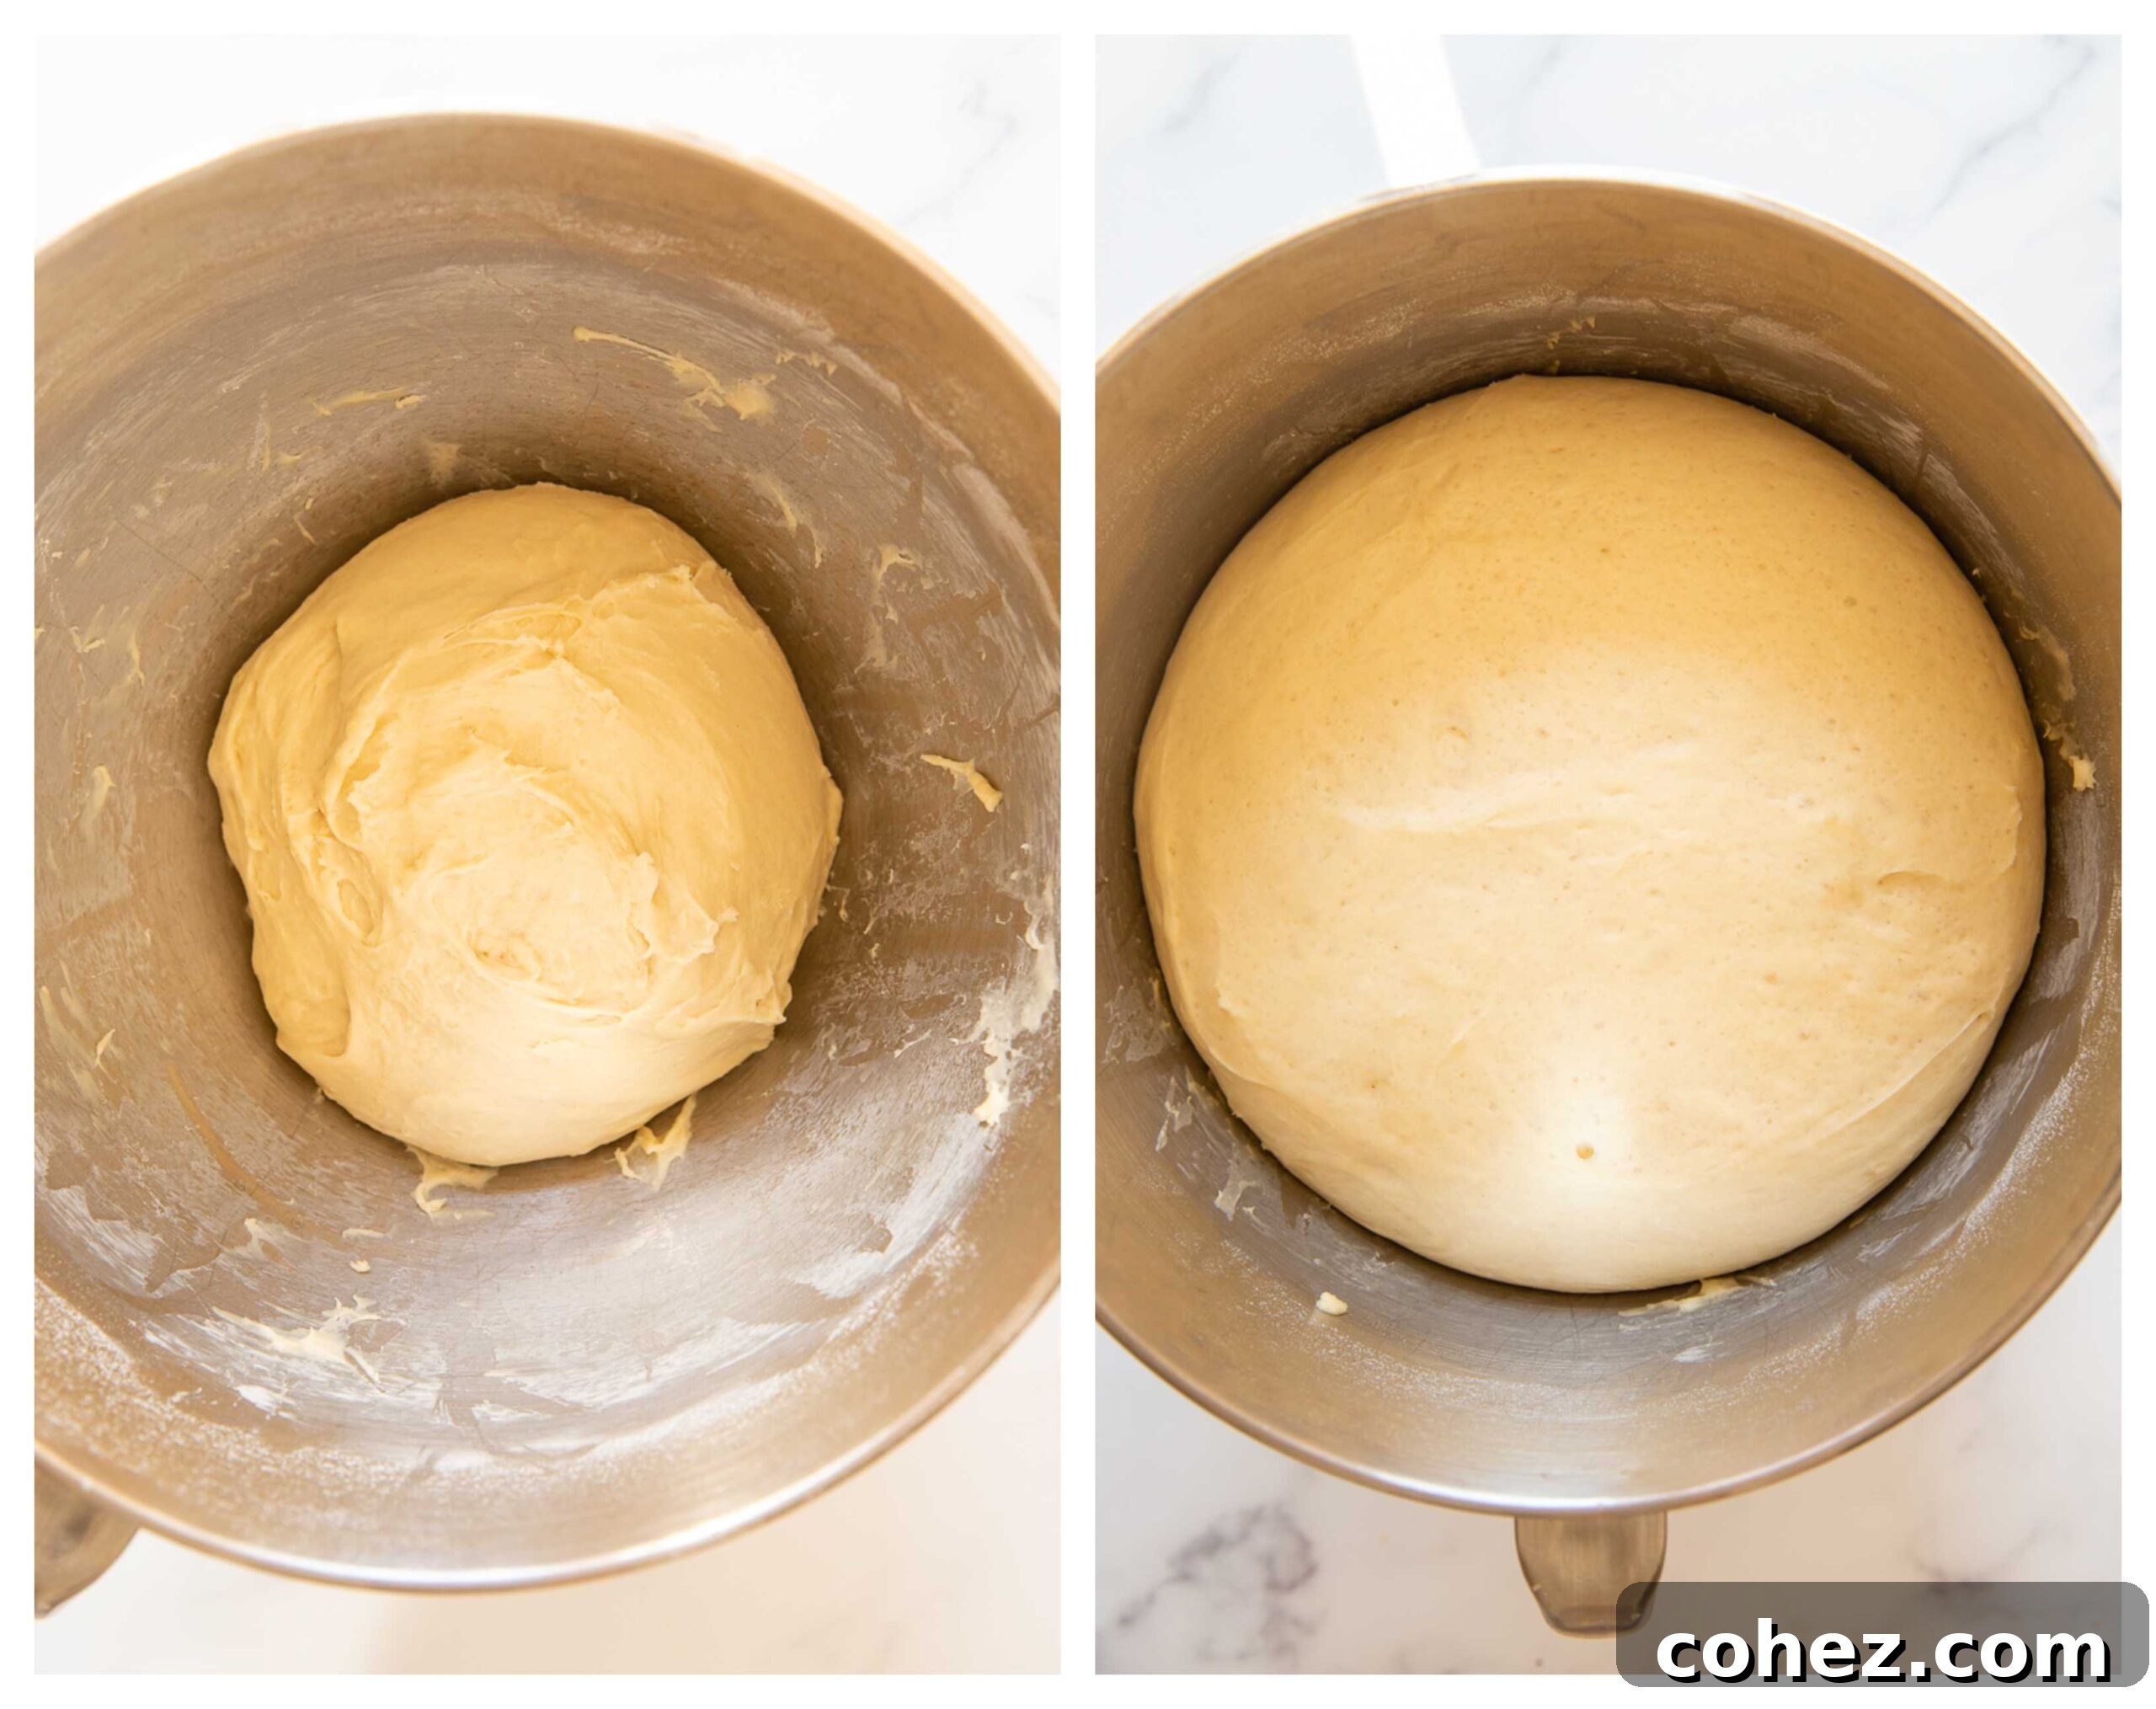
Once your dough is perfectly formed, allow it to undergo its first rise. Place it in a warm spot within your home for approximately 45 minutes to 1 hour, or until it has more than doubled in bulk – a clear sign of the yeast doing its magical work. Following this crucial rise, the creative part begins: shaping your dough into beautiful knots or traditional rolls. A second, shorter rise allows the shaped buns to achieve their full potential before they are finally baked to golden perfection. This simple sequence of mixing, kneading, rising, shaping, rising again, and baking ensures consistently delicious results every time.
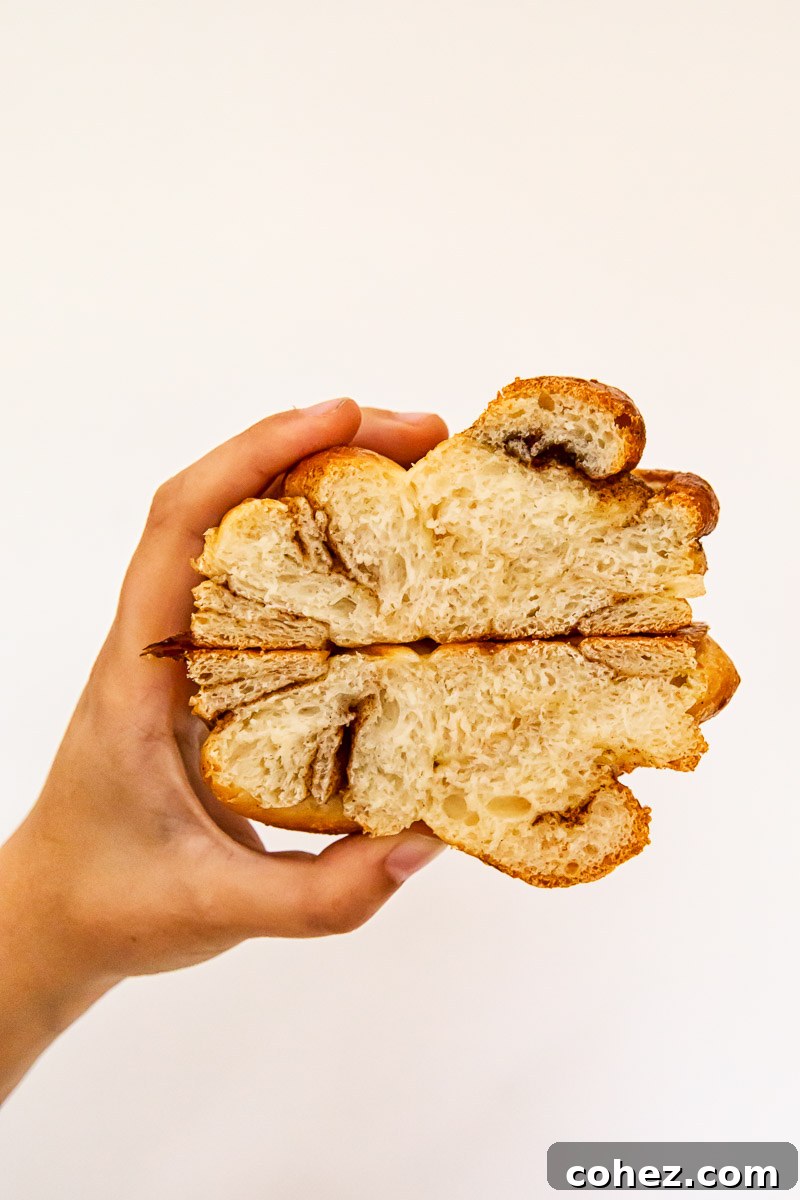
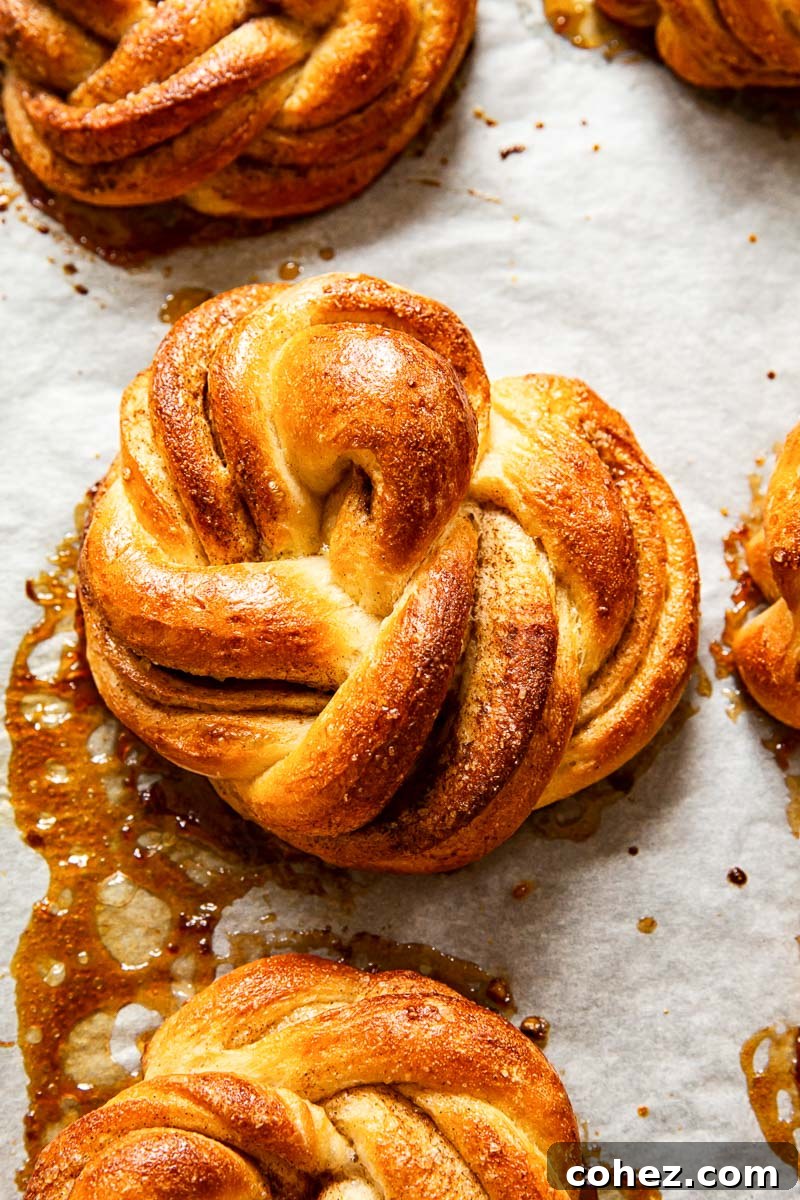
If you’re currently admiring these gorgeous buns and finding yourself thinking they appear overly complicated or surely difficult to master, I urge you to dismiss that notion immediately. Let me assure you: they are NOT difficult to make! The most intricate aspect of this entire recipe is arguably the shaping process – transforming simple dough strips into elegant knots that look as if they came straight from a professional European bakery. And this, precisely, is why I took the time to create a detailed video tutorial just for you. The truth is, once you see the technique demonstrated, you’ll realize that rolling and shaping these buns is incredibly intuitive and surprisingly easy. Sometimes, all it takes is a visual guide to unlock your inner baker!
Mastering the Art: How to Shape Cinnamon Knots and Traditional Buns
For me, transforming a simple, pliable piece of dough into something visually stunning is undoubtedly the most enjoyable part of baking cinnamon buns. The world of sweet rolls offers a myriad of shaping possibilities, with different countries and cultures boasting their own signature styles. My mother, for instance, traditionally shapes her plushki into delicate “roses,” a method that is both incredibly pretty and deeply rooted in Russian baking heritage. While her rose shape is beautiful, I decided to venture into a slightly different, equally captivating presentation.
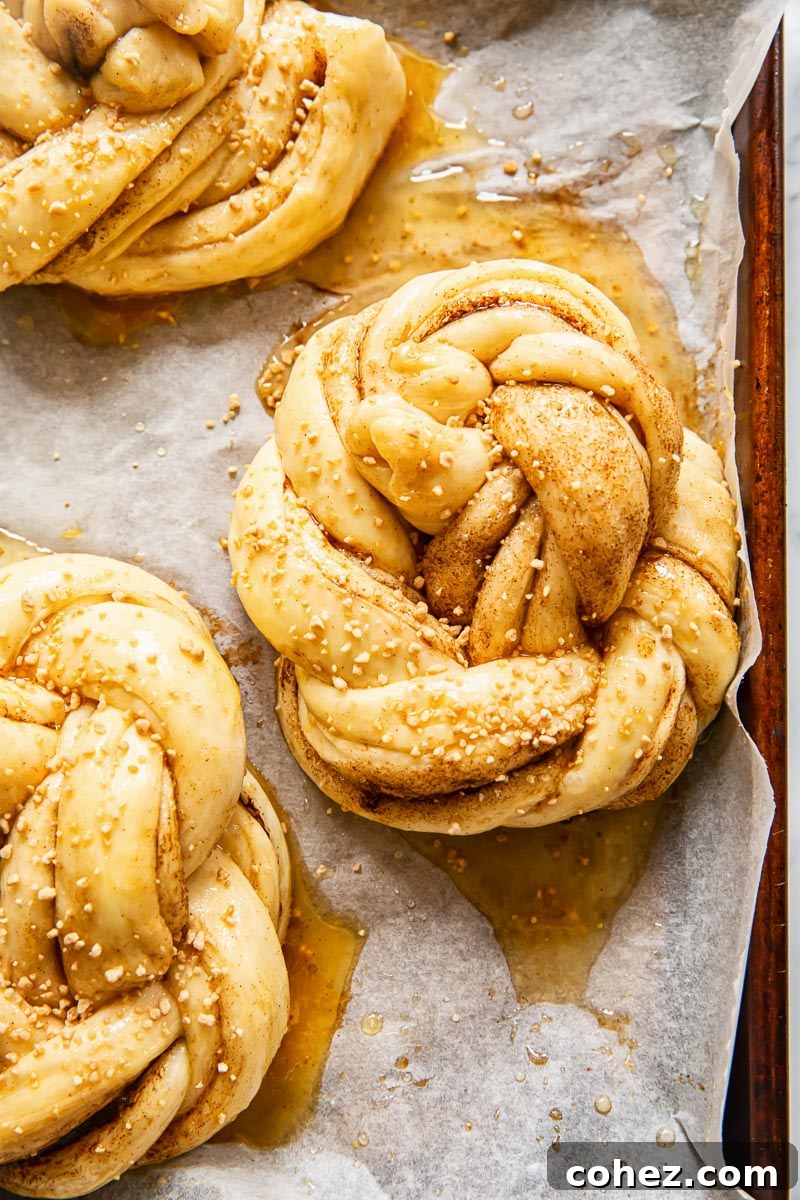
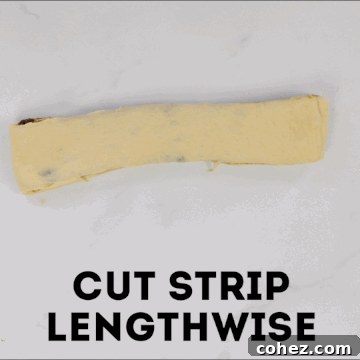
For these European-style cinnamon buns, I opted to cut the dough into long strips, then elegantly twisted them before tying them into intricate knots. This method not only creates a beautiful visual but also ensures plenty of surfaces for that delightful cinnamon sugar filling to peek through. The animated GIF below serves as an excellent visual guide, clearly demonstrating each step of this knot-tying process, making it easy for you to replicate at home.
Alternatively, if you prefer the classic approach, this versatile dough recipe can be effortlessly used to create traditional cinnamon rolls. When baked together in a standard rectangular 9×13 inch pan, they emerge from the oven incredibly fluffy and moist. This recipe yields enough dough for two such pans, making it perfect for feeding a crowd or ensuring you have plenty of leftovers. My children, in particular, absolutely adore this more conventional style, especially when topped with a generous cream cheese frosting. Whichever method you choose to shape your cinnamon buns – be it elegant knots or classic spirals – remember this essential tip: a brush of egg wash before baking is crucial for achieving that coveted, rich golden-brown hue and a beautifully glossy finish that truly makes them irresistible.
Crafting the Perfect Cinnamon Bun Filling: Classic and Creative Variations
The heart of any exceptional cinnamon bun lies in its filling, and ours is a wonderfully simple yet utterly delicious combination of softened butter, granulated sugar, and aromatic cinnamon. While my mother’s original recipe often featured oil in the filling, I made a slight, intentional modification to elevate the flavor profile: I chose to use butter instead. The richness and depth that butter imparts are simply unparalleled, adding a luxurious dimension to the overall taste of the buns. Beyond flavor, butter offers a significant practical advantage during the shaping process; its slightly firmer texture helps bind the strips of dough together beautifully, making them much easier to twist and knot without tearing, unlike oil which can make the dough more slippery and challenging to handle.
Should you ever find yourself craving a departure from the classic cinnamon, this versatile dough invites a world of creative possibilities for fillings. In Russia, a traditional and beloved alternative is a mixture of sugar and poppy seeds, offering a unique texture and subtle nutty flavor. For a truly indulgent treat, you could spread a luscious layer of Nutella, transforming these into chocolate hazelnut delights. Other fantastic options include a vibrant fruit compote, such as apple or berry, a rich cream cheese filling, or even a sprinkle of chopped nuts and dark chocolate chips. Don’t hesitate to experiment and customize your cinnamon buns to suit your personal preferences!
Essential Recipe Tips for Cinnamon Bun Success
- Flour Choice: For the most tender and structured buns, bread flour is ideal due to its higher protein content. However, if strong bread flour isn’t readily available, all-purpose flour can be used as a suitable substitute. Expect a slightly different texture, but still delicious!
- Checking the Rise: You’ll know your dough has fully and successfully risen when it has visibly doubled in volume. This indicates the yeast is active and has adequately fermented the dough, leading to a light and airy finished product.
- Preventing Stickiness: To ensure a smooth shaping process and prevent the dough from adhering to your surfaces, lightly dust both your work surface and rolling pin with a small amount of flour. Avoid over-flouring, as this can make the dough dry.
- Softened Butter is Key: For the filling, it’s crucial that your butter is properly softened to room temperature. This allows it to spread easily and evenly across the dough, ensuring every bite is rich with cinnamon and sugar goodness. Plan ahead by leaving your butter out on the counter for at least an hour before you begin baking.
- Warm Environment for Rising: Yeast thrives in warmth. Ensure your dough has a cozy, draft-free spot for rising. A slightly warmed oven (turned off!) or a sunny windowsill can work wonders.
- Don’t Overbake: Keep a close eye on your buns during the last few minutes of baking. They should be golden brown on top and feel slightly firm to the touch. Overbaking can lead to dry buns.
- Cooling: Allow the buns to cool slightly on a wire rack after baking. This prevents the bottoms from becoming soggy and helps them set.
Serving Your Irresistible Cinnamon Buns
One of the many beauties of these cinnamon buns is their versatility; they can be prepared in advance and kept on hand, ready to transform any moment into a special treat. Enjoy them as a comforting and easy breakfast, perhaps with a dusting of powdered sugar or a simple vanilla glaze. They also make an exquisite accompaniment to your afternoon coffee or tea, offering a delightful pause in your day. I personally find them most enjoyable when they are slightly warm, which truly enhances their soft texture and melts the buttery cinnamon filling. For that perfect warmth, I recommend a quick reheat in either a conventional oven or, for ultimate convenience, an air fryer, which crisps the exterior ever so slightly while keeping the interior wonderfully tender.
Storage and Enjoying Leftover Cinnamon Buns
The good news for avid bakers and dessert lovers is that these cinnamon buns store remarkably well, allowing you to savor their deliciousness for days. Once your freshly baked buns have cooled completely to room temperature, transfer them to an airtight container or a securely sealed bag. Stored this way, they will maintain their freshness at room temperature for up to 2 days, making them perfect for grab-and-go breakfasts or quick snacks. For extended freshness, you can refrigerate them for up to a week. To preserve them for even longer periods, these buns freeze beautifully for up to two months. Simply wrap individual buns tightly in plastic wrap, then place them in a freezer-safe bag or container. When you’re ready to enjoy, thaw them at room temperature or reheat directly from frozen in the oven or air fryer until warmed through and fragrant, almost like they were just baked.
More Delicious Recipes Using Yeasted Dough
- Rhubarb Jam Swirled Bread
- No Knead Farmhouse Bread
- Rye Bread Recipe
- Strawberry Cheesecake Vatrushka Buns
European-Style Cinnamon Buns
Print Recipe
Equipment
-
Baking dish
-
Pastry brush
-
Stand mixer
-
Mixing bowl
Ingredients
- 14g / 1½ tbsp active dry yeast, or 50g fresh yeast if available
- 175ml / 3/4 cup warm water
- 3 tbsp sugar
- 250ml / 1 cup warm milk
- 1 large egg
- 85ml / 1/3 cup vegetable oil
- 1 tsp salt
- 700g / 5⅓ cups strong bread flour
- 125g / 1/2 cup unsalted butter, softened
- 100g / 1/2 cup granulated sugar
- 2 tbsp cinnamon
- 1 egg, for brushing
Instructions
- In a small bowl, combine the warm water, yeast, and 3 tablespoons of sugar. Let this mixture stand for 5 minutes until foamy, indicating the yeast is active. Then, add the warm milk, vegetable oil, salt, and 1 large egg. Mix thoroughly with a fork until well combined.
- Pour the liquid mixture into the strong bread flour. Mix until a rough, shaggy dough forms. Transfer the dough out of the bowl onto a lightly floured surface and begin kneading by hand for approximately 8-10 minutes, or until you achieve a smooth, elastic dough. If using a stand mixer, attach the dough hook and knead on low speed for 1 minute, then increase to medium speed and continue kneading for an additional 4 minutes.
- Lightly grease the mixing bowl with a little vegetable oil. Return the kneaded dough to the bowl, turning it once to coat. Cover the bowl tightly with plastic wrap and then with a clean kitchen towel. Allow the dough to rise in a warm, draft-free place for 45 minutes to 1 hour, or until it has distinctly doubled in size.
- While the dough is rising, preheat your oven to 180°C (350°F). In a separate bowl, combine the softened unsalted butter with the 100g (1/2 cup) granulated sugar and 2 tablespoons of cinnamon. Mix with a spoon or mixer until a smooth, spreadable filling is formed. Set this aside.
- Once the dough has risen, gently punch it down to release the air. Transfer the dough from the bowl onto a lightly floured surface. Dust the top of the dough with a small amount of flour and roll it out into a large, even rectangle, no more than 1 inch thick. Evenly dab the prepared butter, sugar, and cinnamon mixture all over the rolled-out dough, spreading it right to the edges. Visually divide the rectangle into thirds. Carefully lift one-third of the dough (a dough bench scraper can assist here) and fold it over the middle section. Then, take the opposite side and fold it over, creating three layers. (For a clear visual demonstration of this crucial step, please refer to the video tutorial.) Use your rolling pin to gently roll the folded dough out again, aiming for a thickness of 1 to 1.5 inches.
- Using a sharp knife or pizza cutter, divide the rolled-out dough into 12 equal strips. Take each dough strip and cut it lengthwise down the middle, stopping short of one end, so you have two thin strands still connected at the top. Twist these two strands together, then carefully tie them into a knot. Place each shaped cinnamon bun on a parchment-lined baking sheet, ensuring they are spaced approximately 2 inches apart to allow for expansion. Cover the baking sheet with a clean tea towel and let the buns undergo a second, shorter rise for 30 minutes.
- Just before baking, lightly whisk the remaining 1 egg to create an egg wash. Gently brush the tops of each cinnamon bun with the egg wash for a beautiful golden sheen. Bake in the preheated oven for 20-25 minutes, or until the buns are puffed up and golden brown. Once baked, transfer them to a wire rack to cool slightly before serving.
Video Tutorial
Notes
- You can substitute all-purpose flour if bread flour is not available, though bread flour yields a chewier texture.
- The dough has fully risen when it doubles in volume.
- Dust your work surface and rolling pin with flour to prevent the dough from sticking.
- Leaving your butter on the counter to soften will make it easier to spread it evenly for the filling.
Nutrition
| Carbohydrates: 58g
| Protein: 8g
| Fat: 14g
| Saturated Fat: 9g
| Cholesterol: 52mg
| Sodium: 290mg
| Potassium: 117mg
| Fiber: 3g
| Sugar: 13g
| Vitamin A: 334IU
| Calcium: 52mg
| Iron: 3mg
Nutrition information is automatically calculated, so should only be used as an approximation.
Tried this recipe?
Let us know how it was!