
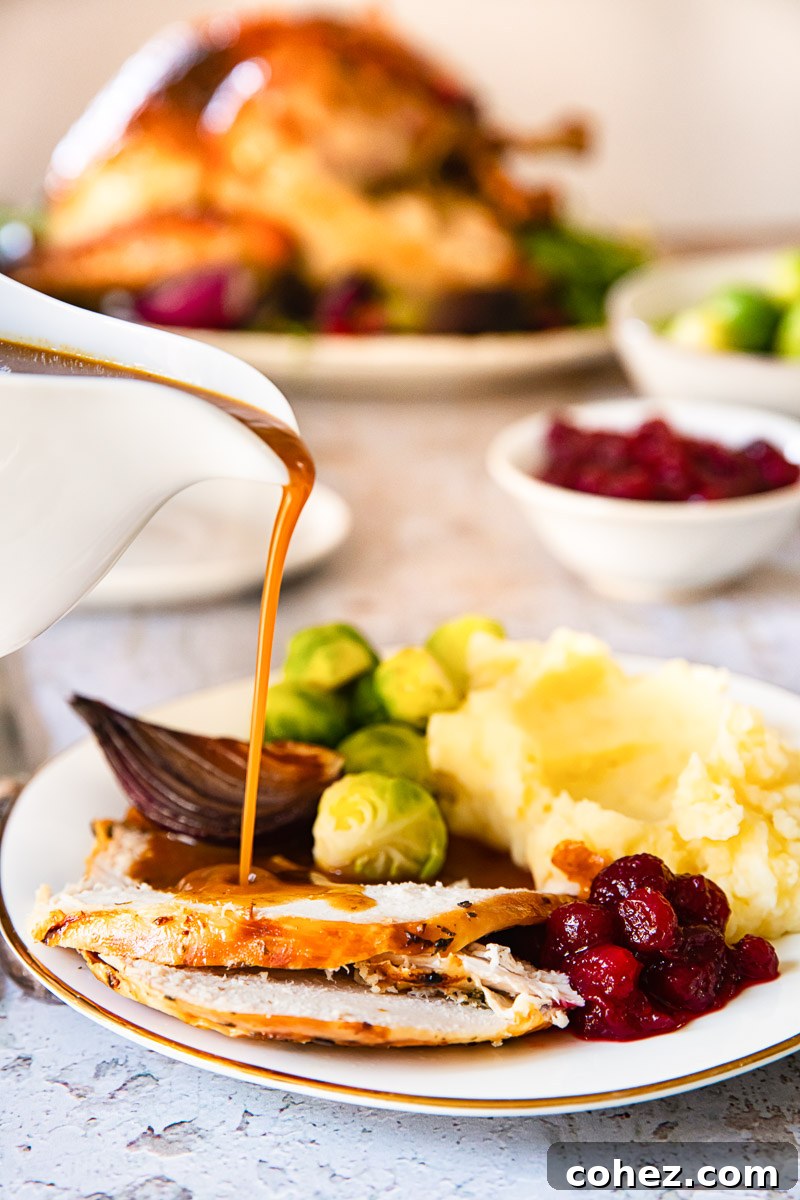
Every memorable roast dinner deserves a magnificent gravy. This easy homemade gravy recipe is designed for success every time, transforming simple pan drippings and a few key ingredients into a rich, savory, and incredibly delicious sauce in just over 10 minutes. With a splash of wine for an extra layer of flavor, you’ll have a lump-free, restaurant-quality gravy that elevates any meal.
While this fantastic gravy can stand alone as a culinary star, it truly shines when paired with an equally fabulous companion. Don’t forget to explore our favorite recipe for a herb and garlic rubbed roast turkey, which provides the perfect foundation for this delectable sauce.
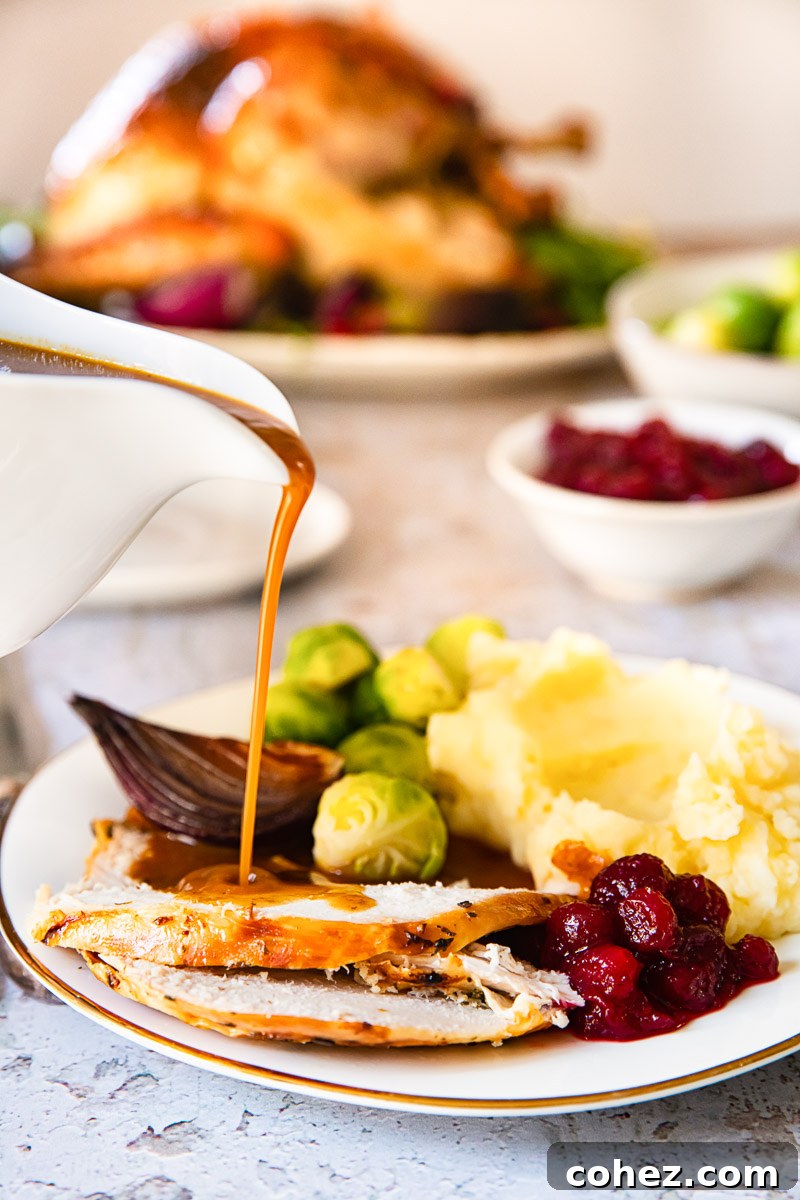
For many, gravy is not just a condiment; it’s the soul of a roast dinner. It’s often an unspoken expectation, a comforting presence assumed at the table, especially during holiday meals. Perhaps this inherent understanding of its importance is why its simple perfection sometimes gets overlooked in favor of more complex dishes. Yet, mastering a truly excellent homemade gravy is a culinary skill that yields immense satisfaction and universal appreciation. This recipe celebrates that simplicity, proving that incredible flavor doesn’t require intricate techniques or endless ingredients.
The Indispensable Sauce: Why Homemade Gravy Reigns Supreme
Gravy holds a unique and revered position in classic comfort food. It’s the luscious, savory ribbon that ties together the various elements of a roast dinner, from the succulent meat to the fluffy mashed potatoes and crisp Yorkshire puddings. While store-bought options exist, they often fall short, lacking the profound depth, natural richness, and authentic character that only a homemade gravy can provide. Making gravy from scratch allows you to capture the unique essence of your specific roast, infusing every drop with the concentrated flavors of the meat and aromatic herbs.
Our recipe demystifies the process, proving that a truly exceptional gravy doesn’t demand hours in the kitchen. In fact, with the right approach and a few key components, you can whip up a batch that rivals any gourmet restaurant in mere minutes. This isn’t just about adding moisture to your plate; it’s about amplifying every single bite, adding layers of savory goodness that transform a good meal into an unforgettable feast. Prepare to impress your family and friends with this simple yet spectacular homemade gravy.
Unlocking Unrivaled Flavor: The Core Ingredients of Our Easy Gravy Recipe
The secret to an extraordinary gravy lies in a handful of carefully selected ingredients, each playing a crucial role in building layers of deep, complex flavor. This recipe harnesses the natural richness of your roast, complemented by a few pantry staples, to create a sauce that is both comforting and sophisticated.
The Golden Foundation: Meat Drippings – Nature’s Flavor Bomb
The undisputed hero of any homemade gravy is the collection of fat and meat juices that accumulate at the bottom of your roasting pan. These invaluable “drippings” are far more than just leftover liquid; they are a concentrated essence of flavor, packed with caramelized meat particles and rendered fat that are fundamental to that deep, savory taste we all crave in a well-made gravy. As the meat roasts, these drippings capture its aromatic essence, creating a robust base that no store-bought substitute can replicate.
To maximize your drippings, consider placing aromatics like onions, carrots, celery, or fresh herbs (rosemary, thyme) in the roasting pan alongside your meat. As they roast and caramelize, they will further enrich the drippings, adding a complex undertone to your gravy. Whether you’re making gravy for turkey, chicken, beef, or pork, these pan drippings are non-negotiable for achieving truly authentic and profound flavor.
A Splash of Sophistication: The Magic of Wine (or Fortified Wines)
The addition of wine, while optional for some, is a game-changer for enhancing gravy’s flavor profile. Beyond simply adding liquid, wine serves a critical purpose: deglazing. As it hits the hot roasting pan, it helps to release all those beautiful, browned bits (known as “fond”) stuck to the bottom. These bits are pure flavor, and scraping them into your gravy base is essential for depth. The wine also contributes its own unique acidity and complexity, cutting through the richness of the fat and adding a nuanced layer that elevates the entire sauce.
For poultry like chicken or turkey, a dry white wine often works best, lending a brighter, more delicate finish. For richer meats such as beef or pork, a robust red wine can complement the flavors beautifully, adding depth and a subtle fruitiness. Alternatively, fortified wines like Port, Sherry, or Marsala are excellent choices for an even deeper, slightly sweeter, and more complex taste. These wines also have a longer shelf life once opened, making them a convenient staple. A good quality Marsala, for example, brings a wonderful nutty and caramel note that pairs exceptionally well with various roasts.
The Thickening Powerhouse: Flour for a Smooth Consistency
To give our gravy its signature rich and smooth texture, flour acts as the primary thickener. When combined with melted butter and cooked in the roasting pan, it creates what’s known as a “roux.” A roux is a fundamental building block in many sauces, and mastering it is key to a lump-free gravy. The butter coats the flour particles, preventing them from clumping when liquid is added, while cooking the flour for a few minutes removes any raw, pasty taste, ensuring a clean and pleasant flavor profile.
The ratio of butter to flour is crucial for achieving the right thickness. Typically, equal parts by weight (or very close to it) create a medium-thickening roux. For those seeking a gluten-free alternative, cornstarch or arrowroot powder can be used. These require a different method, usually mixed with cold water to form a slurry before being whisked into simmering gravy, but for this classic recipe, flour is our preferred choice for its robust thickening power and ability to create a silky, glossy finish.
The Liquid Gold: Choosing the Right Stock
While meat drippings provide the flavor foundation, a good quality stock is essential for providing the bulk and enhancing the overall savoriness of the gravy. Think of stock as the supporting cast that amplifies the star performance of the drippings. Homemade stock is always ideal, as it offers unparalleled depth and control over sodium levels and ingredients. If you have the time, preparing a batch of homemade stock (e.g., from leftover turkey carcass) will undoubtedly produce the most flavorful gravy.
However, we understand that not everyone has homemade stock readily available. In such cases, a high-quality, store-bought stock can certainly do the trick. Look for brands that offer rich, concentrated stock pots or low-sodium options to control the seasoning. Matching your stock to your roast is also beneficial: chicken or turkey stock for poultry, and beef stock for beef roasts, for instance, will create the most harmonious flavor profile. Always taste your stock before adding it, as its inherent saltiness will influence the final seasoning of your gravy.
The Finishing Touches: Seasoning and Optional Flavor Boosters
Even with the most flavorful drippings, wine, and stock, gravy requires careful seasoning to truly sing. Salt and freshly ground black pepper are fundamental. It’s crucial to taste your gravy at the end of the cooking process and adjust the seasoning as needed, as the saltiness of your drippings and stock can vary significantly. Never salt blindly; always taste, adjust, and taste again.
Beyond the basics, there are fantastic optional additions that can elevate your gravy to new heights. One of my favorite secret ingredients, especially when serving with pork roasts, is a tablespoon of blackcurrant jelly. Stirred in at the very end, it melts into the gravy, adding a subtle sweetness and a beautiful fruity tang that complements the savory notes perfectly. Other possibilities include a dash of Worcestershire sauce for umami, a hint of mustard, or a pinch of fresh herbs like thyme or sage, depending on the roast you are serving.
Mastering the Art of Gravy: Step-by-Step Perfection in Under 15 Minutes
Expert Gravy Crafting: Unlocking the Secrets to a Flawless Sauce
- **Leveraging the Roasting Pan for Ultimate Flavor:** To truly capture the essence of your roast, I highly recommend making your gravy directly in the same roasting pan where the meat cooked. The browned, caramelized bits at the bottom of the pan—often referred to as ‘fond’—are a treasure trove of flavor. These bits will infuse your gravy with an incredible depth and richness, contributing significantly to its overall taste and color. The more deeply colored the fond, the darker and more intensely flavored your gravy will be. While you could transfer the drippings to a saucepan, doing so inevitably means leaving behind some of those precious flavorful bits, and it adds an extra dish to wash. Embracing the roasting pan means embracing maximum flavor with minimal effort.
- **Building the Roux in Your Roasting Pan:** Since most roasting pans are larger than a single stove burner, set it across two elements on your stovetop to ensure even heating. Begin by adding butter to the warm pan, allowing it to melt gently. Once melted, sprinkle in the flour. Whisk continuously and vigorously to combine the butter and flour, creating a smooth paste known as a roux. Continue cooking the roux for 1-2 minutes, stirring constantly, to cook out the raw flour taste. This step is crucial for achieving a rich, thick, and flavorful gravy without any starchy aftertaste.
- **The Deglazing and Thickening Process:** Next, pour in your chosen wine. As the wine bubbles, use your whisk or a wooden spoon to scrape up all those flavorful browned bits from the bottom of the pan. Continue whisking as the wine slightly reduces, about one minute. Then, gradually add your stock, whisking vigorously as you pour to ensure a completely smooth, lump-free consistency. Bring the mixture to a boil, then reduce the heat and simmer, continuing to whisk occasionally. The gravy will thicken as it simmers, typically reaching your desired consistency in 5-7 minutes.
- **Adding a Unique Flavor Dimension:** For an extra layer of taste, particularly wonderful with pork roasts, consider stirring in a tablespoon of blackcurrant jelly at the end of the cooking process. As it melts into the hot gravy, it adds a subtle sweetness and a beautiful tangy depth that beautifully complements the richness of the meat. While entirely optional, it’s a delightful secret ingredient that can truly elevate your gravy.
- **Achieving Silky Smooth Perfection:** For those who prefer their gravy impeccably smooth, I always recommend straining it through a fine-mesh sieve before serving. This removes any small lumps, stray herbs, or lingering pan bits, resulting in a velvety, luxurious texture that is simply divine. While some don’t mind a few bits, a silky-smooth gravy is a hallmark of culinary refinement and enhances the overall dining experience.
Expert Tips and Common Questions for Your Best Gravy Ever
Making gravy is a straightforward process, but a few expert tips can make all the difference, transforming a good gravy into a truly spectacular one. Here, we address common questions and offer advice to ensure your gravy is perfect every time.
Maximizing Flavor from Your Roasting Pan
As highlighted, using the roasting pan directly is paramount. Those “burnt-on” bits are a concentrated flavor source. Don’t be shy about scraping them up with a sturdy whisk or wooden spoon; they are the essence of a deeply flavored gravy. If you find your pan has an excessive amount of rendered fat, you can carefully spoon some of it off, leaving about 2-3 tablespoons to combine with the butter for your roux. Too much fat can make the gravy greasy, but a little is essential for richness.
Achieving the Perfect Consistency
The key to lump-free gravy is consistent whisking. When adding the flour, ensure it’s fully incorporated with the butter to form a smooth roux. When adding the liquids (wine and then stock), pour them in gradually while whisking constantly. If your gravy turns out too thick, simply whisk in a splash more stock or water until it reaches your desired consistency. If it’s too thin, let it simmer gently for a few more minutes, allowing it to reduce and thicken naturally. Avoid adding more flour directly, as it can lead to lumps.
Customizing Your Gravy for Any Roast
Remember that the choice of wine and stock can be tailored to your roast. White wine and chicken/turkey stock are perfect for poultry, while red wine and beef stock complement red meats. Experiment with fresh herbs like finely chopped rosemary or thyme, adding them to the drippings before the flour for an aromatic boost. The blackcurrant jelly is particularly fantastic with pork, offering a sweet and savory counterpoint.
Troubleshooting: Common Gravy Glitches and How to Fix Them
- Lumpy Gravy: If despite your best whisking efforts, you end up with a lumpy gravy, don’t despair! Pass it through a fine-mesh sieve. This will catch all the lumps and any undesirable bits, leaving you with a beautifully smooth sauce.
- Greasy Gravy: If your gravy tastes overly greasy, it means you had too much fat in your drippings. A simple fix is to let the gravy sit for a few minutes; the fat will rise to the top. Then, skim off the excess fat with a spoon or a gravy separator.
- Bland Gravy: If your gravy lacks flavor, it might be due to insufficient drippings, bland stock, or inadequate seasoning. Taste it, then consider adding a dash more salt and pepper. You can also stir in a tiny amount of concentrated stock base, a splash of Worcestershire sauce, or a pinch of garlic powder for an umami boost.
- Too Salty Gravy: If you’ve over-salted, try adding a little more unsalted stock or even a splash of water to dilute it. A classic trick is to simmer a peeled potato wedge in the gravy for 10-15 minutes; it can absorb some of the excess salt. Remember to remove it before serving.
Elevating Your Feast: Creative Serving Suggestions
A roast dinner, regardless of its grandeur, simply feels incomplete without a generous pouring of luscious gravy. This particular recipe is incredibly versatile and pairs beautifully with virtually any roasted meat. Imagine it coating slices of succulent Roast Chicken, enriching a classic Pork Roast, or bringing an extra layer of decadence to a glorious Prime Rib. Its robust flavor profile makes it the perfect accompaniment for holiday feasts and everyday Sunday roasts alike.
To truly showcase the magnificent flavors of this homemade gravy, pair it with side dishes designed to soak up every precious drop. My top recommendations include creamy Herb and Garlic Mashed Potatoes, which become an absolute dream when drenched in gravy. Another essential side is crisp, airy Yorkshire Puddings, perfect for creating little pockets to hold pools of savory goodness. Don’t forget hearty stuffing, roasted root vegetables, or even simple rice – anything that can become a vehicle for this liquid gold will make your meal sing.
Storage and Longevity: Enjoying Your Gravy for Days to Come
It’s a common and welcome occurrence to find yourself with leftover gravy after a hearty meal. Fortunately, this homemade gravy is not only delicious but also stores wonderfully, allowing you to extend its enjoyment. Once cooled, transfer any leftover gravy to an airtight container and refrigerate it promptly. It will remain fresh and flavorful for 3-4 days in the refrigerator.
For longer storage, gravy freezes exceptionally well. Pour it into freezer-safe containers or even ice cube trays (for smaller, individual portions), and freeze for up to 6 months. When you’re ready to use it, simply thaw it in the refrigerator overnight.
When reheating, while a microwave can work in a pinch, the best results are achieved by gently warming the gravy in a saucepan over medium heat on the stovetop. Stir it frequently to ensure even heating and prevent sticking. If the gravy appears a little too thick after chilling or freezing, simply whisk in a splash of water, broth, or even leftover pan drippings until it reaches your desired smooth consistency. This ensures your reheated gravy is just as perfect as it was fresh off the stove.
More Amazing Side Dishes to Complement Your Roast
Round out your roast dinner with these incredible side dishes that pair perfectly with a rich, savory gravy:
- Sausage, Pear and Sage Stuffing: A flavorful and aromatic stuffing that adds texture and warmth to any holiday meal.
- Port Cranberry Sauce: The sweet and tart notes of this cranberry sauce provide a refreshing contrast to the richness of gravy and roast meat.
- Herb and Garlic Mashed Potatoes: Creamy, garlicky, and herbaceous, these mashed potatoes are the ideal sponge for soaking up every drop of gravy.
- Fresh Green Bean Casserole: A comforting classic with crisp green beans baked in a creamy sauce, perfect for a balanced plate.
- Sweet Potato and Rutabaga Mash: A vibrant and subtly sweet mash that offers a delightful alternative to traditional potatoes.
Easy Homemade Gravy Recipe
By Julia Frey of Vikalinka
Prep Time: 2 mins
Cook Time: 10 mins
Total Time: 12 mins
Servings: 12
This recipe consistently yields perfect results every time. Follow these simple steps for a rich, flavorful gravy.
Ingredients
- 2 tbsp butter
- 2 tbsp flour
- Fat and meat juices on the bottom of pan (drippings)
- 125ml / ½ cup red or white wine (see notes for choice)
- 1 litre / 4 cups stock (chicken, turkey, or beef)
- Salt and black pepper to taste
Instructions
- Remove the meat from the roasting pan and cover it loosely with foil to keep warm. Place the roasting pan with the drippings on the stovetop over two elements and turn them on medium heat. (If your roast was very fatty, carefully spoon off some of the excess fat, leaving about 2-3 tablespoons in the pan.)
- Once the meat juices begin to bubble, add the butter to the pan and let it melt completely. Then, sprinkle the flour evenly over the melted butter and drippings. Whisk continuously until the butter and flour combine to form a smooth paste, ensuring there are no lumps. Continue cooking and whisking for 1-2 minutes to cook out the raw flour taste.
- Next, pour in the wine. Continue to whisk, scraping up all the browned bits (fond) from the bottom of the pan as the wine slightly reduces. Cook for about 1 minute. Finally, gradually add the stock while whisking constantly to combine thoroughly and bring the mixture to a boil.
- Reduce the heat and let the gravy simmer, stirring occasionally, until it reaches your desired consistency. This typically takes 5-7 minutes. Taste the gravy and season with salt and freshly ground black pepper as needed. For an extra smooth texture, strain the gravy through a fine-mesh sieve before serving. Serve hot with your choice of roasted meat.
Notes
- For gravy accompanying a beef or pork roast, red wine is generally more suitable due to its robust flavor profile.
- When making turkey or chicken gravy, white wine is often preferred for a lighter, complementary taste.
- Consider using Marsala wine, Sherry, or Port for a deeper, slightly sweeter, and more complex flavor dimension.
- The amount of salt needed will depend heavily on the inherent saltiness of your pan drippings and the stock used. Always taste your gravy at the end of cooking and adjust seasoning accordingly.
Nutrition Information
Nutrition information is automatically calculated, so should only be used as an approximation. Per serving (based on 12 servings):
- Calories: 59 kcal
- Carbohydrates: 1g
- Protein: 1g
- Fat: 5g
- Saturated Fat: 4g
- Cholesterol: 5mg
- Sodium: 18mg
- Potassium: 7mg
- Fiber: 1g
- Sugar: 1g
- Vitamin A: 59 IU
- Calcium: 1mg
- Iron: 1mg
Tried this recipe? Let us know how it was!