
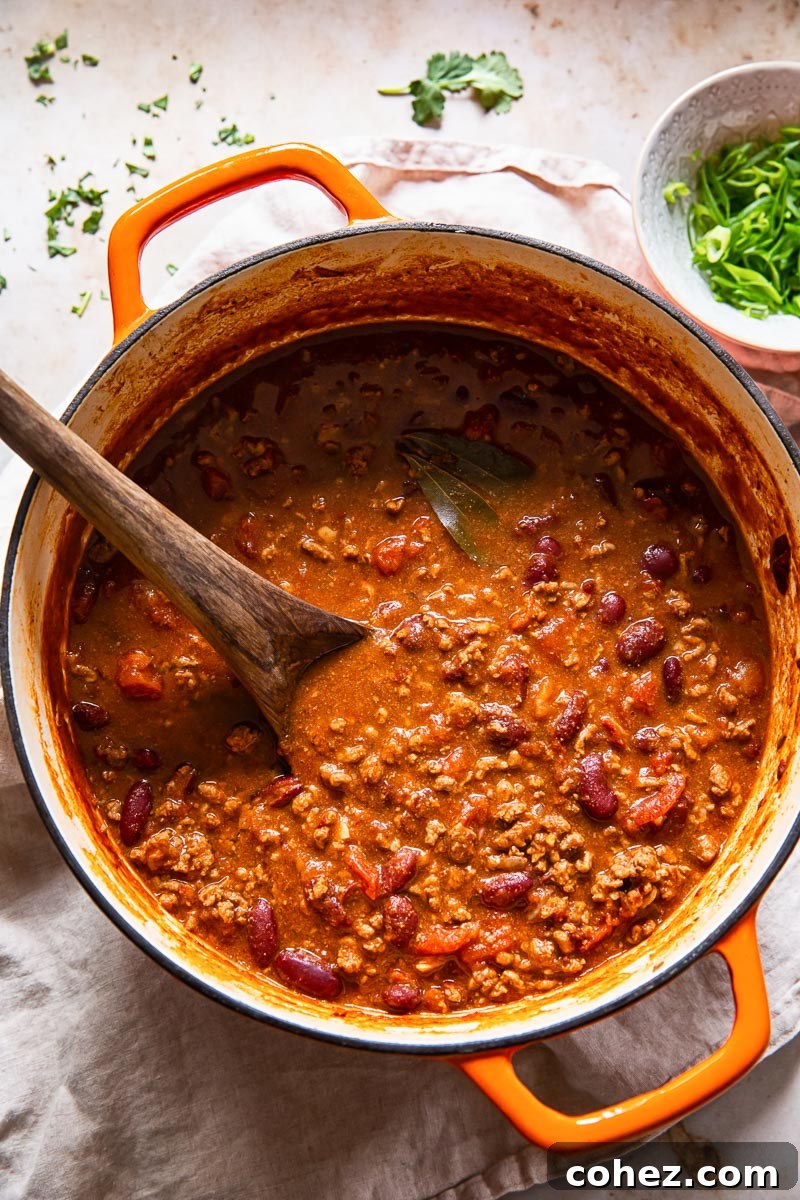
Imagine a hearty bowl of rich, savory goodness, where succulent beef and tender kidney beans are slowly simmered in a luscious tomato sauce, infused with the warming, aromatic embrace of cumin, chili, coriander, and more. This isn’t just a meal; it’s an experience – a truly crowd-pleasing chili recipe that’s destined to become a treasured family classic!
For those who revel in the vibrant and diverse flavors of chili, and are eager to explore exciting variations, you might also enjoy giving our Chile Verde a try. It’s a wonderfully delicious and comforting dish that offers a different, yet equally satisfying, flavor profile!
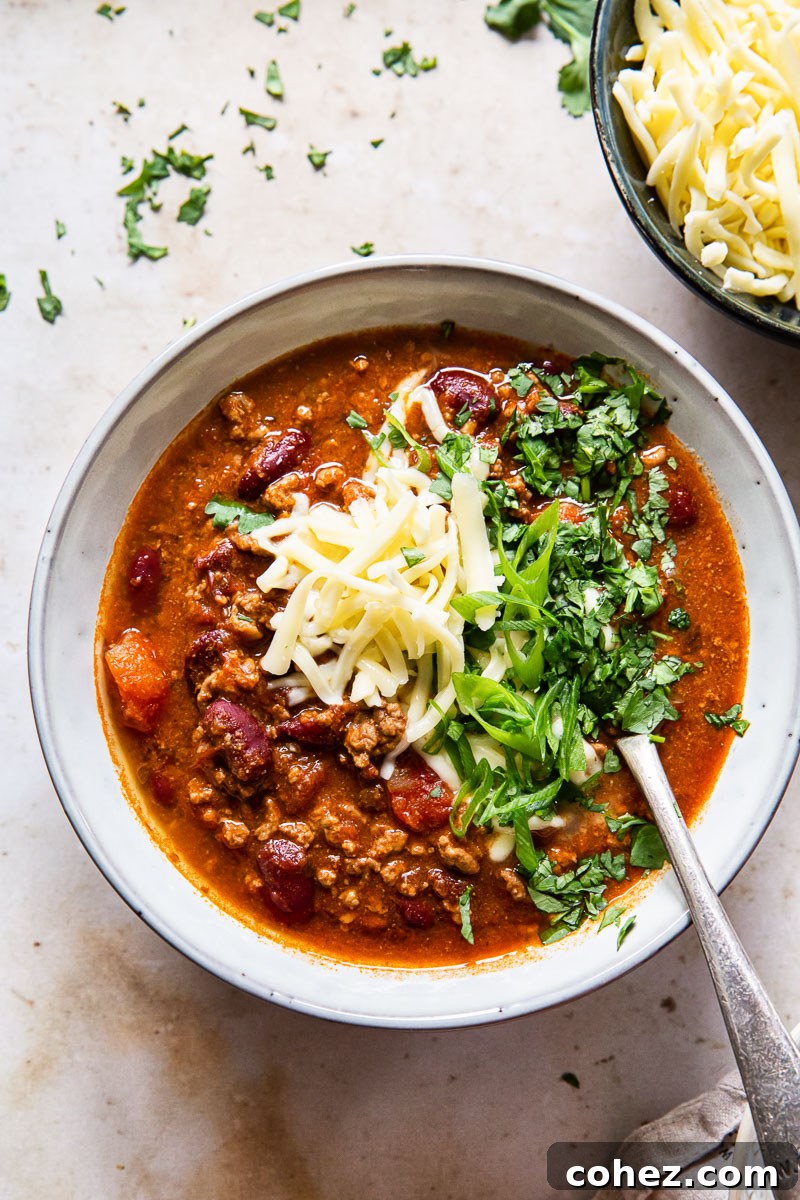
There are certain recipes that become so deeply ingrained in the fabric of family life that their extraordinary nature is almost taken for granted. This ultimate chili recipe is precisely one of those culinary gems. Passed down and perfected, it holds a special place in our kitchen and our hearts.
I’ve been crafting this particular chili for almost two decades, and while it has undergone minor tweaks and refinements over the years, its soulful essence has remained gloriously unchanged. Each spoonful of this chili is the very embodiment of comfort food – deeply satisfying, incredibly flavorful, and wonderfully warming.
Beyond its ability to cheer us up on a chilly evening, this chili recipe is also remarkably generous. The proportions yield a substantial batch, making it perfect for feeding a crowd or ensuring you have plenty of delicious leftovers. If you’re not cooking for many, a portion can be effortlessly frozen for another quick and wholesome meal, truly a gift that keeps on giving!
Chili Con Carne: A Brief History of a Beloved Dish
The precise origins of chili con carne remain a subject of friendly debate among culinary historians, with its true birthplace often attributed to either Northern Mexico or the great state of Texas. Many enthusiasts point to San Antonio, Texas, as a significant hub in chili’s early history, lending credence to its Texan roots.
However, the name itself, “chili con carne,” is unequivocally Spanish, translating directly to ‘chili peppers with meat’. This intriguing linguistic clue, combined with its historical development, positions chili con carne as a quintessential example of Tex-Mex cuisine – a vibrant fusion of flavors and traditions from both sides of the border. It’s a testament to how cultures blend and create something truly unique and delicious.
Like many of the world’s most enduring and beloved recipes, chili con carne was historically a staple for the working class. Its practical nature made it ideal: it could be prepared from readily available ingredients, cooked in a single pot, and, being packed with protein and robust flavors, it provided substantial sustenance and warmth after a long, arduous day of labor. This inherent heartiness continues to make it a popular choice for families seeking fulfilling and budget-friendly meals.
While chili, as we recognize it today, is a relatively recent addition to our dinner tables, its universal appeal has quickly propelled it into the pantheon of ultimate comfort foods. It’s a dish that evokes feelings of coziness, nostalgia, and deep satisfaction, consistently delivering a filling and warming experience that is ever so good, truly transcending generations and palates.
Crafting the Perfect Spice Mix for Ultimate Flavor
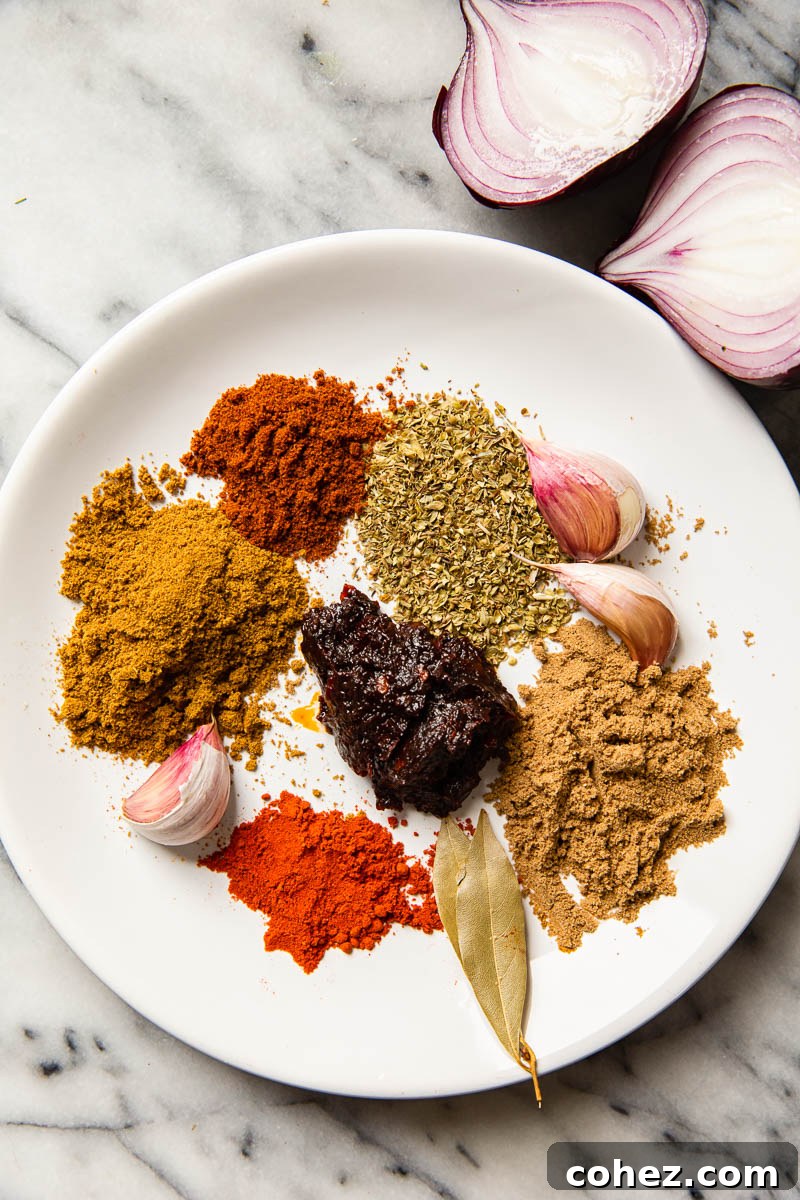
The core ingredients in our chili will be familiar to any seasoned chili lover, but the unique blend of spices and seasonings is a distinctive hallmark of our family’s recipe. Over the years, this blend has evolved, gradually leaning towards a slightly spicier profile as our children’s palates matured. It offers a wonderful kick without ever veering into overwhelming heat, ensuring a balanced and enjoyable experience for most.
However, the beauty of homemade chili lies in its adaptability. You are always welcome to adjust the spice level to perfectly match your personal preference, making it as mild or as fiery as you desire. Don’t be afraid to experiment!
Here’s a breakdown of the essential spices that create the incredible depth of flavor in our chili:
- Cumin: Absolutely non-negotiable! Cumin is the cornerstone of authentic chili flavor, providing a warm, earthy, and slightly smoky aroma that is instantly recognizable and deeply satisfying. It binds all the other flavors together.
- Chili Powder: This is where much of your heat and core chili flavor comes from. A good quality chili powder typically contains a blend of ground chilies, cumin, oregano, and garlic powder, contributing a complex, savory, and spicy base.
- Dried Coriander: Adds a bright, citrusy, and slightly floral note that beautifully complements the richer, earthier spices. It prevents the chili from becoming too heavy, offering a fresh counterpoint.
- Oregano: Mexican oregano is often preferred for chili, offering a more robust and peppery flavor compared to Mediterranean oregano. It contributes a classic herbal warmth that is integral to Tex-Mex dishes.
- Smoked Paprika: This is a fantastic addition, infusing the chili with a beautiful, deep smokiness without needing actual smoke. It adds another layer of complexity and richness that truly elevates the dish.
- Chipotle Paste or minced chipotle peppers: While optional, this ingredient is highly recommended. Chipotles are smoked and dried jalapeños, offering a distinctive smoky heat with a touch of fruitiness. The paste is convenient, but minced peppers provide an even more authentic texture and flavor.
- Bay Leaves: These humble leaves might seem minor, but they add a subtle, herbaceous backdrop that enhances the overall savory profile of the chili during the slow simmering process.
While you can certainly adjust the quantities and proportions of these spices to suit your taste, I firmly believe that this specific combination is the secret to creating the most profoundly flavorful and satisfying chili. Each spice plays a crucial role in building a harmonious and unforgettable taste experience.
The Great Debate: Beans or No Beans in Your Chili?
As a food blogger with years of experience, I’ve encountered my fair share of passionate reader feedback. Some recipes are met with widespread acclaim, while others stir up lively debates and occasional suspicion. My Texas Style Chili (using the British spelling here!) was one such recipe, primarily due to one major point of contention: the inclusion of beans!
Through some rather spirited comments – both polite and, shall we say, “less polite” (which were promptly deleted!) – I quickly learned that for many purists, an “authentic” Texas chili recipe contains absolutely no beans. I respect this culinary tradition and understand its significance.
However, I also recognize that while bean-less chili might represent one authentic regional style, the practice of adding beans to chili is incredibly widespread and conventional, especially across the United States and the United Kingdom. It’s a common and beloved variation that many people grew up with and continue to enjoy.
Personally, I always choose to add beans to my chili for two compelling reasons:
- Enhanced Taste and Texture: Beans contribute a wonderful creaminess and a slightly earthy flavor that I find incredibly complementary to the richness of the meat and tomato sauce. Their soft texture also provides a delightful contrast to the ground beef, adding another dimension to each bite.
- Economical and Hearty: Incorporating beans alongside meat is a fantastic and time-honored way to make a meal more substantial and budget-friendly without sacrificing flavor. They stretch the meat further, making the dish more filling and accessible, especially when feeding a large family or crowd.
I know this stance can be controversial for some chili aficionados! But rest assured, if you genuinely can’t fathom beans in your chili, you are more than welcome to omit them entirely. The recipe will still yield a delicious, meaty stew. When I do add beans, I typically reach for canned dark red kidney beans for their robust flavor and firm texture, but feel free to use any variety you prefer, such as pinto or black beans, to customize your dish.
How to Make the Ultimate Slow-Cooked Chili Con Carne
Crafting a truly exceptional chili is much like preparing any great stew: patience and slow, low heat are your best friends. These elements are absolutely crucial for allowing the flavors to meld, deepen, and truly transform into something extraordinary. Here’s a step-by-step guide to achieving chili perfection:
I always begin by thoroughly browning the ground beef. This step is more critical than you might think! The goal is to achieve a deep, rich brown crust, not just to steam the meat. For optimal browning, ensure your pan is very hot and you’re using about 1 tablespoon of hot oil. I find my heavy-bottomed Dutch Oven to be ideal for this task, as it retains heat exceptionally well.
Add the ground beef to the hot pot and resist the urge to stir it immediately. Let it sear undisturbed for a good five minutes. This allows a beautiful, flavorful crust to develop on the bottom. After five minutes, you can begin breaking it up with a spoon. Once the beef is evenly browned and cooked through, move it to one side of the pan. Lower the heat to medium-low, and then add your chopped onions to the cleared space.
Sauté the onions with care, stirring occasionally, until they become wonderfully soft, translucent, and slightly caramelized. This process typically takes no less than 7-10 minutes. Don’t rush this step, as properly sautéed onions contribute immense sweetness and aromatic depth to your chili – they’re a fundamental building block of flavor. Once the onions are tender, quickly stir in your crushed garlic and cook for just about 30 seconds until fragrant; avoid burning it.
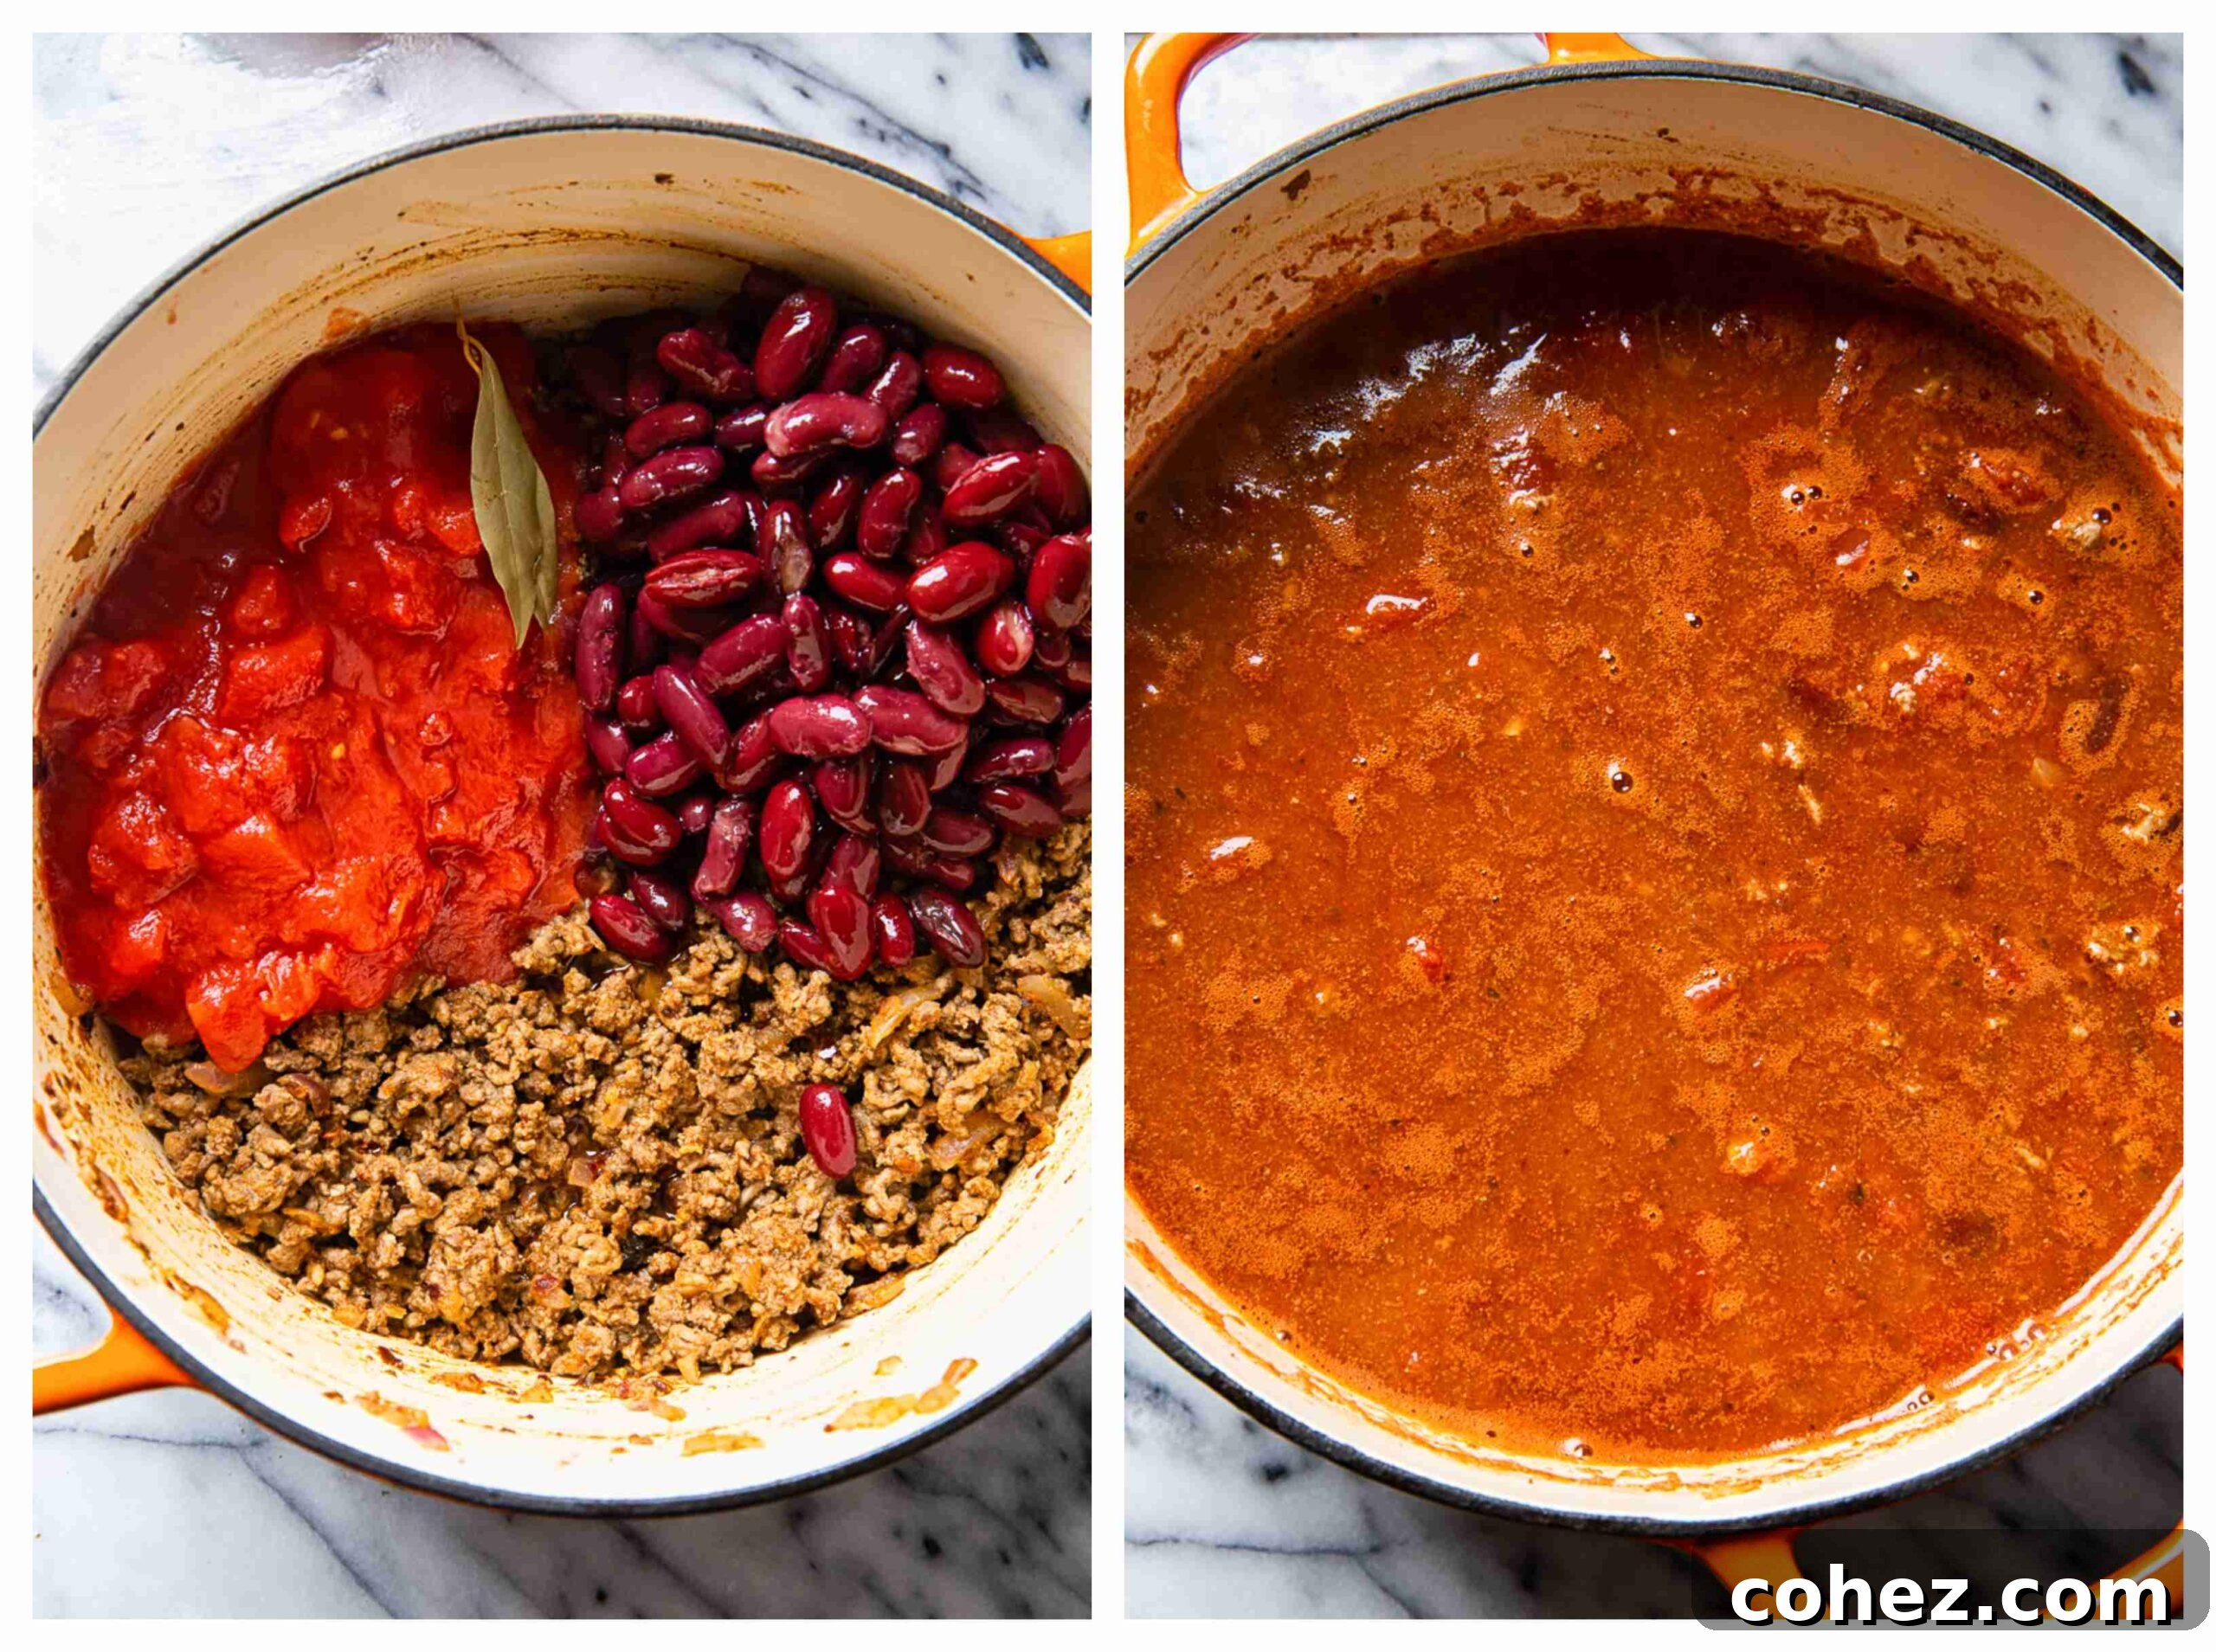
At this point, your kitchen will already smell incredible! Now, it’s time to simply add the rest of the ingredients: the prepped spices, canned tomatoes, and kidney beans. Give everything a good stir to combine, bring it to a gentle boil, then reduce the heat to a low simmer. Cover the pot and let your chili work its magic, simmering for at least 1 hour. During this time, the flavors will deepen and harmonize, creating a truly rich and complex sauce. Your primary work here is essentially done – the pot takes over!
Achieving the Perfect Thickness for Your Chili
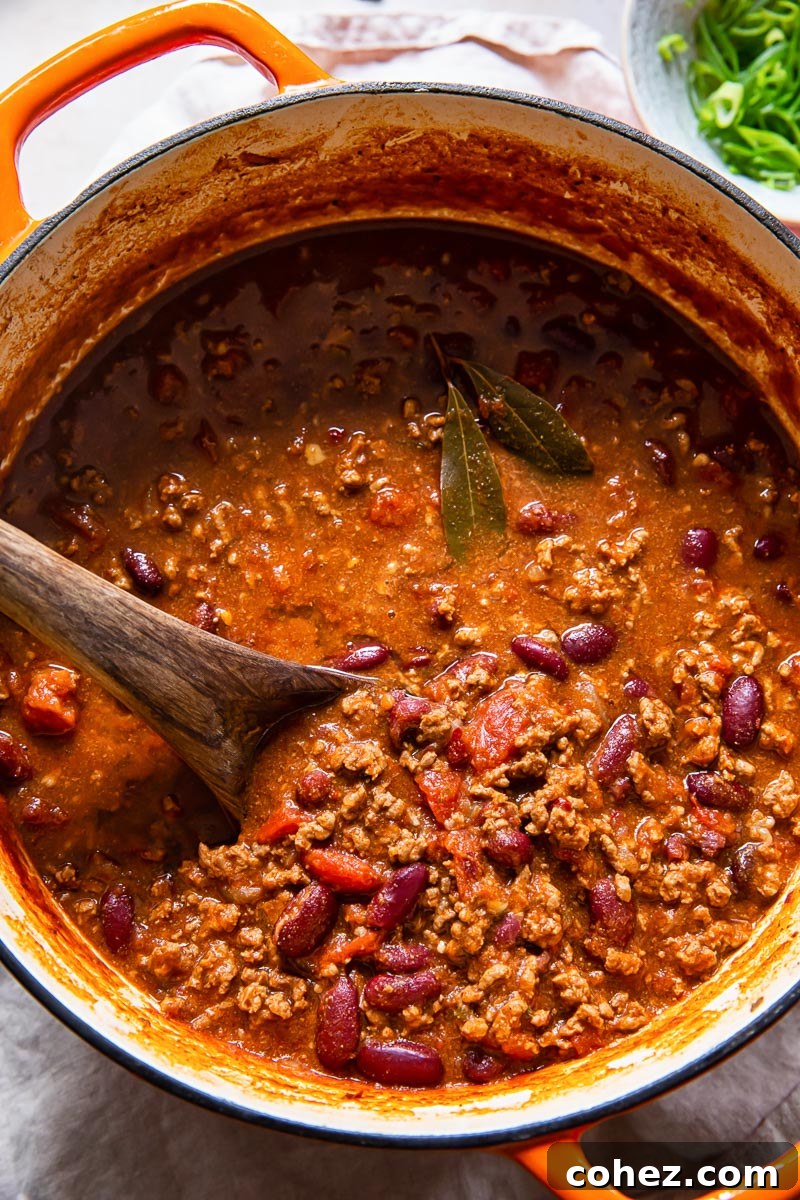
A perfectly thick chili is a joy to behold and savor. While I initially recommend cooking chili covered for about 40 minutes to allow flavors to meld and the beef to tenderize, a crucial step for achieving that desired consistency is to then uncover the pot. Continue cooking for an additional 20-30 minutes, allowing some of the excess liquid to evaporate, which naturally thickens the chili. This gentle reduction concentrates the flavors even further.
If, after this simmering period, your chili still appears a bit more liquid than you prefer, there’s a simple, starch-free trick to thicken it. Grab a potato masher and gently press it into the pot, crushing some of the kidney beans (and perhaps a few pieces of beef) against the bottom and sides. The released starches from the beans will work wonders, creating a naturally thicker and richer chili without the need for cornstarch or flour, preserving its pure, authentic flavor and texture.
Essential Recipe Tips and Notes for Chili Perfection
- The Secret Ingredient: Chocolate! Surprised to find chocolate in a chili recipe? Don’t be! It’s actually a fantastic, age-old secret to deeply enrich the flavors of chili. Just a single square of dark chocolate (about 70% cocoa or higher) will beautifully mellow out the acidity of the tomatoes and add an incredible depth, richness, and subtle complexity to the overall dish. Unsweetened cocoa powder or semi-sweet chocolate will also achieve a similar magical effect. Consider it your stealthy secret weapon for an award-winning chili!
- Customizing the Heat: A little fiery kick is a preference for many, and there are several ways to incorporate it. For an integrated heat, you can finely slice a fresh chili pepper (like jalapeño or serrano) and add it to the pot along with the onions. For those who prefer to control their spice level individually, simply offer red pepper flakes or extra chili powder at the table, allowing everyone to customize their bowl to their liking.
- Choosing Your Beef: I personally opt for ground beef with just 5% fat to create a leaner, yet still incredibly flavorful, chili. This is a personal preference that results in a less greasy finish. However, feel absolutely free to use the type and fat percentage of ground beef you enjoy most; a higher fat content can add even more richness to the chili.
- The Virtue of Slow Simmering: The best chili is never rushed. The true magic happens during the slow simmer over low heat. This extended cooking time is what allows all the individual flavors from the beef, vegetables, and, most importantly, the spices, to fully meld, intertwine, and blossom into a cohesive, deeply satisfying whole. Patience truly pays off in the flavor department.
- Final Seasoning Check: Always, always taste your chili before serving! The flavors can evolve significantly during the simmering process. Add more salt, if it seems to be lacking, a touch more chili powder for heat, or even a squeeze of lime juice for brightness, until the seasoning is perfectly balanced to your palate.
Delightful Serving Suggestions for Your Chili
How you enjoy your chili is largely a matter of personal preference, but the versatility of this dish means there are countless delicious ways to serve it. While a bowl of chili on its own is a much-loved and satisfying meal, pairing it with a starch or an array of toppings is a fantastic way to elevate the experience and make it even more filling.
Eating chili with warm, crumbly cornbread is an absolute classic combination that has stood the test of time. While I don’t always have cornbread on hand, I particularly enjoy my chili with a thick slice of homemade no-knead farmhouse bread or our delightfully simple easy flatbread, perfect for soaking up every drop of that rich sauce. My kids, with their youthful preferences, often love their chili served over fluffy cilantro lime rice or even alongside crispy french fries the next day – a truly comforting twist!
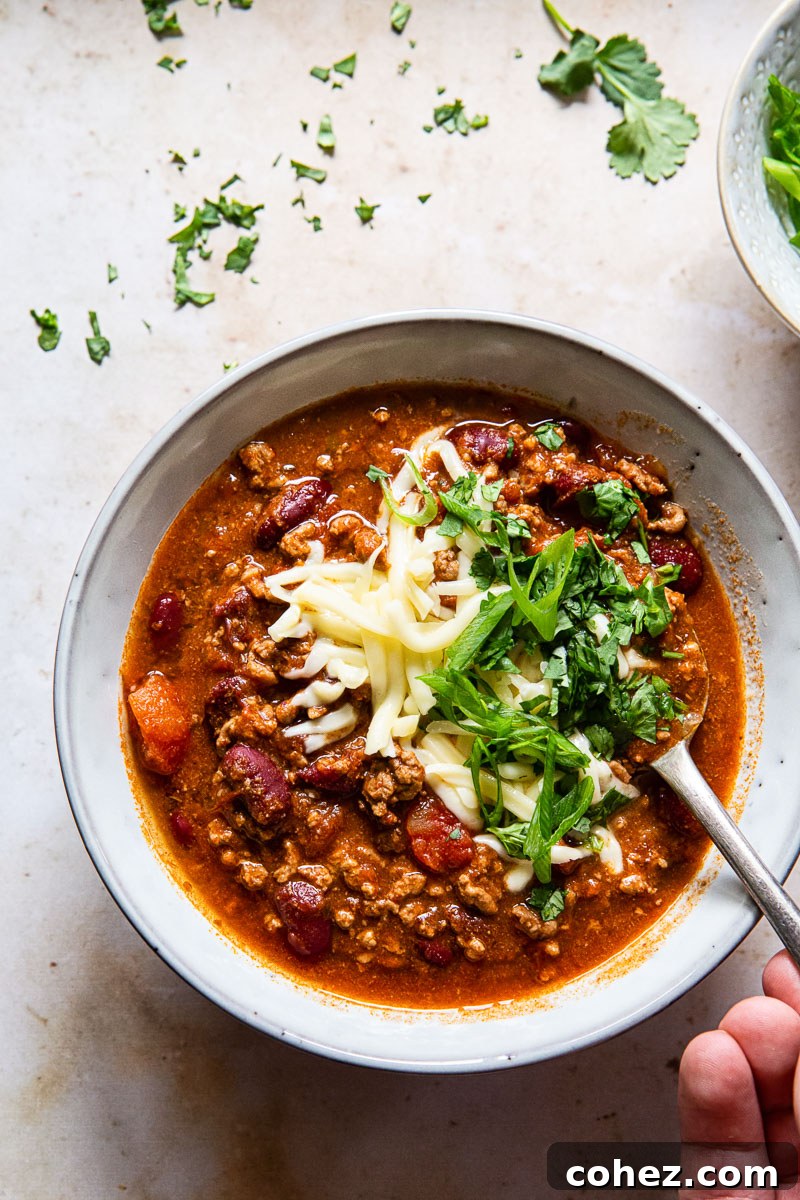
To truly complete your chili masterpiece, be sure to sprinkle generously with freshly shredded cheddar cheese, which melts into gooey perfection, and bright, chopped green onions for a fresh, mild bite. For an extra layer of richness and tang, a dollop of cool sour cream or plain Greek yogurt is highly recommended. And if you’re a fan of fresh herbs, a scattering of chopped cilantro adds a burst of vibrant flavor.
Another beloved and incredibly delicious classic is topping a perfectly baked potato or jacket potato with a generous spoonful of hot chili. The creamy potato combined with the hearty chili is a match made in heaven, especially when finished with grated cheese, a dollop of cooling sour cream or yogurt, sliced onions, and fresh cilantro. Pure culinary bliss!
Storage and Leftovers: Chili Gets Even Better With Time
Few dishes rival chili when it comes to the magic of leftovers. In fact, many chili enthusiasts firmly believe that chili should only be eaten a day after it’s made! This isn’t just a quirky preference; it’s rooted in culinary wisdom, as the extra time allows the various spices and ingredients to fully meld and deepen, resulting in an even more complex, harmonious, and utterly delicious flavor profile.
This is precisely why making a big batch of chili makes so much sense. Preparing a larger quantity doesn’t significantly increase the total cooking time, but it provides you with convenient, ready-to-eat meals for days to come. It’s a fantastic strategy for meal prepping and ensures you always have a comforting, wholesome option available.
Proper storage is key to enjoying your chili for longer. This chili recipe will keep beautifully for 4-5 days when stored in an airtight container in the refrigerator. For longer preservation, chili freezes exceptionally well and can be kept in a freezer for 2-3 months. To maximize convenience, it’s a brilliant idea to freeze your chili in individual portions – this way, you can easily pull out exactly what you need for a quick lunch or dinner. These freezer molds from Souper Cubes are my personal favorite for perfectly sized portions!
When it comes to reheating, the best method for chili is gently warming it in a saucepan over medium-high heat. Stir regularly to ensure it heats evenly and prevent scorching. If you find the chili has thickened too much in the fridge, feel free to add a splash or two of water or broth to reach your desired consistency, and let it come to a gentle boil. That being said, for those busy moments, a microwave will also do a perfectly good job of warming it through!
Explore More Tex-Mex Inspired Recipes
If this chili has ignited your passion for vibrant Tex-Mex flavors, be sure to explore some of our other delightful recipes that celebrate this exciting cuisine:
- Chicken Chilaquiles with Warm Corn Salsa
- Chicken Fajita Bowl
- Texas-Style Chili (for the bean-free purists!)
- Best Taco Meat Recipe
- Black Bean and Corn Salsa
Crowd Pleasing Chili Recipe
By Julia Frey of Vikalinka

- Prep Time: 10 mins
- Cook Time: 1 hr 20 mins
- Total Time: 1 hr 30 mins
- Servings: 8
- Rating: 4.67 from 6 votes
Beef and kidney beans are slowly cooked in a tomato sauce, seasoned with warming spices of cumin, chili, and more. This crowd-pleasing chili recipe is a one for the books!
Equipment
- Dutch oven (or a large heavy-bottomed pot)
Ingredients
- 1 tbsp vegetable oil
- 750g / 1½ lbs ground beef (I use 5% fat for a leaner chili)
- 1 medium onion, chopped
- 3 cloves garlic, pressed or minced
- 2 tbsp ground cumin
- 1 tsp chili powder (adjust to taste)
- 2 tsp ground coriander
- 1 tsp dried oregano
- 1 tsp smoked paprika
- 1 tsp chipotle paste (or 1-2 minced chipotle peppers in adobo sauce, optional but recommended)
- 2 bay leaves
- Salt to taste
- 2x400g / 28oz canned chopped tomatoes + water from 1 can (refill one empty can with water)
- 2x400g / 28oz canned kidney beans, drained (or any beans you like, rinsed well)
- 10g / 1/2 oz dark chocolate, 1 square (optional, for depth of flavor)
Instructions
- In a large Dutch oven or heavy-bottomed pot, heat the vegetable oil over medium-high heat. Add the ground beef and cook until no longer pink, breaking it up with a spoon as it browns. For best flavor, allow it to sear for a few minutes undisturbed before breaking it up further.
- Once the beef is browned, push it to one side of the pot. Lower the heat to medium. Add the chopped onion to the cleared space and sauté for 7-10 minutes until soft, translucent, and slightly golden, stirring occasionally. This step is crucial for developing deep flavor.
- Add the pressed garlic to the pot and cook for another 30 seconds until fragrant, stirring constantly to prevent burning.
- Stir in all the spices: cumin, chili powder, ground coriander, oregano, smoked paprika, chipotle paste (if using), and bay leaves. Add a pinch of salt. Cook for 1 minute, stirring constantly until very fragrant.
- Pour in the canned chopped tomatoes. Fill one of the empty tomato cans with water and add that to the pot as well. Stir in the drained kidney beans.
- Bring the mixture to a gentle boil, then reduce the heat to low. Add the dark chocolate (if using) and stir until it melts and is fully incorporated.
- Cover the pot with a lid and simmer for 40 minutes, allowing the flavors to meld beautifully.
- After 40 minutes, uncover the pot and continue to simmer for an additional 20-30 minutes, or until the chili has thickened to your desired consistency. Stir occasionally.
- Taste the chili and adjust seasoning with more salt if needed. Serve hot with your favorite toppings!
Notes
- Chocolate for Depth: A square of dark chocolate is a secret ingredient that enriches chili flavors, mellowing tomato acidity and adding depth. Unsweetened cocoa powder or semi-sweet chocolate also work well.
- Adjusting Heat: For more spice, add a finely sliced chili pepper with onions, or offer red pepper flakes or extra chili powder for individual servings.
- Beef Choice: I prefer 5% fat beef for a leaner chili, but feel free to use your favorite type and fat percentage.
- Patience is Key: Allow the chili ample time to simmer over low heat. This slow cooking process is essential for the spices and flavors to fully meld and develop.
- Season to Taste: Always taste and adjust salt levels before serving; flavors evolve during cooking.
Nutrition
Calories: 374kcal | Carbohydrates: 22g | Protein: 23g | Fat: 22g | Saturated Fat: 9g | Cholesterol: 67mg | Sodium: 482mg | Potassium: 779mg | Fiber: 7g | Sugar: 5g | Vitamin A: 359IU | Vitamin C: 12mg | Calcium: 101mg | Iron: 5mg
Nutrition information is automatically calculated and should only be used as an approximation.
Tried this recipe? Let us know how it was! Your feedback is always appreciated.