

Unlock the secrets to baking exceptional sourdough bread right in your own kitchen. This comprehensive guide covers everything from cultivating your vibrant sourdough starter to mastering the baking process and troubleshooting common challenges.
If you love baking bread but are currently seeking a traditional yeasted loaf rather than embarking on the sourdough journey, explore our Easy No-Knead Farmhouse Bread Recipe for a delightful alternative.

What is Sourdough Bread? A Deep Dive into Natural Fermentation
For many, sourdough bread evokes images of rustic charm, a distinct tangy flavor, and a uniquely chewy texture. While it shares similarities with other breads, the fundamental difference lies in its leavening agent. Unlike conventional bread that relies on commercially produced baker’s yeast, sourdough achieves its rise and characteristic flavor from a ‘sourdough starter’—a living, fermented culture of flour and water that harbors wild yeasts and beneficial bacteria naturally present in our environment.
This symbiotic relationship between wild yeast and lactic acid bacteria is what makes sourdough truly special. The yeast produces carbon dioxide, causing the dough to rise, while the bacteria create lactic and acetic acids, contributing to the bread’s complex flavor profile and superior texture. This natural fermentation process also offers potential digestive benefits, as it breaks down complex carbohydrates and gluten, making the nutrients in the bread more bioavailable.
Creating a robust and active sourdough starter typically spans 7 to 10 days, though the daily commitment is minimal. It’s a testament to patience and observation. From this living starter, the bread dough undergoes a slow fermentation, often lasting several hours or even overnight. This extended fermentation is crucial for developing the nuanced flavors, achieving a desirable open crumb structure, and ensuring a proper rise. Consequently, a truly authentic sourdough bread is never a quick project; it’s a journey that rewards patience with unparalleled taste and satisfaction.
While the process of making sourdough bread is not inherently difficult, it does demand a significant time commitment compared to breads made with commercial yeast. There are no true shortcuts to developing its signature flavor and texture. Each stage, from the initial mix to the final bake, plays a vital role in creating that exquisite loaf of sourdough you’ve been dreaming of.
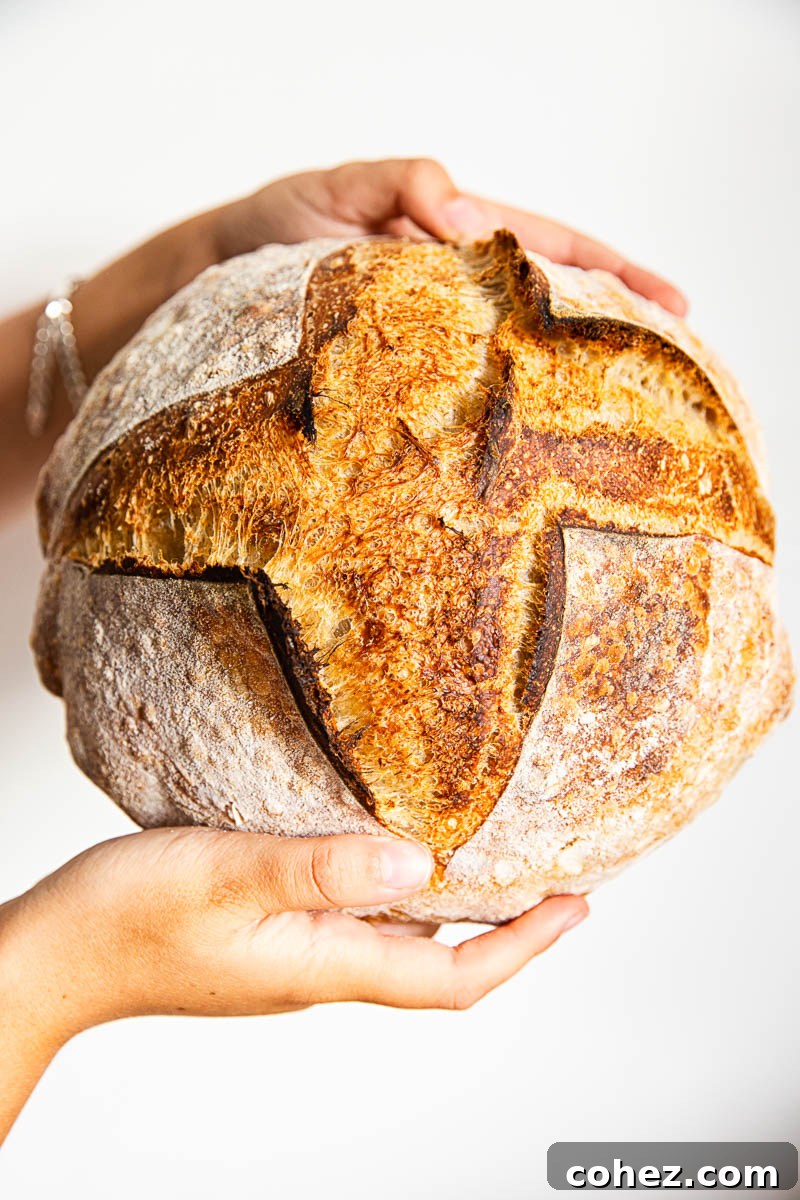
Cultivating Your Own Sourdough Starter: The Heart of Your Bread
My personal journey into sourdough began out of necessity, much like for many others who faced the infamous yeast shortages during March 2020. With grocery store shelves empty and the directive to stay home, the dream of fresh bread seemed distant. It was then that I turned to the age-old tradition of sourdough.
Initially, I found myself skeptical of the advice I received about making a sourdough starter. It sounded almost too simple. “Just mix equal parts flour and water and wait,” they said. Surely, it couldn’t be that straightforward? To my delight, it is precisely that simple! The magic unfolds with time and consistency.
If cultivating a starter from scratch feels daunting, another wonderful option is to ask a friend who bakes sourdough to share some of their active starter with you. Most sourdough bakers are more than happy to do so, as regular discarding is a necessary part of maintaining a healthy starter. Sharing a bit of this vibrant culture is a joyful part of the sourdough community, ensuring that this living legacy continues to thrive.
A sourdough starter is often referred to as a “pet” by bakers because it’s a living organism that requires consistent care and feeding. This simple mixture of flour and water, when exposed to the ambient yeasts and bacteria in your home environment, transforms into a powerful leavening agent. Over time, it develops a unique microbial ecosystem that will impart unparalleled flavor and rise to your homemade loaves.
Step-by-Step Guide: How to Make Your Sourdough Starter
Embarking on your sourdough adventure begins with the creation of your starter. Follow these daily steps to cultivate a strong and active culture:
- Day 1: Initial Mix. In a clean, medium-sized jar (ensure no lingering soap residue, but sterilization is not required), combine 50 grams of whole wheat or rye flour with 50 grams of lukewarm water. These whole grain flours are rich in nutrients and wild microorganisms, providing an ideal food source for the nascent yeast and bacteria. Mix thoroughly until no dry spots remain. Loosely place a lid on top – do not screw it on tightly. This allows wild yeasts from the air to enter while preventing dust and contaminants. Place the jar in a warm spot, ideally between 70-78°F (21-26°C).
- Days 2-7 (and beyond): Regular Feeding. Each subsequent day, observe your starter. You might see some initial bubbles, or it might remain quiet. Regardless, the process is consistent: scoop out and discard approximately half of the mixture (about 50 grams). Then, feed the remaining starter with another 50 grams of whole wheat or rye flour and 50 grams of water. Mix well, cover loosely, and return to its warm spot.
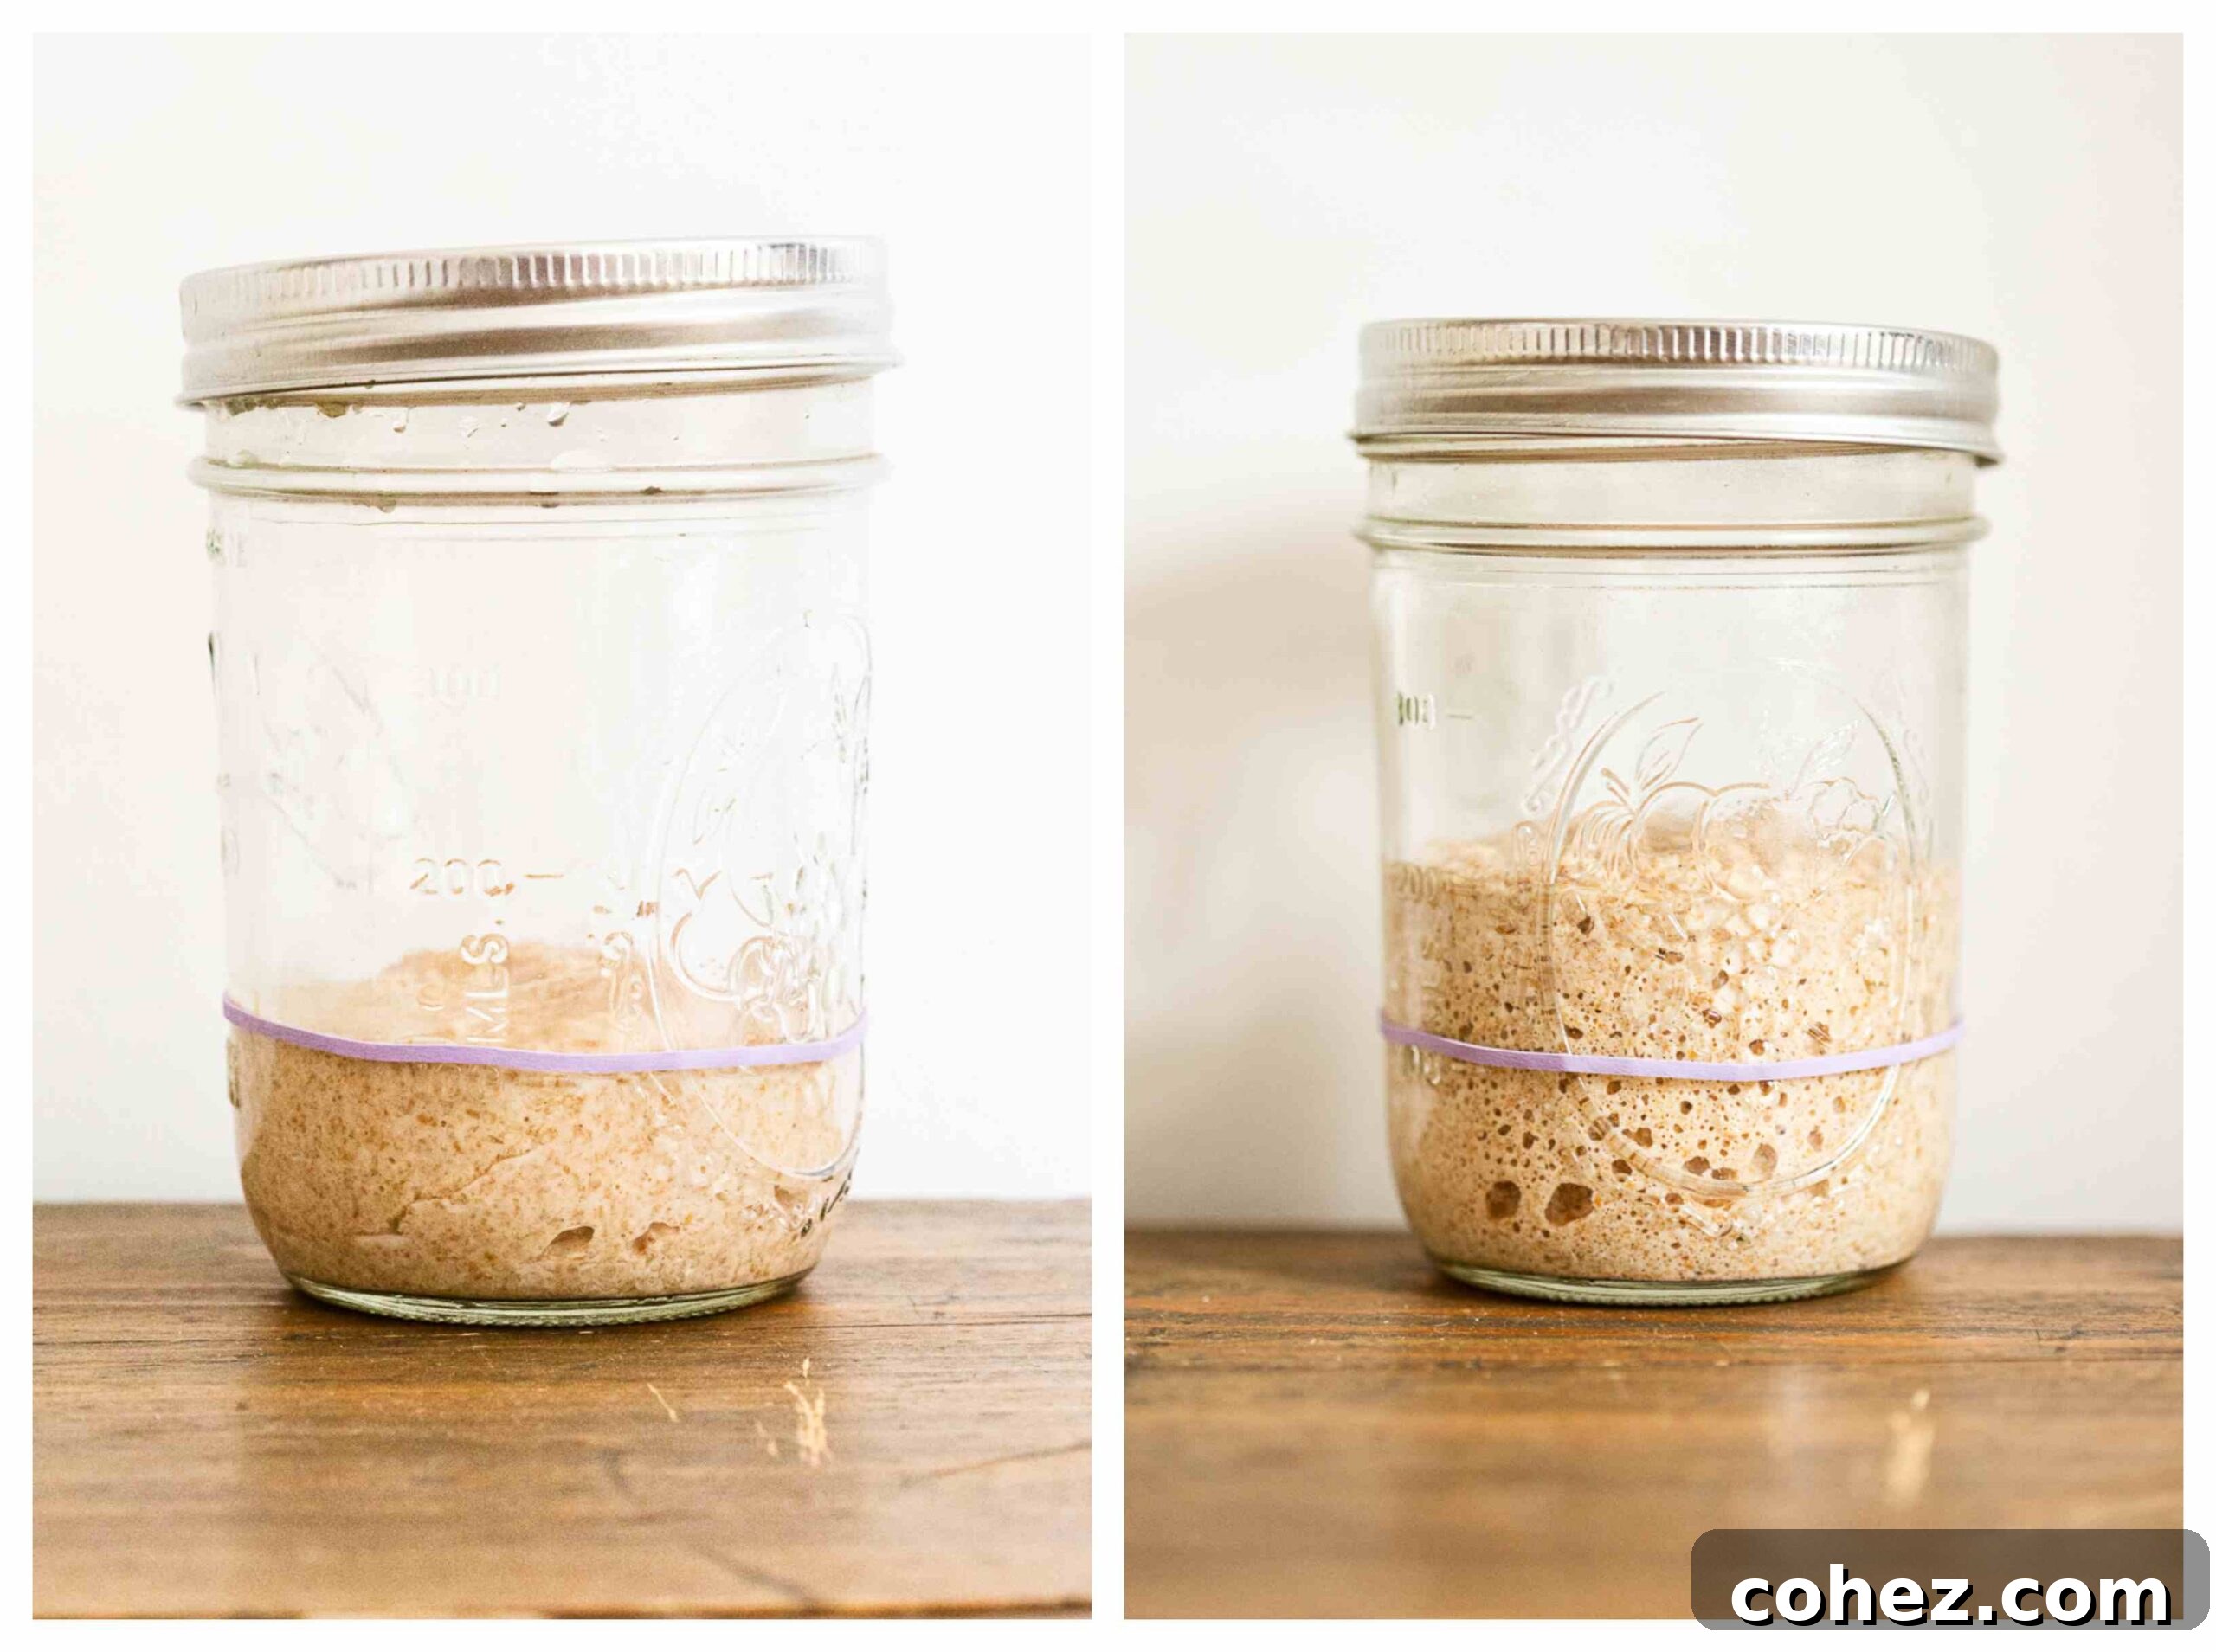
Continue this daily feeding regimen for at least 7 days. By the end of this period, you should consistently observe active bubbling, a pleasant tangy aroma (similar to yogurt or ripe fruit), and a noticeable rise and fall after each feeding. These are clear indicators that your starter is becoming vibrant and ready for baking!
Problem 1: I don’t have whole grain flours. Can I use all-purpose flour or white flour?
Solution 1:
Yes, you can absolutely use all-purpose or white flour for your sourdough starter. However, be aware that it will likely take longer for your starter to become fully active and robust. Whole grain flours, such as whole wheat and rye, are more nutrient-dense and contain a higher concentration of the microorganisms that sourdough starter needs to thrive and develop quickly. These additional nutrients act as a superfood for the wild yeast and bacteria, accelerating their growth and activity. If using white flour, maintain the same feeding schedule but be prepared for your starter to take a few extra days, possibly up to 10-14 days, to reach peak strength and consistency. You’ll know it’s ready when it consistently doubles in size within 4-6 hours of feeding.
Problem 2: My starter has separated, and a clear or dark liquid has formed on top.
Solution 2:
This liquid, often called “hooch,” is a natural byproduct of fermentation. It typically indicates that your starter is hungry and needs to be fed. A clear liquid suggests it’s just becoming hungry, while a darker liquid (often brownish or grayish) means it’s very hungry and has been unfed for too long. In most cases, it’s not a problem at all! Simply pour off the hooch (though some bakers prefer to stir it back in for a more intense flavor) and proceed with your regular feeding. As long as your starter maintains a generally regular color (creamy white to light beige, depending on the flour) and doesn’t emit an offensive, putrid smell, it’s a healthy part of the fermentation process. Consider feeding your starter more frequently or with a slightly larger flour-to-water ratio if hooch appears consistently and quickly.
Problem 3: My starter developed a black or pink fuzzy mold on top and smells foul or acetone-like.
Solution 3:
Unfortunately, if you observe black, pink, or green fuzzy mold, or if your starter has an unmistakably foul, rotten, or strong acetone-like (nail polish remover) smell, it indicates that undesirable bacteria or mold have taken over. In this scenario, it is best to discard the entire batch and start over. A healthy, active sourdough starter should exhibit consistent bubbling throughout, have a light, airy texture when mature, and emit a pleasant, tangy, slightly sweet, or sour aroma, reminiscent of fresh fruit or good quality yogurt. While rare, contamination can occur, often due to unclean jars or an imbalanced microbial environment. Ensure your jar is very clean before starting your next attempt.
The Foundation: A Basic Sourdough Bread Dough Recipe
The beauty of sourdough baking lies in its simplicity, relying on just a handful of core ingredients to produce an extraordinary loaf. My weekly go-to recipe is incredibly basic, consisting only of flour, water, active sourdough starter, and salt. This minimalist approach allows the complex flavors developed during fermentation to truly shine. Once you’ve mastered this fundamental recipe, an exciting world of customization opens up!
Feel free to experiment with a vast array of additions to personalize your loaves. Imagine the rich aroma of rosemary and garlic, the savory depth of cheddar cheese, the sweetness of dried cranberries, or the earthy crunch of walnuts. The possibilities are truly endless.
You can also explore different flour combinations to alter the texture, flavor, and nutritional profile of your bread. While my active sourdough starter is often fed with whole wheat or rye flour, my base dough typically combines high-protein white bread flour with a smaller percentage of whole grain flour, creating a balanced loaf that is approximately 20% whole grain and 80% white. This blend offers the benefits of whole grains (flavor, nutrition) while maintaining a lighter, more open crumb. Experiment with different ratios or entirely new flours like spelt, durum, or einkorn to discover your personal favorite.
Understanding Fermentation: The Key to Exceptional Sourdough
Once your sourdough starter is consistently active and bubbly, you’re ready to embark on the journey of baking your first sourdough loaf. While the overall process might initially appear complex or intimidating, with this structured guide and a bit of practice, you’ll soon be producing stunning, artisanal loaves with confidence. The most important principle to grasp with sourdough is that planning ahead is essential. All sourdough recipes, by their very nature, require an extended fermentation period, typically including an overnight cold proof. This means if your goal is to enjoy a freshly baked loaf for breakfast, you’ll need to begin the preparation stages on the morning or afternoon of the previous day.
While this multi-day process might sound like a lot of work, in reality, it involves more waiting than active labor. Sourdough baking is a game of patience, where time is your most crucial ingredient. The long fermentation periods are not just about convenience; they are vital for developing the bread’s characteristic deep flavor, improving its digestibility, and achieving that sought-after open, airy crumb structure.
The Main Stages of Sourdough Fermentation
Mastering sourdough involves understanding the distinct phases your dough will go through. Each stage plays a critical role in the final product:
1. Activating Your Sourdough Starter (Building the Levain)
The first step on baking day is to ensure your starter is at its peak activity. In the morning, take your stored starter (which might be dormant from refrigeration) and discard roughly half of it. Feed the remaining starter with equal parts flour and water (e.g., 50g flour + 50g water). Mix it thoroughly in a clean jar and mark the level with a rubber band or marker. This allows you to visually track its progress. You want your starter, now often called a ‘levain’ when prepared for baking, to double in size within 4-6 hours, indicating it’s vigorous and full of active yeast.
The Float Test: Confirming Starter Readiness
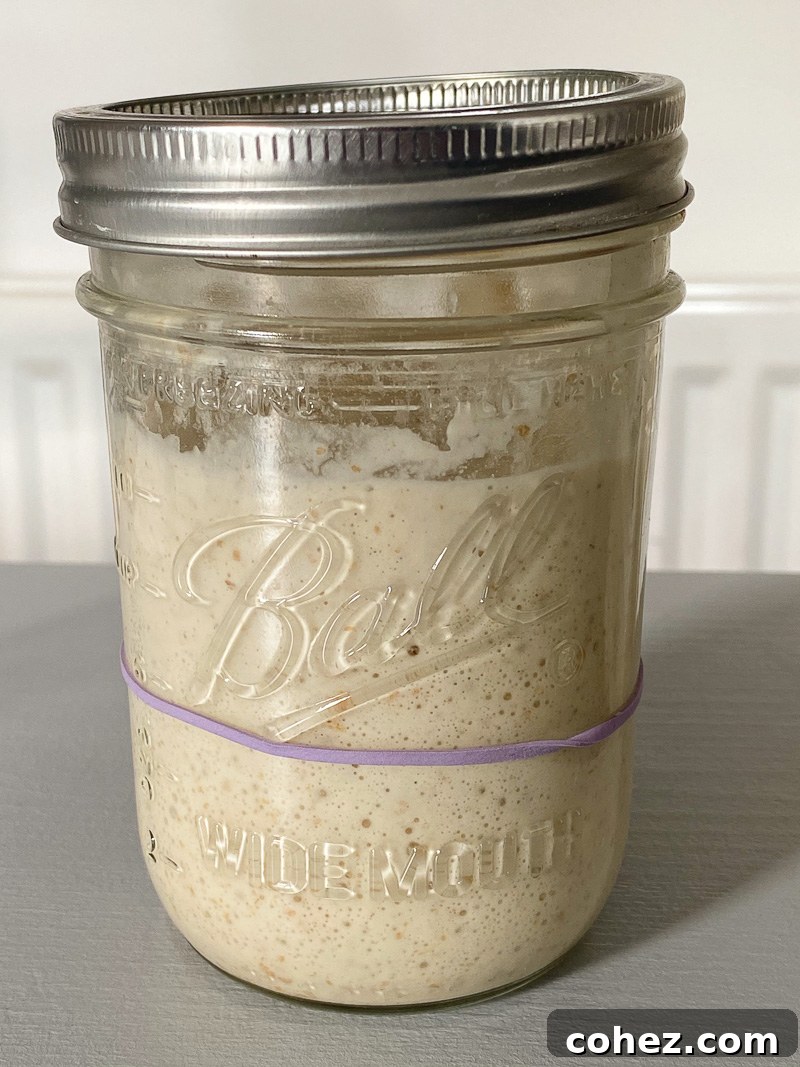
A reliable way to confirm your starter’s readiness is the ‘float test.’ Gently drop a small spoonful of your peaked starter into a glass of room temperature water. If the starter floats on the surface, it means it contains sufficient gas (produced by active yeast) and is buoyant enough for effective leavening. This indicates your starter is at its most active and potent, making it the ideal time to incorporate it into your dough. If it sinks, it may need a little more time to fully activate.
2. Autolyse: Hydrating and Developing Gluten
Before adding the active starter and salt, it’s highly recommended to perform an ‘autolyse.’ This involves simply mixing the flour and water for your dough until just combined, then letting the mixture rest for anywhere between 30 minutes to one hour. This seemingly simple step has profound benefits:
- Full Hydration: It allows the flour to fully hydrate, absorbing the water evenly, which is crucial for dough development.
- Gluten Development: It gives enzymes present in the flour time to break down starches and proteins, naturally beginning the gluten development process without any kneading.
After just 30 minutes of autolyse, you’ll witness a magical transformation: your initially clumpy mixture will relax and become a soft, much more pliable, and noticeably stretchy substance. This softened dough is now perfectly primed and ready for the final two ingredients – your active sourdough starter and salt.
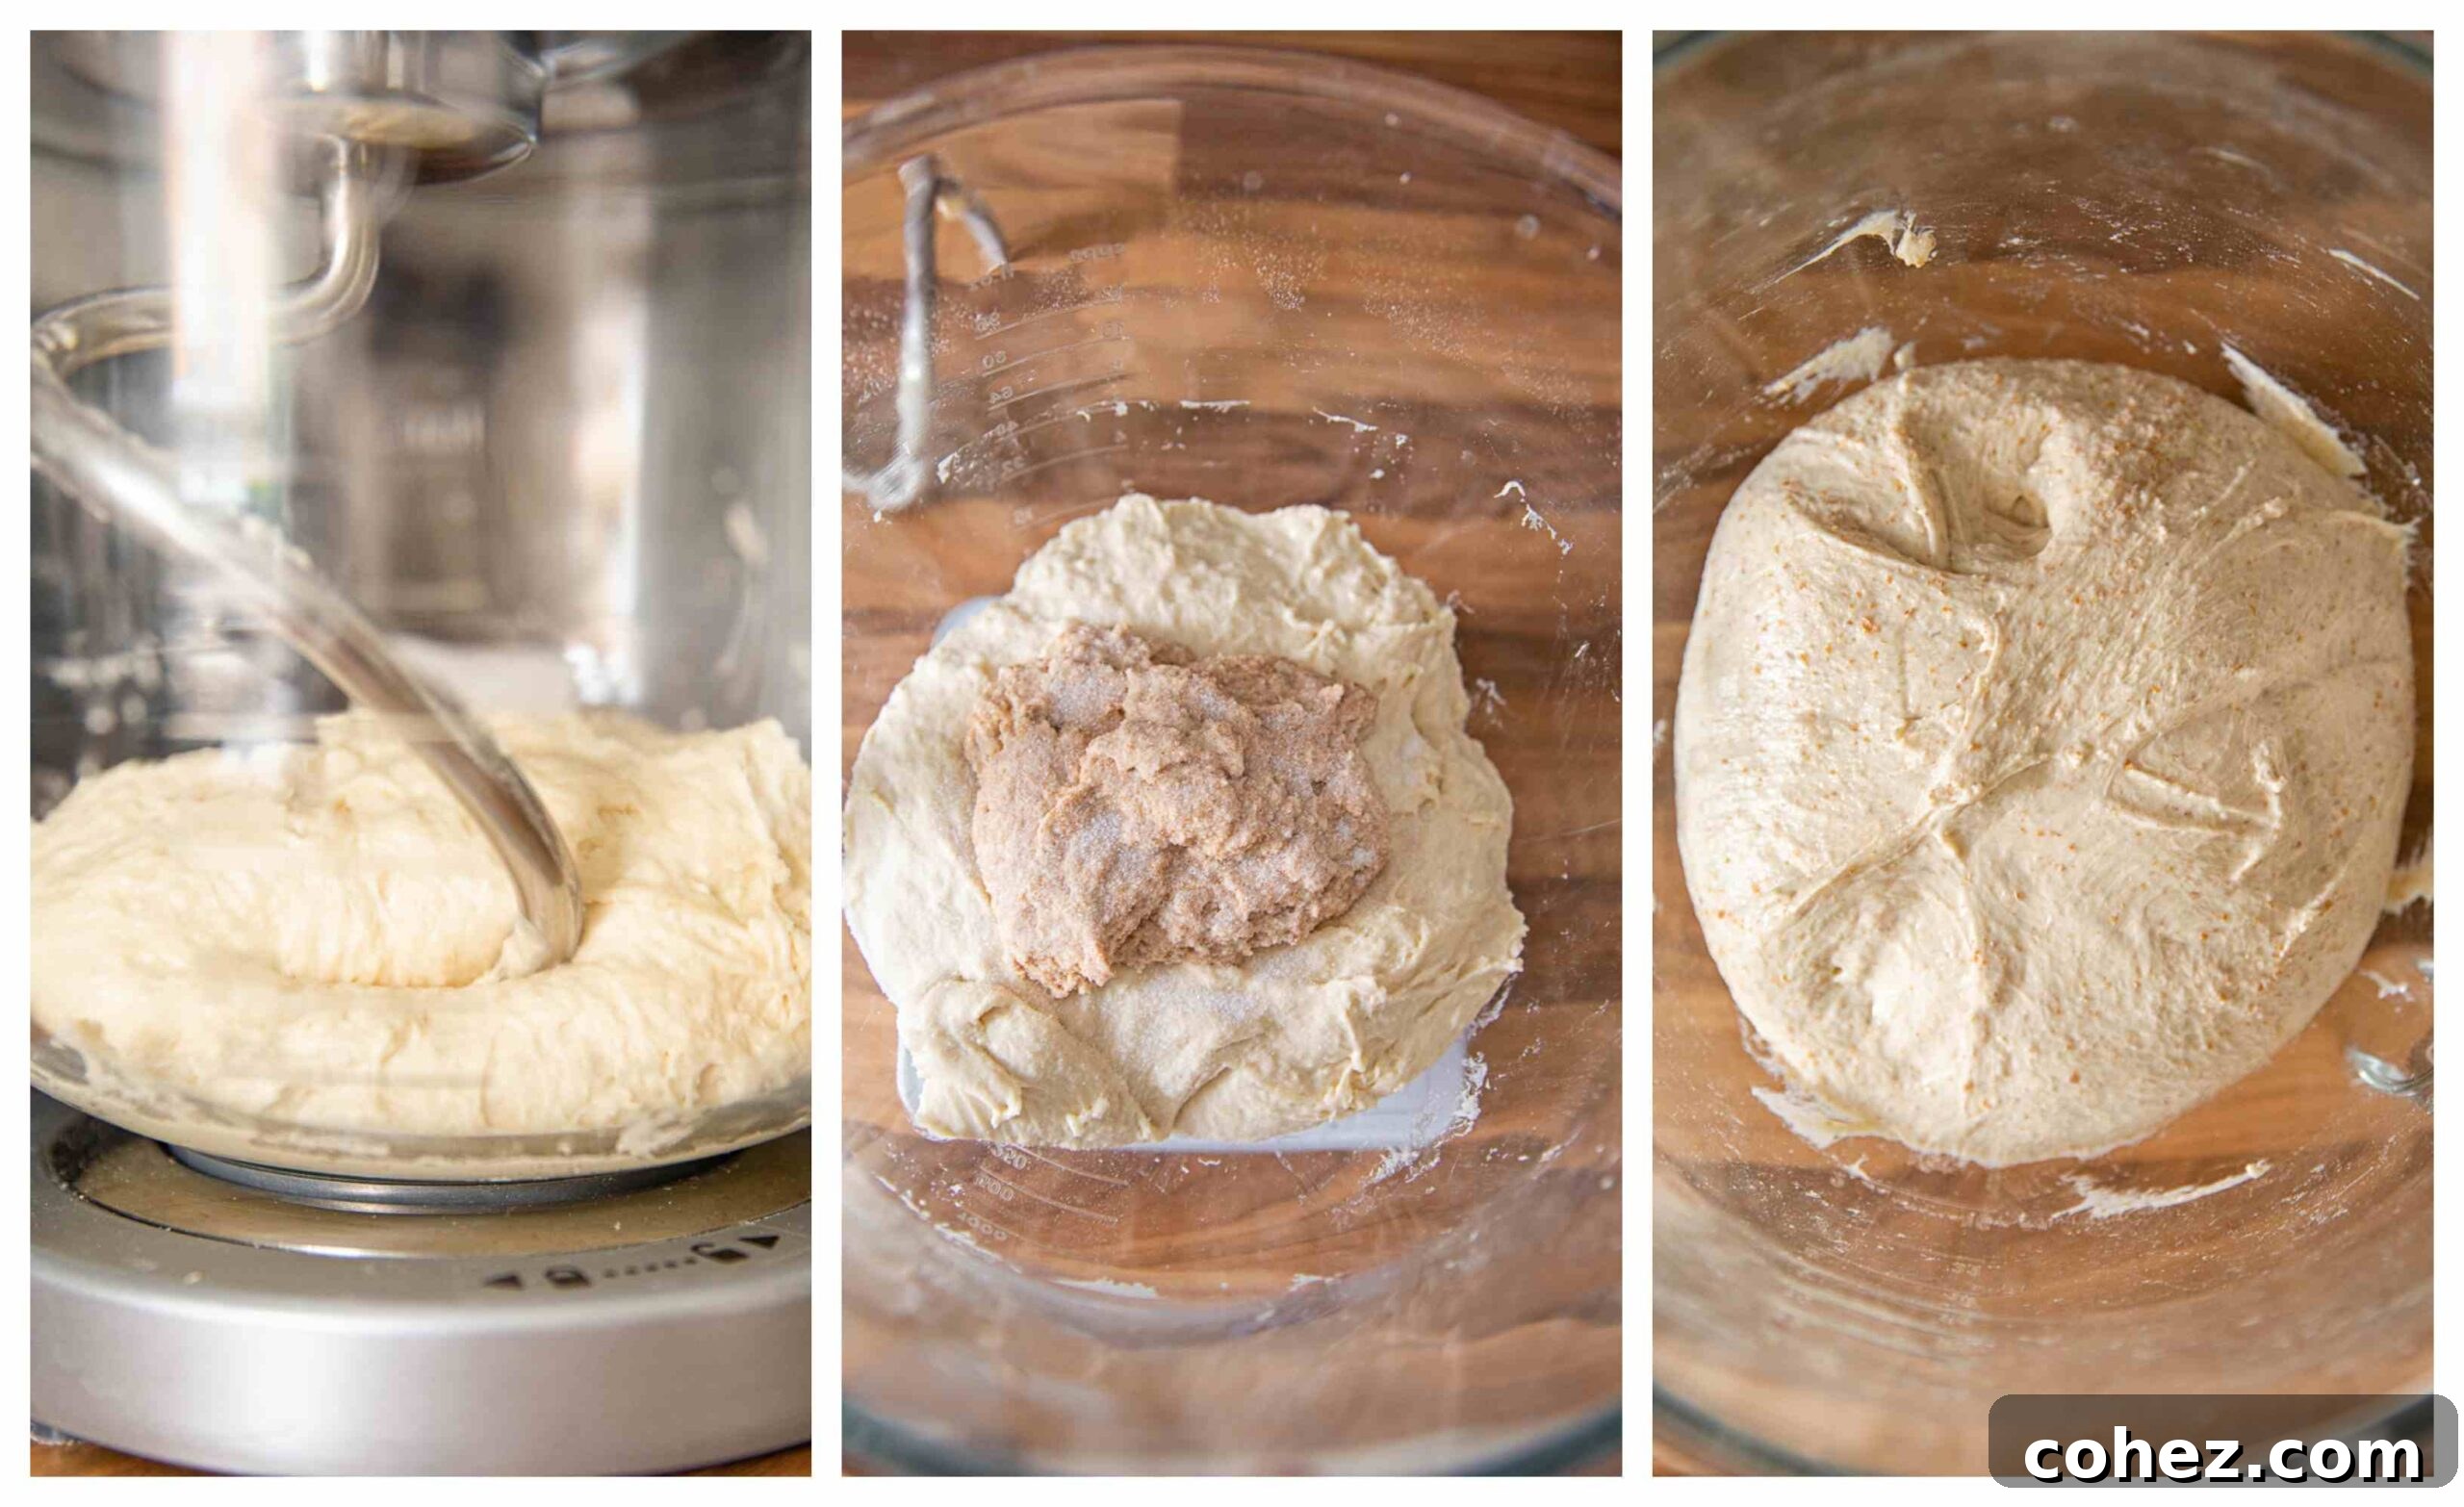
3. Bulk Fermentation: Building Strength and Flavor
The first photo in the collage above illustrates the dough immediately after the autolyse stage – a hydrated blend of flour and water, marking the beginning of the bread-making process.
Next, I incorporate 100g of my activated sourdough starter and 9-10g of fine salt into the autolysed mixture. I then knead the dough for approximately 10 minutes. The final photo in the collage demonstrates the appearance of the dough at the conclusion of this kneading process. It should feel notably soft, elastic, and exhibit a slight roundness on top, which is a positive indication that gluten strength has been effectively built into the dough. A good check is the “windowpane test”: take a small piece of dough and gently stretch it. If you can stretch it thin enough to see light through it without tearing, your gluten is well-developed.
At this juncture, I cover the mixing bowl with plastic wrap or a damp towel to prevent drying and allow the dough to undergo its ‘bulk fermentation’ (also known as the first rise) on my kitchen counter for anywhere between 4-5 hours. During this stage, the dough develops its primary flavor and structure. By the end, you should observe a dough that gently jiggles when you carefully shake the bowl. While it won’t necessarily double in size, it will increase slightly in volume and become noticeably bubbly, bouncy, and alive with fermentation activity.
Understanding the Stretch and Fold Method
While I personally find a good kneading session sufficient for my baking needs, it would be incomplete to discuss bulk fermentation without acknowledging the widely popular ‘stretch and fold’ method. This technique is highly effective for building strength and structure in high-hydration sourdough doughs, ultimately contributing to a beautifully shaped and well-risen loaf.
The first set of stretch and folds is typically performed 30 minutes to an hour after the starter and salt have been incorporated into the dough. To execute, dampen your hands slightly to prevent sticking. Gently pull a section of the dough up and stretch it as far as it can go without tearing, then fold it back over itself towards the center of the bowl. Rotate the bowl a quarter turn and repeat this motion with the next section of dough. Continue this process four times, effectively folding all sides into the center. Ideally, bakers perform at least 3-4 sets of these stretch and folds, spaced out at 30-minute intervals, over the initial 1.5 to 2 hours of bulk fermentation. This method systematically strengthens the gluten network, creating a more cohesive and elastic dough. While it undeniably produces excellent results, it does require active engagement with the dough over a period, which some bakers, like myself, might find time-consuming or bothersome compared to the more hands-off approach of initial kneading followed by passive fermentation.
4. Overnight Fermentation (Cold Proofing): Enhancing Flavor and Manageability
Once the bulk fermentation is complete, I typically shape my sourdough and place it into the refrigerator for an extended cold proof. This usually happens around 8 pm or 9 pm, and the dough then ferments in the cold for up to 16 hours. This long, slow cold fermentation is instrumental for several reasons: it deeply develops the bread’s complex flavor, improves the crust’s crispness, and makes the dough much easier to handle and score the following day.
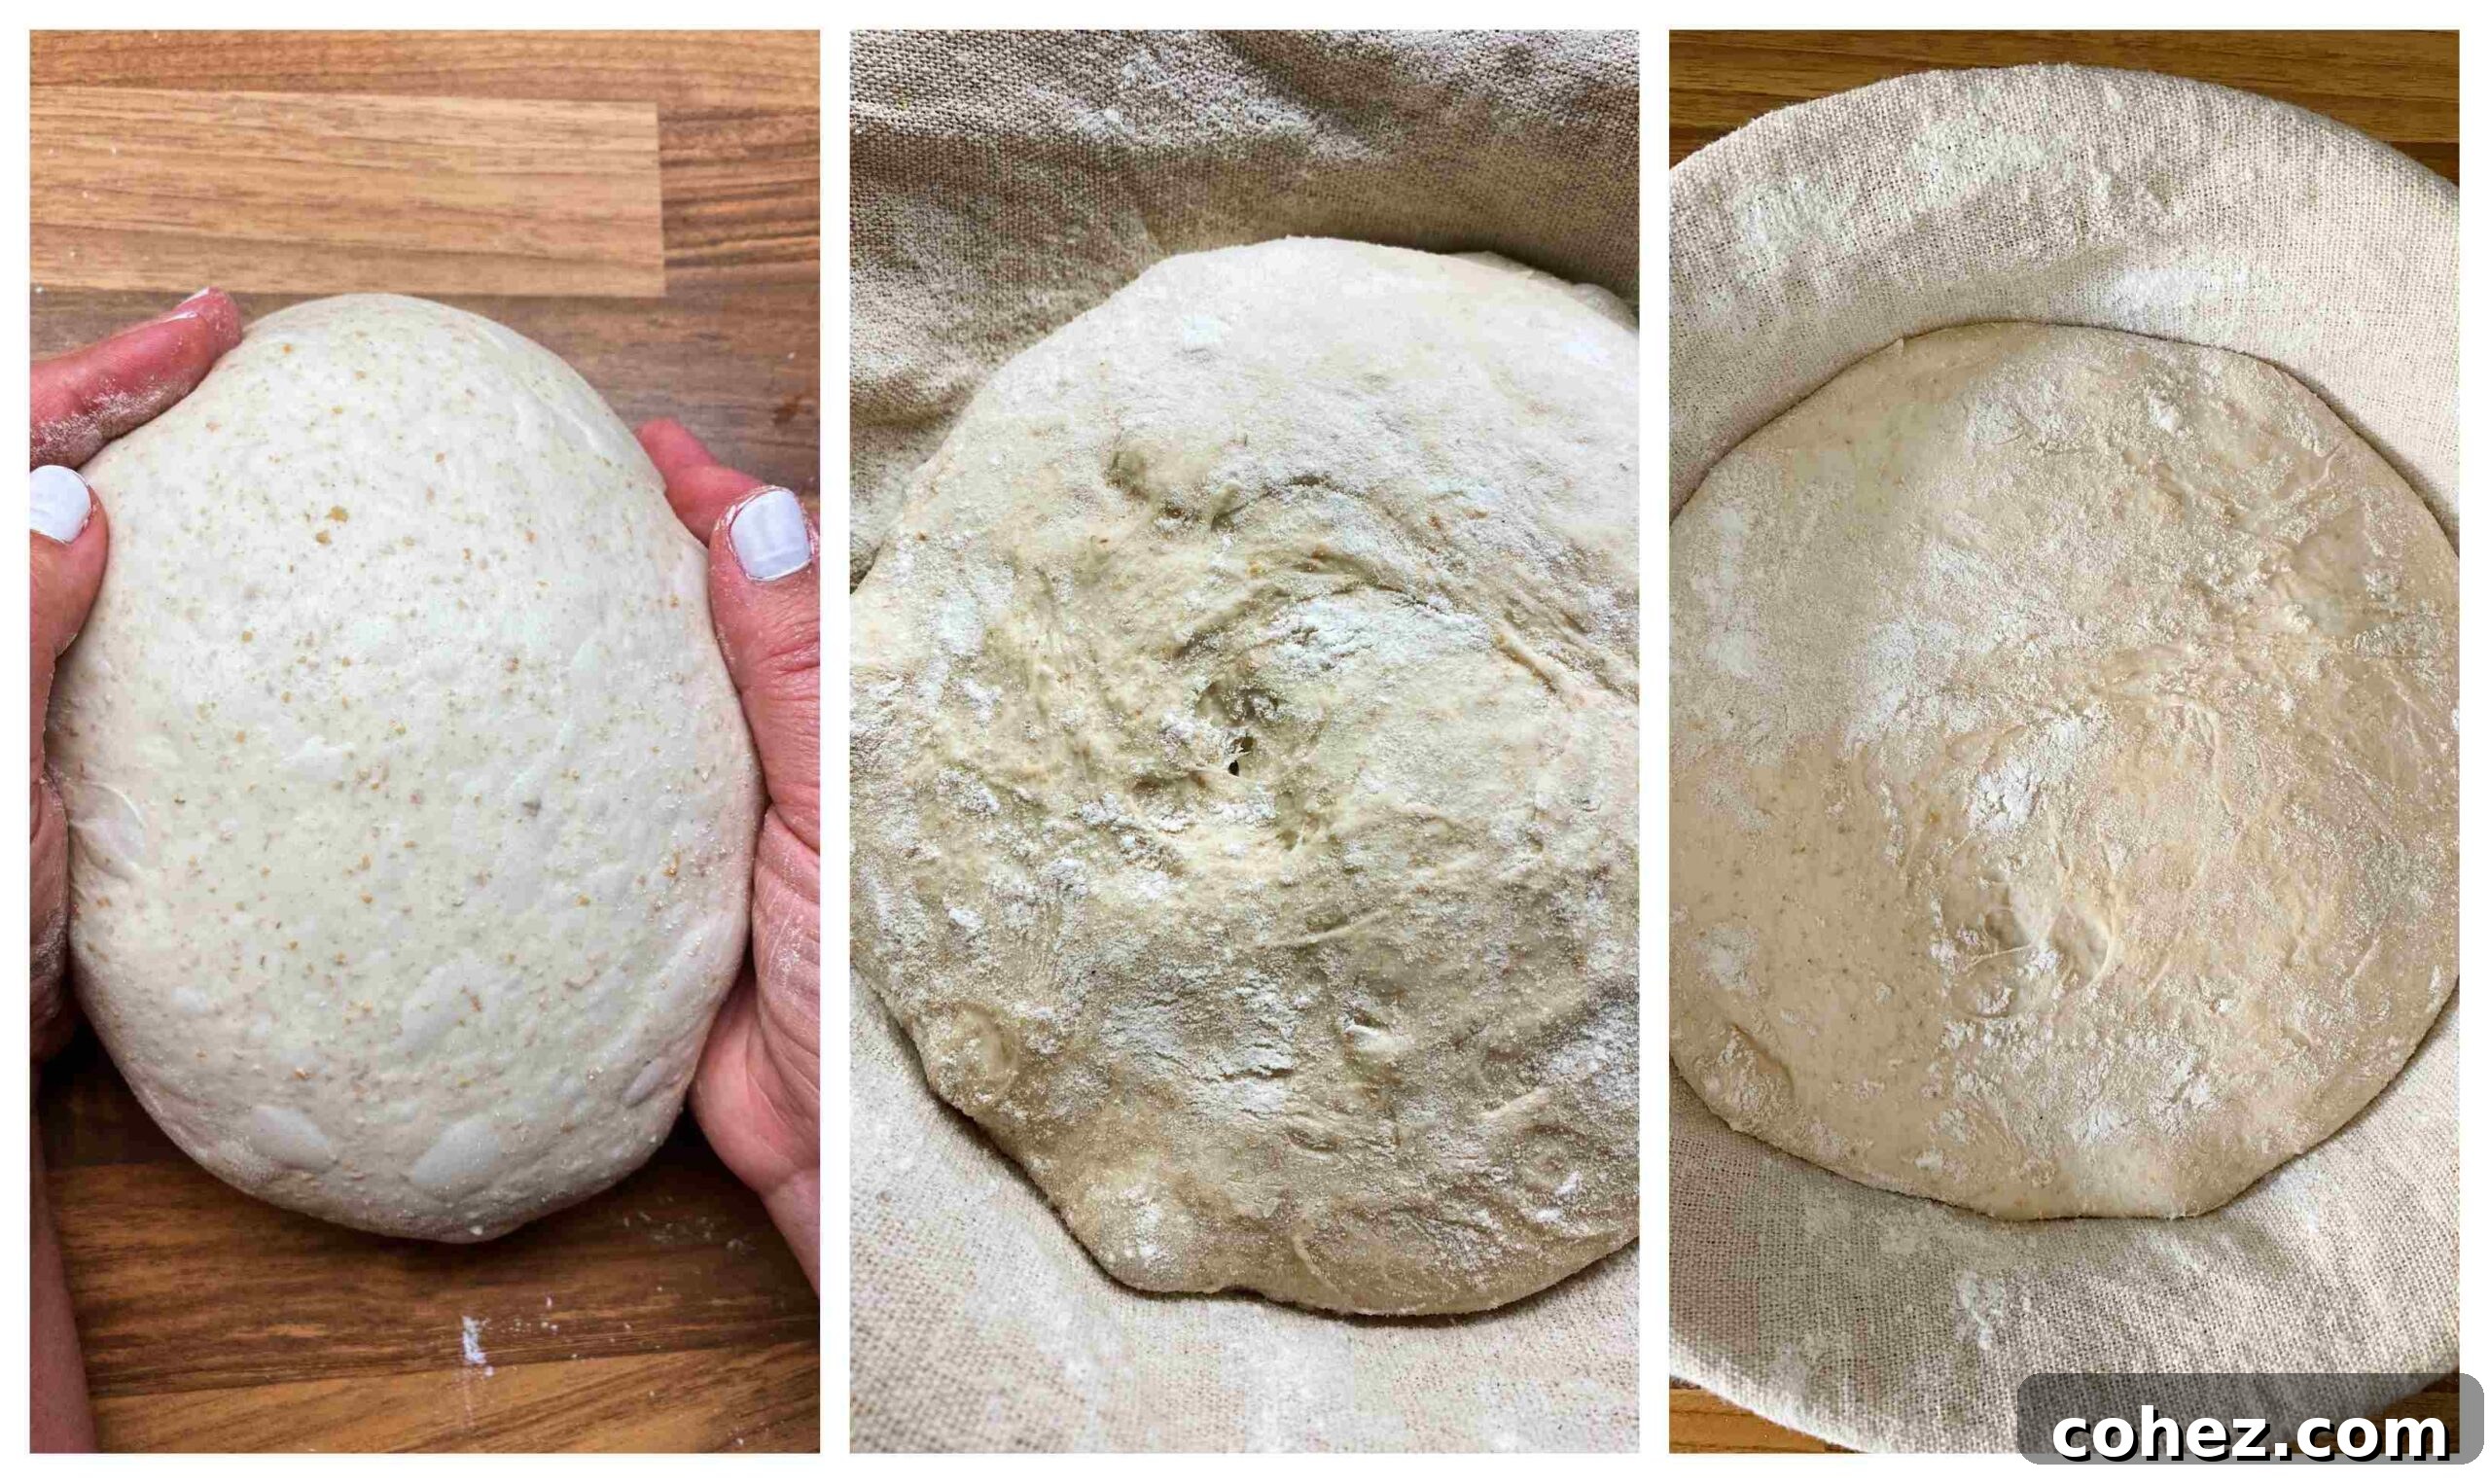
In the photos below, you’ll see the dough after bulk fermentation, shaped and ready to go into a banneton, also known as a wicker proofing basket. If you don’t own a banneton, a round bowl generously lined with a clean kitchen towel (and dusted with flour) works perfectly. The key is to provide a structured vessel that helps the dough maintain its shape during the long proof.
If you observe closely, you might notice tiny bubbles, almost like blisters, forming on the surface of the dough. These “blisters” are excellent indicators that your dough has undergone a successful initial stage of fermentation and is ripe for its overnight rest in the fridge. The middle photo shows the dough just before entering cold fermentation, and the third photo captures it 16 hours later. You’ll note the presence of bubbles on the surface in all images, signifying active fermentation even at colder temperatures.
Mastering the Art of Shaping Your Sourdough Loaf (Boule)
When I first ventured into sourdough baking, shaping the loaf was undeniably the most intimidating step. I spent countless hours watching various professional videos, attempting to mimic their skilled movements. While visual aids were certainly beneficial, the single most effective teacher was consistent practice—lots and lots of it! While I’m still far from a professional, I’ve embedded a video within the recipe card that offers a visual guide to walk you through the shaping process.
The goal of shaping is to create surface tension, which helps the loaf hold its structure during baking and allows it to achieve an impressive “oven spring.”
Key Shaping Pointers:
- Gentle Handling is Paramount: Carefully scrape the fermented dough out of its bowl onto a lightly floured work surface. The keyword here is ‘gently.’ Sourdough dough, unlike yeasted dough, is a delicate network of gas pockets. Handling it roughly or aggressively punching it down will deflate these precious bubbles, leading to a denser crumb. Always use a light touch.
- Creating an Envelope: With floured hands to prevent sticking, gently pull one side of the dough outwards and fold it back over itself towards the center. Repeat this motion with the other three sides, effectively creating an ‘envelope’ around the dough. Pinch the seams at the top to seal them together. At this point, your dough should be visibly full of tiny bubbles; exercise caution to avoid knocking them out.
- Building Surface Tension: Using a bench scraper, carefully pick up the dough and flip it over, so the pinched seam is now facing the countertop. Now, shape it into a tight ball (a ‘boule’) by tucking the sides of the dough inwards and underneath with your hands. As you do this, gently spin the dough against the work surface. This simultaneous tucking and spinning action creates crucial tension on the surface of the dough, resulting in a smooth, taut, and round exterior. Using a minimal amount of flour on your work surface during this step helps the dough ‘catch’ and pull, enhancing that vital surface tension. (Refer to the first photo in the collage above for visual guidance.)
- Preparing for Cold Proofing: Generously dust your banneton (wicker proofing basket) with rice flour. Rice flour is excellent for this purpose because it contains no gluten, making it highly effective at preventing the dough from sticking. Carefully place the shaped loaf into the banneton, ensuring the seam side is facing upwards. Cover the banneton with a clean tea towel to prevent drying and transfer it to the refrigerator for its extended cold fermentation, typically lasting 16-20 hours. This prolonged chill slows fermentation, allowing flavors to deepen and the dough to become firmer and easier to score.
Baking Your Sourdough Masterpiece
After all the careful preparation and patient waiting, baking your sourdough bread is often considered the most straightforward and rewarding part of the entire process. Here’s how to achieve that perfect golden crust and airy crumb:
- Preheat the Oven and Dutch Oven: Approximately one hour before you plan to bake, place your empty Dutch oven with its lid into your oven. Preheat the oven to its highest temperature, ideally 450°F (230°C) or even higher if your oven allows. Allowing the Dutch oven to preheat for a full hour ensures it reaches a uniformly scorching temperature, which is crucial for creating the steam environment necessary for a beautiful crust and excellent oven spring.
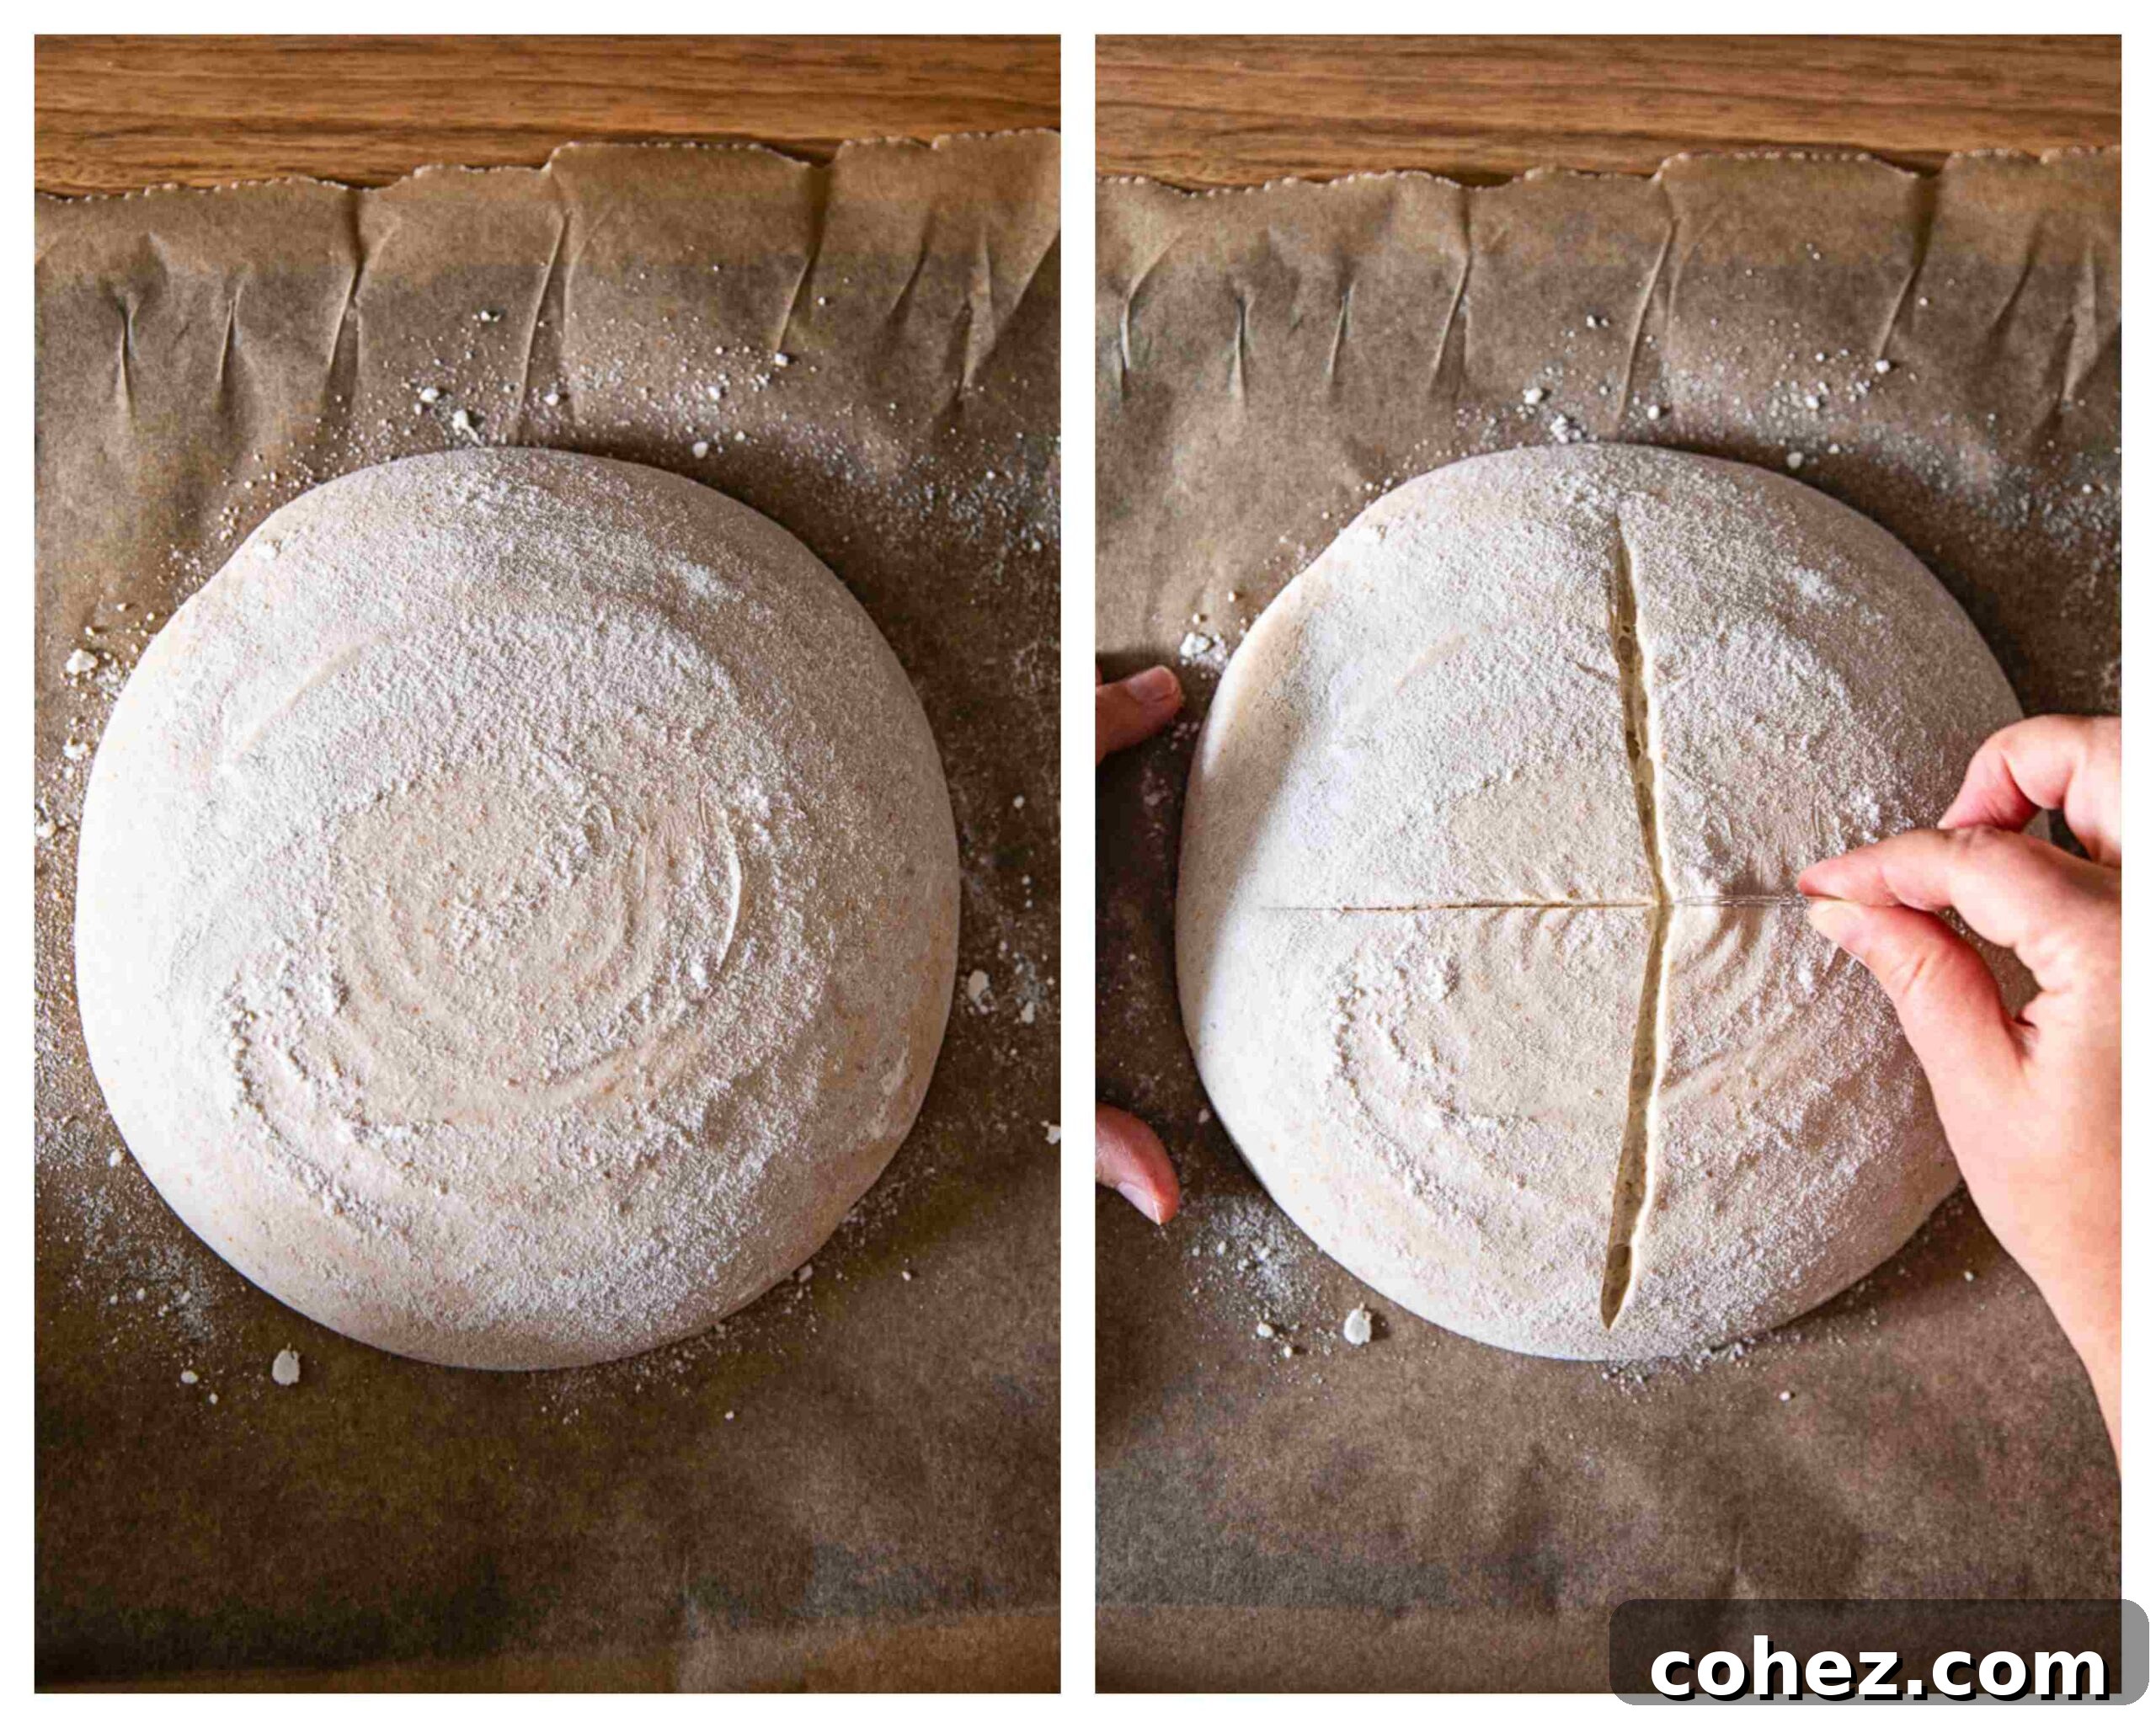
- Prepare and Score the Dough: Once the preheating is complete, carefully remove your cold dough from the refrigerator. Gently flip the proofed loaf out of the banneton onto a piece of parchment paper. Placing the parchment paper on a flat baking sheet or a cutting board can make this transfer easier and safer. Now, using a very sharp knife or a specialized bread lame, score the dough in any pattern you desire. Scoring isn’t just for aesthetics; it serves a vital functional purpose by guiding where the steam escapes during baking, allowing the loaf to expand beautifully without tearing unpredictably.
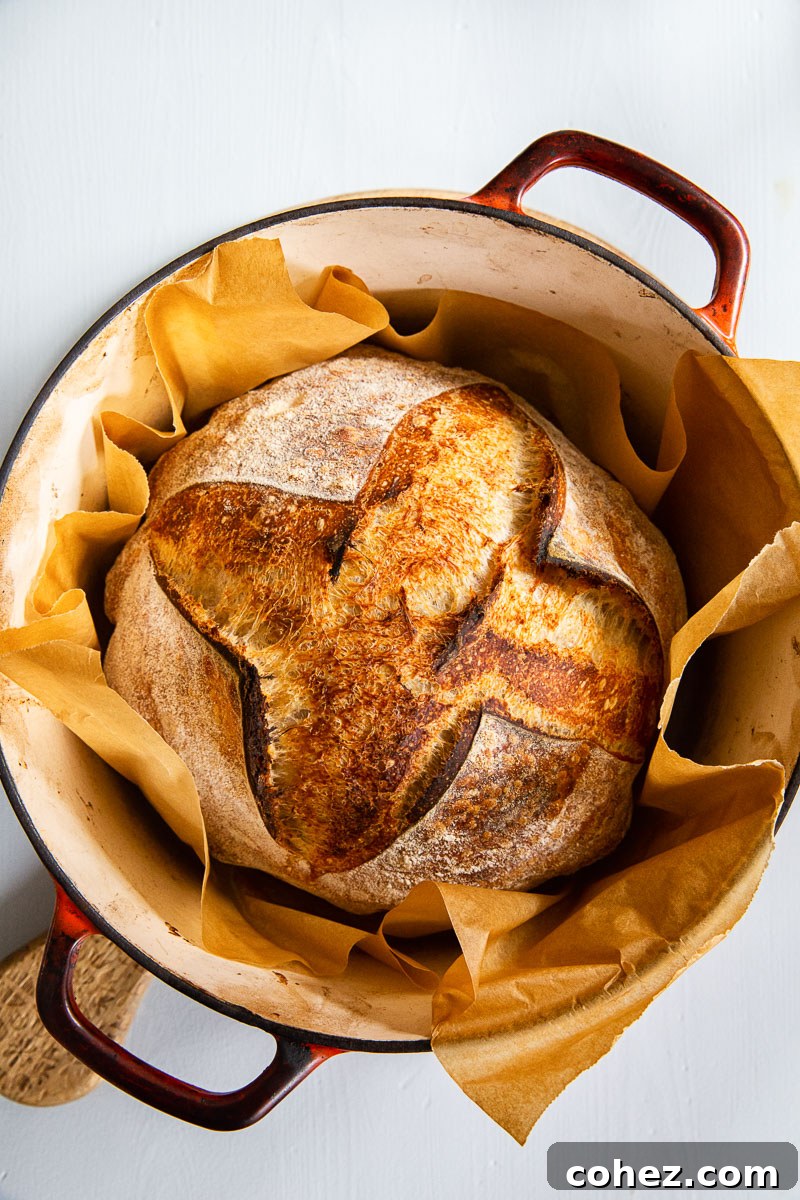
- The Dutch Oven Bake: With extreme care (as the Dutch oven will be incredibly hot), remove it from the preheated oven. Using the parchment paper as a sling, swiftly pick up the shaped and scored loaf and lower it into the hot pot. Immediately place the lid back on the Dutch oven. This traps the steam released from the dough, mimicking a professional bread oven and allowing the crust to expand and develop without hardening too quickly. Bake for 30 minutes with the lid on. After 30 minutes, carefully remove the lid. The bread will have achieved most of its rise and started to develop a crust. Continue baking for an additional 15-20 minutes with the lid off, or until the crust reaches your desired deep golden-brown color and the internal temperature of the bread reads around 200-210°F (93-99°C).
Troubleshooting Common Sourdough Baking Issues
Even experienced bakers encounter challenges from time to time. Here are some of the most common issues beginners face and effective solutions to overcome them, ensuring your sourdough journey is as smooth as possible.
- Problem 1: My bread didn’t rise well in the oven (poor oven spring).
- Solution 1: The primary reason for a lack of oven spring is often underproofing of the dough. While cold fermentation slows the process, the dough still needs to develop sufficiently. Before your dough goes into the oven, perform a gentle “poke test”: lightly flour your finger and gently press it into the surface of the dough about half an inch deep.
- If the indentation immediately springs all the way back, your dough is likely underproofed. Place it back in the fridge for another 1-3 hours (or longer, depending on its initial state) to allow more fermentation time.
- If the indentation stays down completely and doesn’t spring back at all, your dough is likely overproofed. Bake it as soon as possible and hope for the best, as an overproofed loaf will often spread rather than rise.
- If the indentation slowly springs back but leaves a slight dimple or indentation on the surface, your dough is perfectly proofed and ready for baking. This is the sweet spot for maximum oven spring.
- Problem 2: My dough got stuck in the proofing basket (banneton).
- Solution 2: This is a frustrating but common issue, often caused by using too little or the wrong type of flour for dusting. Instead of relying on wheat flour, which contains gluten and can become sticky when moist, consistently opt for rice flour to generously dust your banneton. Rice flour has no gluten, making it an excellent anti-stick agent, ensuring your beautifully shaped loaf releases cleanly from the basket every time.
- Problem 3: The crumb of my bread is sticky and gummy.
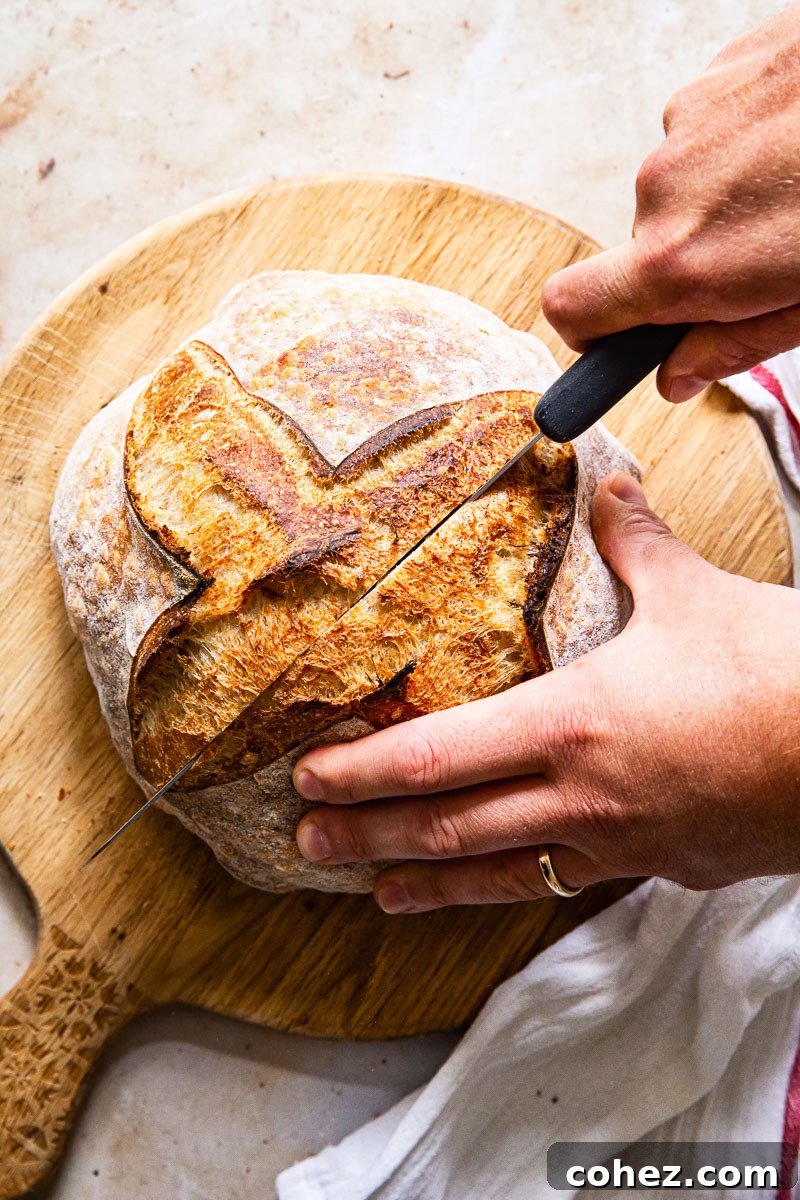
- Solution 3: This issue almost always stems from impatience! You likely cut into your freshly baked loaf too early. While the aroma of warm sourdough is irresistible, the bread continues to cook and set internally as it cools. Sourdough bread requires a minimum cooling period of at least 3-4 hours on a wire rack before it is recommended to slice into it. For best results, many bakers recommend waiting even longer, sometimes 6-8 hours, to allow the crumb structure to fully stabilize and the moisture to redistribute evenly, preventing a gummy texture.
- Problem 4: My crumb is too dense, with large holes at the top and small holes at the bottom, or uniformly small holes throughout.
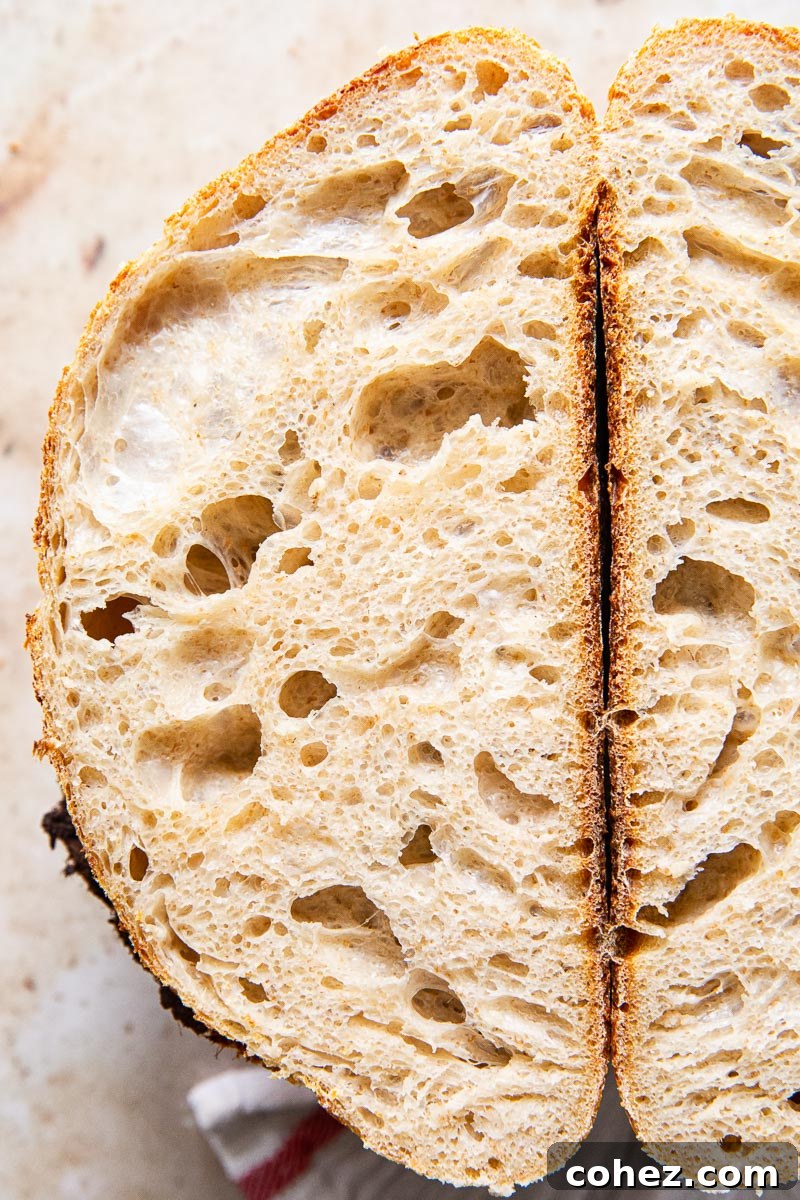
- Solution 4: A dense crumb, or an uneven crumb with significant variations in hole size, is a classic sign of underproofed dough. When the dough doesn’t ferment long enough, the yeast and bacteria haven’t had adequate time to produce enough gas to create an open, airy structure. This leads to a less developed flavor profile and a heavier, more uniform crumb. Conversely, an overproofed dough might also result in a dense crumb if the gluten structure collapses, or a very open crumb that lacks strength. Consistent results require precise timing and attentive observation of your dough’s fermentation activity at each stage.
I genuinely hope this detailed information and the accompanying recipe empower you on your exciting sourdough journey. Remember, like any craft, practice makes perfect! Each loaf you bake will teach you something new. Once you’ve mastered the fundamentals of this basic sourdough recipe, I encourage you to expand your repertoire. Give our delightful Walnut and Raisin Sourdough Bread a try, and don’t forget the incredible versatility of your starter—it’s perfect for creating our mouth-watering Sourdough Pizza and light, airy Sourdough Focaccia!
More Favorite Bread Recipes to Explore:
- Dutch Oven Bread (Ready in 2 Hours)
- Rosemary Spelt Bread Recipe
- Classic Rye Bread Recipe
- Sweet Rhubarb Jam Swirled Bread
Sourdough Bread for Beginners

Ingredients
- 100g/1/2 cup active sourdough starter
- 500g/4 cups high-protein white bread flour
- 350ml/1 1/3 cups + 1 tablespoon water (lukewarm)
- 9-10g/ 1/2 tablespoon fine sea salt
Instructions
-
1. Activate Your Starter (Morning): In the morning, remove your sourdough starter from the fridge. Discard about half of it (approx. 50g). Feed the remaining starter with 50g flour (whole wheat or rye is ideal for strength) and 50g lukewarm water. Mix well and leave it to ferment at room temperature (70-78°F / 21-26°C). It should double in size within 4-5 hours, or up to 6-7 hours in cooler conditions. Perform a float test to confirm readiness before proceeding.
-
2. Autolyse (Prepare Dough Base): As your starter approaches its peak (around 30 minutes to 1 hour before it’s ready), mix the 500g white bread flour and 350ml water in a large bowl until no dry flour remains. Cover the bowl with plastic wrap or a damp towel and let it rest at room temperature. This autolyse step allows the flour to fully hydrate and gluten to begin developing naturally.
-
3. Mix Final Dough: Once your starter is at its peak (doubled and passes the float test), add 100g of the active starter to your autolysed flour and water mixture. Then, add the 9-10g salt. Mix thoroughly to ensure all ingredients are well combined. You should have some starter leftover; feed it as usual and return to the fridge for future use.
-
4. Knead the Dough: Knead the dough vigorously for approximately 10 minutes. This can be done in a stand mixer with a dough hook on low speed (speed 1 or 2 out of 7) or by hand on a lightly floured surface. The goal is to develop a strong gluten network. To check if the dough is ready, perform the windowpane test: pull a small amount of dough and stretch it gently between your fingers. It should stretch into a thin, translucent membrane without tearing.
-
5. Bulk Fermentation (First Rise): Cover the kneaded dough with plastic wrap or a damp cloth to prevent it from drying out. Let it ferment at room temperature for 5-7 hours. During this time, the dough will become bubbly and increase slightly in volume (it won’t double). It should feel lively and bouncy to the touch.
-
6. Preshape and Shape the Loaf: Gently scrape the fermented dough out of the bowl onto a lightly floured work surface. With floured hands, carefully pull one side of the dough and fold it over itself towards the center. Repeat this motion with the other 3 sides, creating an envelope shape and gently pinching the seams at the top. This builds initial tension without deflating the bubbles. Flip the dough over so the pinched seam faces the countertop. Shape it into a tight ball (boule) by tucking the sides inwards and underneath with your hands while simultaneously spinning the dough against the surface. This creates a taut, smooth surface tension. (Refer to the shaping pointers and photos in the article for visual guidance.)
-
7. Overnight Cold Proof: Generously dust your banneton (proofing basket) with rice flour to prevent sticking. Place the shaped loaf into the banneton, seam-side up. Cover with a clean tea towel and transfer to the refrigerator for a cold proof lasting 16-20 hours. This slow, cold fermentation develops flavor and makes the dough easier to handle and score the next day.
-
8. Bake the Bread (Next Day): One hour before baking, place your Dutch oven (with its lid) into your oven and preheat to the highest temperature (450°F / 230°C or higher). Once preheated, carefully remove the dough from the fridge and flip it onto a piece of parchment paper. Score the dough with a sharp knife or bread lame in your desired pattern. Take the hot Dutch oven out of the oven. Using the parchment paper, quickly lower the loaf into the pot. Place the lid on and bake for 30 minutes. After 30 minutes, remove the lid and continue baking for another 15-20 minutes, or until the crust is deeply golden brown.
-
9. Cool Completely: Transfer the baked sourdough bread to a wire rack and allow it to cool for at least 3-4 hours before slicing. Cooling completely is crucial for the crumb to set and for optimal flavor and texture.
Video
Notes
This sourdough bread recipe requires preparation to begin at least a day before you plan to bake the bread due to the necessary long fermentation periods.
Nutrition
Nutrition information is automatically calculated, so should only be used as an approximation.