
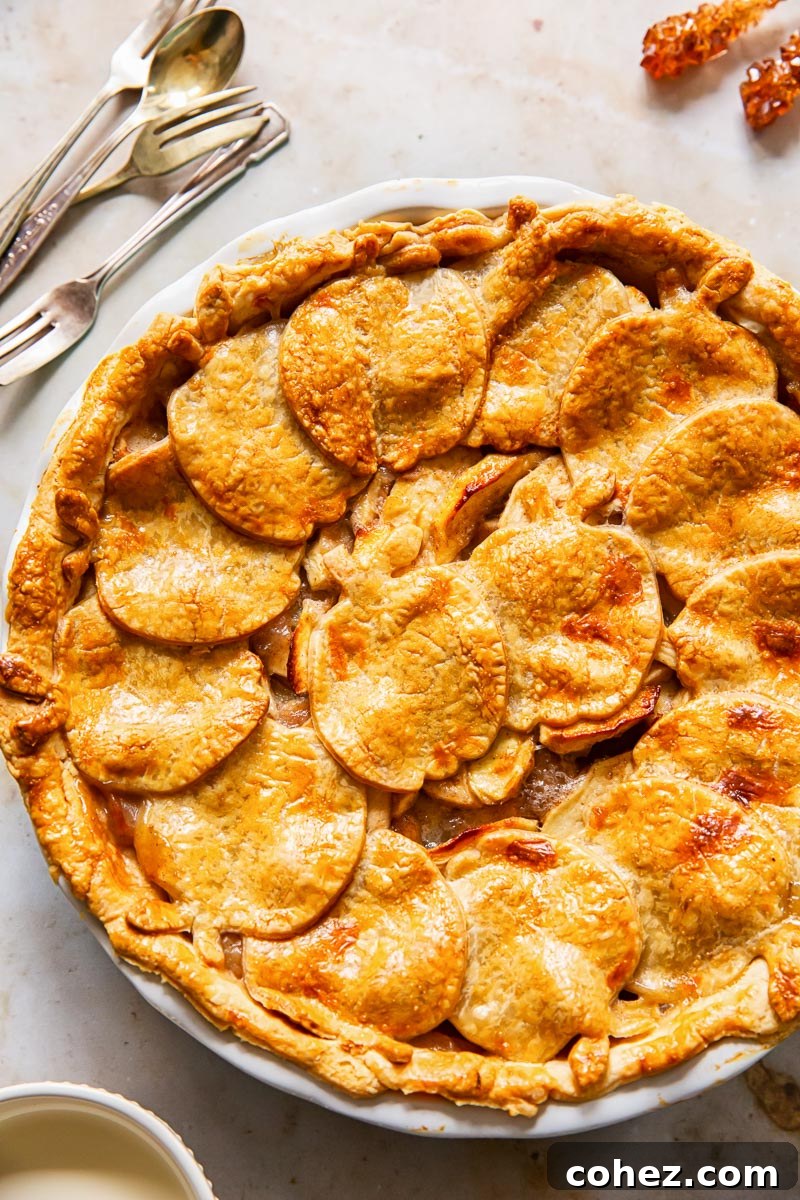
This Dulce de Leche Apple Pie offers a delightful and innovative twist on a beloved classic, elevating traditional apple pie to a new level of indulgence. Adorned with charming mini apple cutouts for the top crust, it not only presents a visually stunning dessert but also proves to be surprisingly straightforward to create compared to more intricate lattice designs. Get ready to impress with this unique and delicious apple pie!
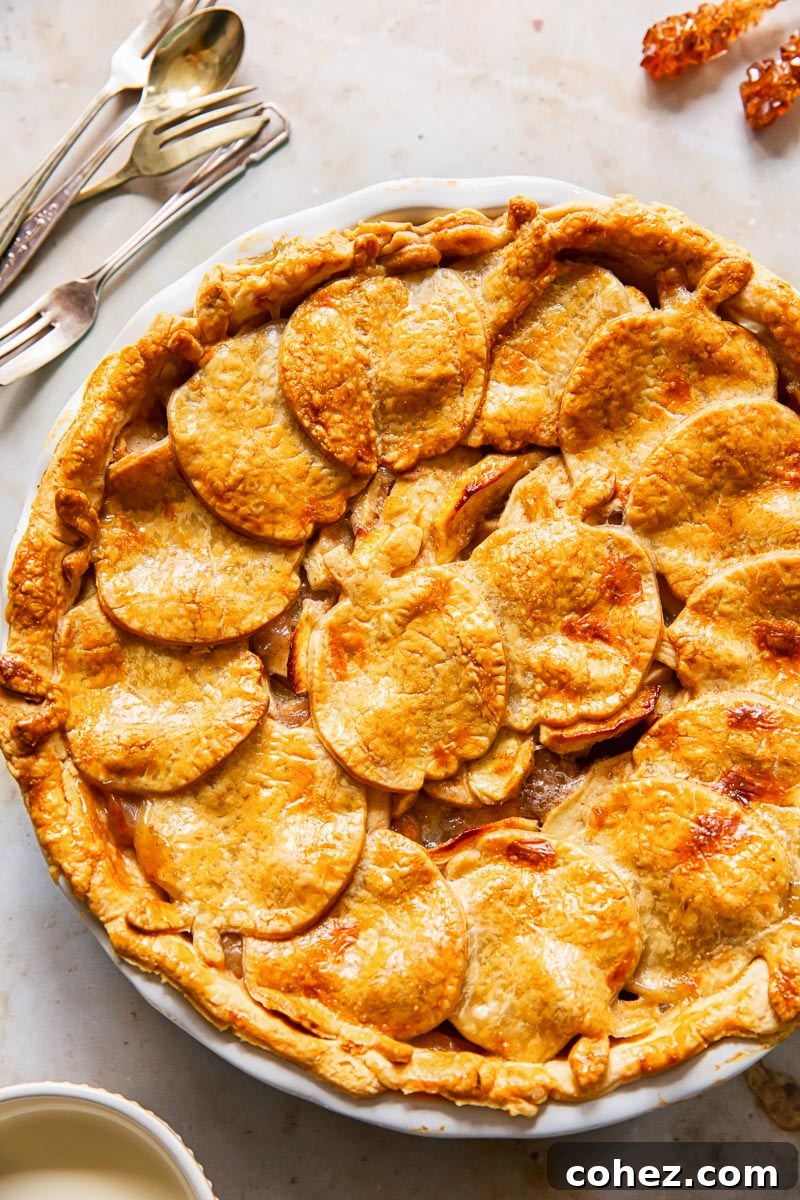
Few things evoke the warmth and comfort of home quite like a freshly baked apple pie. While the classic version holds a special place in our hearts, there’s always room for innovation. This recipe takes everything you love about apple pie and infuses it with the rich, creamy allure of dulce de leche, creating a dessert that is both familiar and excitingly new. The decorative apple cutouts on top add an elegant touch, making this pie perfect for holiday gatherings or any occasion where you want to serve something truly special.
If you find yourself craving more delightful apple treats, don’t miss our simple yet irresistible Apple Turnovers, a quick and easy way to enjoy the crisp sweetness of baked apples.
The Secret to an Unforgettable Pie Crust: The “No-Fail” Recipe
The foundation of any exceptional pie lies in its crust, and this recipe features a legendary one. My mother-in-law’s pie crust recipe, affectionately known as the “No-Fail Crust,” has garnered widespread acclaim in our family for decades. Her pies were so notoriously flaky and flavorful that my late father-in-law would eagerly request one for his birthday instead of a traditional cake. For years, I found myself constantly calling her for the recipe, having misplaced my handwritten notes countless times.
It wasn’t until much later that she finally revealed the secret behind her celebrated crust: it was, in fact, the Tenderflake pie crust recipe, readily available on the back of the box! For those unfamiliar, Tenderflake is a prominent lard producer in Canada, and they’ve truly perfected the art of pie pastry. This revelation was a game-changer, democratizing the creation of truly outstanding pie crusts.
Why Lard is the Ultimate Pie Crust Ingredient
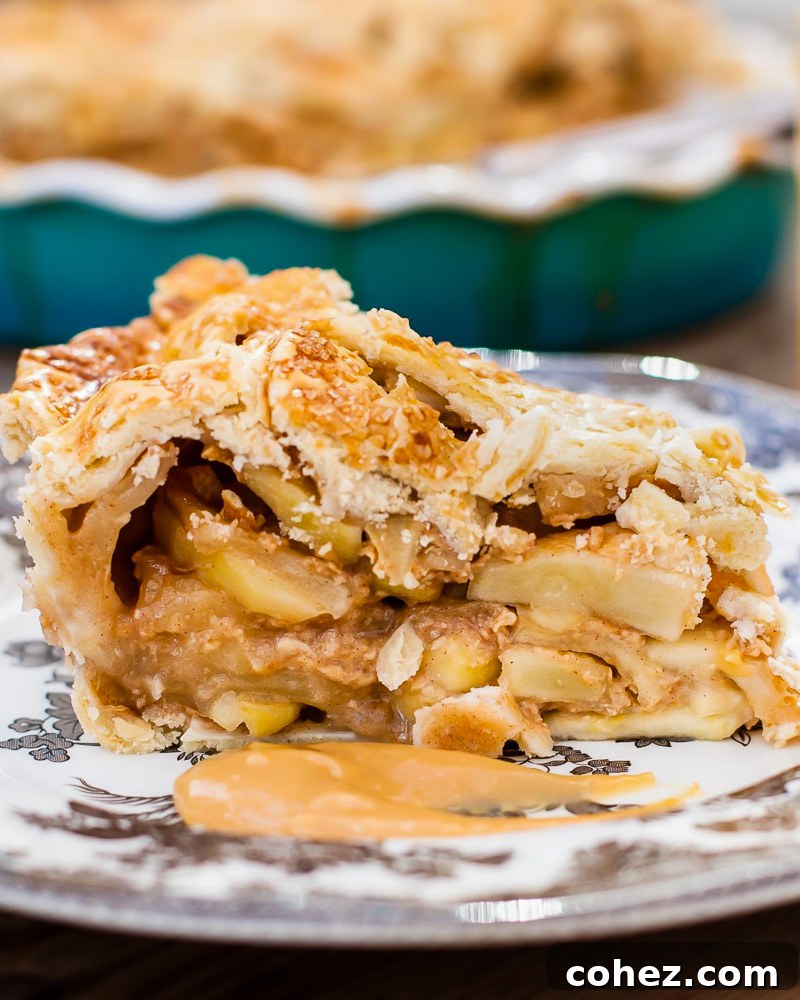
The Tenderflake recipe stands out due to a unique ingredient: a touch of vinegar. This addition plays a crucial role in tenderizing the dough, working in conjunction with the lard to inhibit gluten development. The result is an incredibly tender and impossibly flaky pastry, unlike anything achieved with butter or shortening alone. When you gently break into a slice of this pie, you’ll witness layers upon layers of delicate, golden crust – a truly phenomenal experience that sets this pie apart.
While I am a passionate advocate for butter in many culinary applications, when it comes to crafting a truly light and delicate pie pastry, lard reigns supreme. Lard, rendered pork fat, boasts a higher melting point than butter, which is key to achieving those coveted flaky layers. As the pie bakes, the solid pieces of lard within the dough slowly melt, releasing steam that pushes the layers apart, creating air pockets and a marvelously crisp texture. Butter, with its lower melting point, tends to melt too quickly, often leading to a denser, less flaky crust. If sourcing lard proves challenging or if you prefer an alternative, high-quality vegetable shortening can be used as a substitute, although it may slightly alter the final texture and flavor profile.
Batching Your Pie Crusts for Convenience
This particular pie crust recipe yields enough pastry for three 9-inch double-crust pies, which is incredibly convenient for a baking enthusiast. I often prepare one pumpkin pie and one apple pie for holiday feasts, then freeze the remaining pastry for future culinary endeavors, such as a savory chicken pot pie. Having ready-to-use pie dough in the freezer significantly streamlines the baking process, allowing you to whip up delicious homemade pies with minimal fuss.
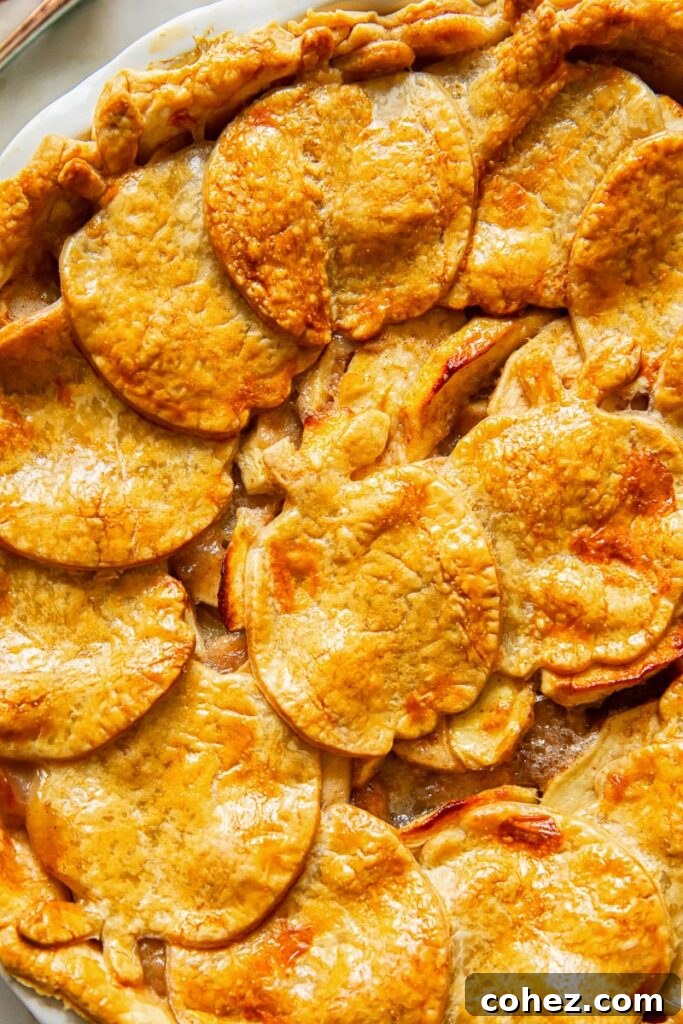
As the captivating images above illustrate, this isn’t just an ordinary apple pie. Beyond its luscious dulce de leche-infused apple filling, it showcases a stunningly beautiful top crust crafted from charming apple cutouts. Fear not, this intricate-looking design is surprisingly simple to achieve and, in many ways, easier than attempting a traditional lattice or crimped top crust. I’ll guide you through the exact method to recreate this elegant finish, ensuring your pie is as much a feast for the eyes as it is for the palate.
Essential Tips for Crafting the Perfect Pie Pastry
Achieving a truly flaky and tender pie crust requires attention to a few critical details. Keep these pastry-making tips in mind:
- **Avoid Overmixing:** This is perhaps the most crucial rule in pastry making. Overworking the dough develops gluten, which leads to a tough crust. The goal is simply to bring the ingredients together until they barely form a cohesive mass. If your pastry looks perfectly smooth and uniform, you’ve likely mixed it too much. A slightly ragged, uneven texture is ideal, as it will smooth out sufficiently during the rolling process.
- **Keep Ingredients Cold:** The temperature of your ingredients, especially the fat (lard or shortening) and water, is paramount. Ice water is essential because it prevents the fat from melting prematurely under the warmth of your hands or the friction of mixing. We want pea-sized bits of solid fat to remain embedded within the dough. These tiny pockets of fat are what render the pastry incredibly flaky as they melt and create steam during baking.
- **Chill Your Dough:** After mixing, always chill your pastry dough for at least 20-30 minutes before rolling it out. Chilling allows the gluten to relax, making the dough easier to handle and preventing it from shrinking excessively during baking. It also re-solidifies the fat, which is vital for flakiness. If you’re using frozen pastry, ensure it thaws sufficiently in the refrigerator before use.
Creating the Irresistible Apple Pie Filling
The success of any apple pie hinges significantly on the quality and type of apples chosen for the filling. While most apples can be used, selecting the right varieties will truly elevate your pie. Aim for firm, crisp apples that hold their shape well during baking and offer a balance of sweetness and tartness. Excellent choices include Granny Smith (for tartness), Honeycrisp (for sweetness and crispness), Braeburn, Fuji, or Golden Delicious. A blend of two or three varieties often yields the most complex and satisfying flavor. Remember that you may need to adjust the sugar content based on the inherent sweetness of your chosen apples and their ripeness.
The cooking time for your apple pie will also depend on the firmness of your apples. Softer, riper apples will cook down more quickly, while harder varieties will require a longer baking period. If your pie crust begins to brown too quickly before the apples are tender, loosely cover the pie with aluminum foil to prevent over-browning while allowing the apples to continue cooking until they are perfectly tender throughout. A simple test for doneness is to insert a knife into the filling; it should pierce the apples with ease.
For this specific Dulce de Leche Apple Pie, the amount of sugar required will also be influenced by the sweetness of the apples and the addition of the dulce de leche. In my case, I used very green and tart apples, which necessitated 2/3 cup (120g) of sugar in addition to 1/2 cup (125ml) of dulce de leche. This combination struck the perfect balance of sweet and tangy. However, it is always recommended to taste your sliced apples before mixing them with sugar and spices. This simple step allows you to accurately gauge the natural sweetness and adjust the added sugar accordingly, ensuring your pie filling is perfectly balanced to your preference.
What is Dulce de Leche?
Dulce de leche, meaning “sweet of milk” in Spanish, is a rich, caramelized milk confection beloved across Latin America. It boasts a deeply rich, creamy flavor profile, akin to caramel but with a unique milk-based depth. While often used interchangeably with caramel in recipes, dulce de leche offers a distinct nuance that truly shines in desserts like this apple pie.
Traditionally, dulce de leche is made by slowly simmering milk and sugar together for several hours until the mixture thickens and transforms into a dark amber, intensely flavorful substance. A more common and convenient homemade method involves slowly boiling a sealed can of sweetened condensed milk in water for 1.5 to 2 hours. This process gently caramelizes the milk within the can, yielding a luscious dulce de leche. If attempting this method, ensure the can is fully submerged in water throughout the entire cooking process to prevent it from overheating and potentially bursting. For convenience, high-quality store-bought dulce de leche or a readily available brand like Carnation Caramel works perfectly well.
While the dulce de leche adds an unparalleled depth and richness to this apple pie, the recipe is also wonderfully adaptable if you prefer to omit it. Should you choose to go without, simply increase the amount of white sugar in the apple filling to 1 cup (200g) to maintain the desired sweetness and balance of flavors.
Serving Suggestions for Your Decadent Apple Pie
Once your exquisite Dulce de Leche Apple Pie emerges from the oven, resist the urge to cut into it immediately. Patience is key! Allow the pie to cool for several hours, ideally until it reaches room temperature. This crucial cooling period allows the apple juices, which are quite liquid immediately after baking, to thicken and set properly. Cutting into the pie too soon will result in a runny, almost soup-like filling at the bottom of your pie plate, detracting from the overall texture and presentation. A well-cooled pie will yield clean, beautifully defined slices with a perfectly set, caramelized apple filling.
To truly elevate this dessert, serve generous slices with a scoop of creamy vanilla bean ice cream or a dollop of freshly whipped cream. For an extra touch of indulgence, drizzle a tablespoon of warm dulce de leche over the top of each serving. The combination of warm apple pie, cold ice cream, and rich, creamy dulce de leche creates a symphony of textures and flavors that is nothing short of pure heaven. As you take your first bite, you’ll immediately notice the incredible flakiness of the crust, a testament to the “No-Fail” recipe, crumbling delicately with every forkful. The caramelized apples, infused with the deep notes of dulce de leche, provide a sweet and tender contrast, making each bite an unforgettable experience.
Explore More Baked Apple Delights
If this Dulce de Leche Apple Pie has awakened your love for baked apple desserts, be sure to explore these other fantastic recipes from our collection:
- Easy Homemade Apple Crisp
- Apple and Blackberry Brown Butter Crumble
- Apple Cake Sharlotka
- Apple Spice Cake with Salted Caramel Drizzle
Dulce de Leche Apple Pie
Julia Frey of Vikalinka
30
1
8

Ingredients
For the pastry
- 5 1/2 cups/770g all purpose flour (plain flour in UK)
- 2 tsp salt
- 1lbs/454g lard
- 1 tbsp vinegar
- 1 egg
- ice water
For the apple filling
- 6 apples, firm and large
- 2/3 cup/130g white sugar , see notes
- 1 1/2 tsp cinnamon
- 125ml/1/2 cup dulce de leche/Carnation caramel , see notes
- 1/4cup/30g flour
- 1 egg for brushing, beaten
Instructions
For the pastry
-
This recipe makes enough for 3 x 8-inch double crust pies or 2 x 9-inch pies and 1 single crust. Mix together flour and salt. Cut in lard with a pastry blender until the mixture resembles coarse breadcrumbs. In a measuring cup (250ml) combine vinegar and egg. Add ice water to make 1 cup. Gradually stir liquid into the flour and lard mixture. You might need to add a little more cold water to make the pastry dough come together. Do not overmix. (If you think you have a perfectly shaped dough, you’ve probably gone too far.)
-
Divide into 3 equal parts, and press them into disks, wrap them in plastic wrap, and put in the refrigerator to chill or a freezer if you are intending to use the other two pie crusts later.
For the apple filling
-
Peel and core your apples and slice them thinly. In a large mixing bowl, combine sliced apples, sugar, cinnamon, flour, and dulce de leche. Make sure dulce de leche evenly coats the apples.
To assemble and bake the pie
-
Preheat your oven to 400F/200C. Take 1 of the 3 chilled pastry disks out of the fridge. The bottom crust needs more pastry than the top. To make the bottom crust, roll out 2/3 of the pastry on a floured surface into a circle big enough to fit into a 9-inch pie plate.
-
Drape it on a rolling pin and carefully transfer the pie crust into a 9-inch pie plate. Make sure your pie crust hangs over the edges a little bit, which will help to bring the bottom and the top crust together. Fill your pie crust with the apple mixture.
-
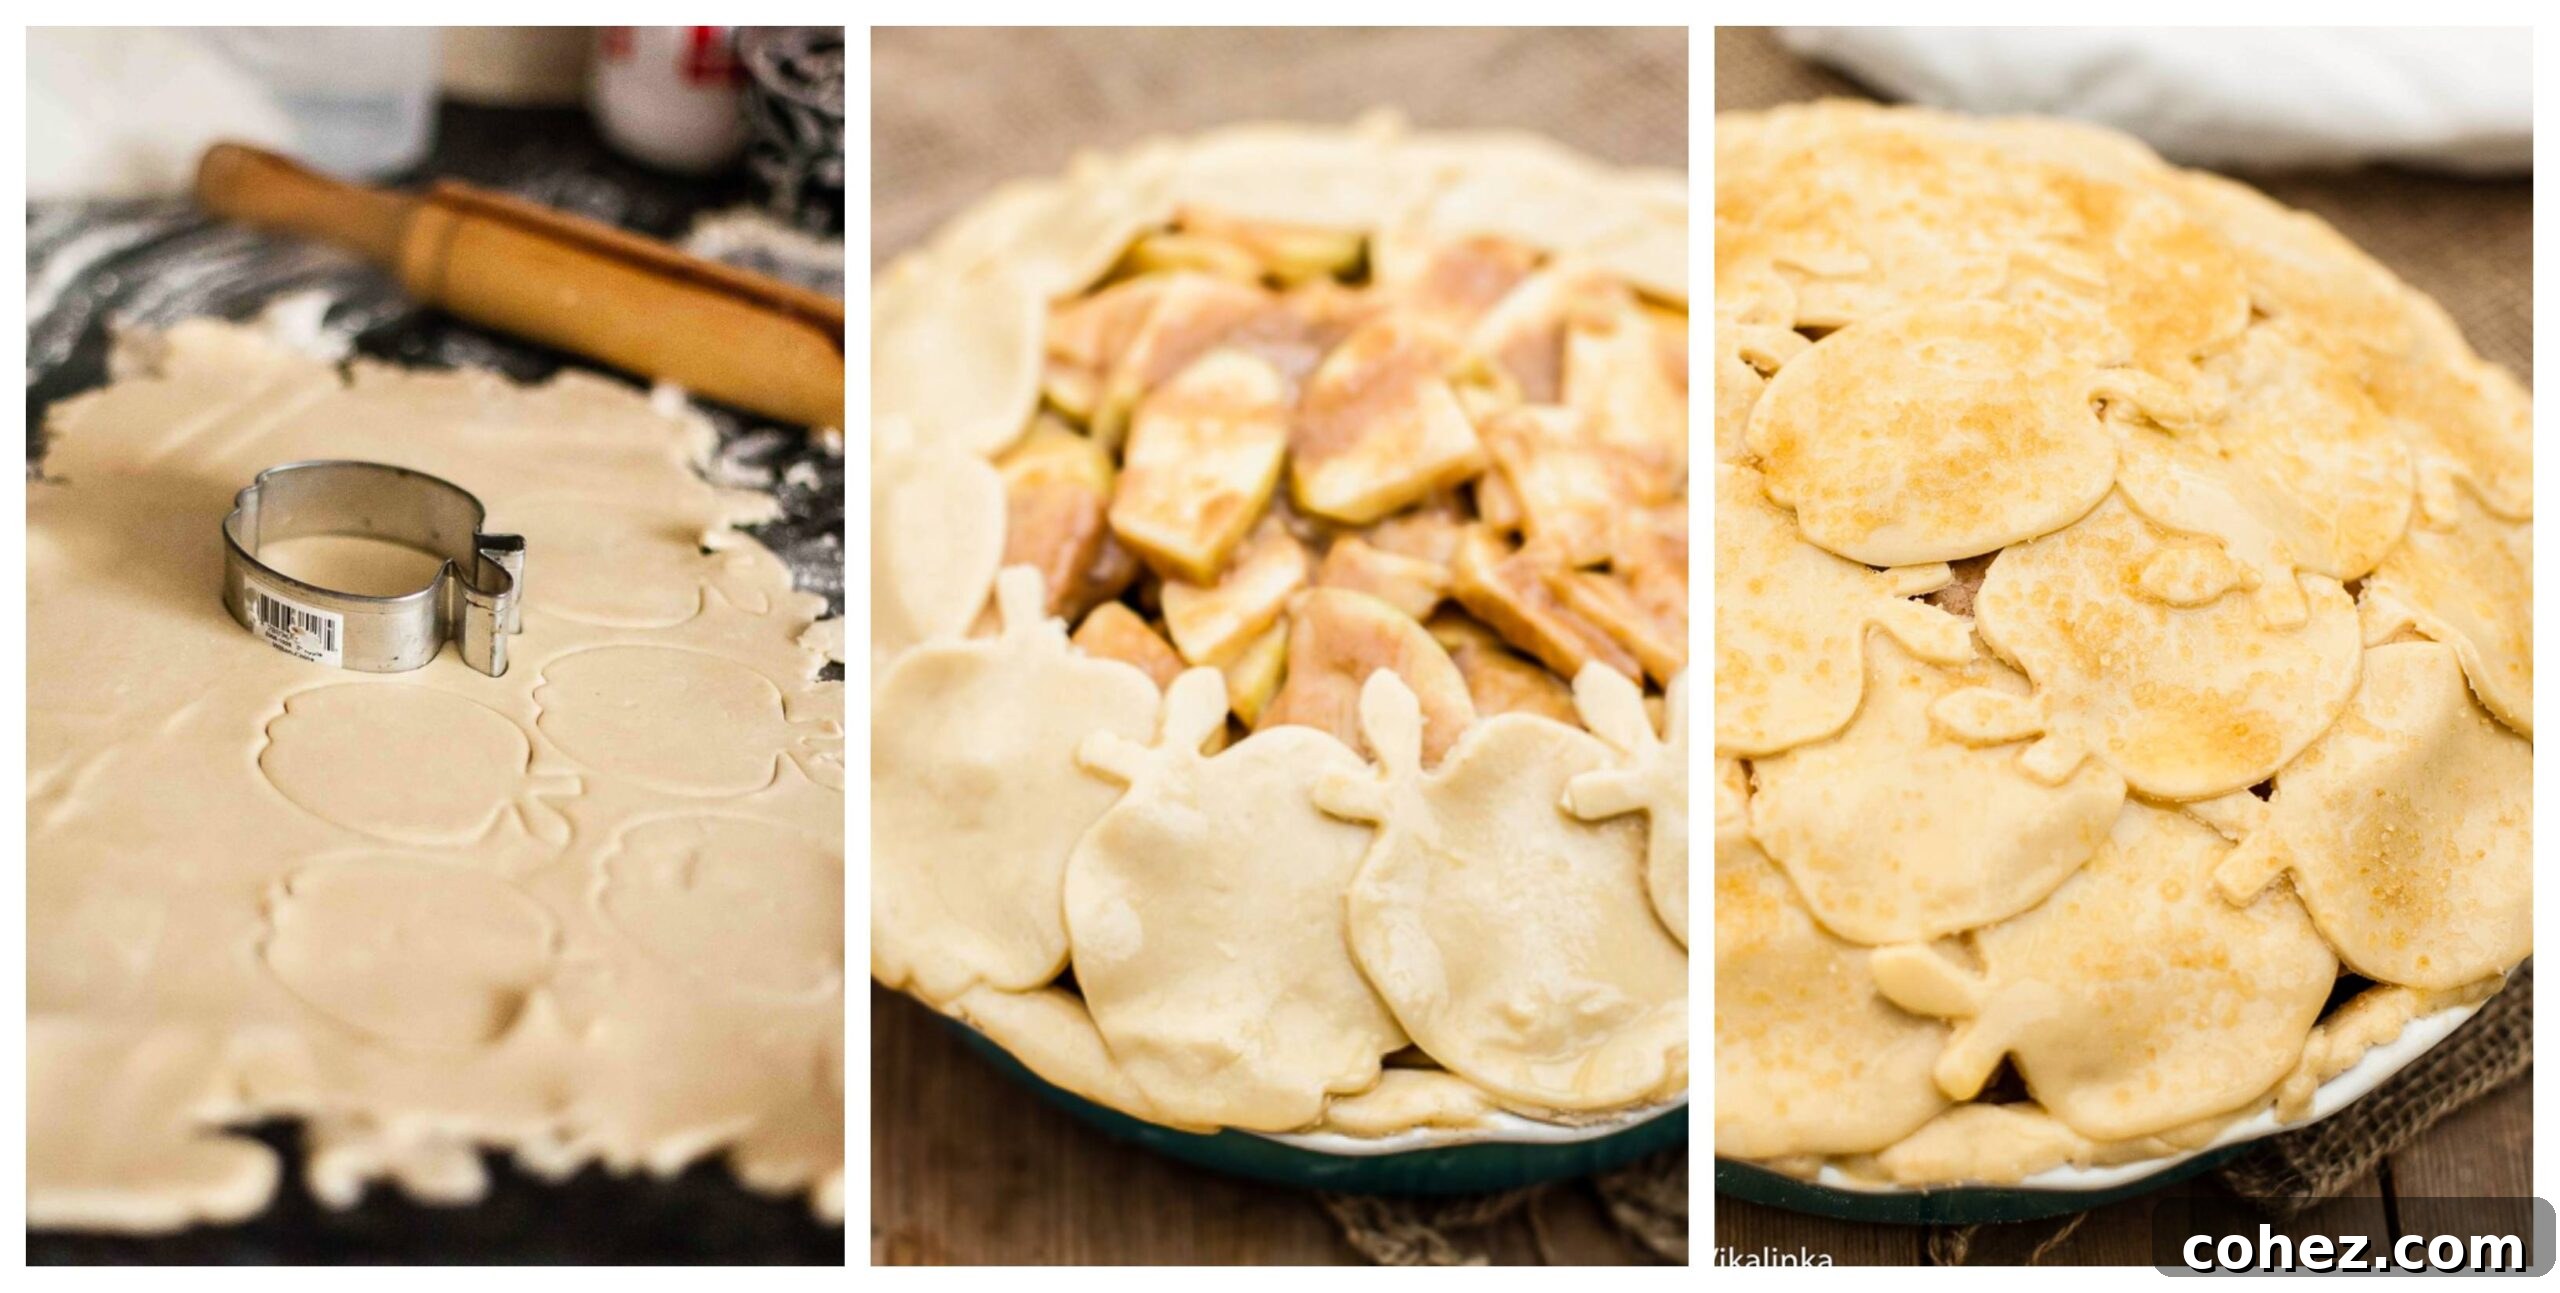
To prepare the top crust, roll out the remaining pastry on a floured surface and cut out little shapes with a pastry/cookie cutter. (I used an apple cookie cutter but you can use anything you love that fits the autumnal theme, or just little rounds will do.)
-
Brush the pastry, that covers the rim of your pie plate, with an egg wash. Start placing the little pastry cutouts on the outer row, making sure they are connected to the edges of the bottom crust, overlapping them slightly, and brushing each cutout with an egg wash. This will ensure that individual cutout “apples” stick to each other. It will also give your pie an attractive shiny and golden finish. It’s okay to leave little space between the pastry “apples” as it will act as slits and will allow the pie to ventilate while baking. Once you finished the first row, continue the same way until the whole pie is covered.
-
Put the pie in the oven on the lower rack and place a large baking sheet/pan to catch the drips from the pie to eliminate a lot of mess in the oven. Bake for 20 minutes, then reduce the temperature to 375F/190C and bake for 40-50 minutes until the crust is golden and the apples are soft.
Notes
- Increase or reduce the amount of sugar depending on the sweetness of the apples used.
- Use store-bought Dulce de Leche or make your own by boiling a can of sweetened and condensed milk in water for 1.5-2 hours. Make sure the can is fully submerged in water at all times.
- If your apples are very ripe, it will take less time to cook, but it might take longer if your apples are hard. In this case, loosely cover your pie with some foil and continue baking until the apples are tender all the way through. (Test with a knife for doneness; they should pierce easily).
- This apple pie recipe will also work if you choose to omit the dulce de leche. Simply increase your amount of sugar to 1 cup/200g.
Nutrition information is automatically calculated, so should only be used as an approximation.